Overview
| Excerpt |
|---|
Information and step-by-step instructions on how to register for classes: Students wishing to register for variable hour courses (Directed Study, Independent Study, Internship, Thesis, Dissertation) should see their |
...
Academic Advisor who will complete a Variable Credit Hour |
...
Undergraduate students wishing to |
...
enroll in graduate courses need special permission from the Graduate School Office. Permission is granted in the form of a Level Restriction Override Registration for non-standard Part of Term courses (Parts of Term 5-9) runs through the 7th day of the month in which the course begins. Any action (add, drop, or withdraw) after that point in time must be submitted to the Office of the Registrar via |
...
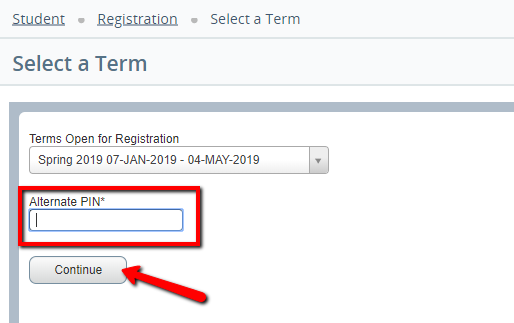
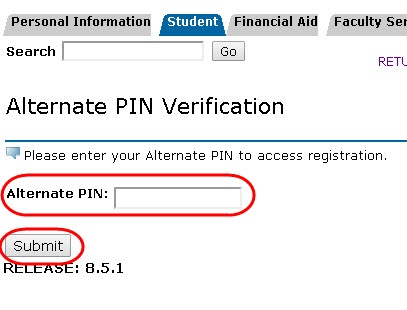
In addition to an Advising PIN, all students are also assigned a Time Ticket which specifies when the student is allowed to register. For additional information on Advising PINs and Time Tickets, please see the Previous/Next Steps section at the bottom of this page. Courses with "I" (Incomplete) grades will not count as meeting the minimum grade for a prerequisite. (Ex: I have an I grade in ENC 1101, which is a prerequisite for ENC 2000. I will not be able to register for ENC 2000 because the grade of an "I" does not meet the minimum prerequisite grade requirement for ENC 2000. |
| Info |
|---|
NEW FOR SPRING 2015: Students are now also able to use schedule planner to create the ideal class schedule. |
For additional assistance with organizing your schedule, please use one or both of the scheduled organization tools below:
| ||
|
| Warning |
|---|
| Warning |
Students may be removed from all courses in which they do not meet the prerequisite requirements. |
...
| Warning | ||
|---|---|---|
| ||
The UWF Financial Aid Office cannot award aid to a student for classes that do not count toward his/her degree or minor program. U U.S. Department of Education regulation states that classes not counting towards a student’s degree or other recognized credential credentials cannot be used to determine Title IV aid eligibility. Any student who receives aid for classes that do not count towards their degree program will be liable for any funds that need to be returned to the Department of Education |
. Beginning August 4, 2015, a new process was initiated to notify students who are registered for courses if they have registered for a course that is not applying to their degree requirements. Students can view by accessing the Degree Works audit. If you receive an email from Financial Aid regarding courses that are not applying toward your program, please contact your advisor for further information and options. If you need your advisor's contact information, please access the Advising Status app in MyUWF. |
| Section | |||||||||||||||||||||||||||||||||||||||||||||||||||||||||||||||||||||||||||||||||||||||||||
|---|---|---|---|---|---|---|---|---|---|---|---|---|---|---|---|---|---|---|---|---|---|---|---|---|---|---|---|---|---|---|---|---|---|---|---|---|---|---|---|---|---|---|---|---|---|---|---|---|---|---|---|---|---|---|---|---|---|---|---|---|---|---|---|---|---|---|---|---|---|---|---|---|---|---|---|---|---|---|---|---|---|---|---|---|---|---|---|---|---|---|---|
|


Overview
| Excerpt |
|---|
Information and step-by-step instructions on how to register for classes: Students wishing to register for variable-hour courses (Directed Study, Independent Study, Internship, Thesis, Dissertation) should see their Academic Advisor who will complete a Variable Credit Hour Course request. Undergraduate students wishing to enroll in graduate courses need special permission from the Graduate School Office. Permission is granted in the form of a Level Restriction Override Registration for non-standard Part of Term courses (Parts of Term 5-9) runs through the 7th day of the month in which the course begins. Any action (add, drop, or withdraw) after that point in time must be submitted to the Office of the Registrar via email In addition to an Advising PIN, all students are also assigned a Time Ticket which specifies when the student is allowed to register. For additional information on Advising PINs and Time Tickets, please see the Previous/Next Steps section at the bottom of this page. Courses with "I" (Incomplete) grades will not count as meeting the minimum grade for a prerequisite. (Ex: I have an I grade in ENC 1101, which is a prerequisite for ENC 2000. I will not be able to register for ENC 2000 because the grade of an "I" does not meet the minimum prerequisite grade requirement for ENC 2000. |
| Info | ||
|---|---|---|
| ||
|
| Warning |
|---|
Students may be removed from all courses in which they do not meet the prerequisite requirements. |
| Warning | ||
|---|---|---|
| ||
The UWF Financial Aid Office cannot award aid to a student for classes that do not count toward his/her degree or minor program. U.S. Department of Education regulation states that classes not counting towards a student’s degree or other recognized credentials cannot be used to determine Title IV aid eligibility. Any student who receives aid for classes that do not count towards their degree program will be liable for any funds that need to be returned to the Department of Education. Beginning August 4, 2015, a new process was initiated to notify students who are registered for courses if they have registered for a course that is not applying to their degree requirements. Students can view by accessing the Degree Works audit. If you receive an email from Financial Aid regarding courses that are not applying toward your program, please contact your advisor for further information and options. If you need your advisor's contact information, please access the Advising Status app in MyUWF. |
| Section | ||||||||||||||||||||||||||||||||||||||||||||||||||||||||||||||
|---|---|---|---|---|---|---|---|---|---|---|---|---|---|---|---|---|---|---|---|---|---|---|---|---|---|---|---|---|---|---|---|---|---|---|---|---|---|---|---|---|---|---|---|---|---|---|---|---|---|---|---|---|---|---|---|---|---|---|---|---|---|---|
| ||||||||||||||||||||||||||||||||||||||||||||||||||||||||||||||
| Section | ||||||||||||||||||||||||||||||||||||||||||||||||||||||||||||||
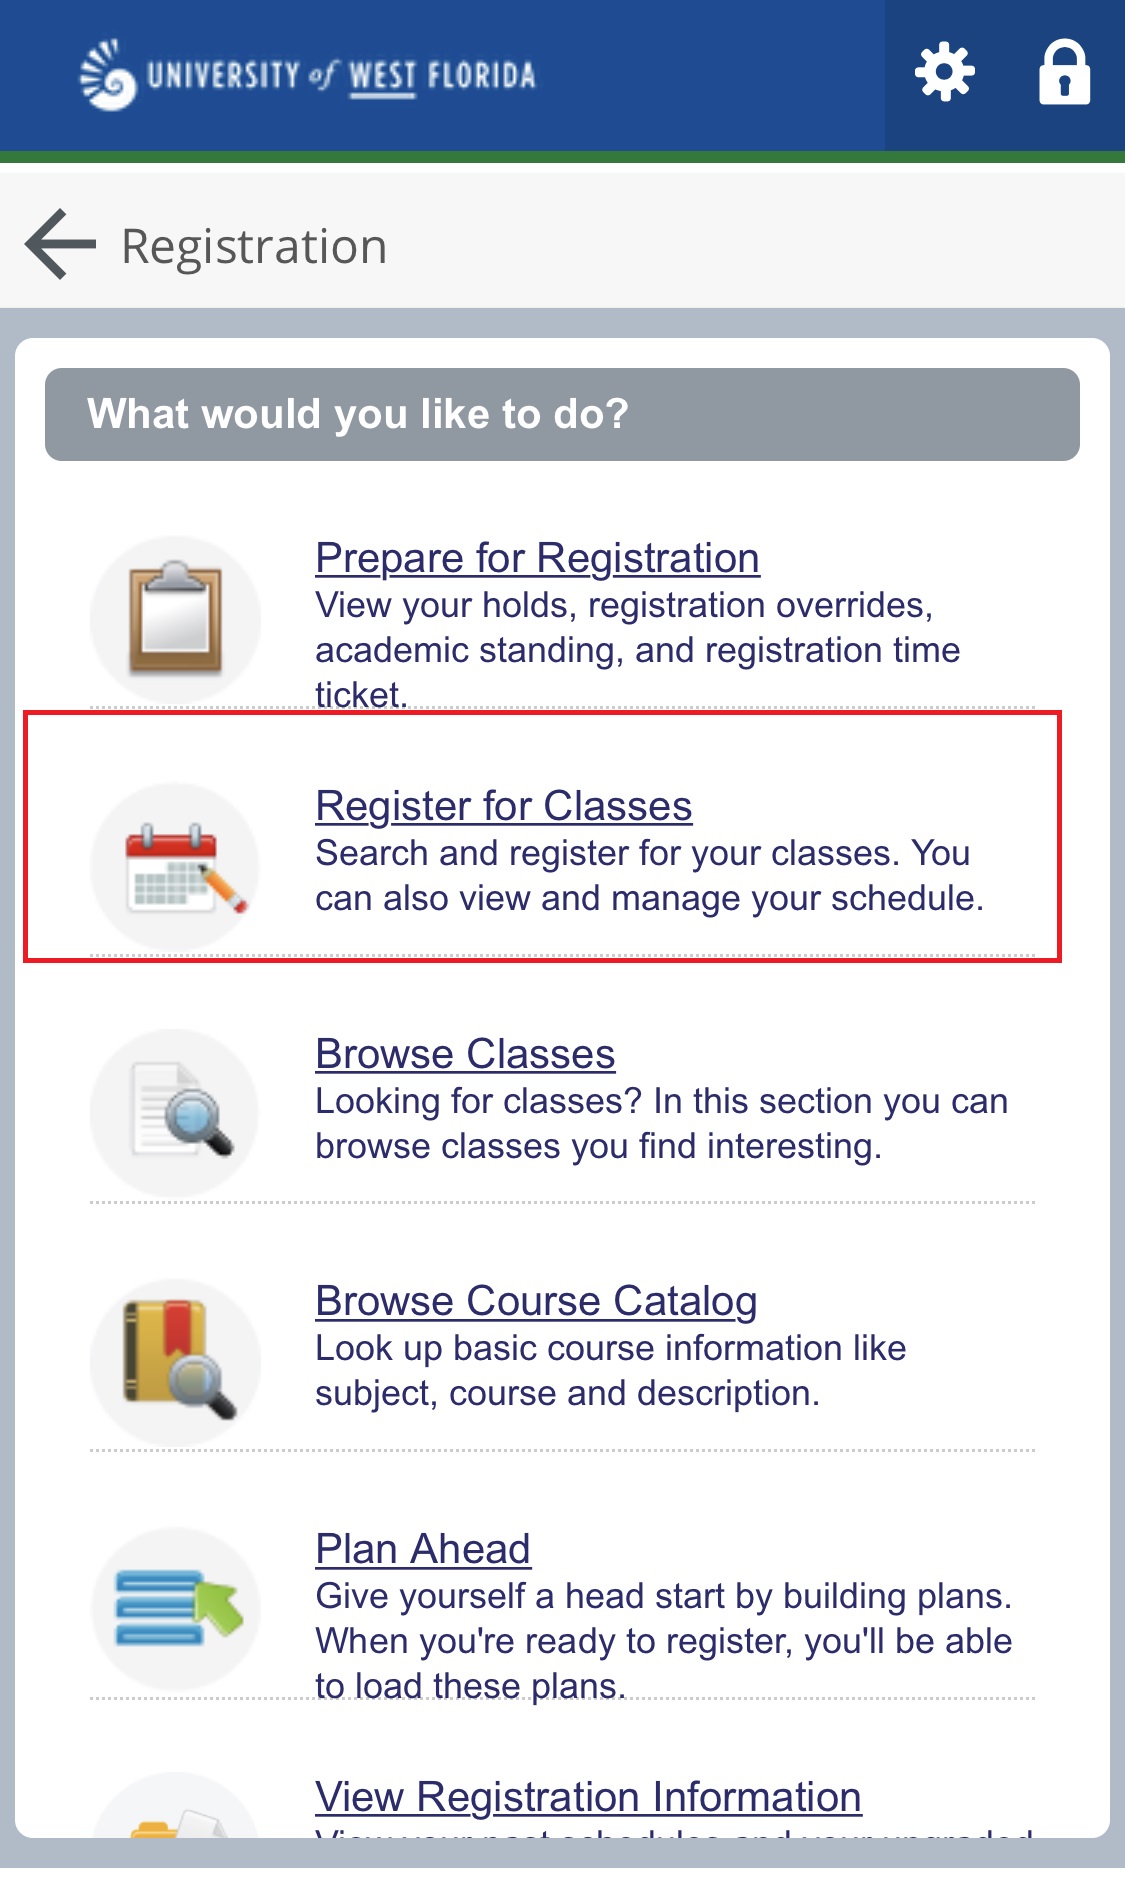
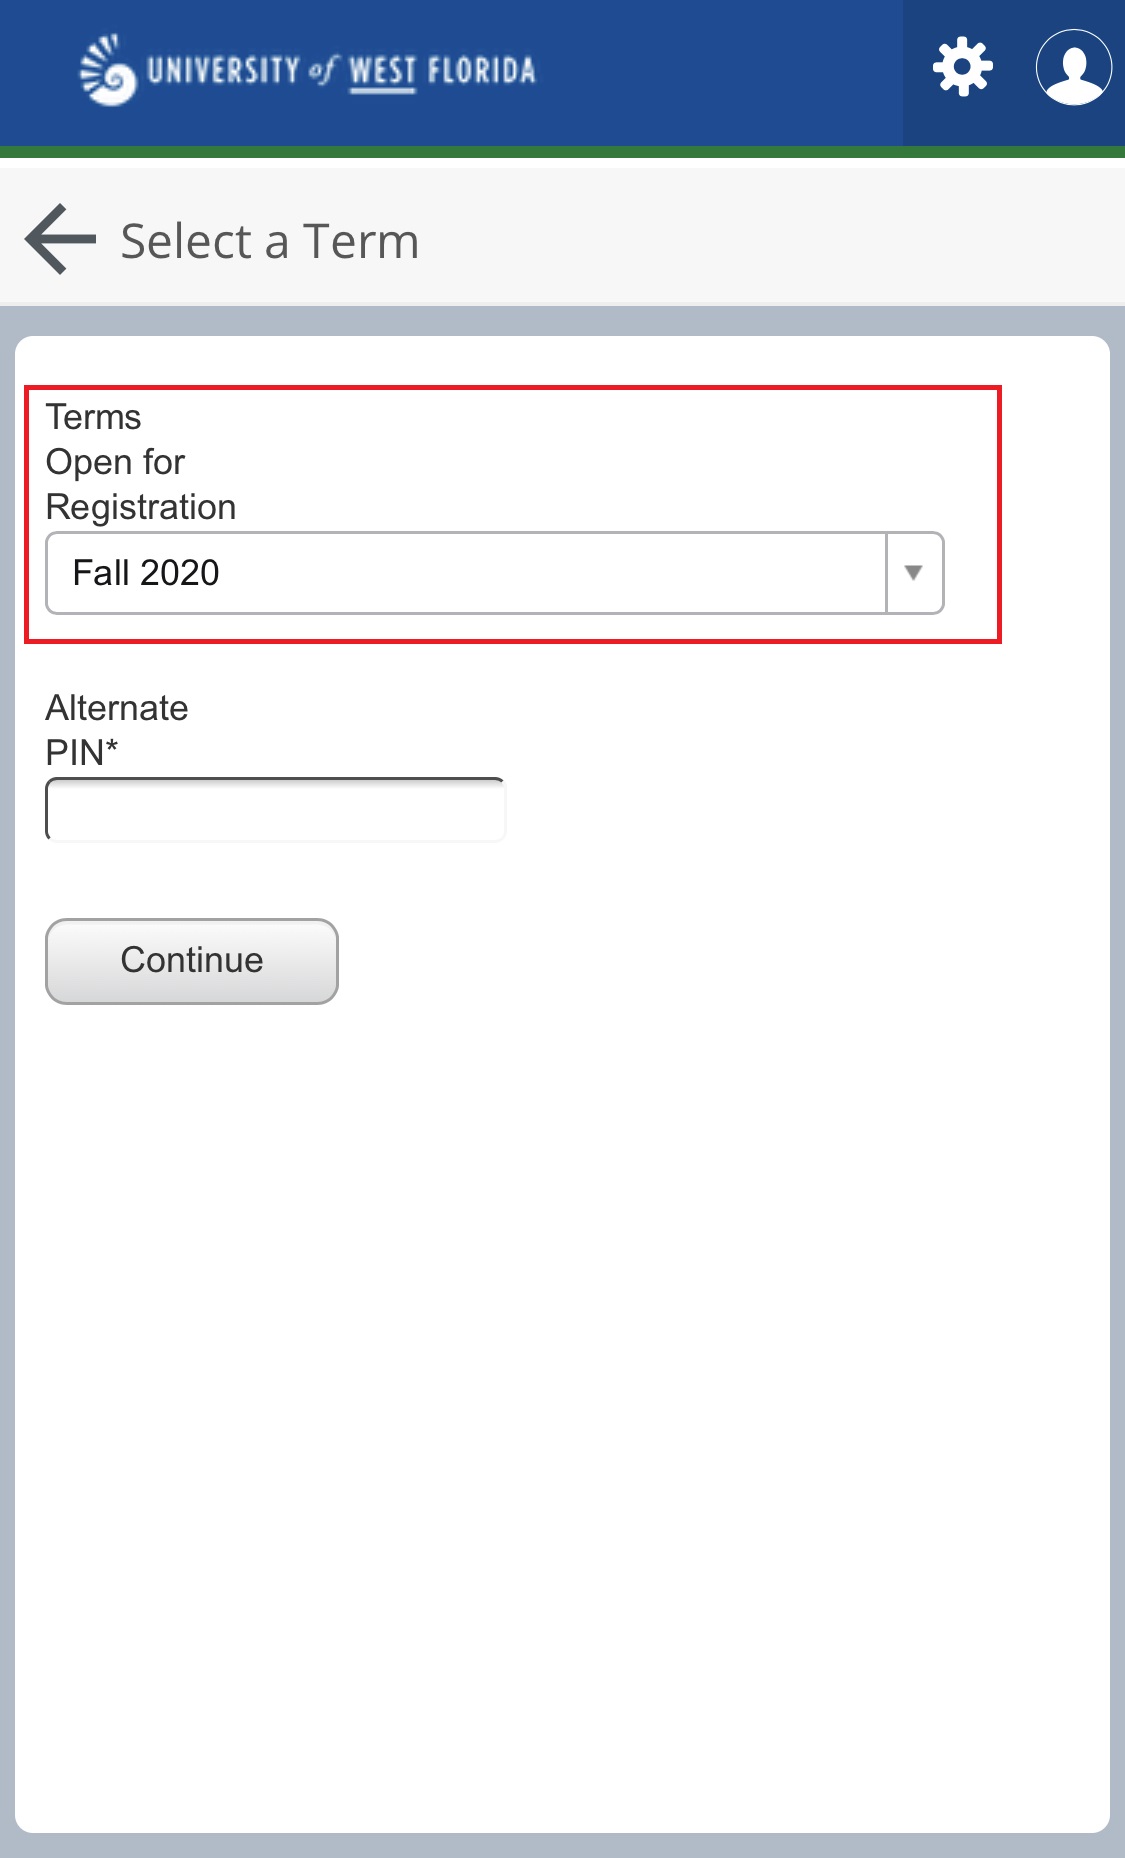
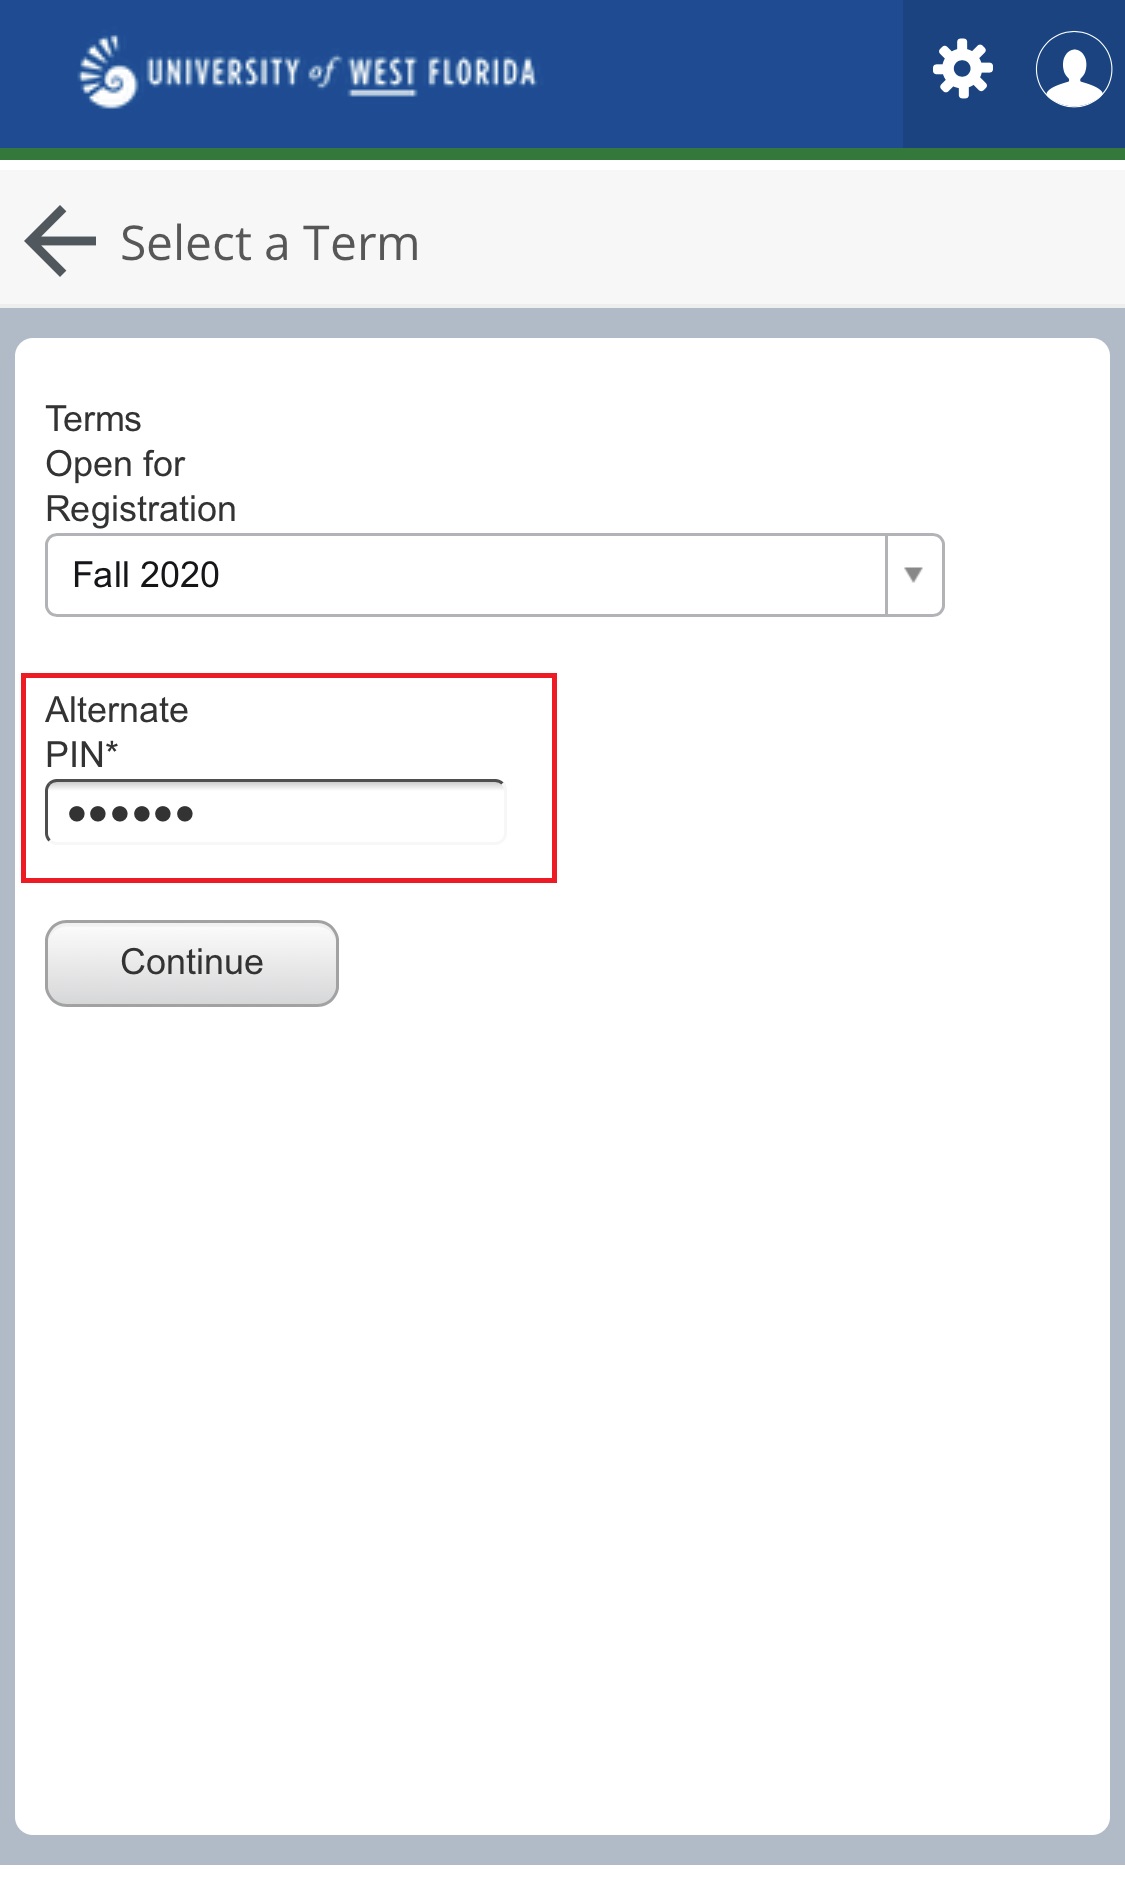
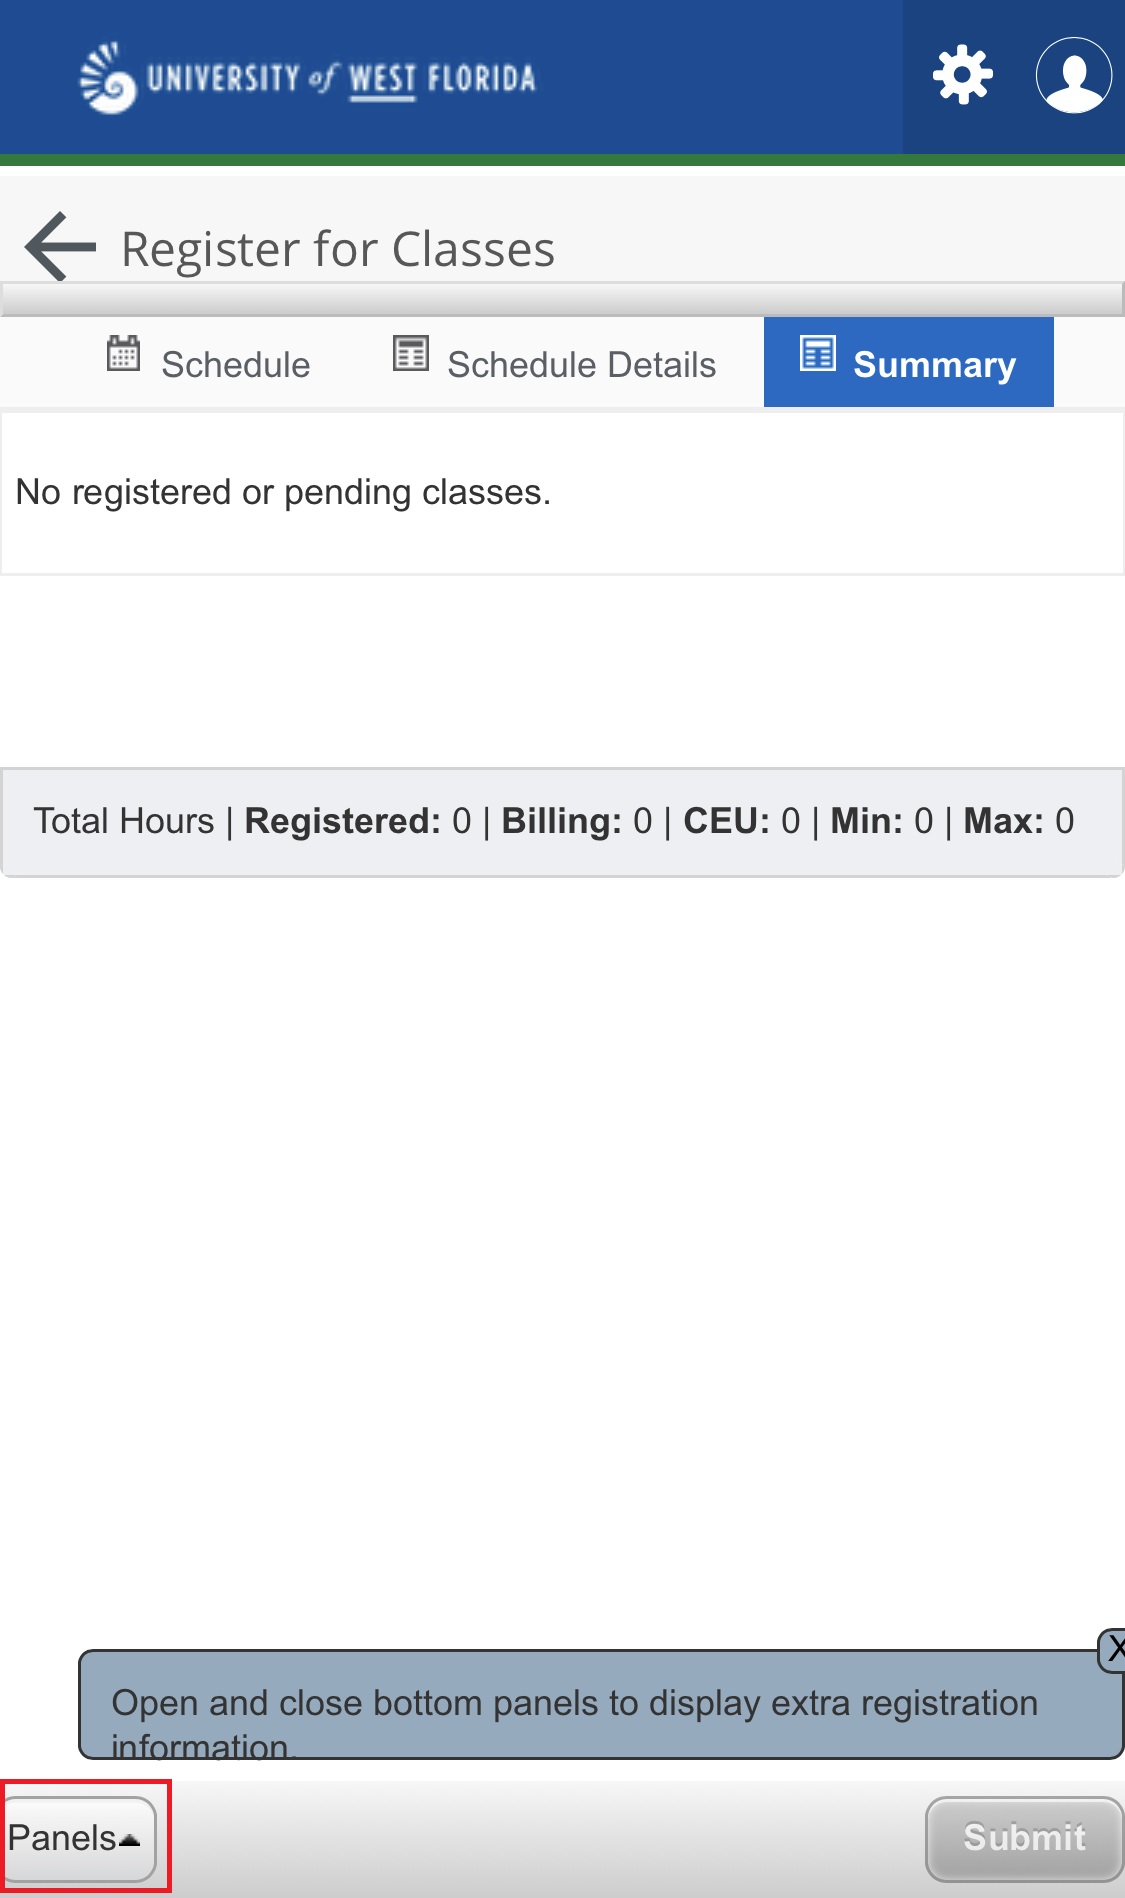
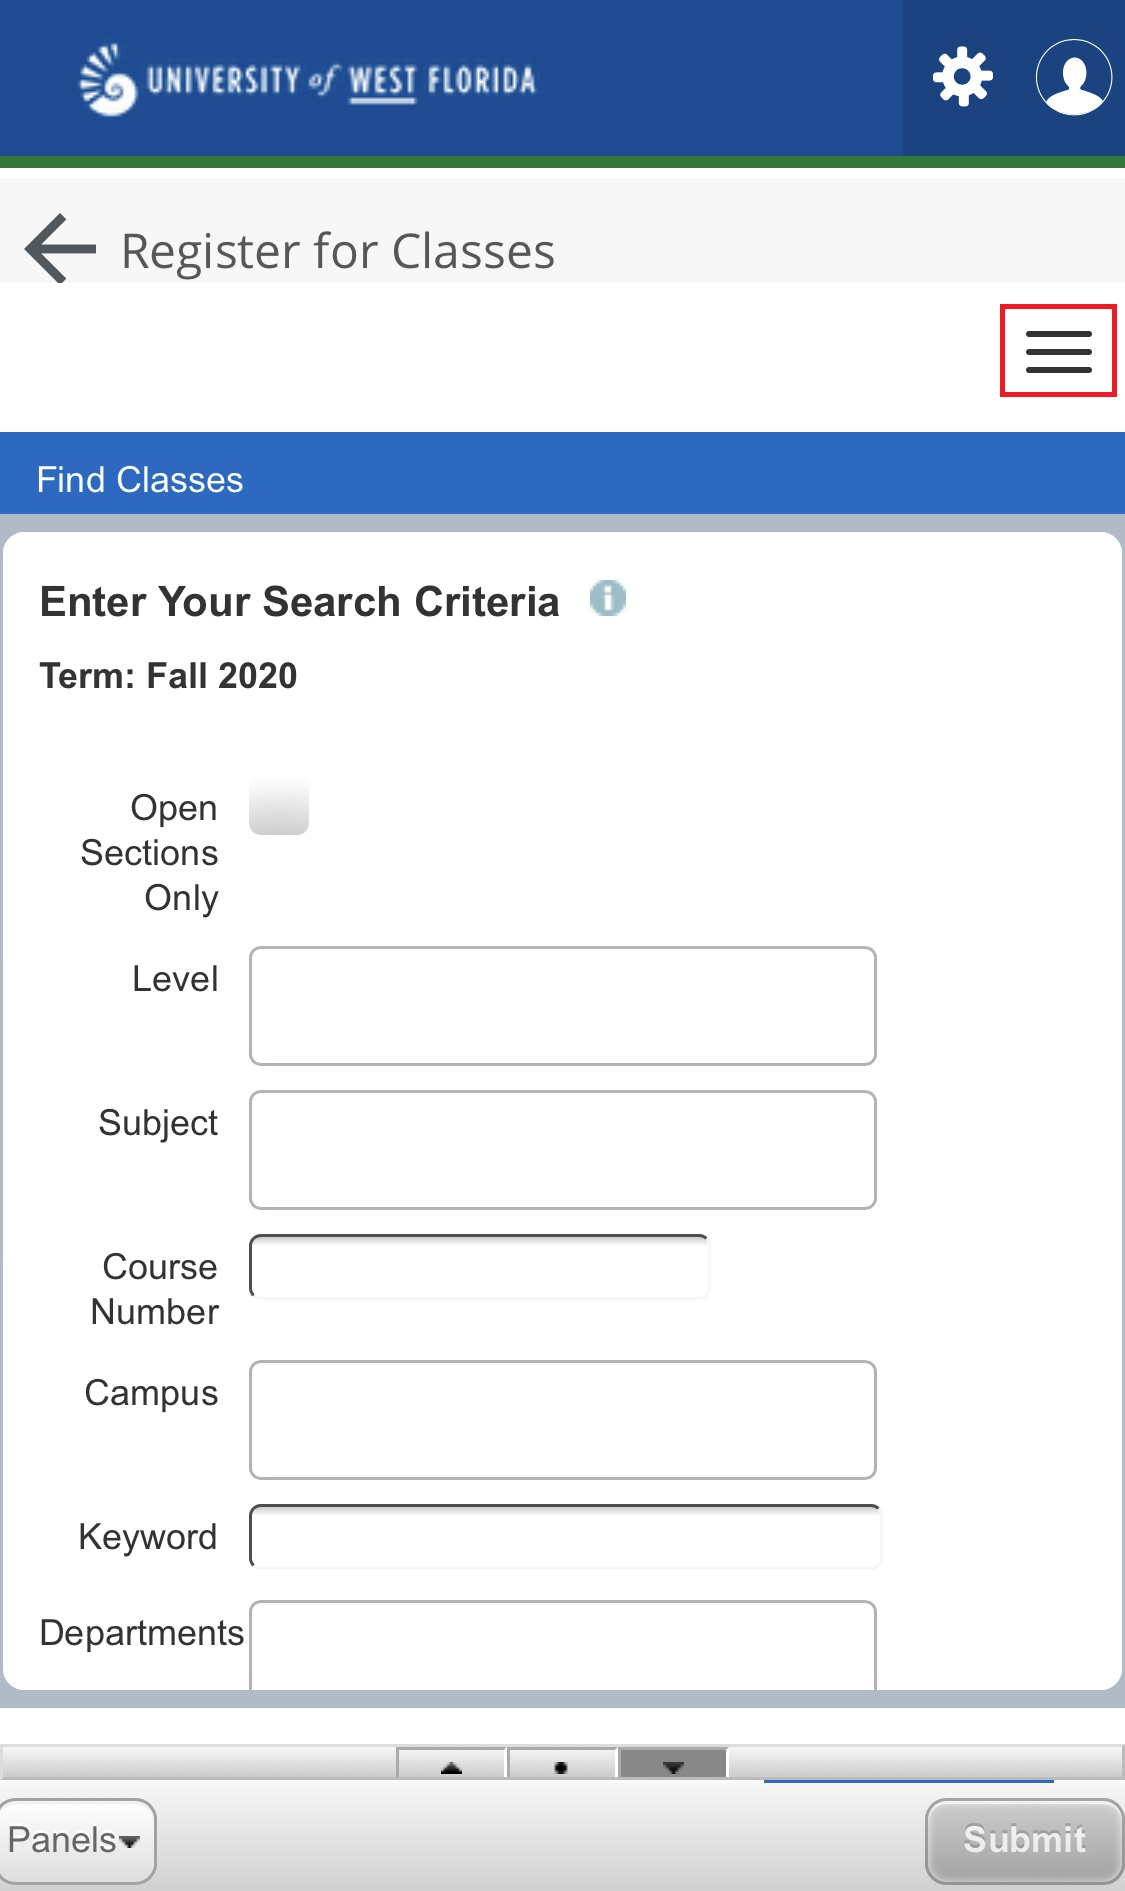
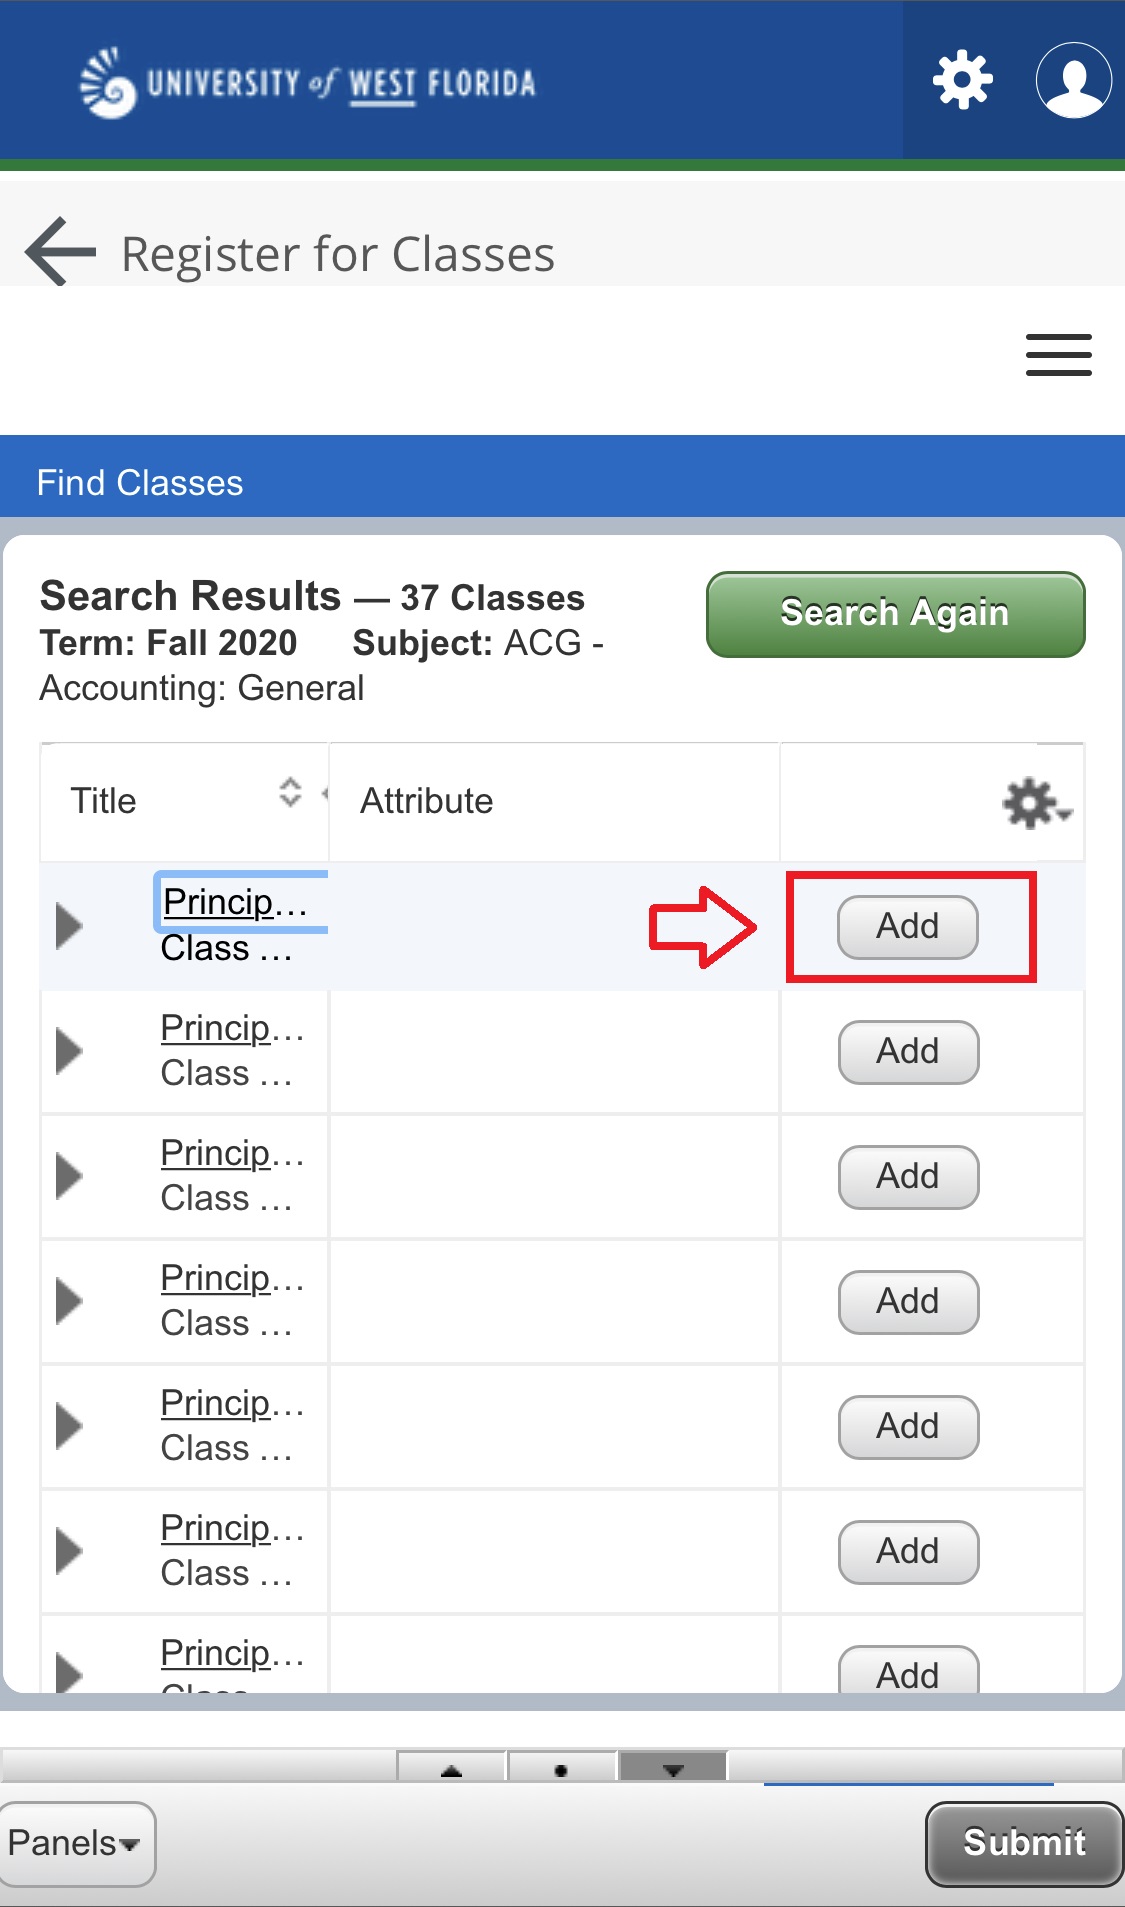
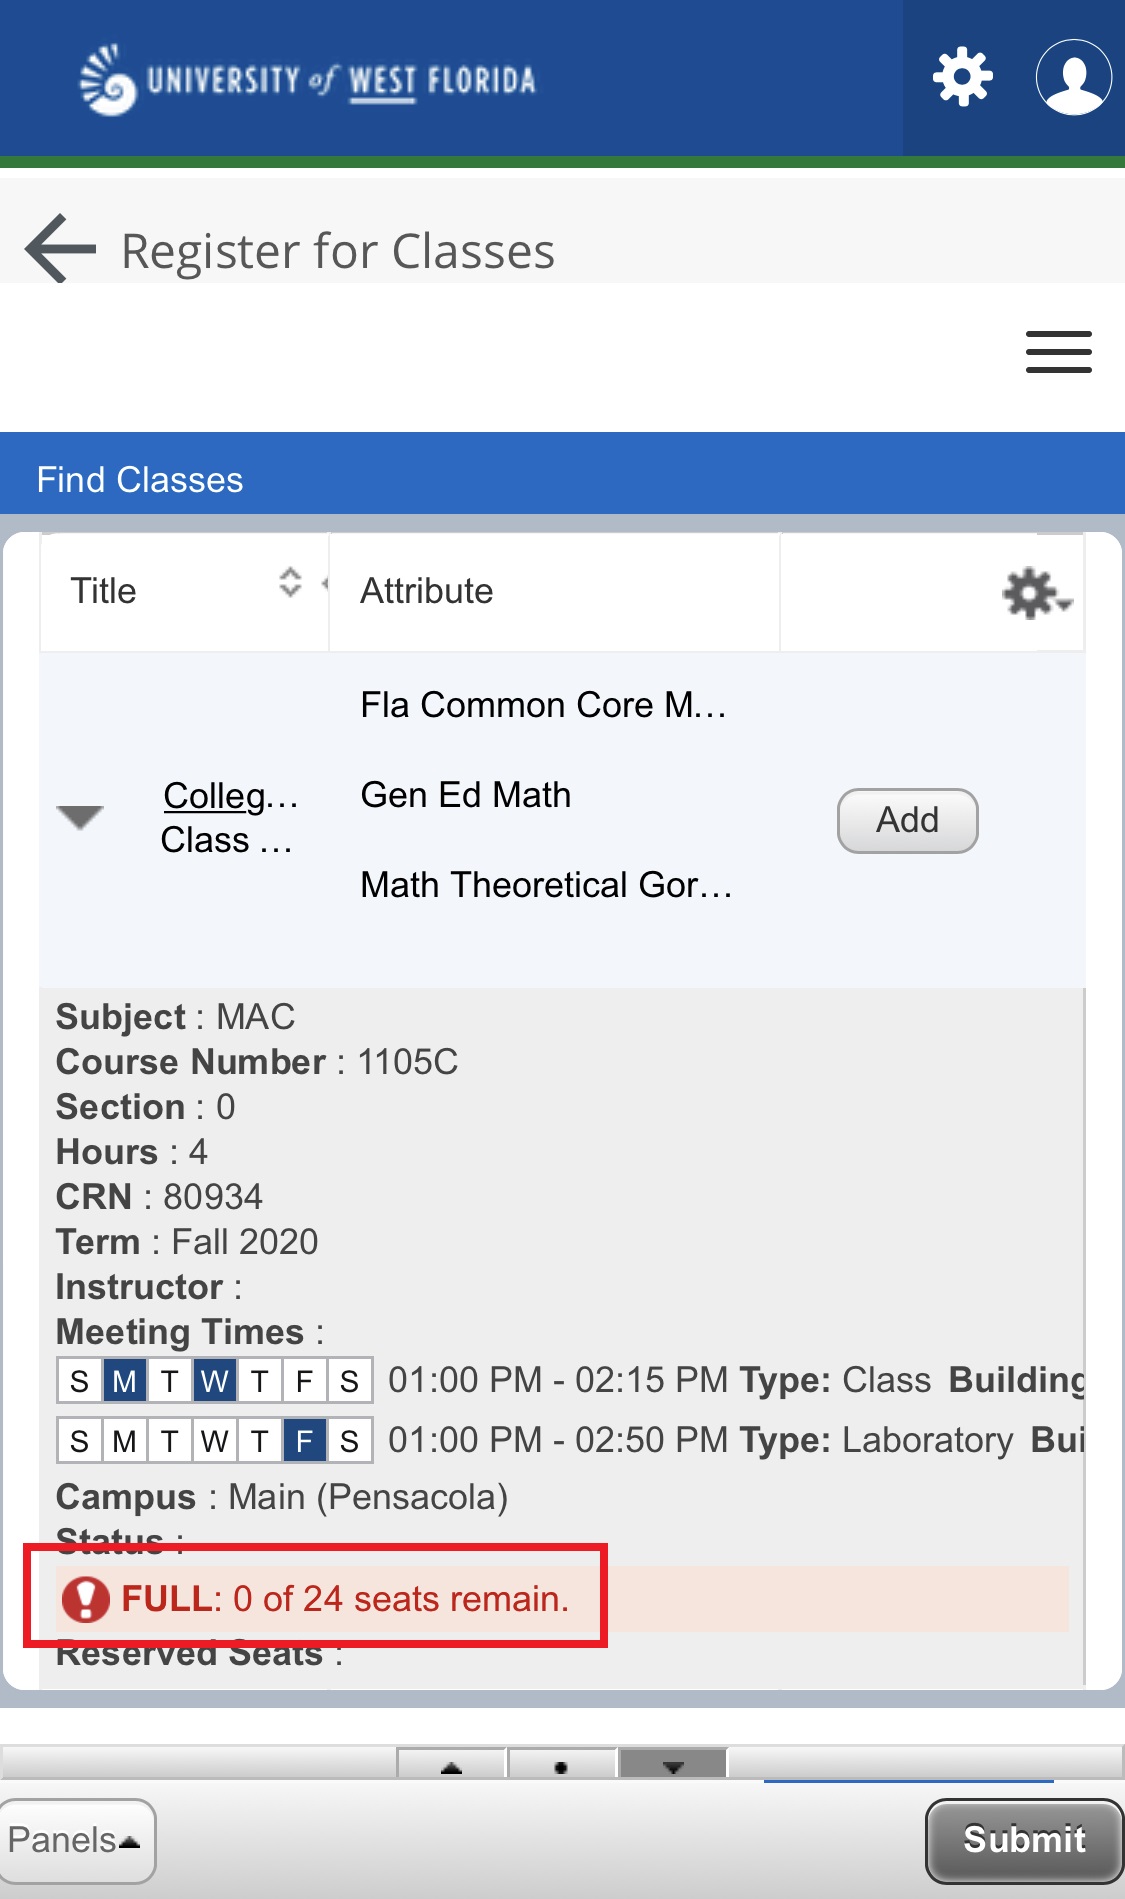
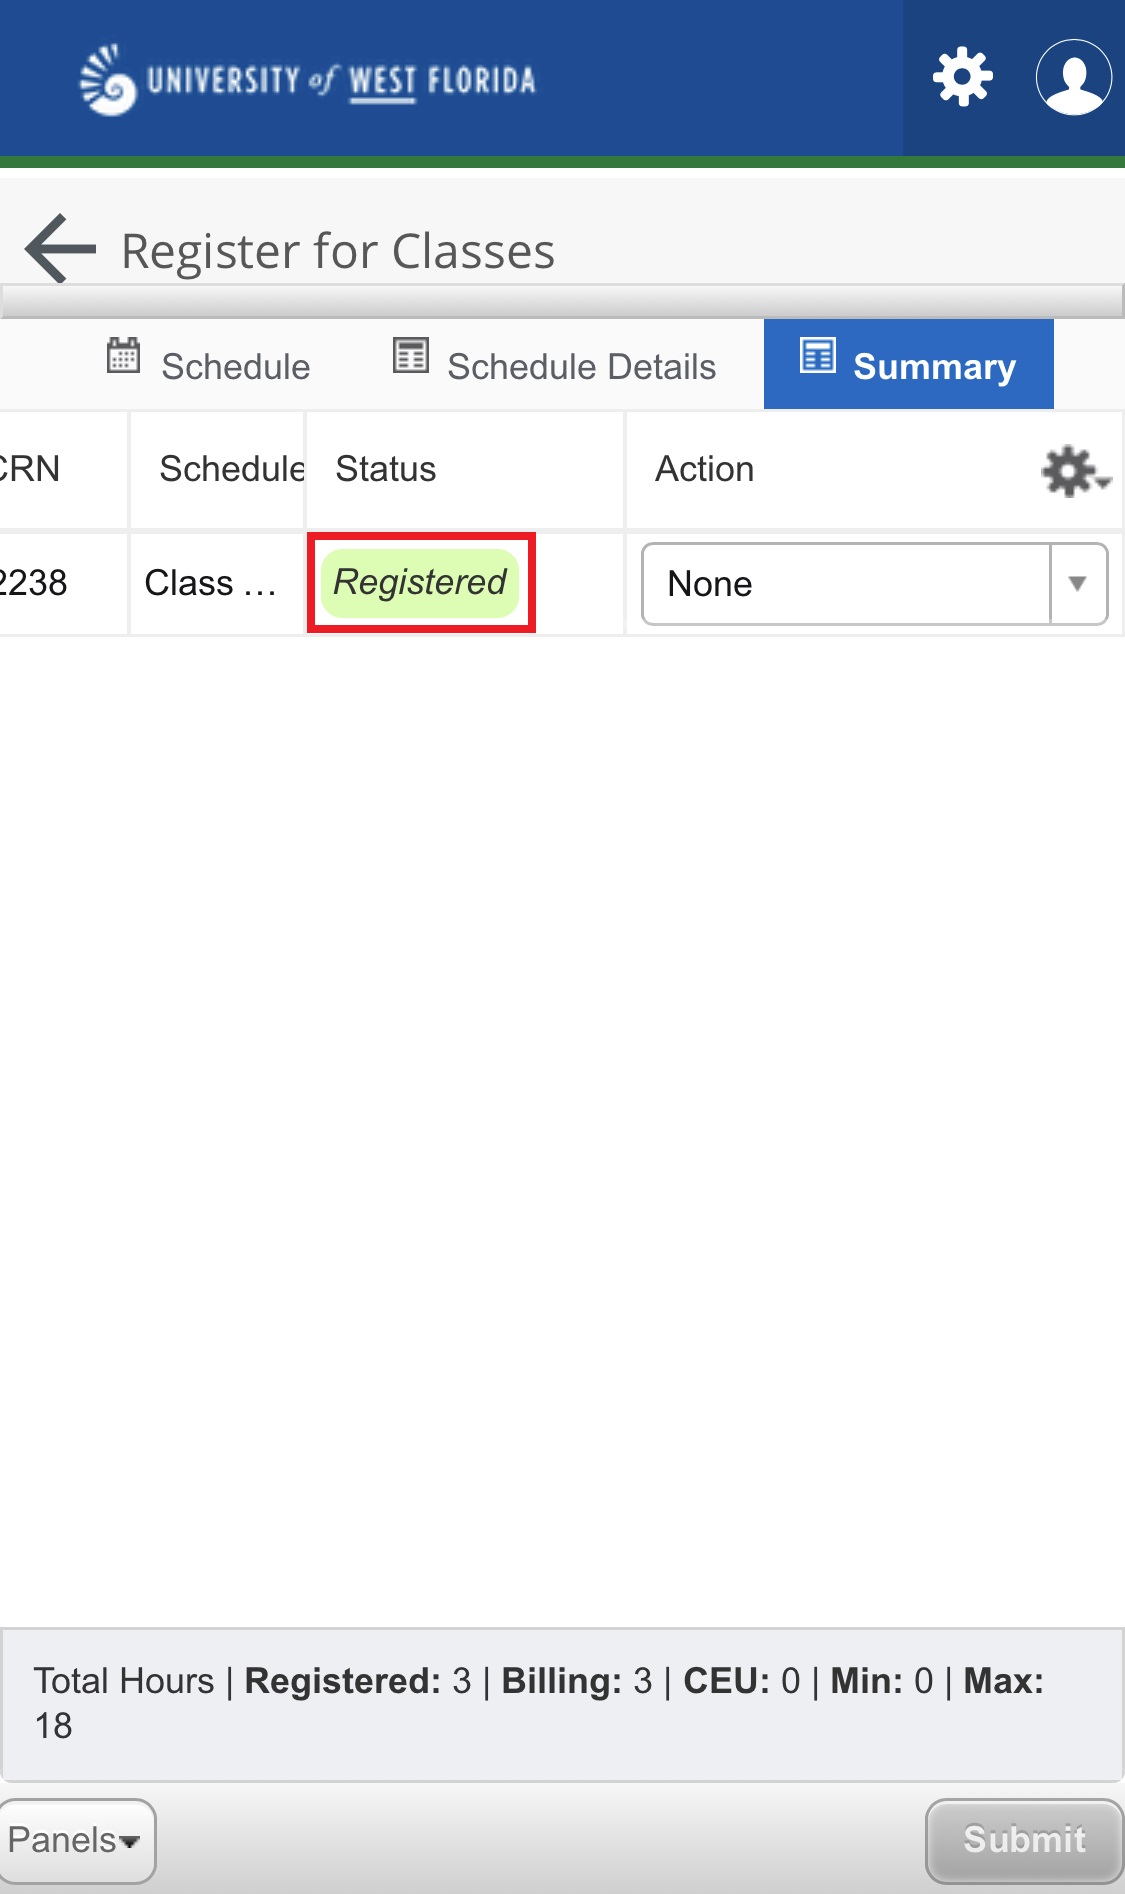
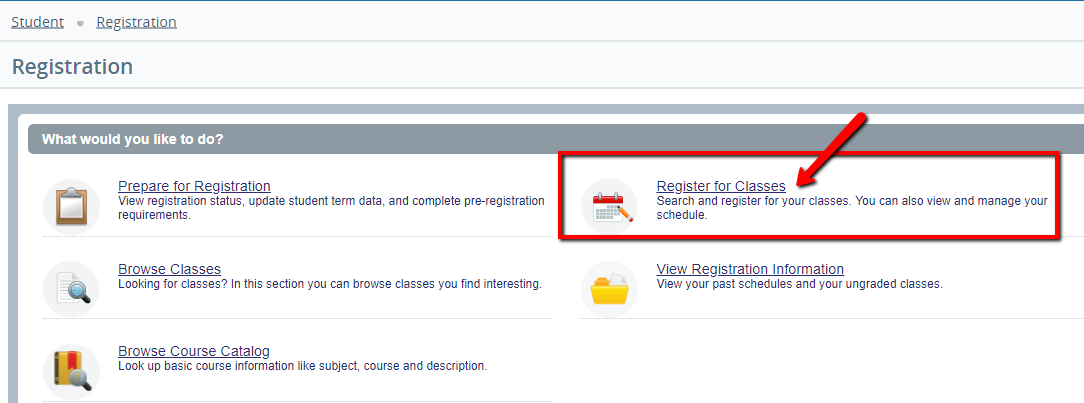
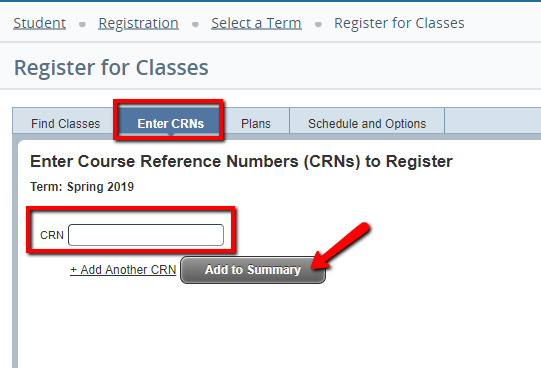
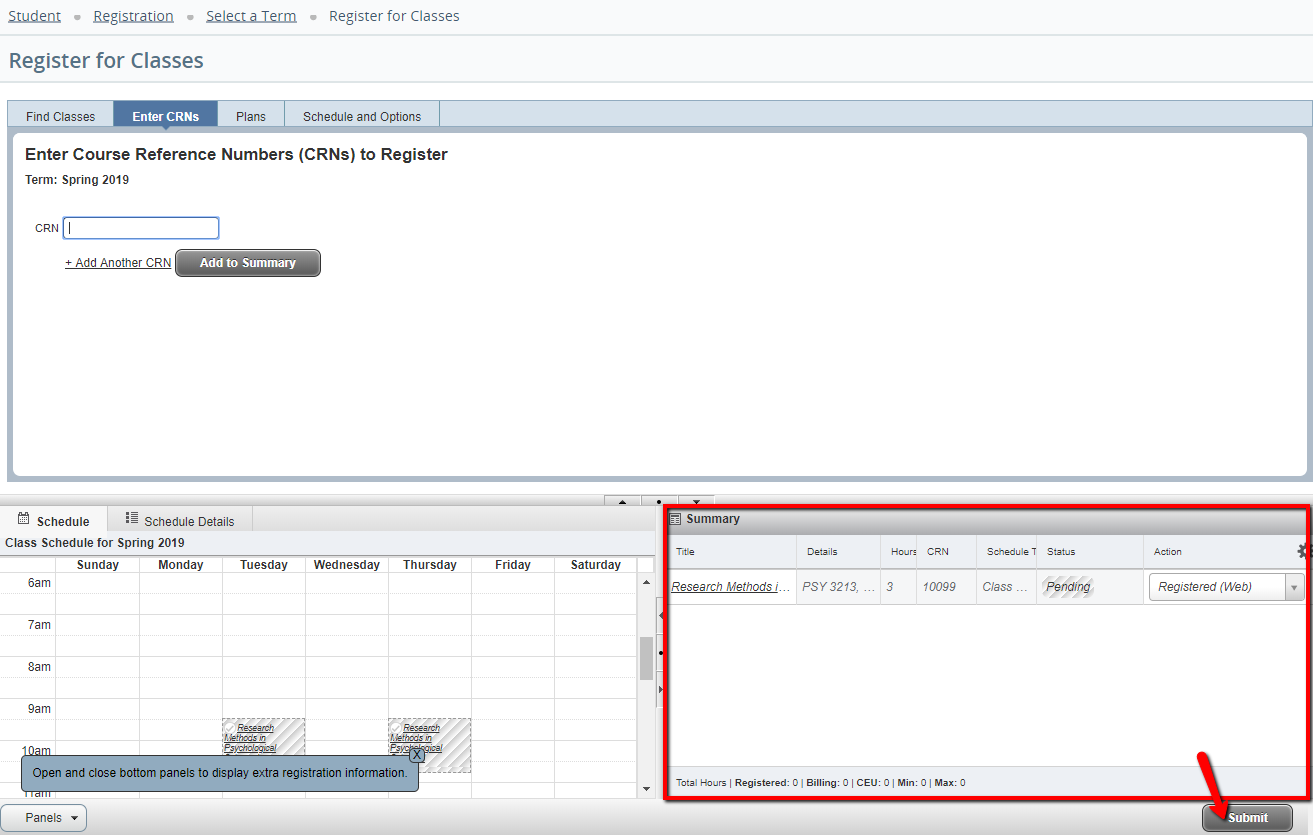
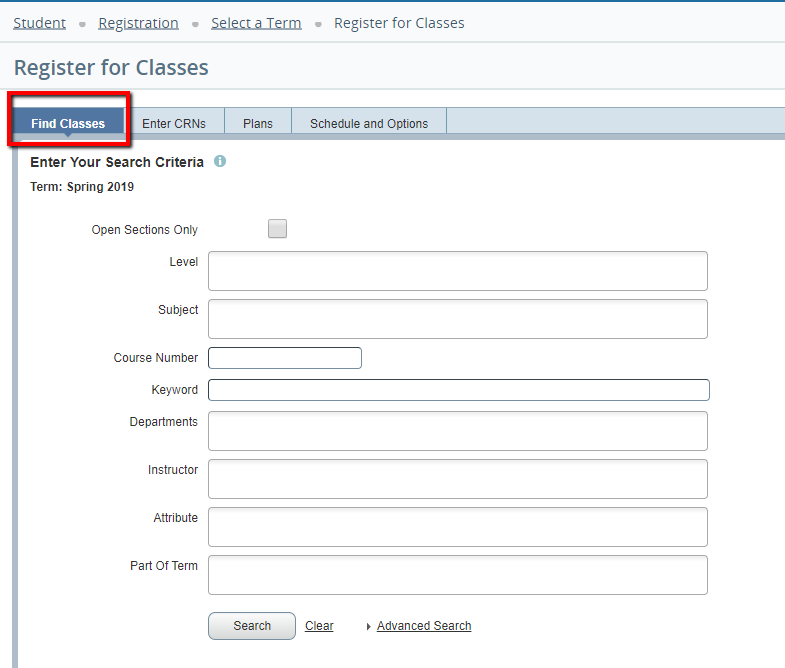
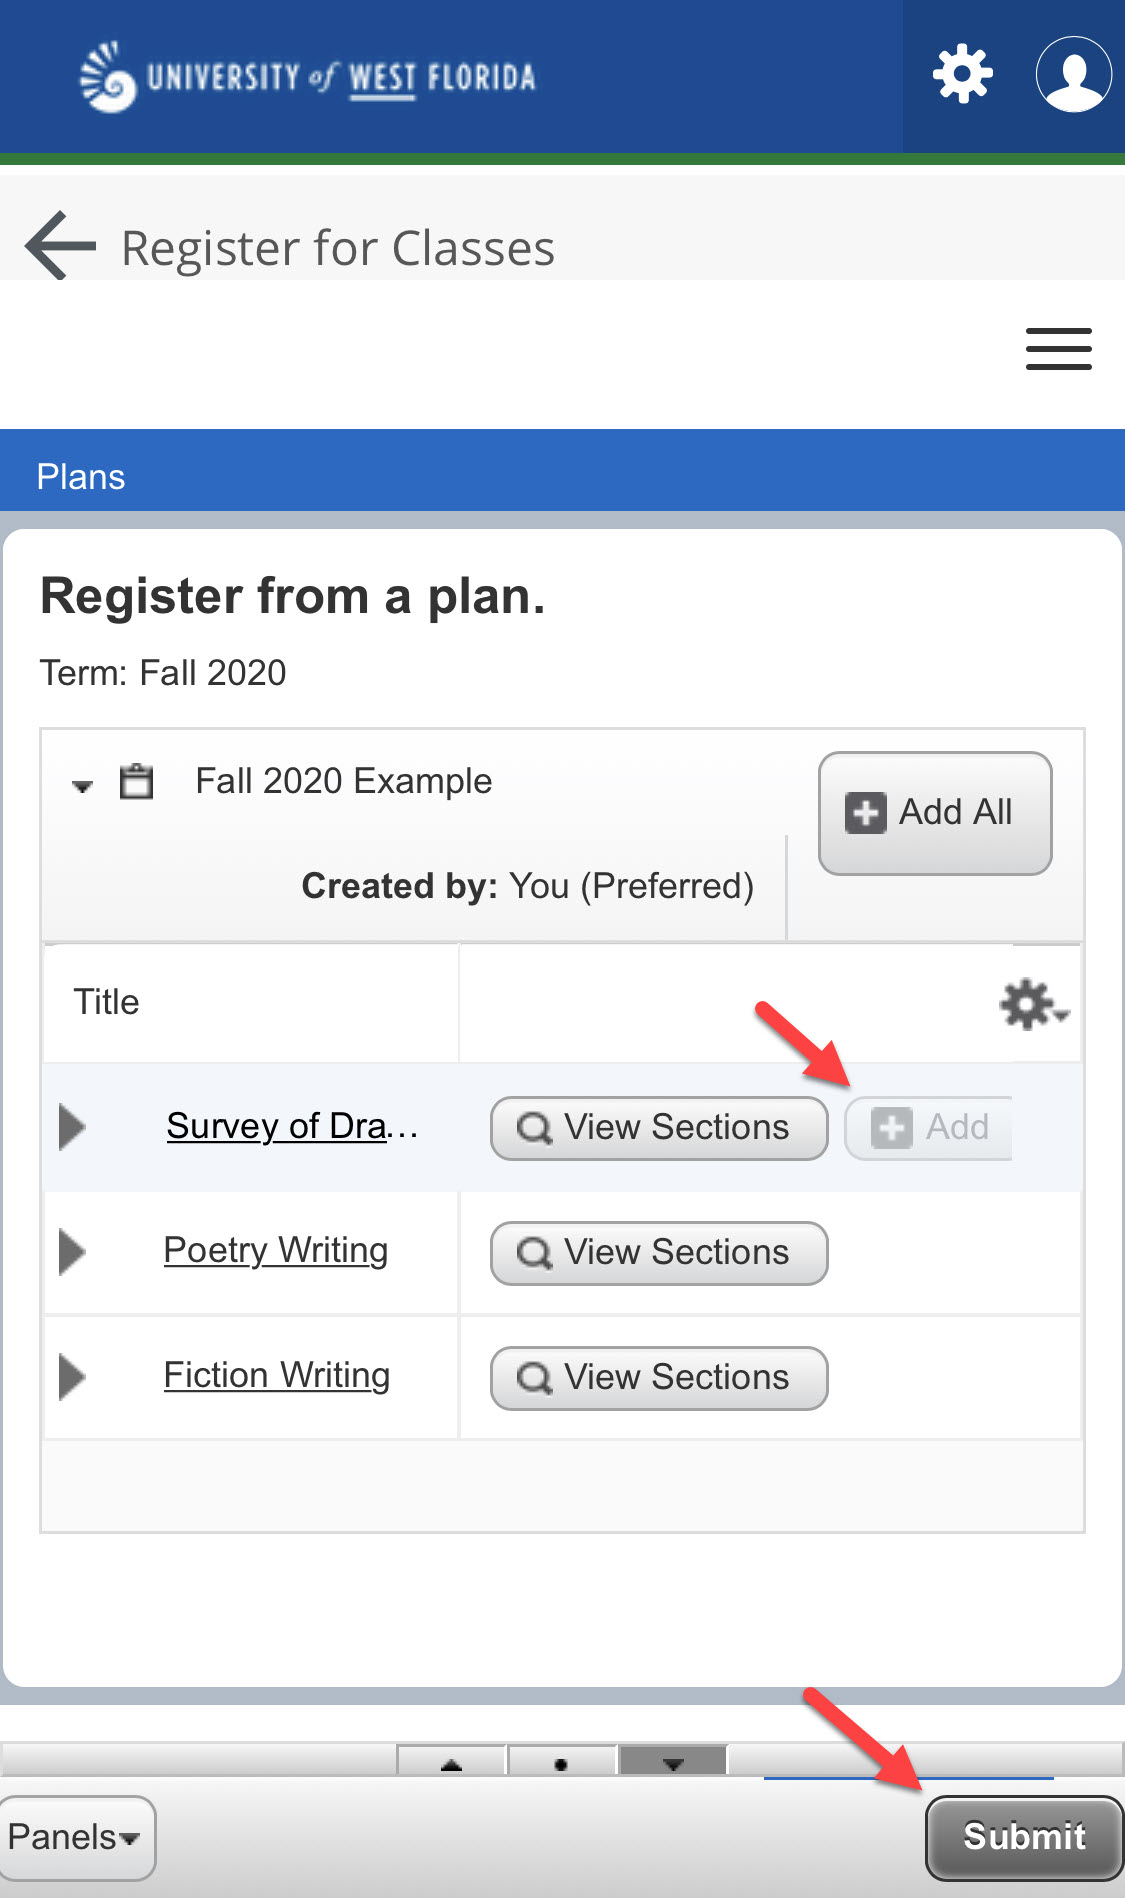
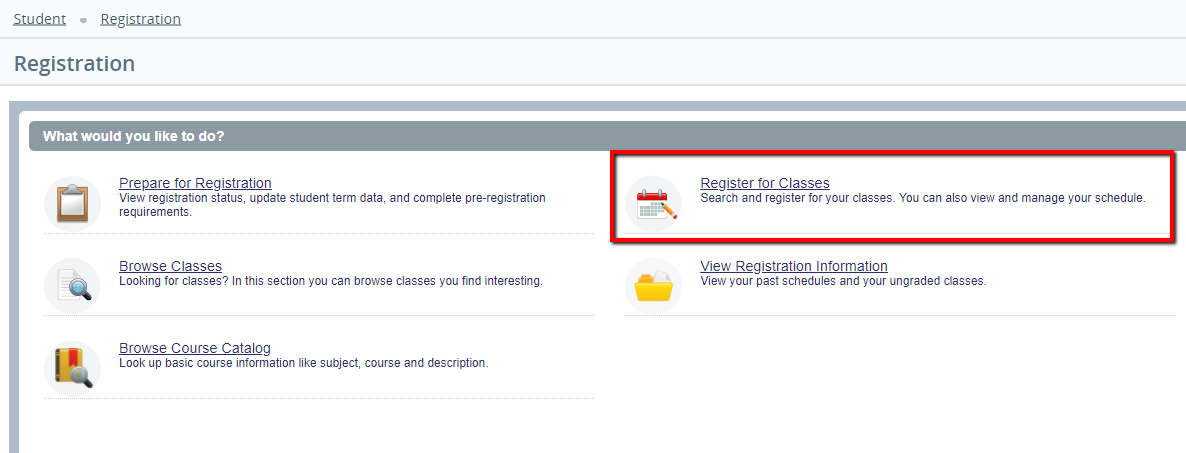
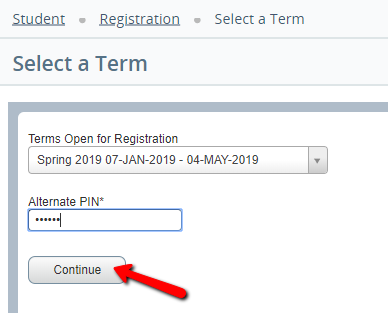
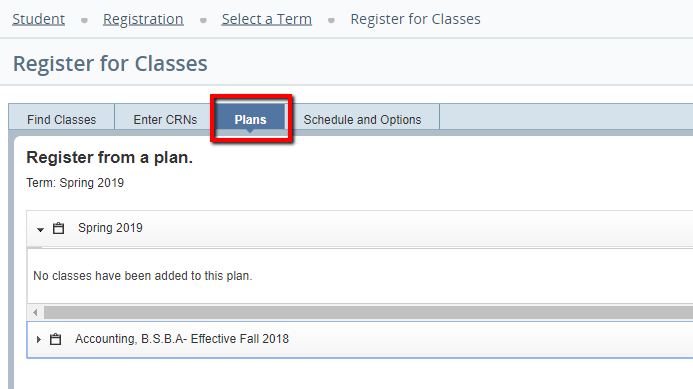
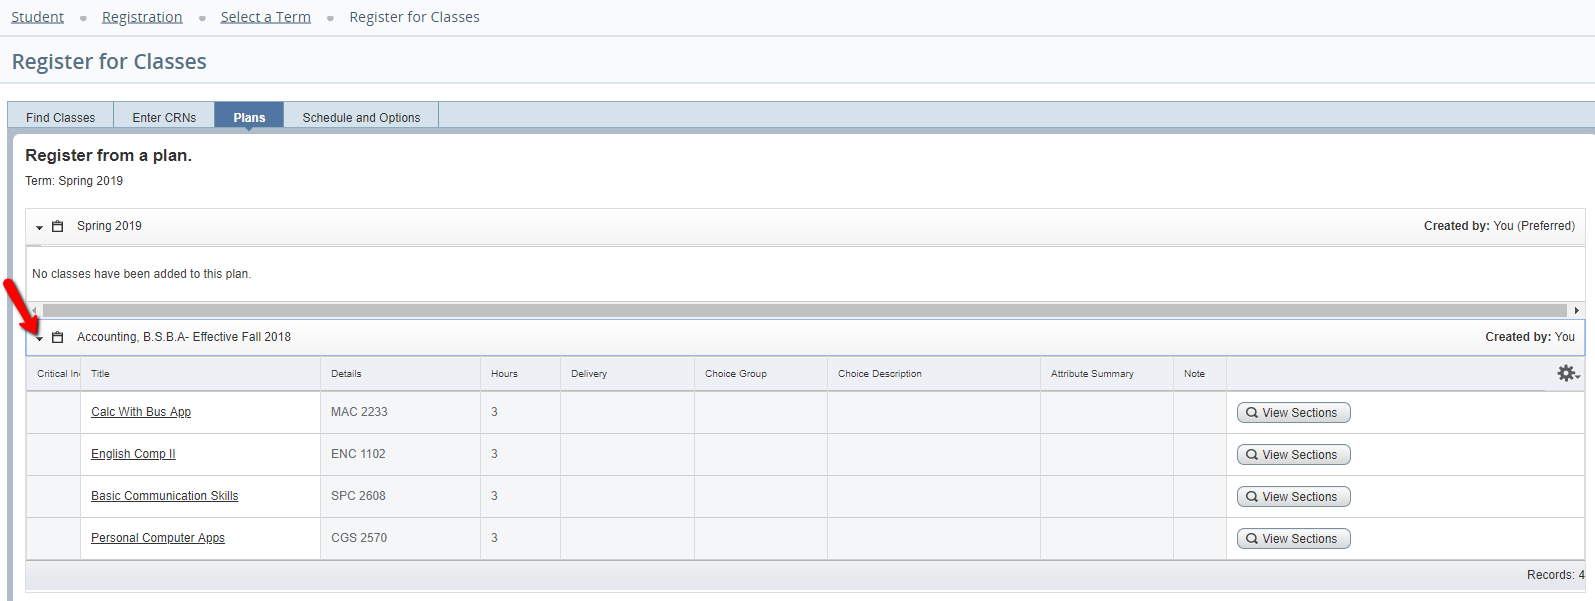
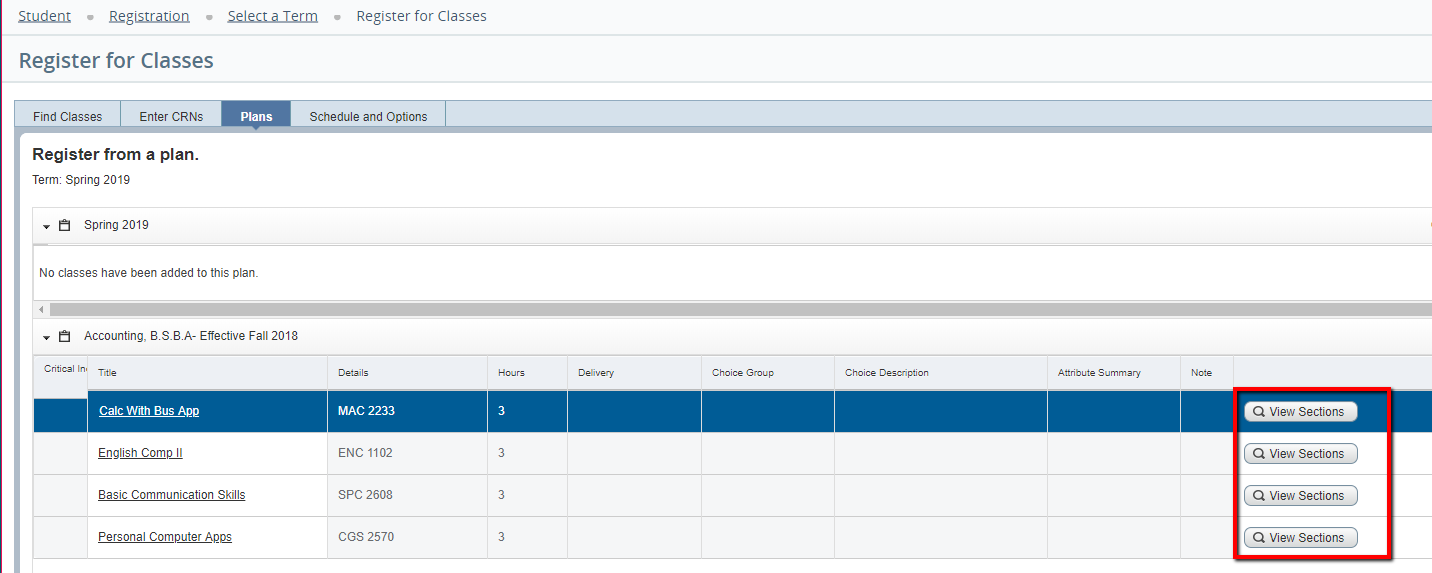
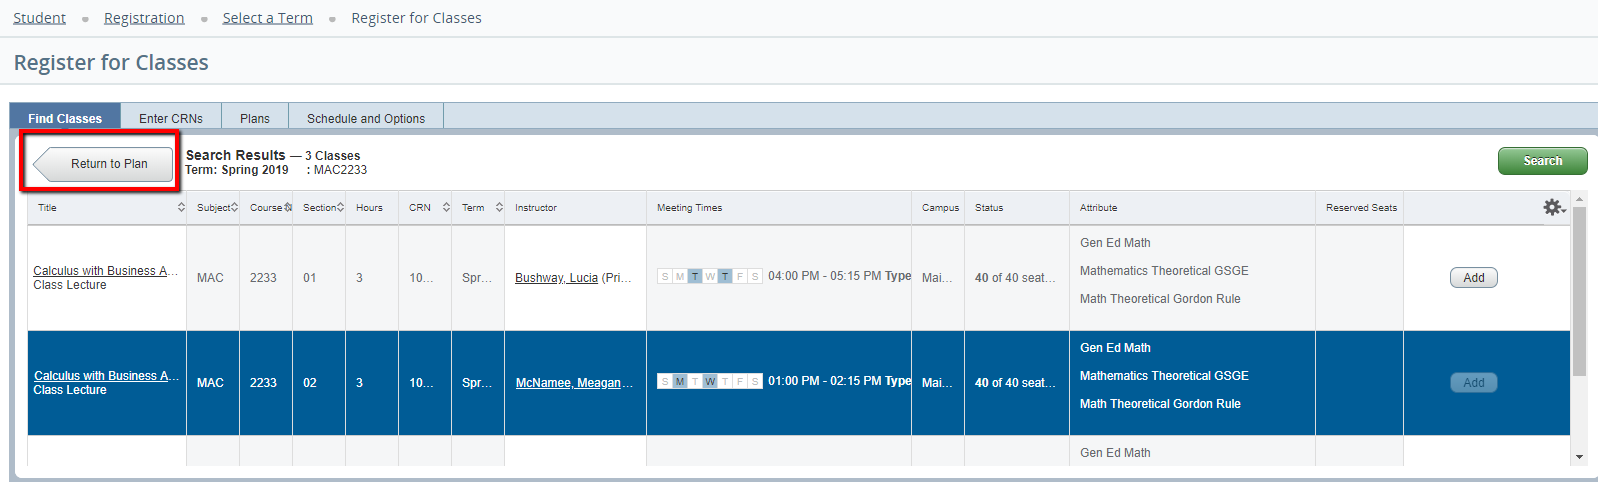
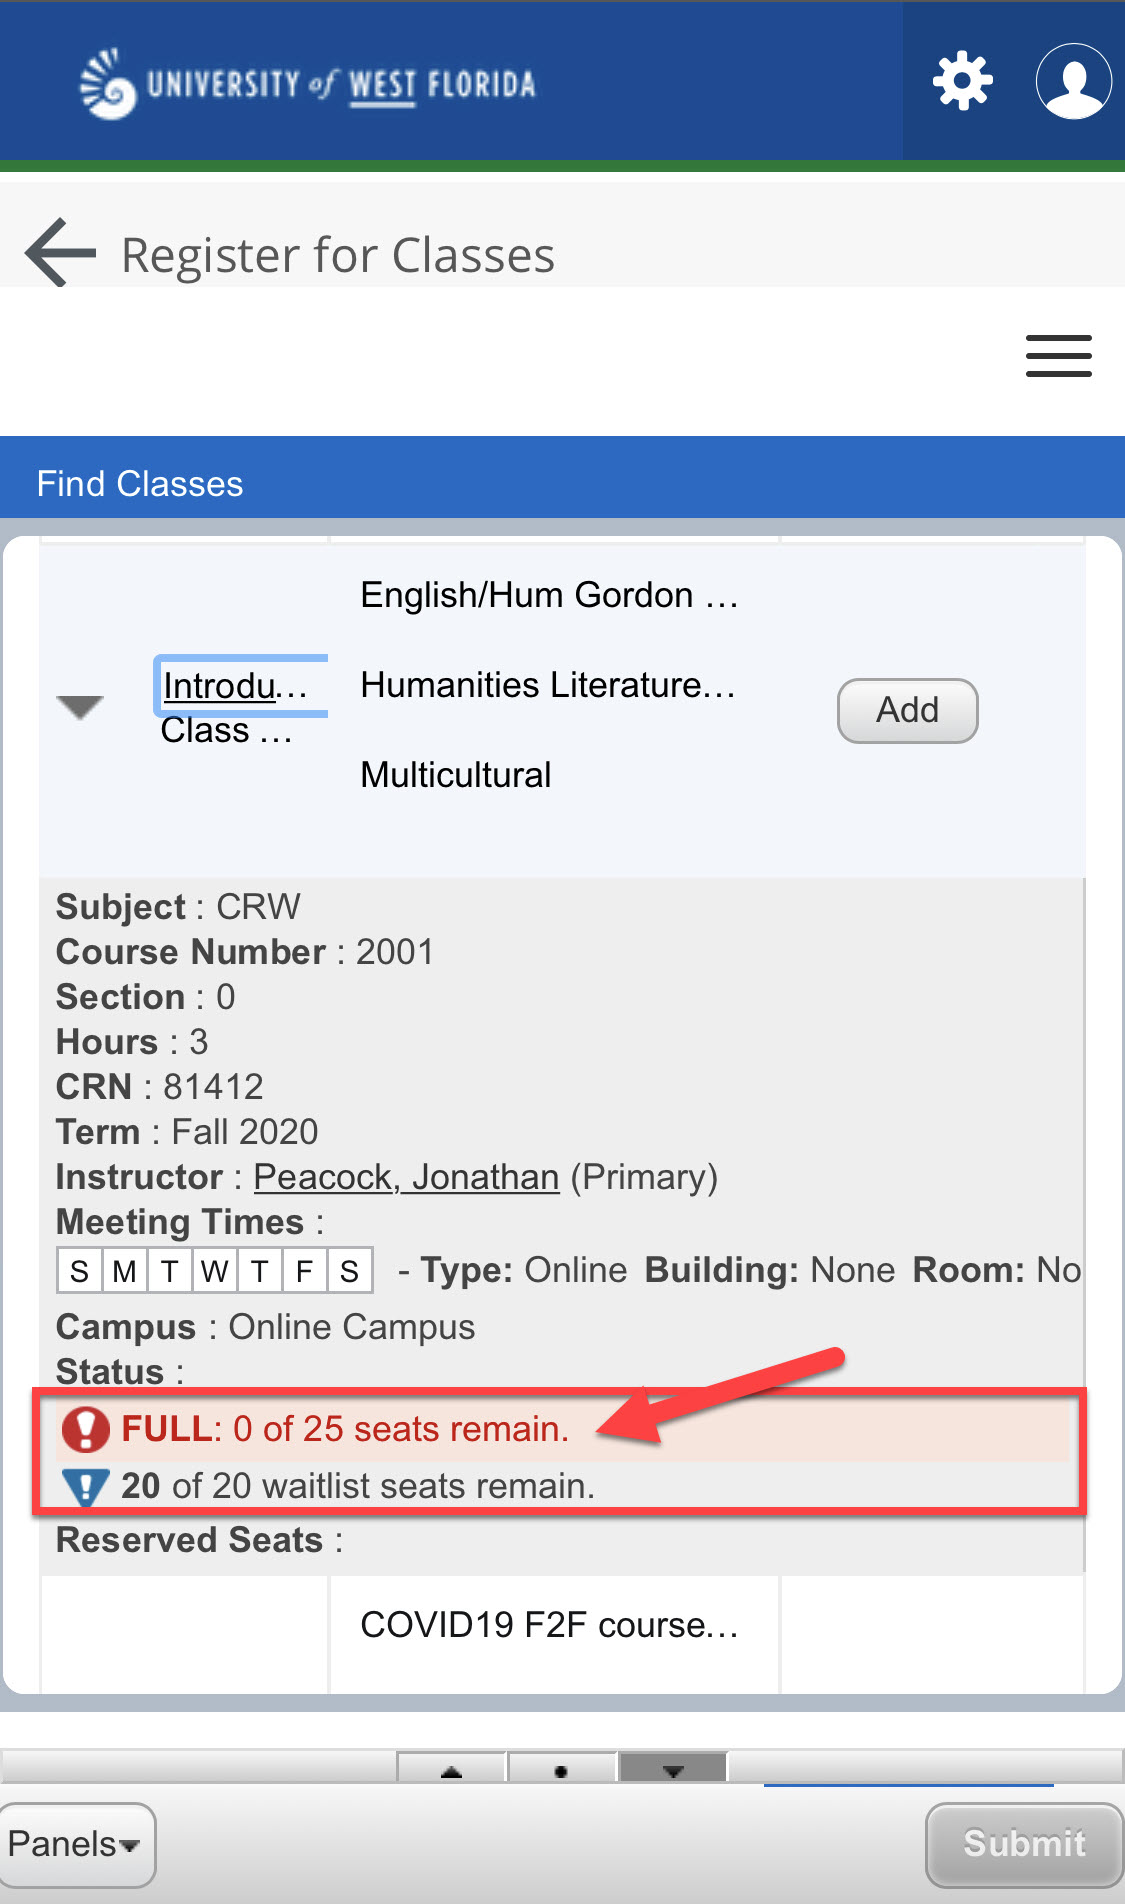
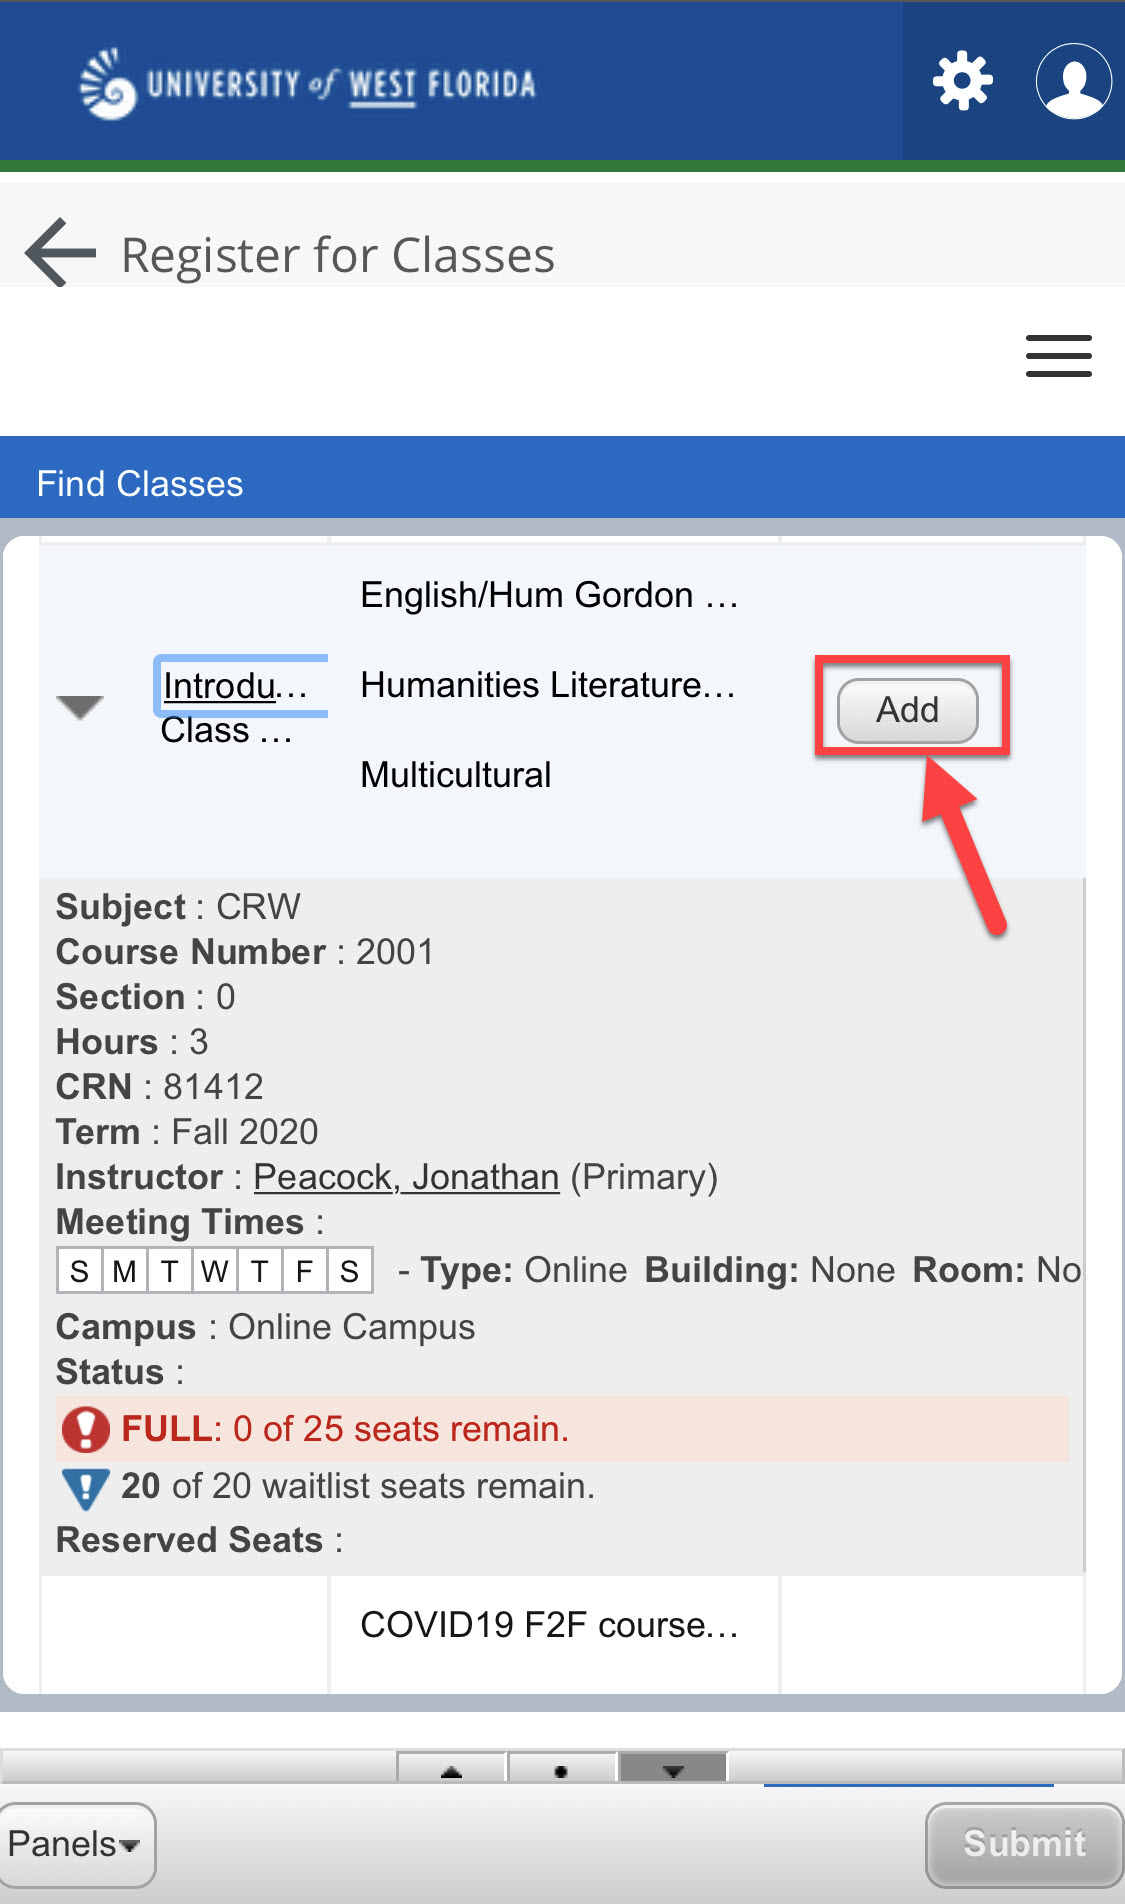
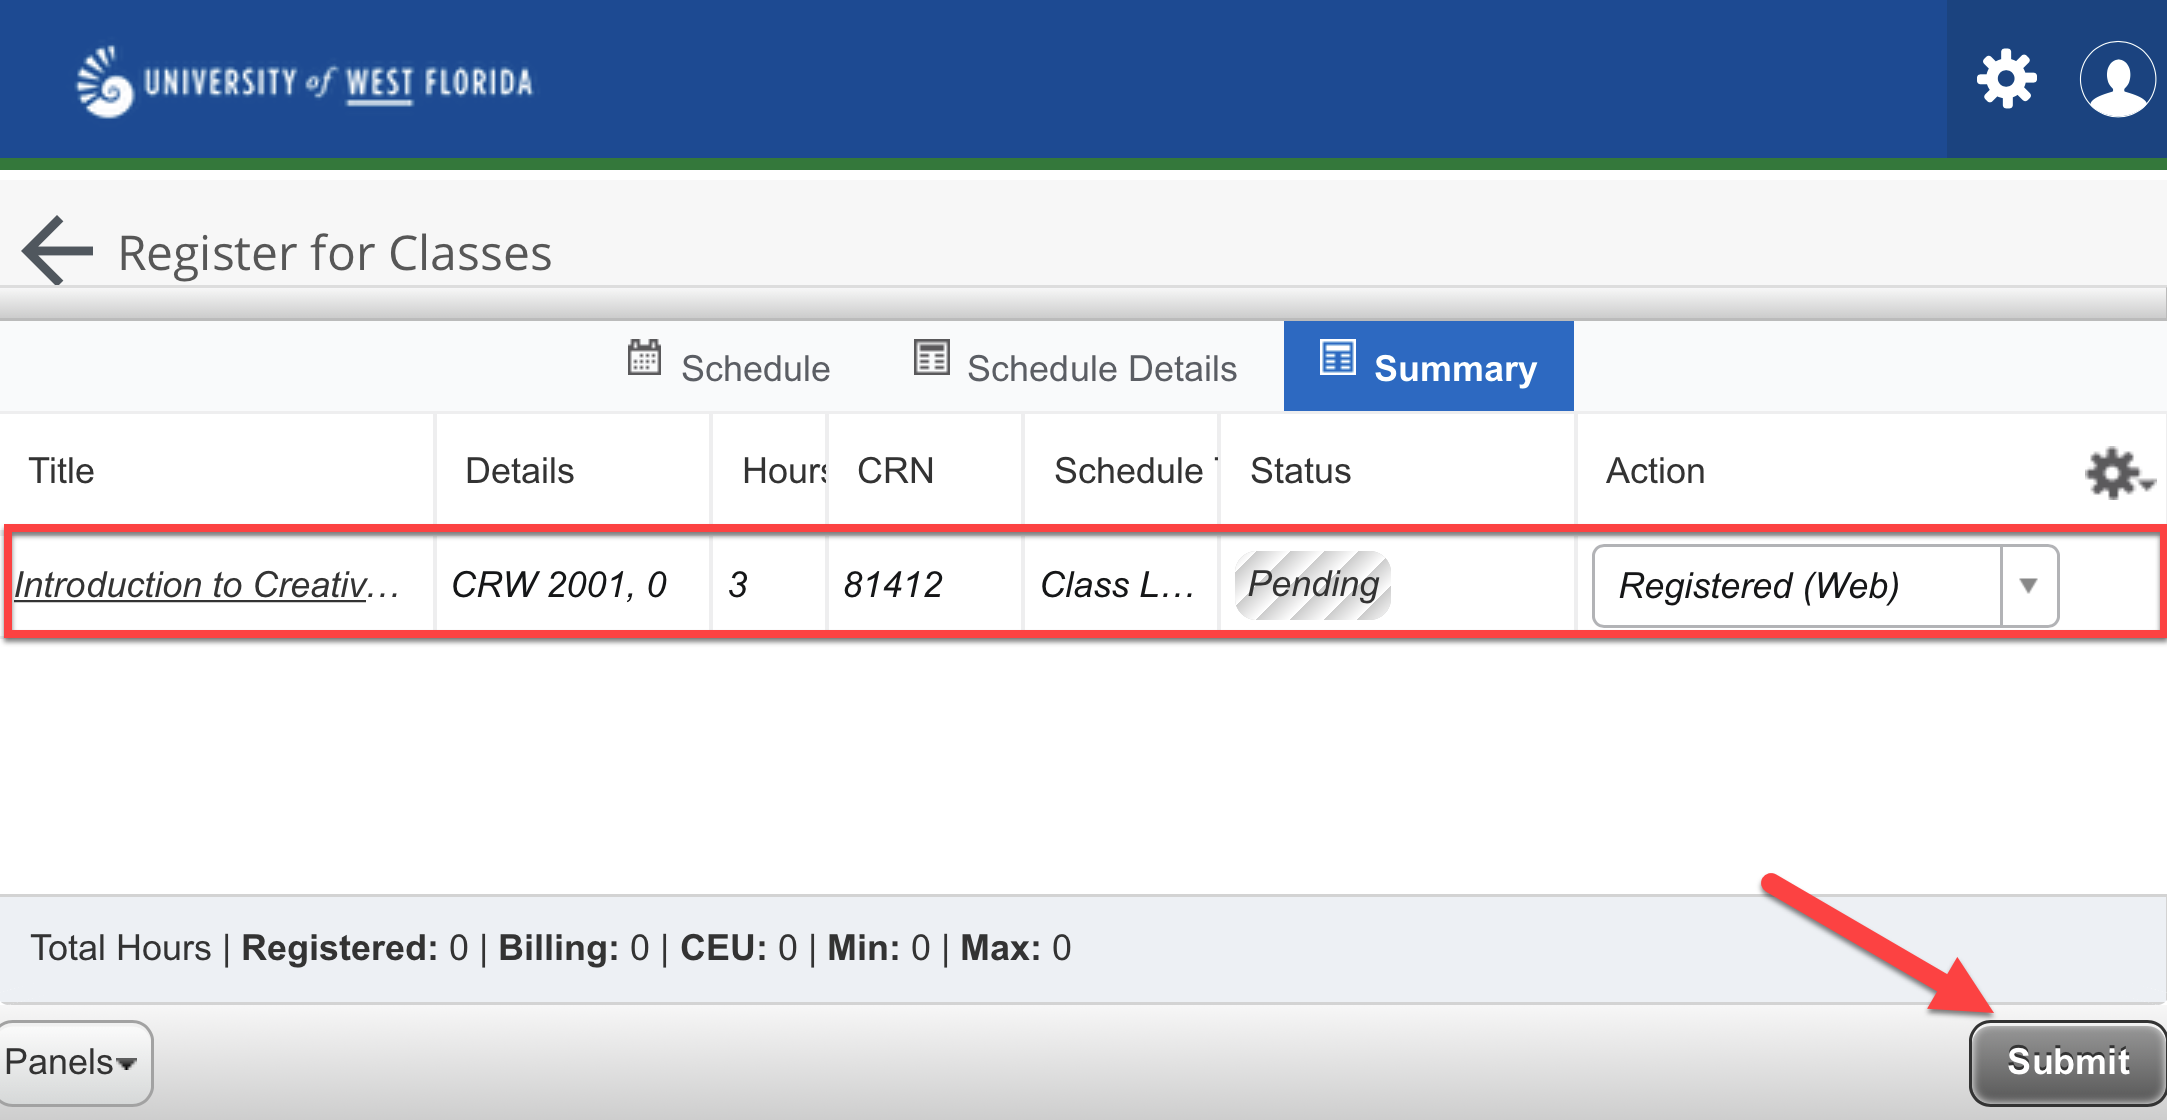
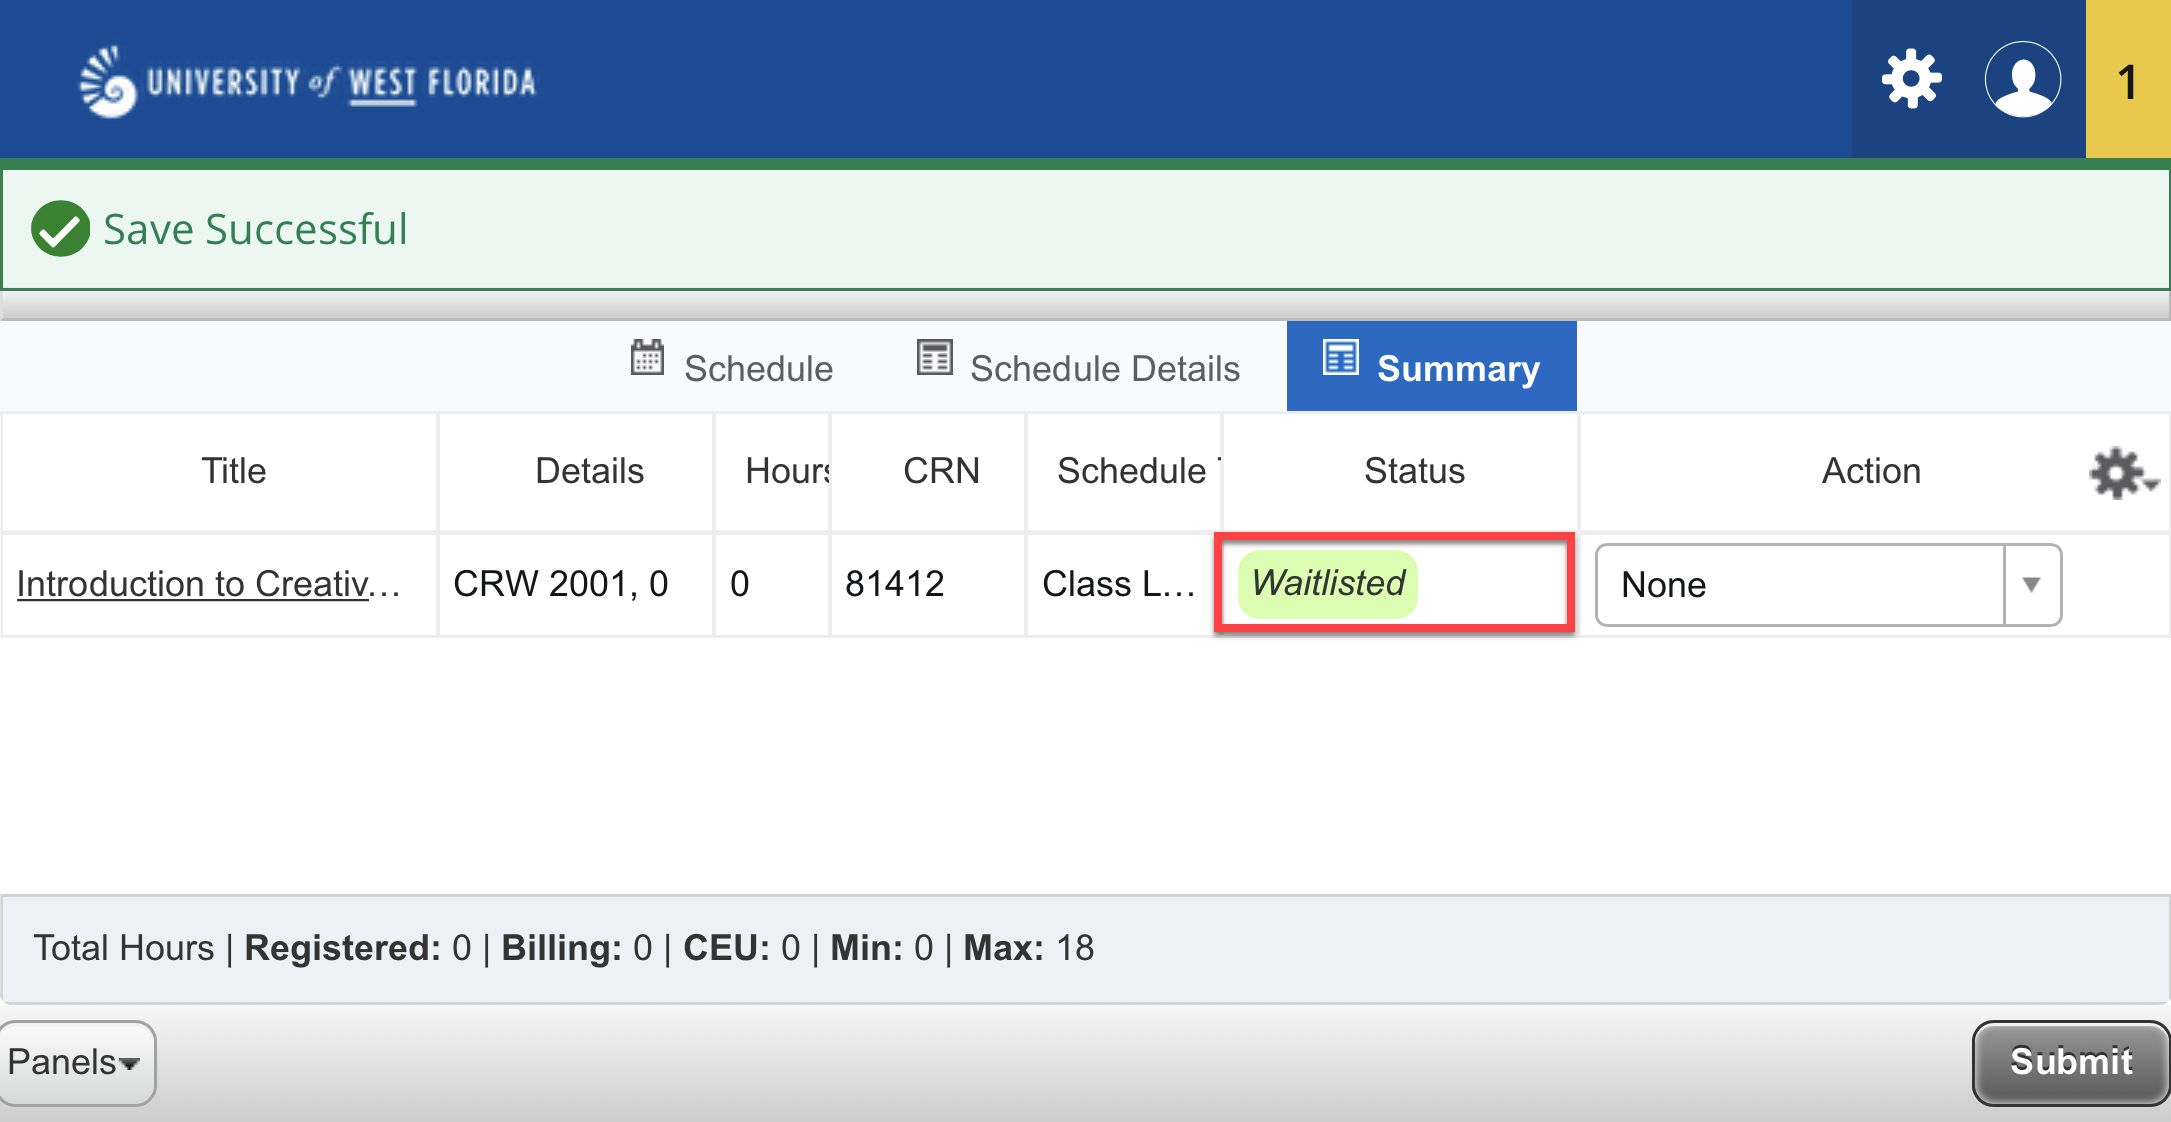
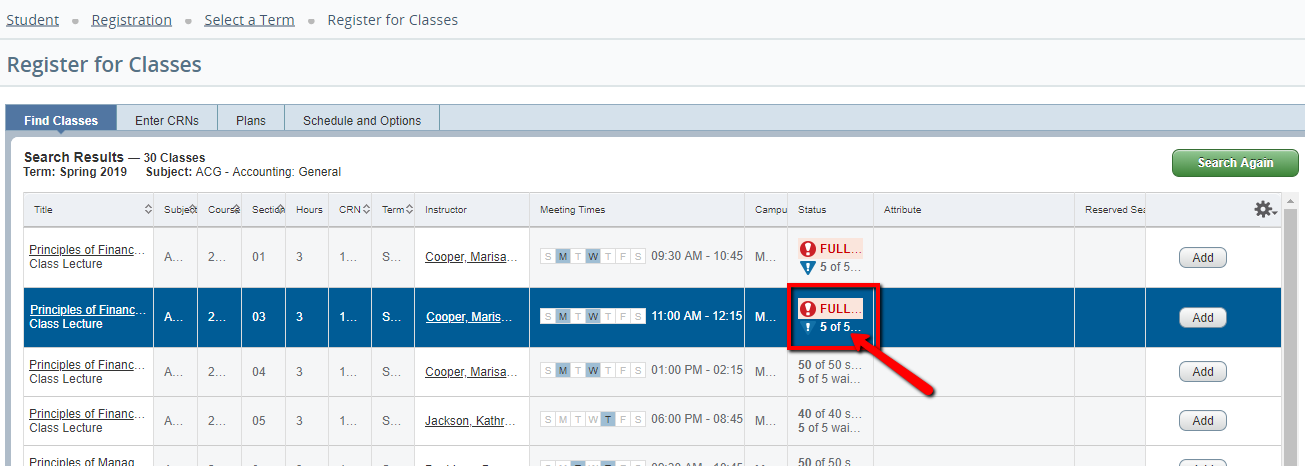
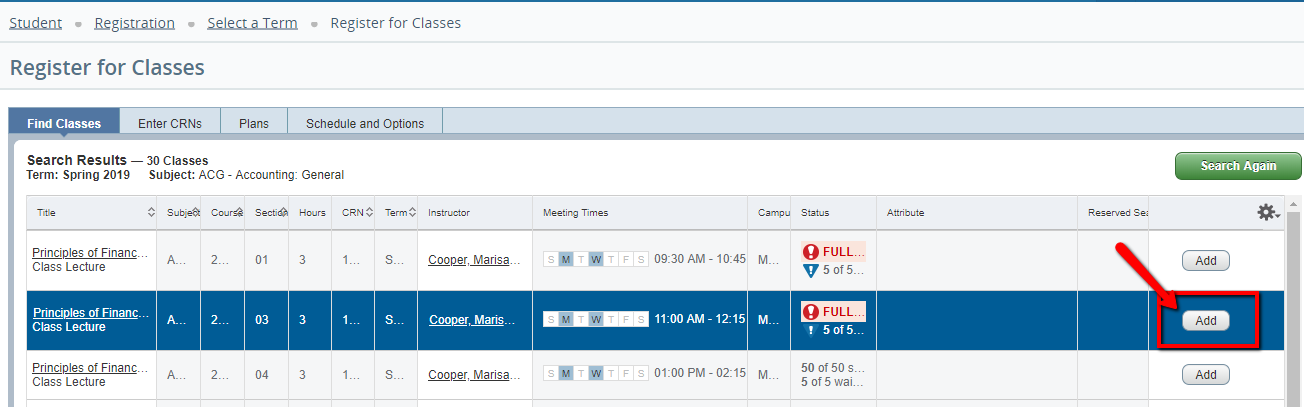
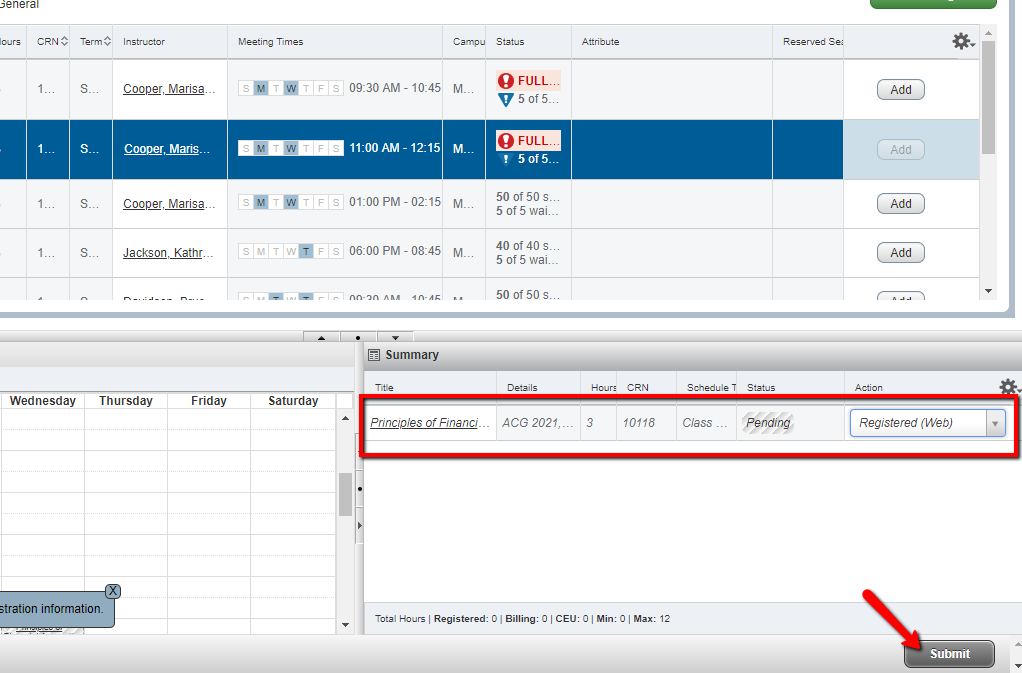
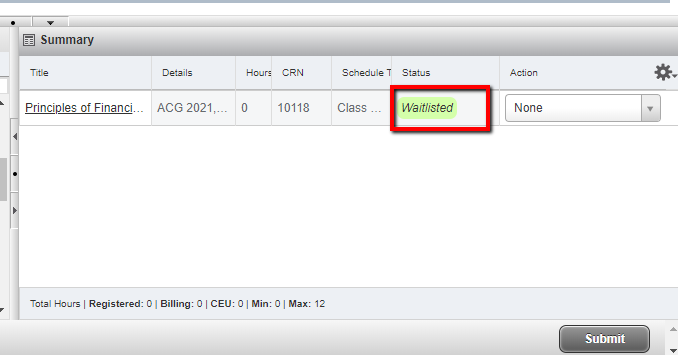
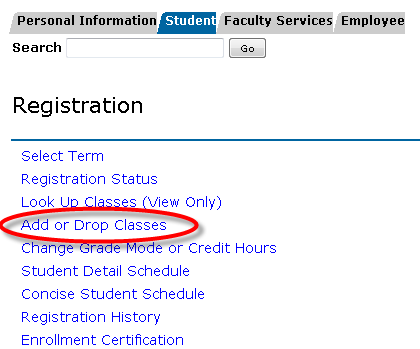
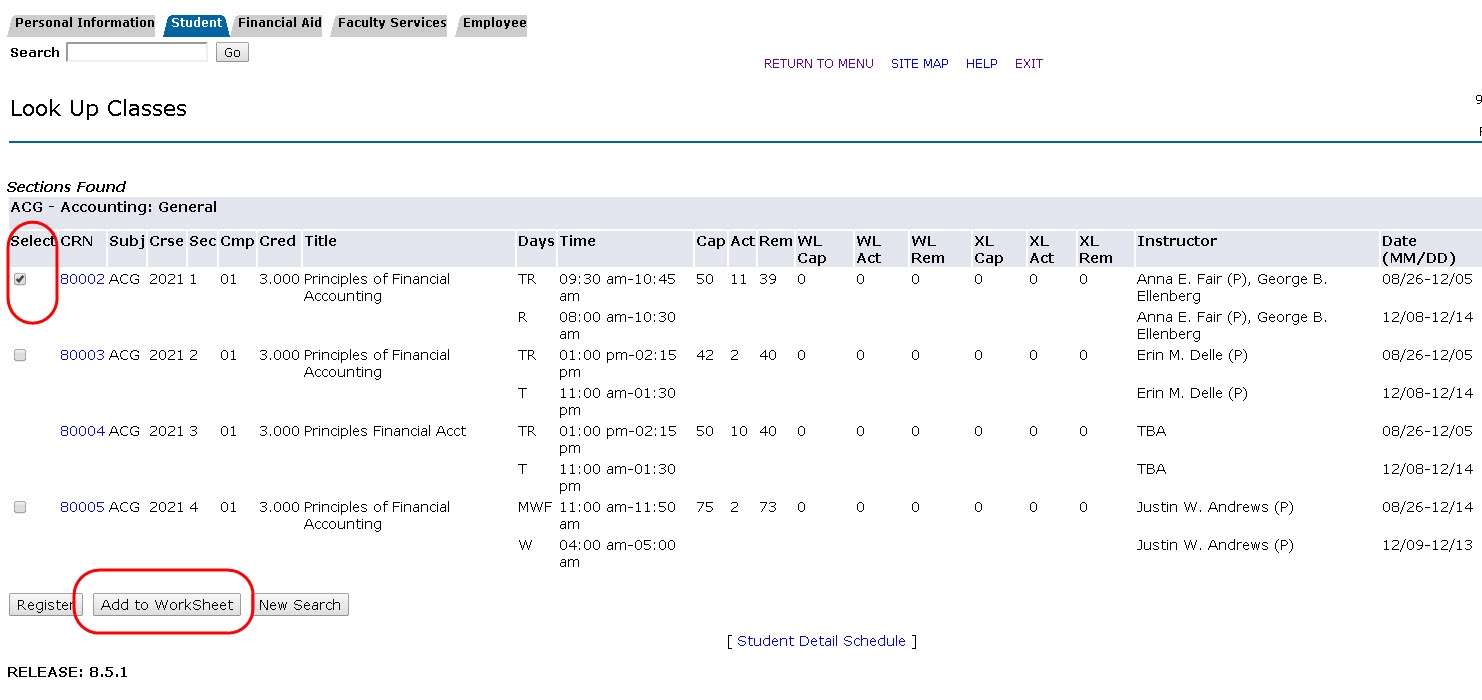
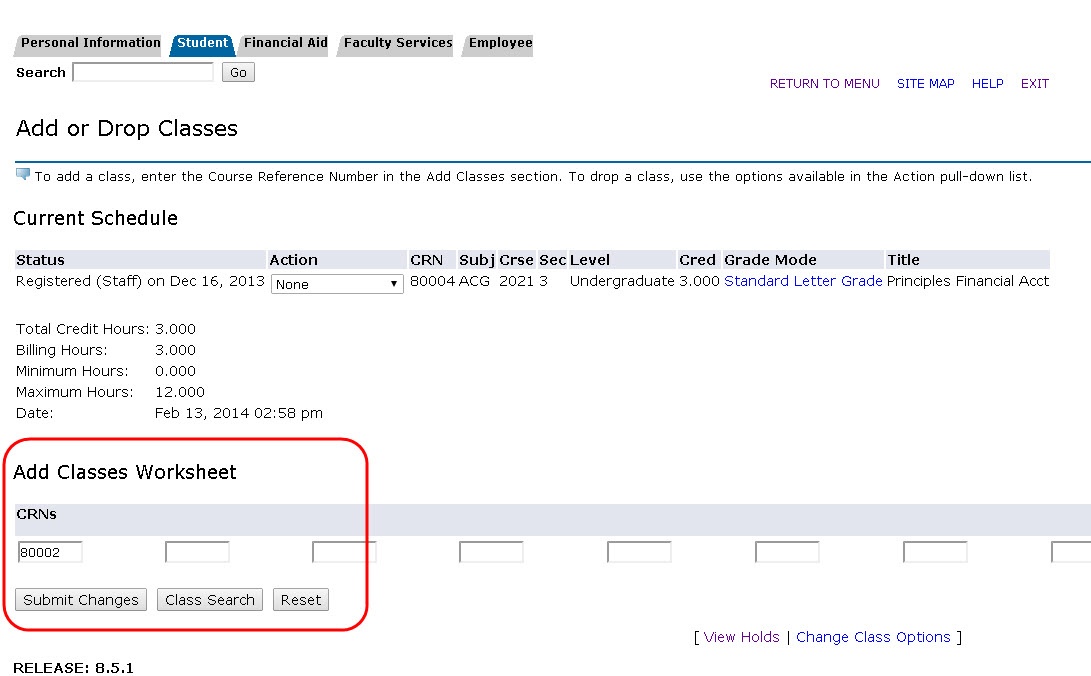
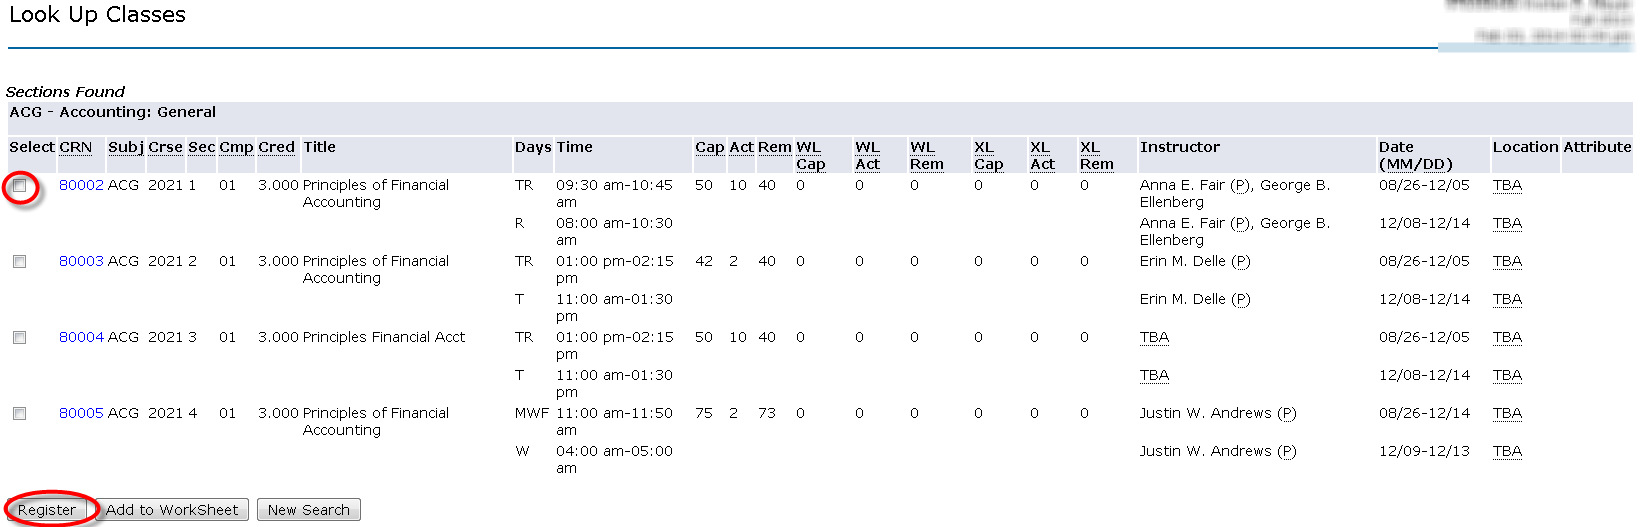
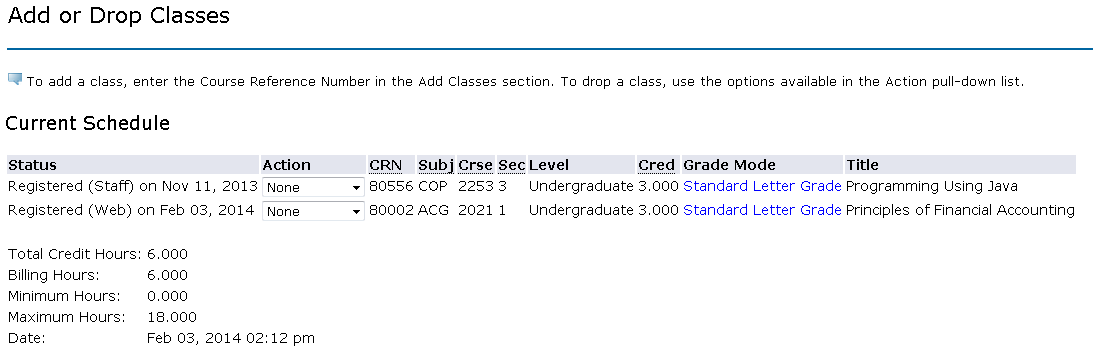
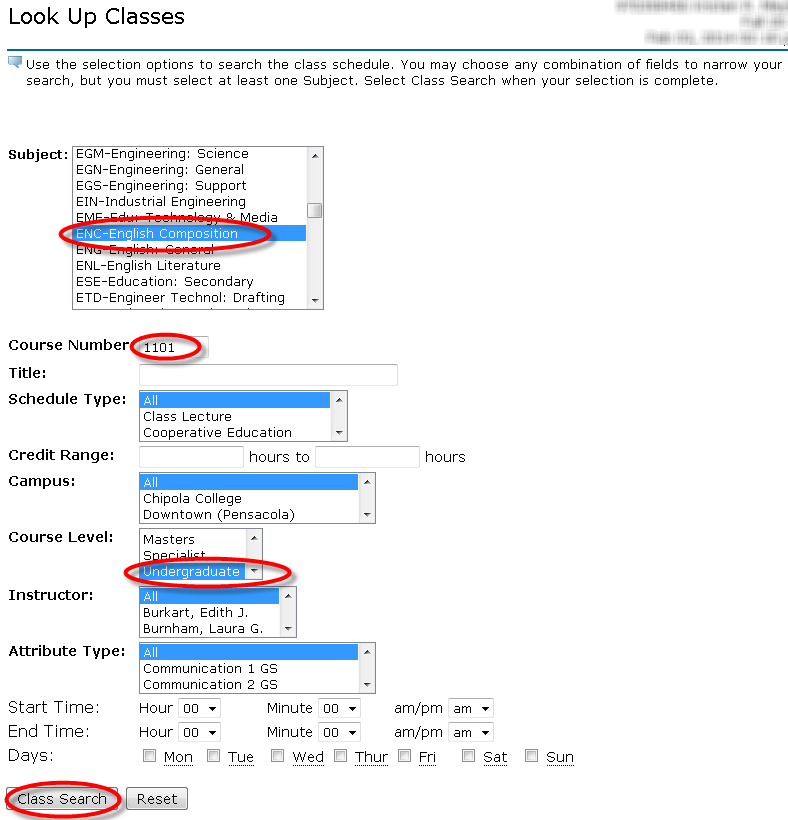
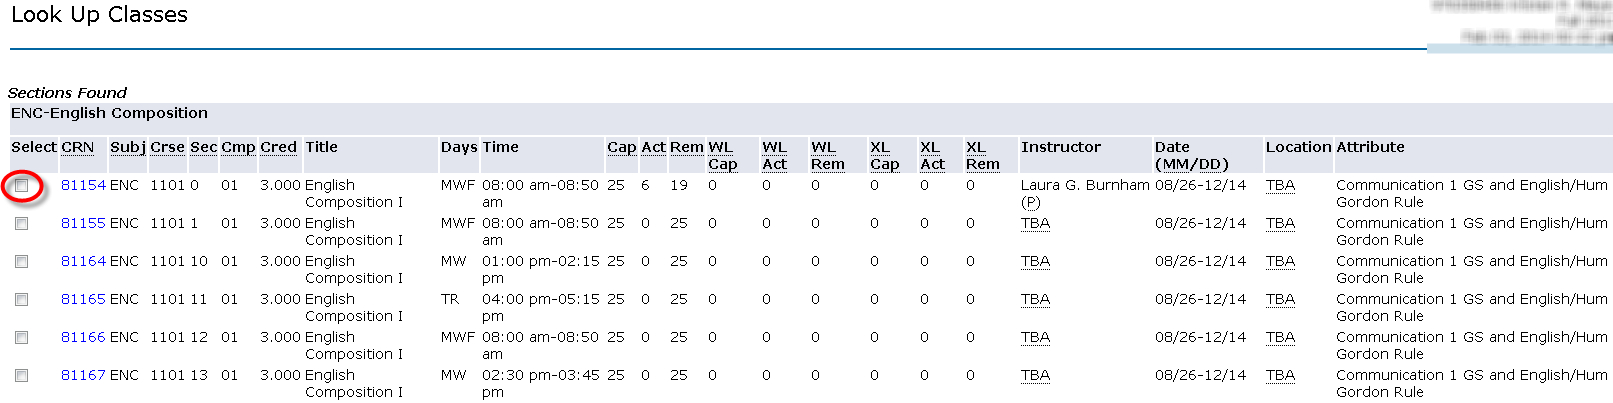
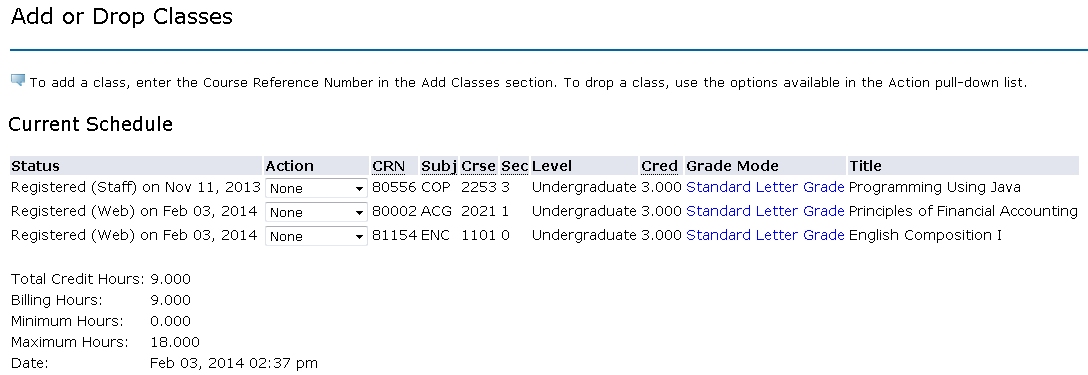
Instructions
|


...