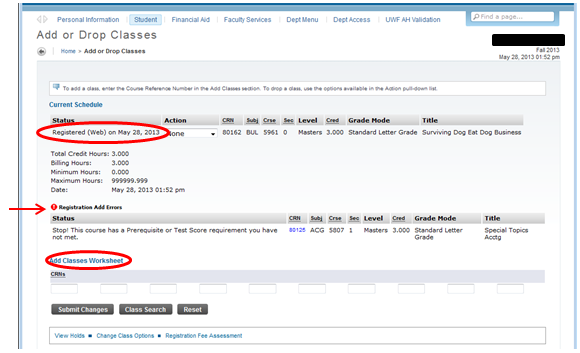
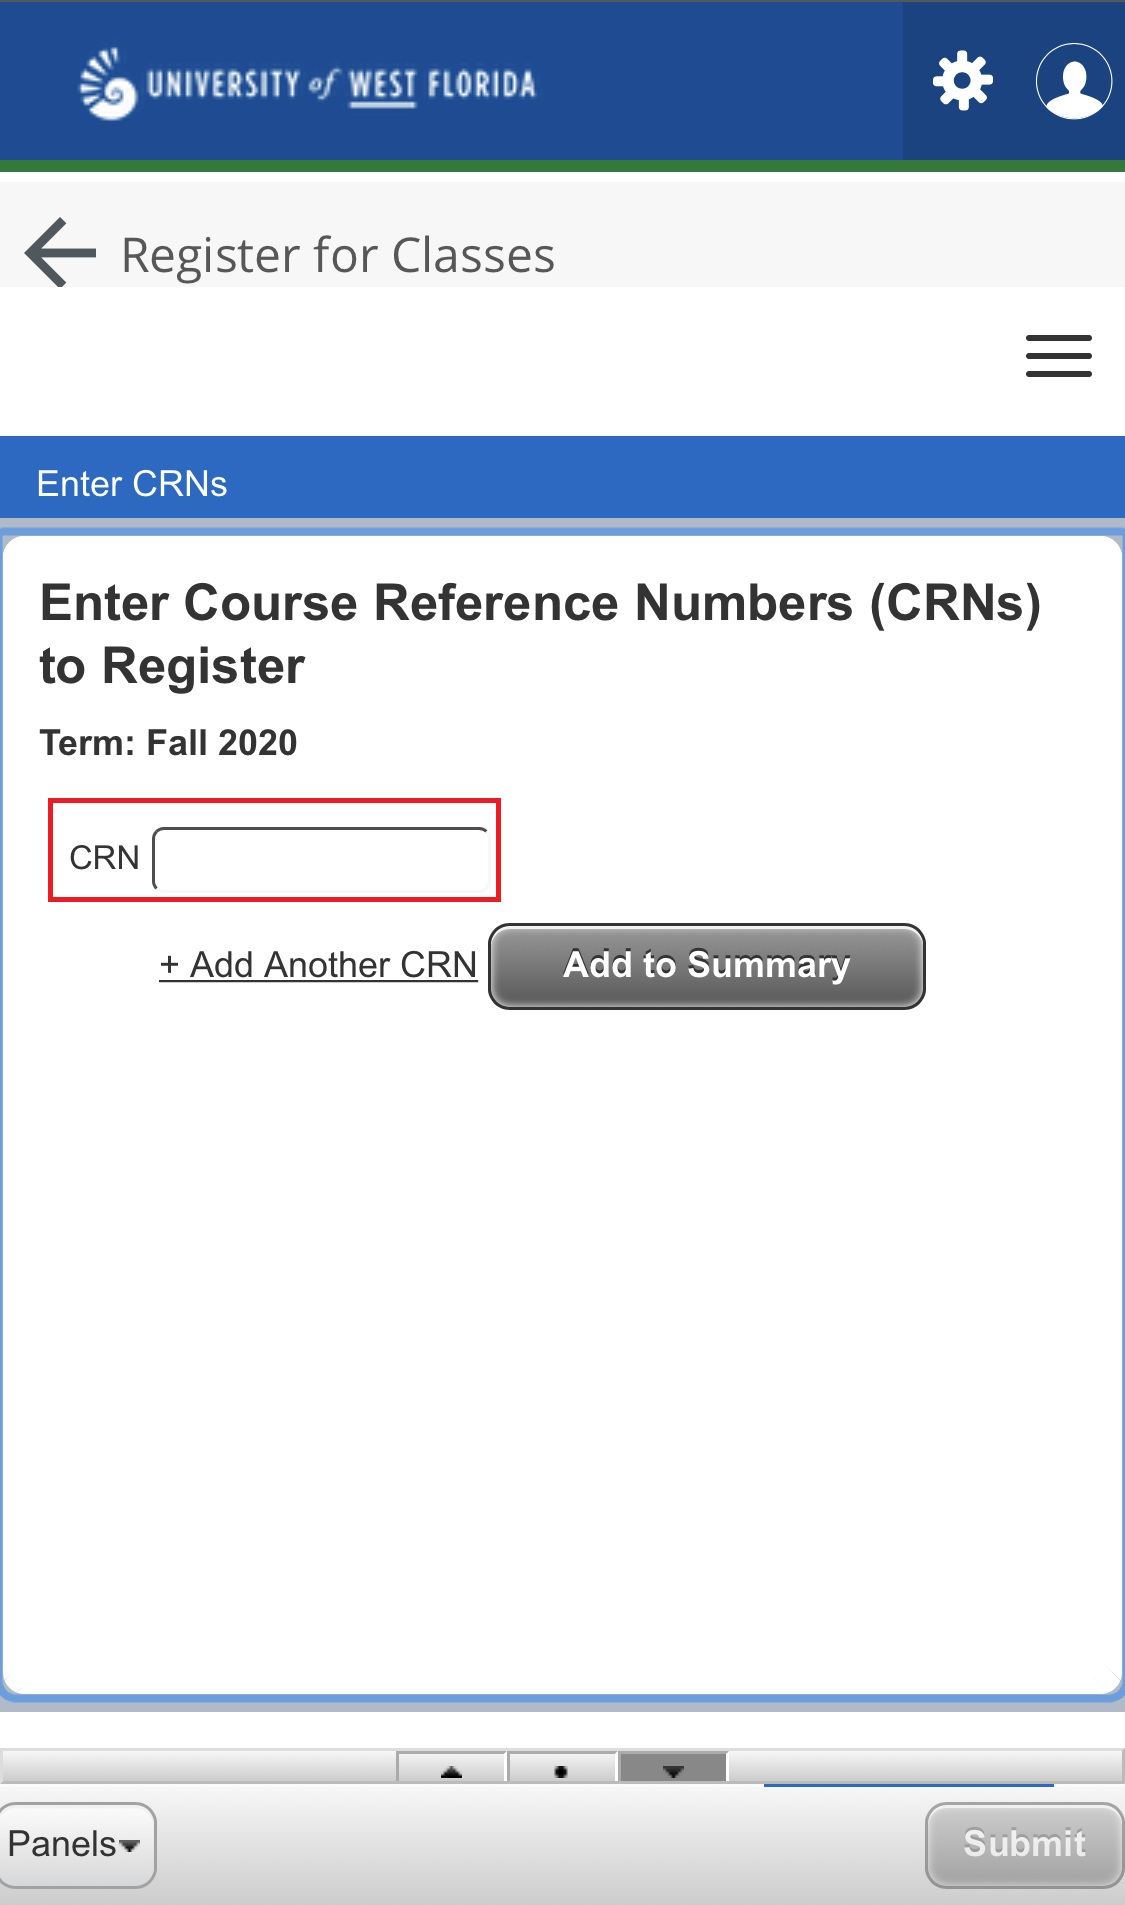
- the CRN box and click the Add to Summary button.
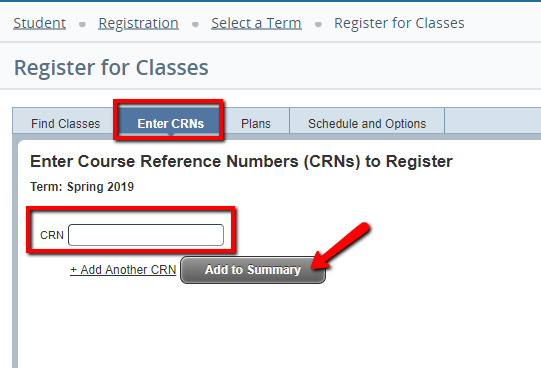 Image Added Image Added- The course will then appear in the Registration Summary. To complete the registration for the course, click on the Submit button.
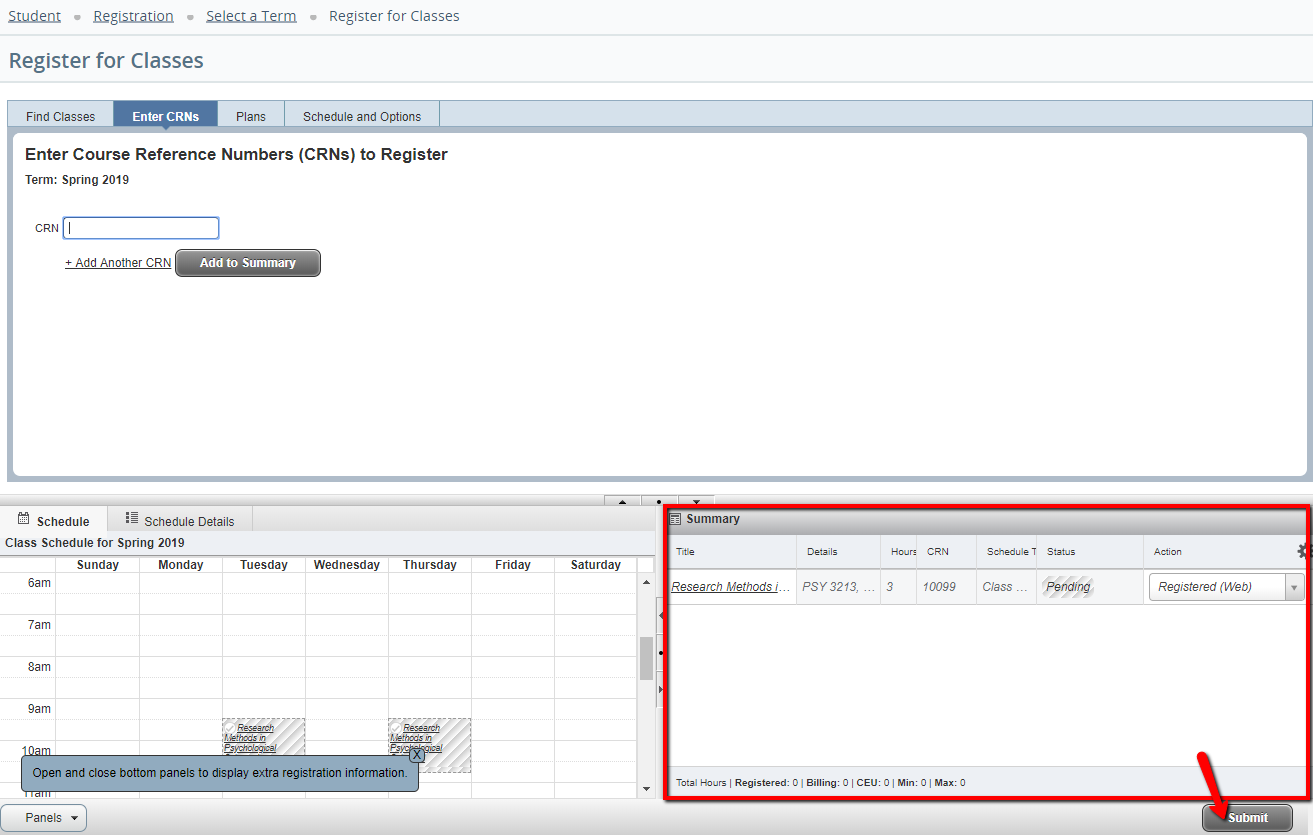 Image Added Image Added
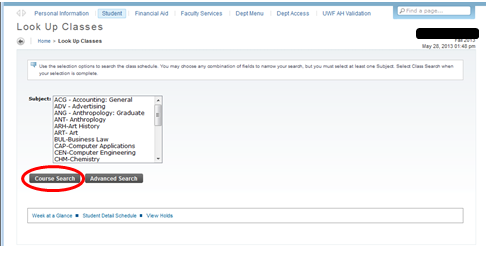
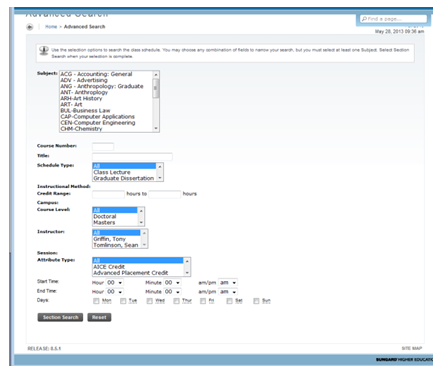
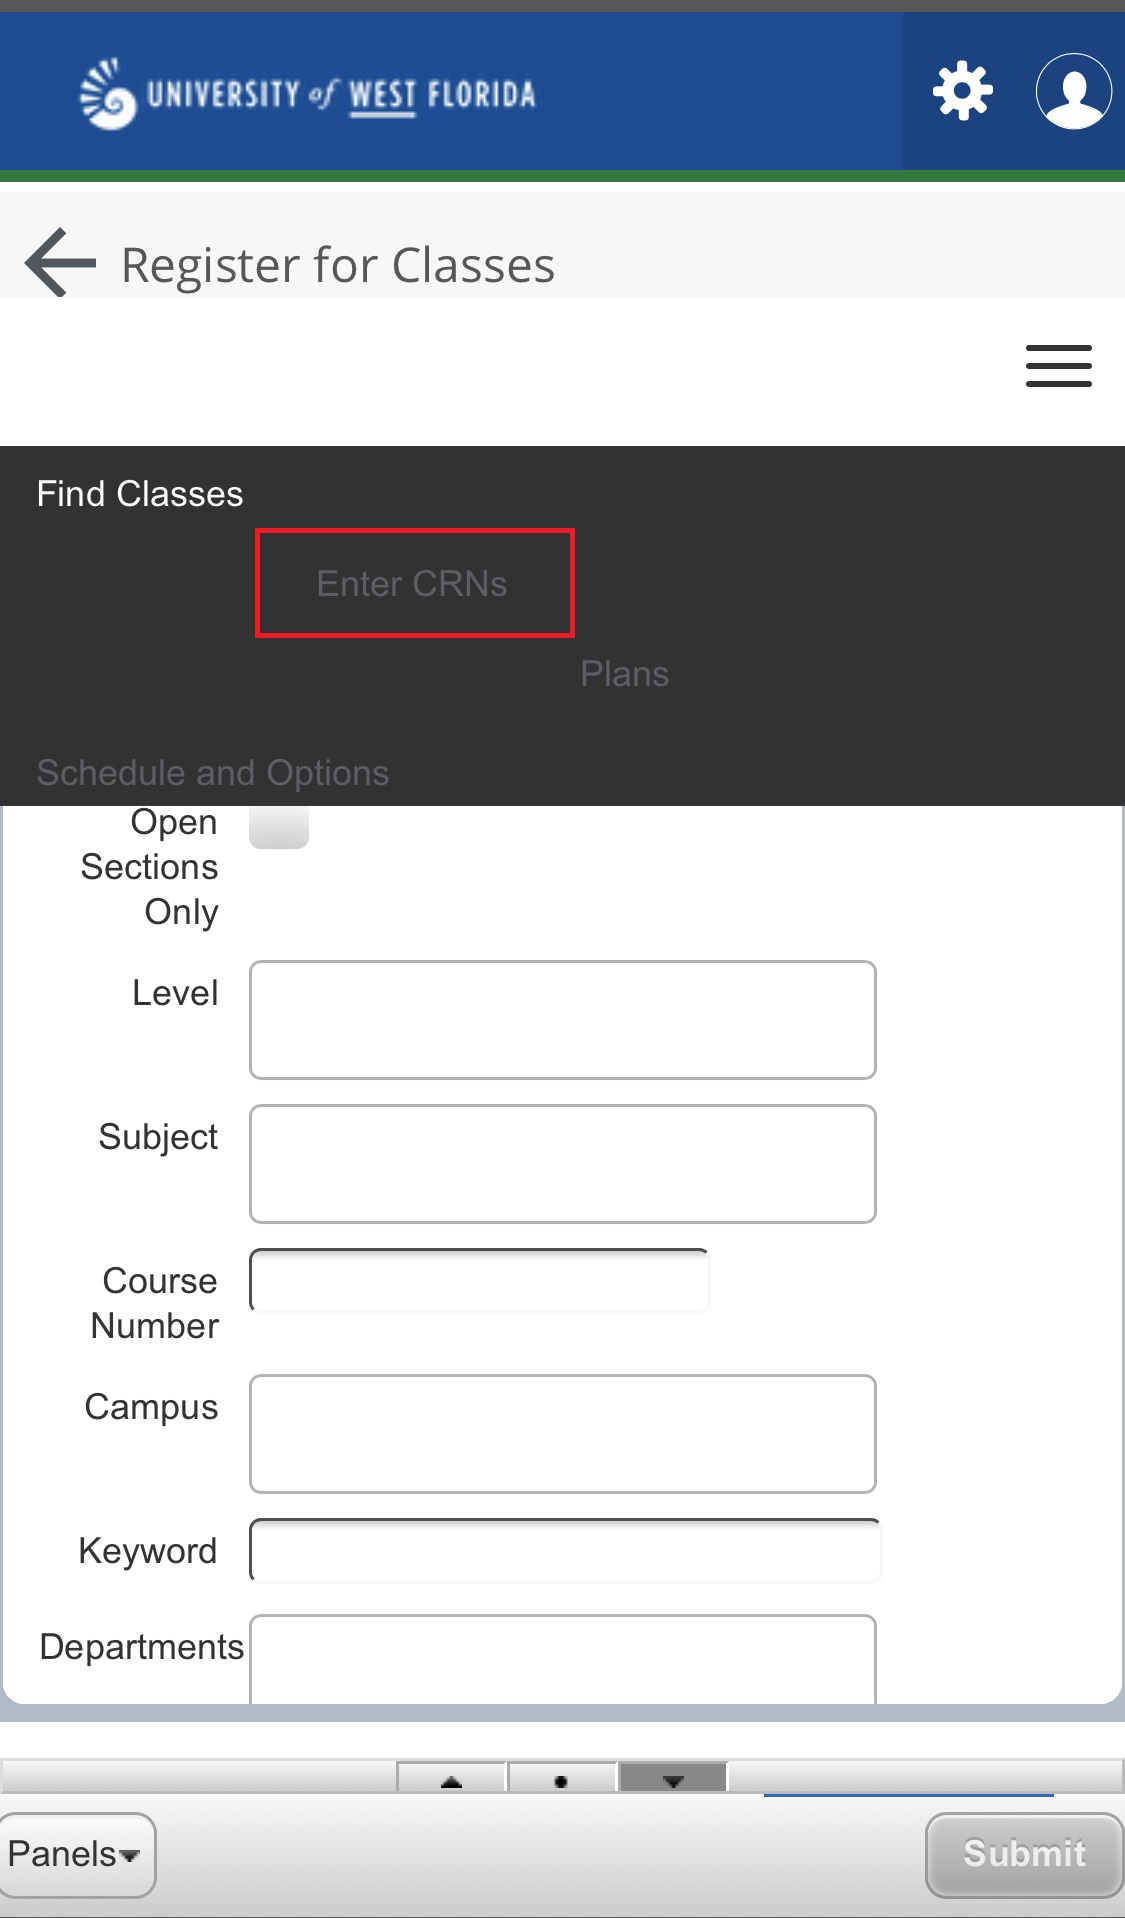
Searching for Course Sections (CRNs)- To search for courses, click the "Find Classes" tab.
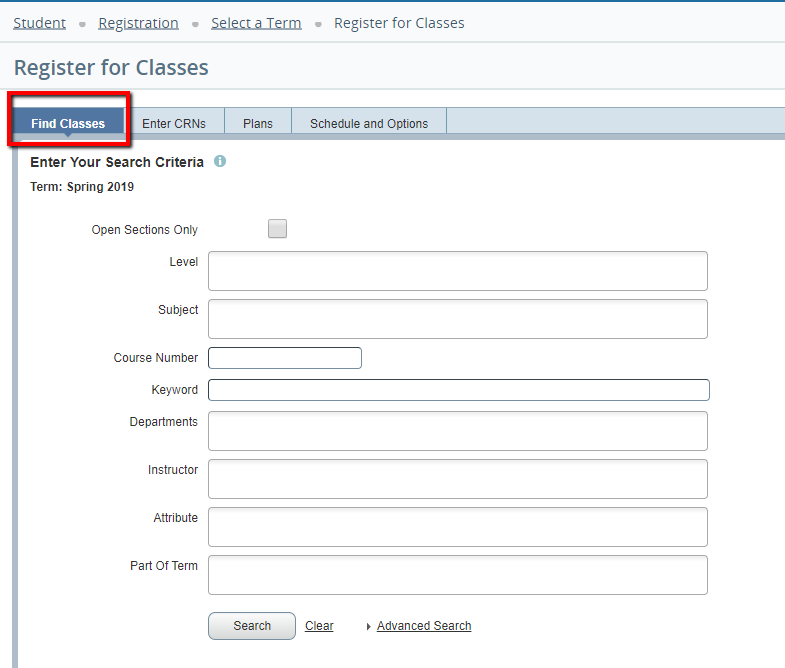 Image Added Image Added Use the Basic Course Search or the Advanced Search to find classes. For further instruction on how to search for classes, review Searching for Course Offerings for further details.
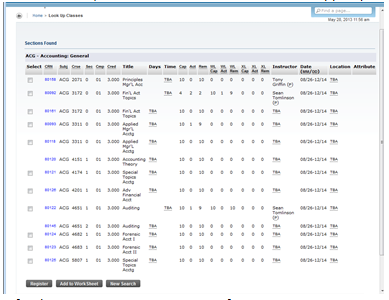
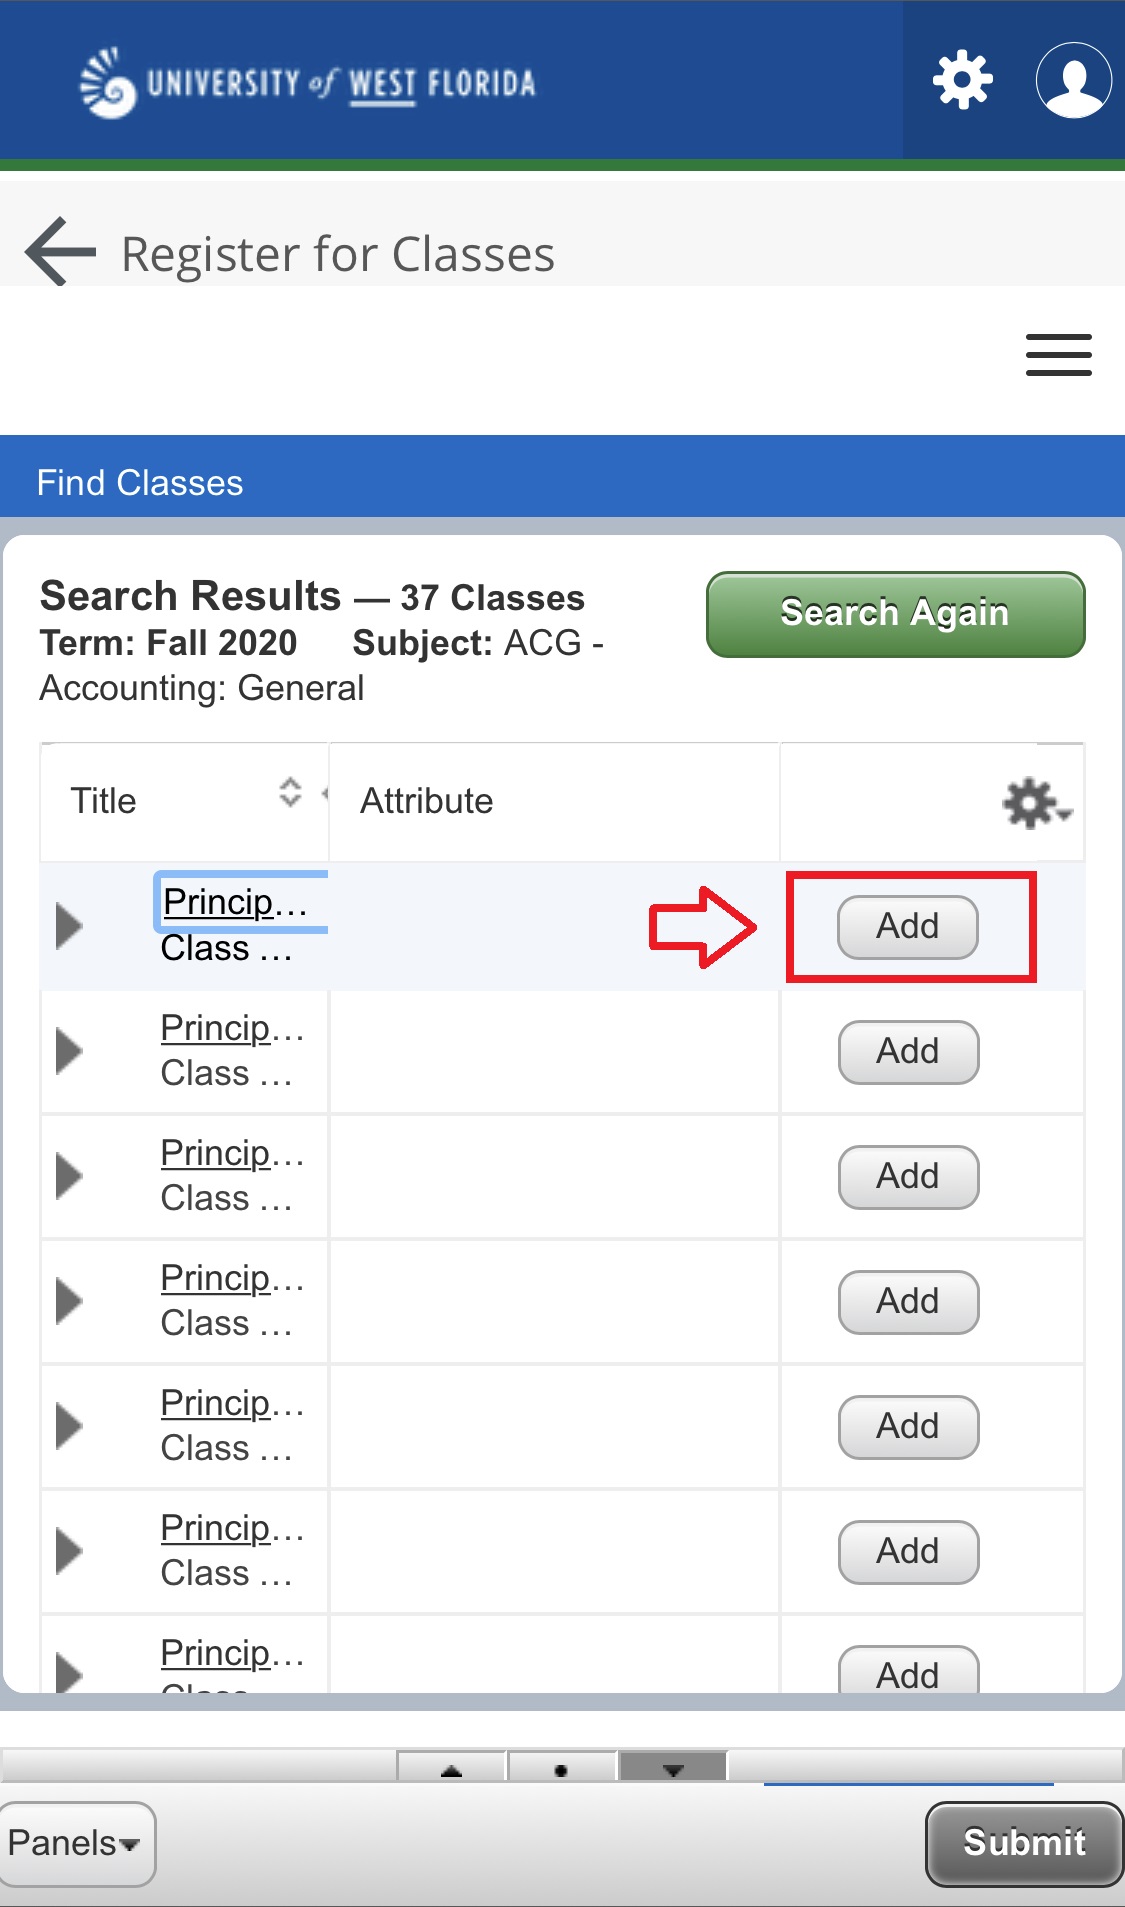
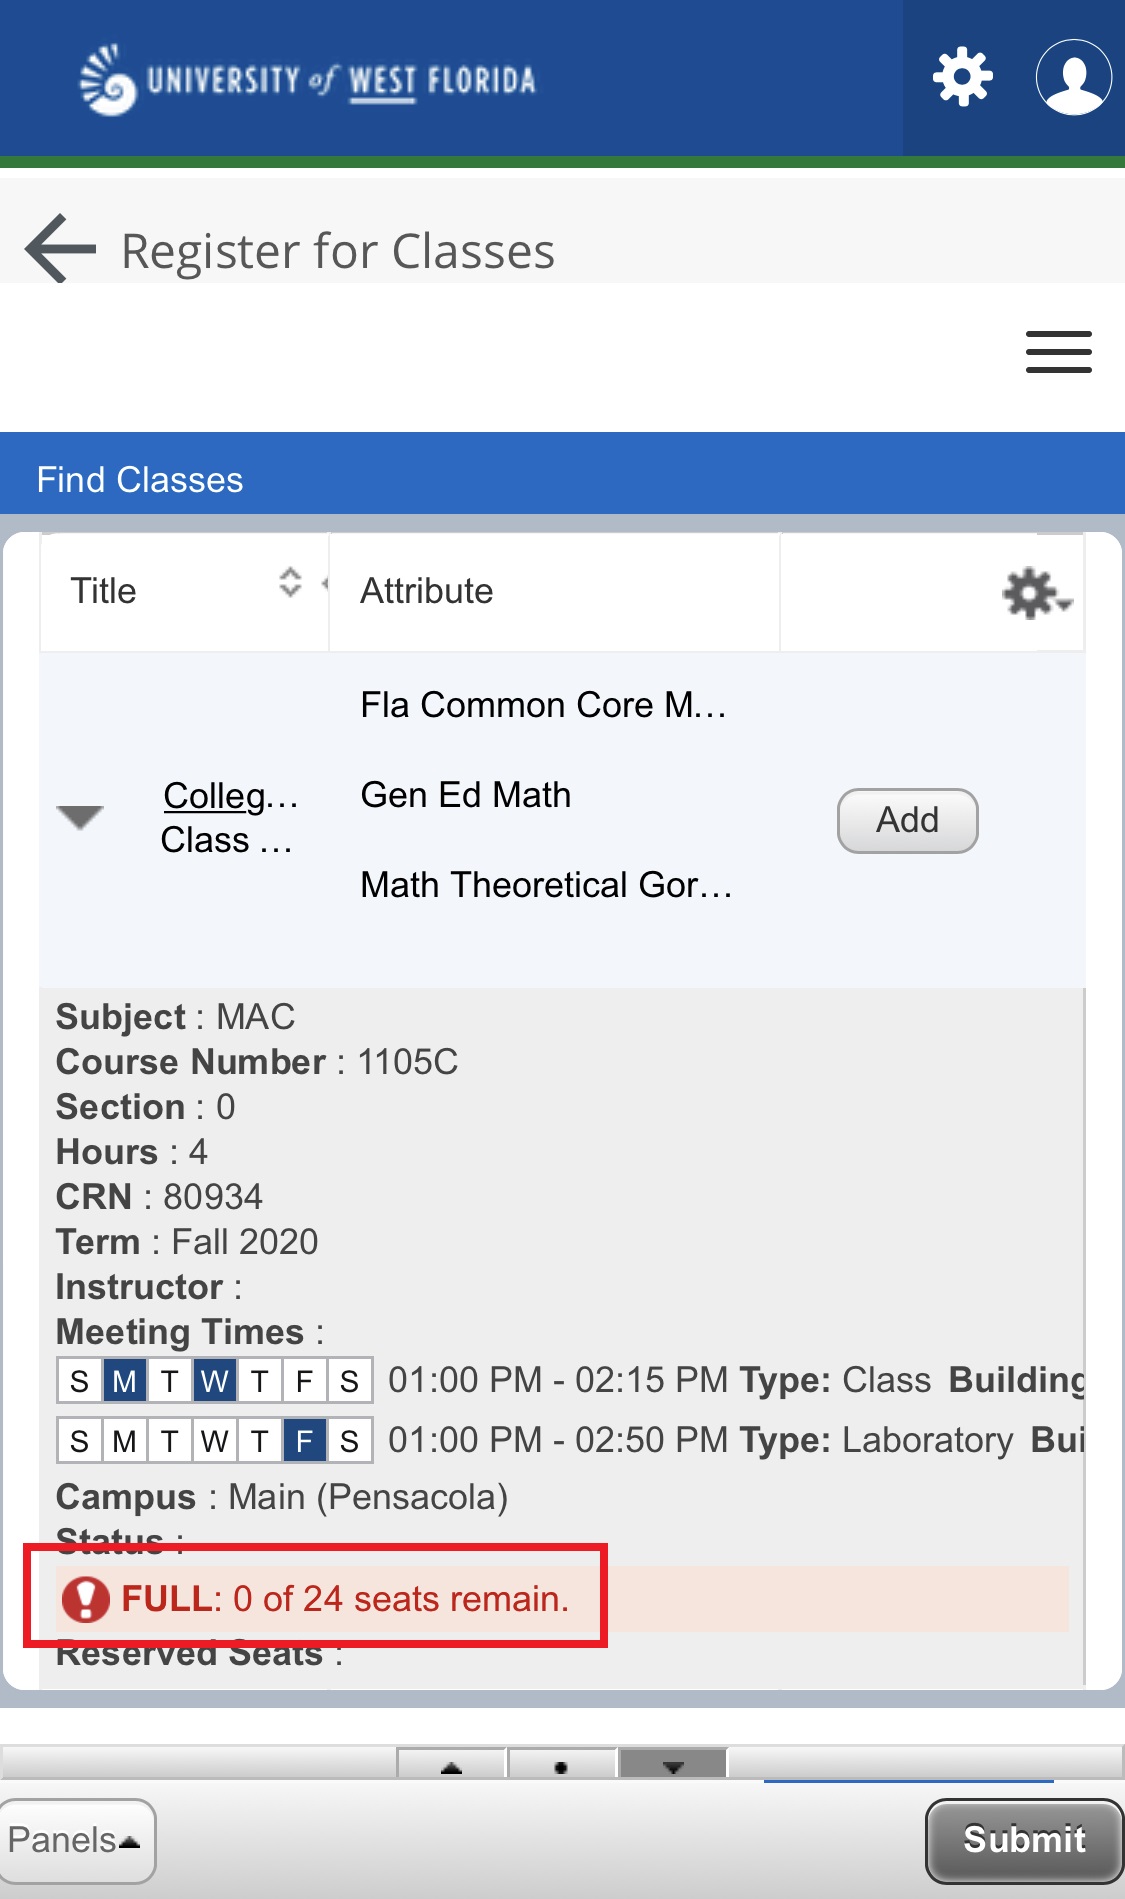
Courses with the "Add" icon next to them have seats available for registration. If the "Add" icon is grey: Closed Class or you are already registered for the class.
| Info |
|---|
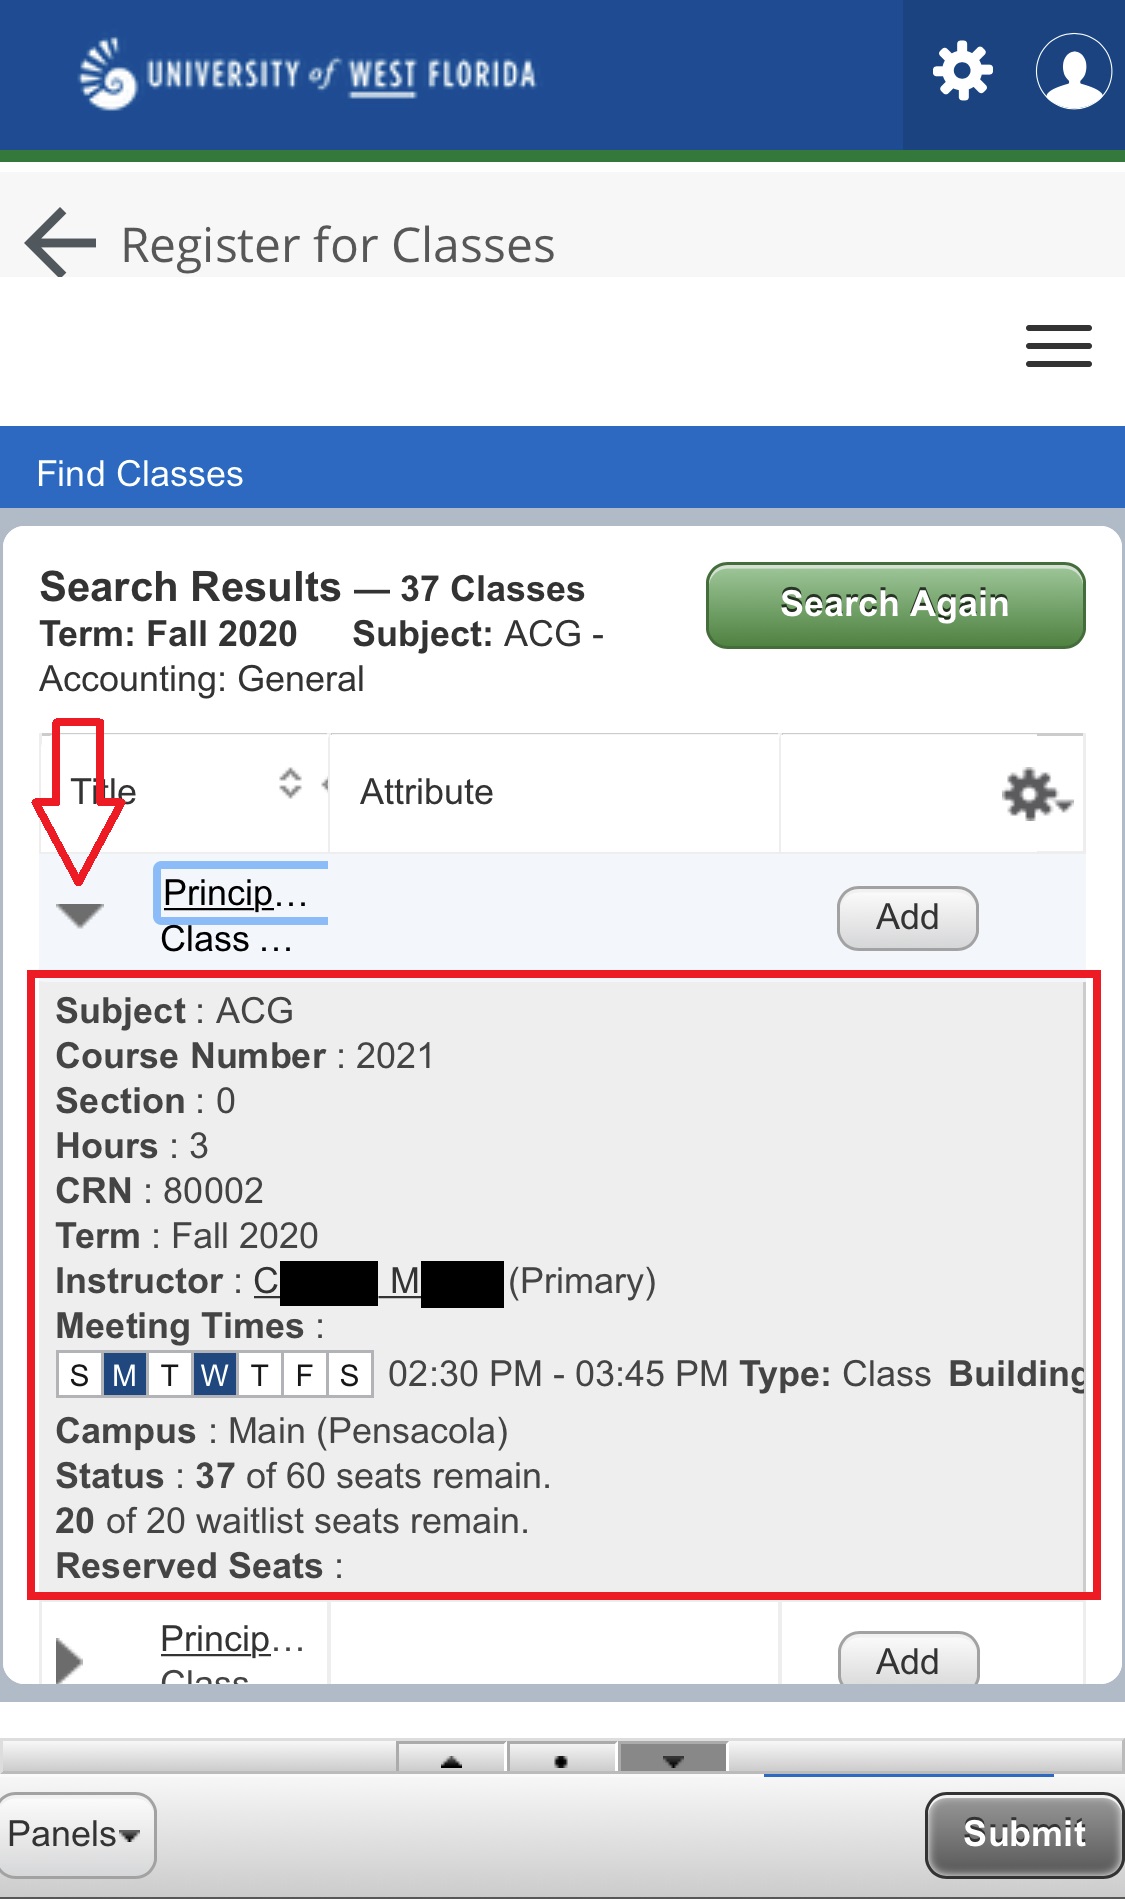
The course CRN, subject, course number, credit hours, title, meeting days & times, the total number of seats, number of students currently enrolled, seats remaining, waitlist capacity, number of students currently on the waitlist, cross-list information, instructor(s), dates the course will run through, and location (building, room number) can be found on this page. |
- To add a course to your worksheet before registering for the course, first select the "Add" box next to the section you wish to add, scroll to the bottom of the page, then select "Submit."
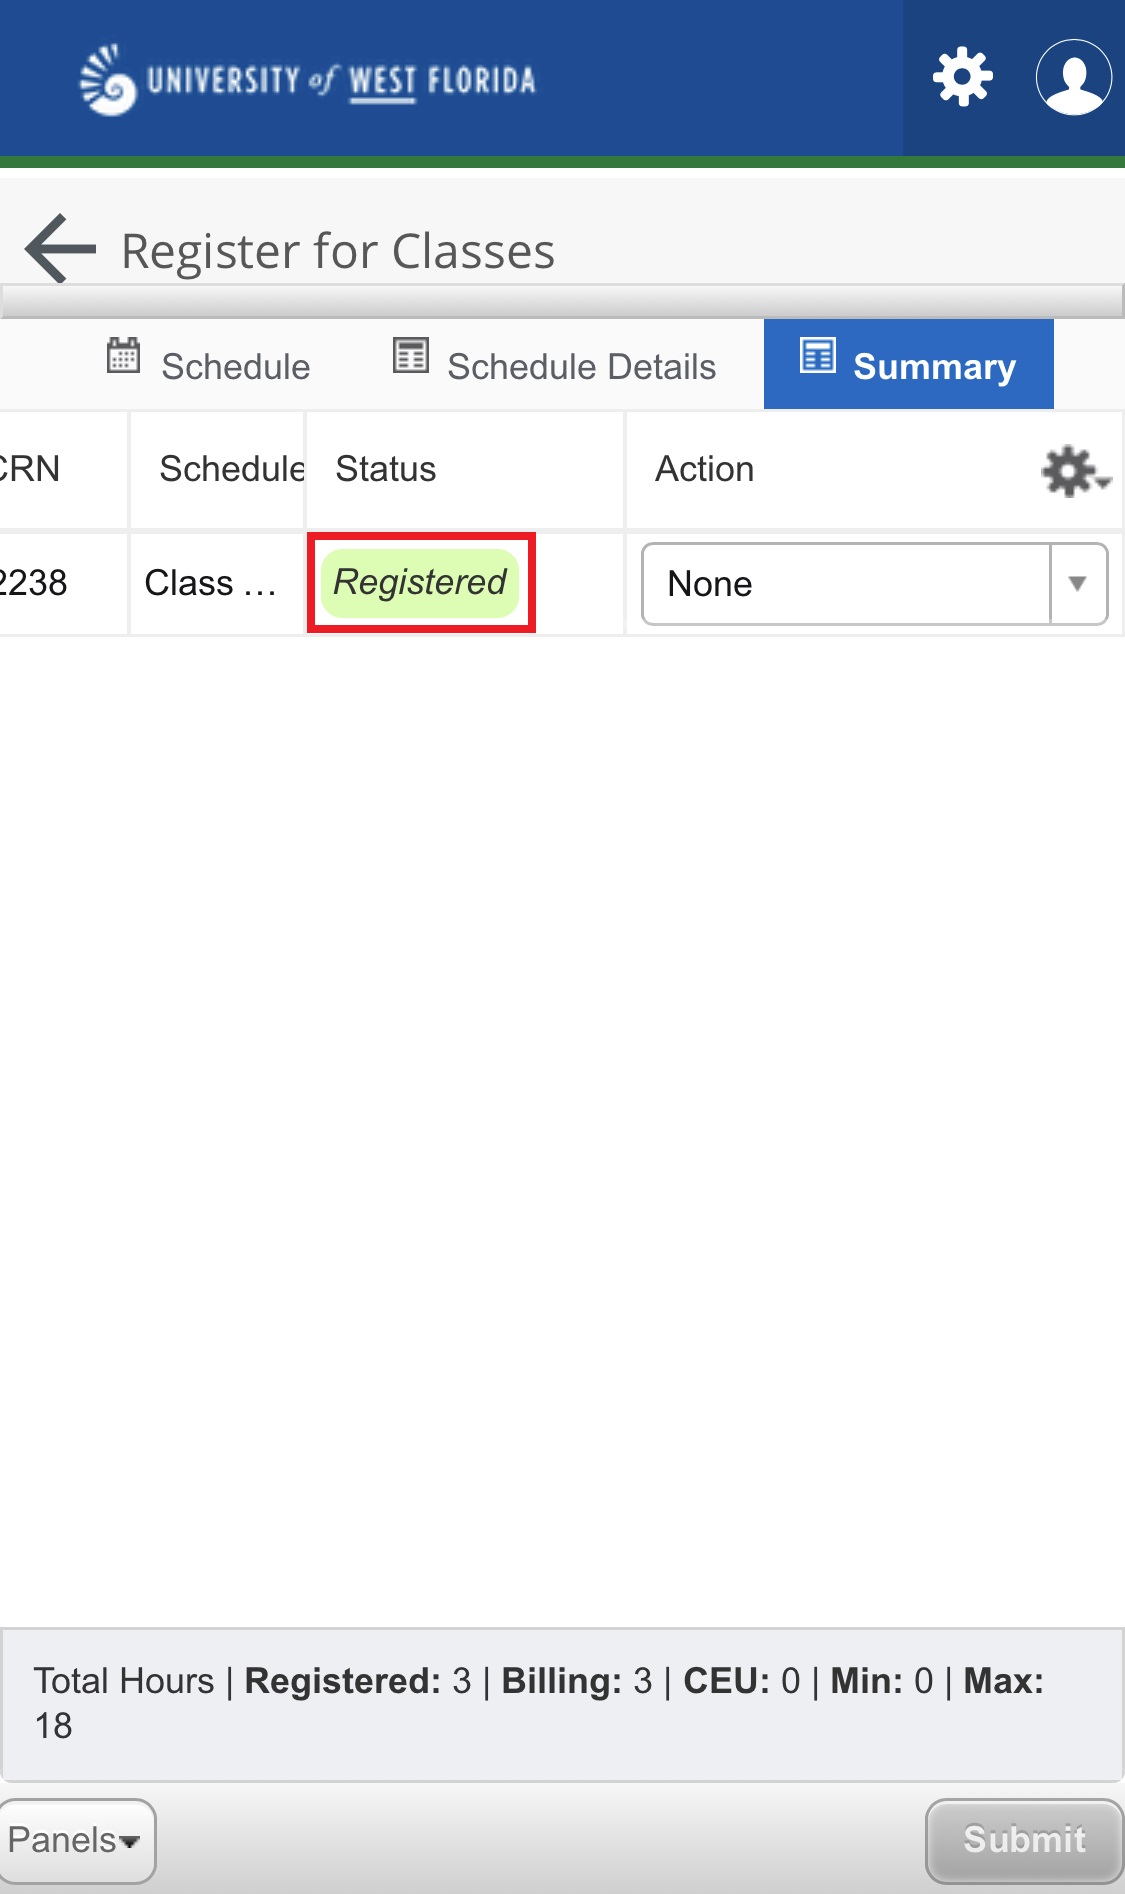
 Image Added Image Added- Once the course is added to your worksheet, you will see a Save Successful popup. The CRN of the course should now appear with a Green "Registered" icon next to the Course in the Summary box.
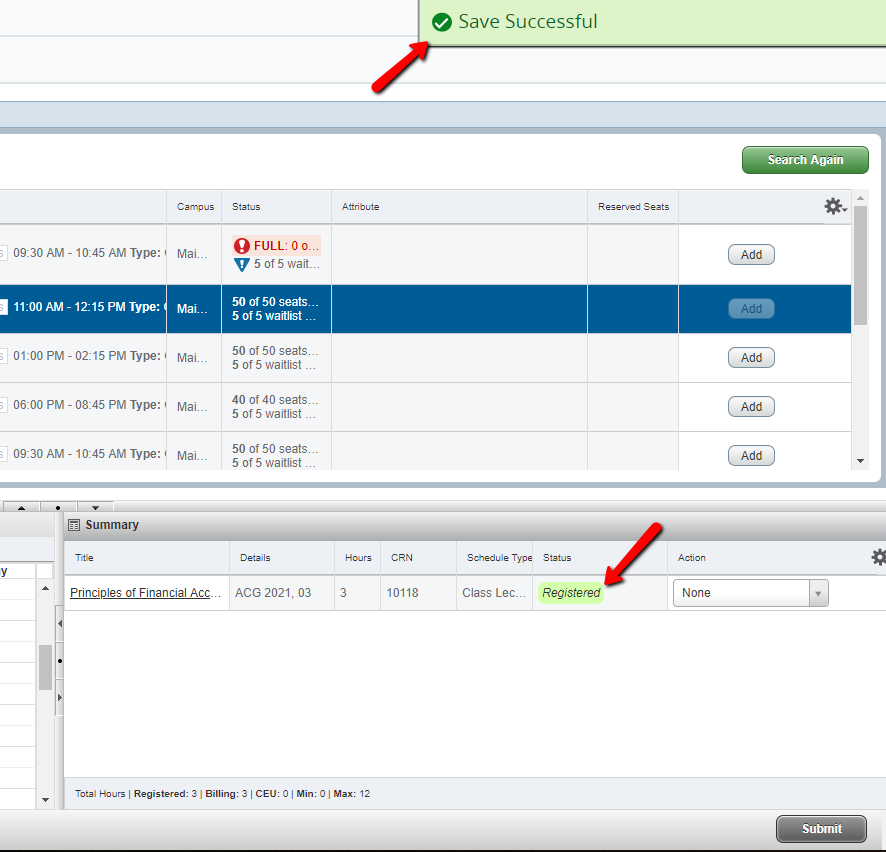 Image Added Image Added
|
Registering for Classes from a Plan| Info |
|---|
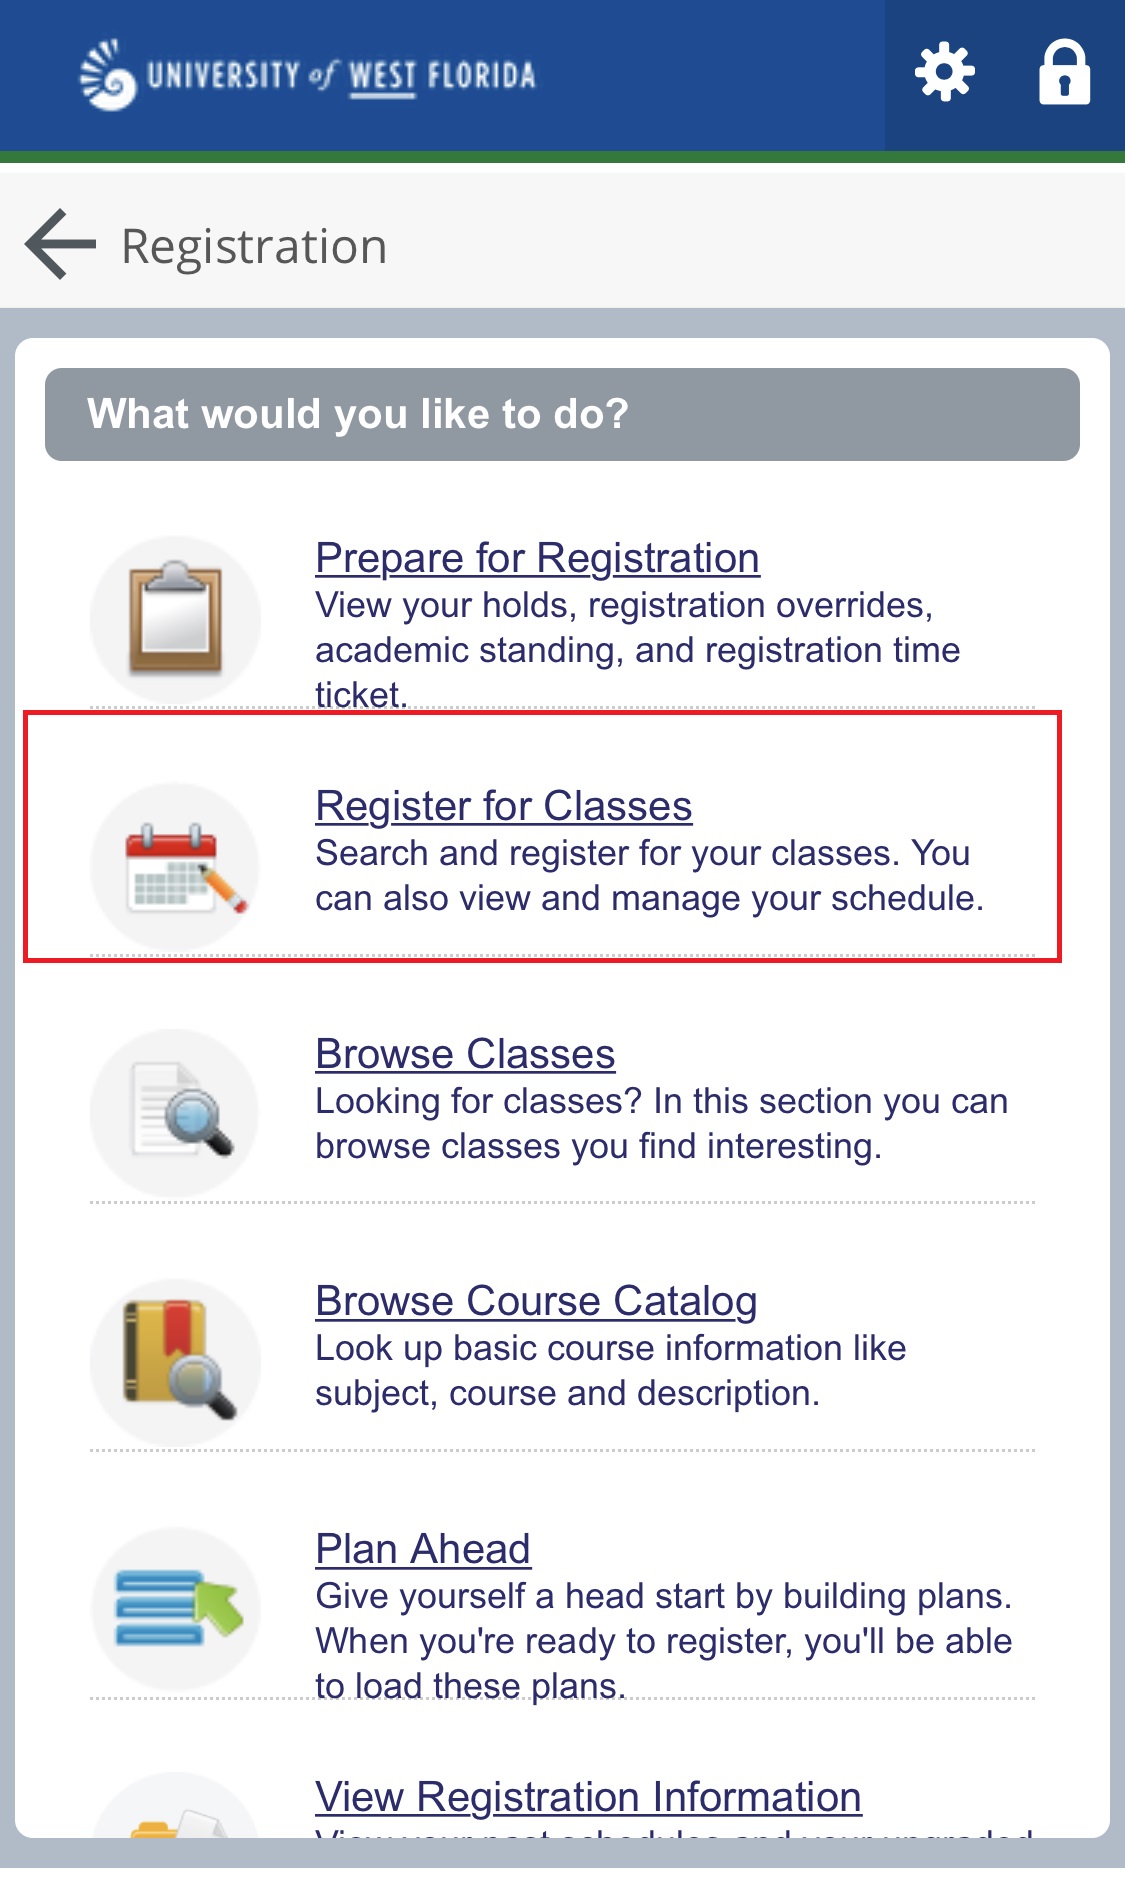
| Mobile RegistrationStep 1 Access the Registration menu and select "Registration and Planning". Step 2 Select the "Register for Classes" option. 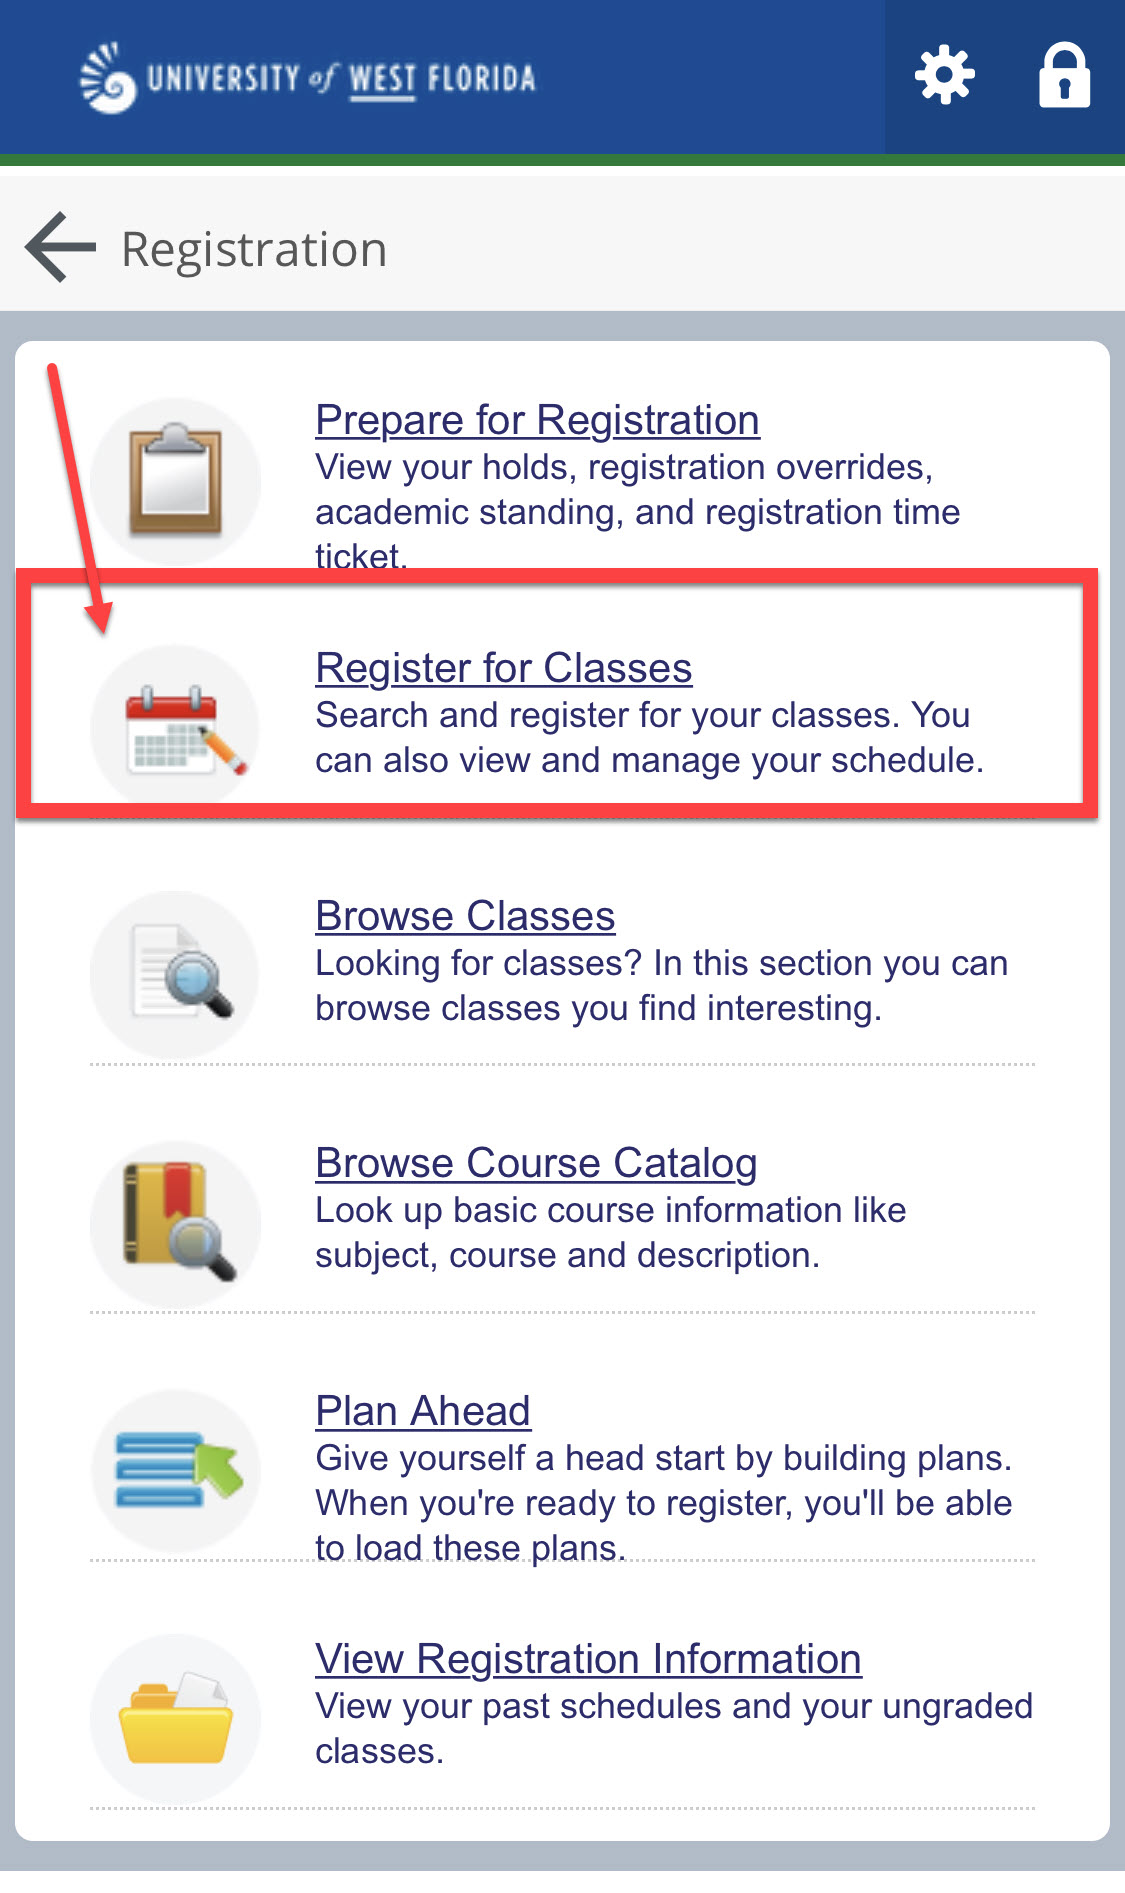 Image Added Image Added
Step 3 Select the term you would like to register for. Then, enter your Registration PIN and select "Continue. 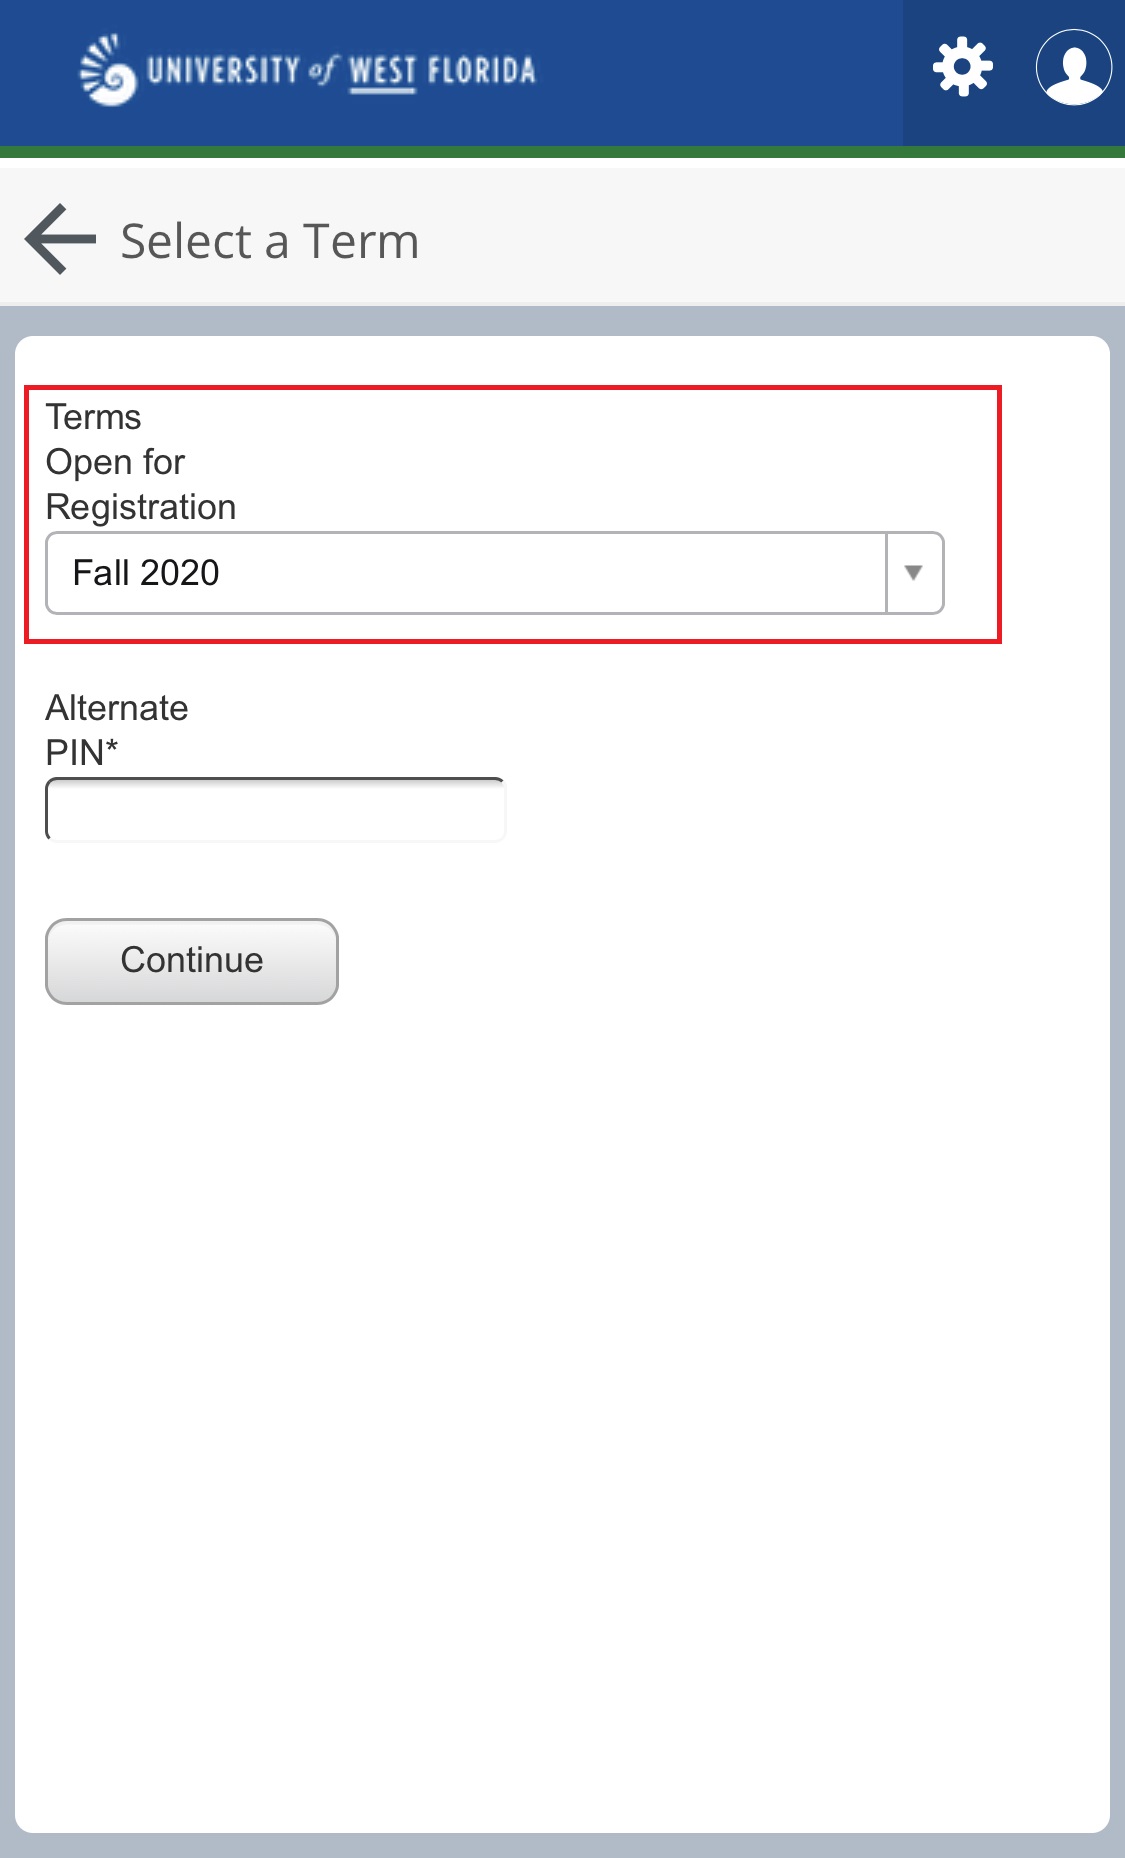 Image Added Image Added 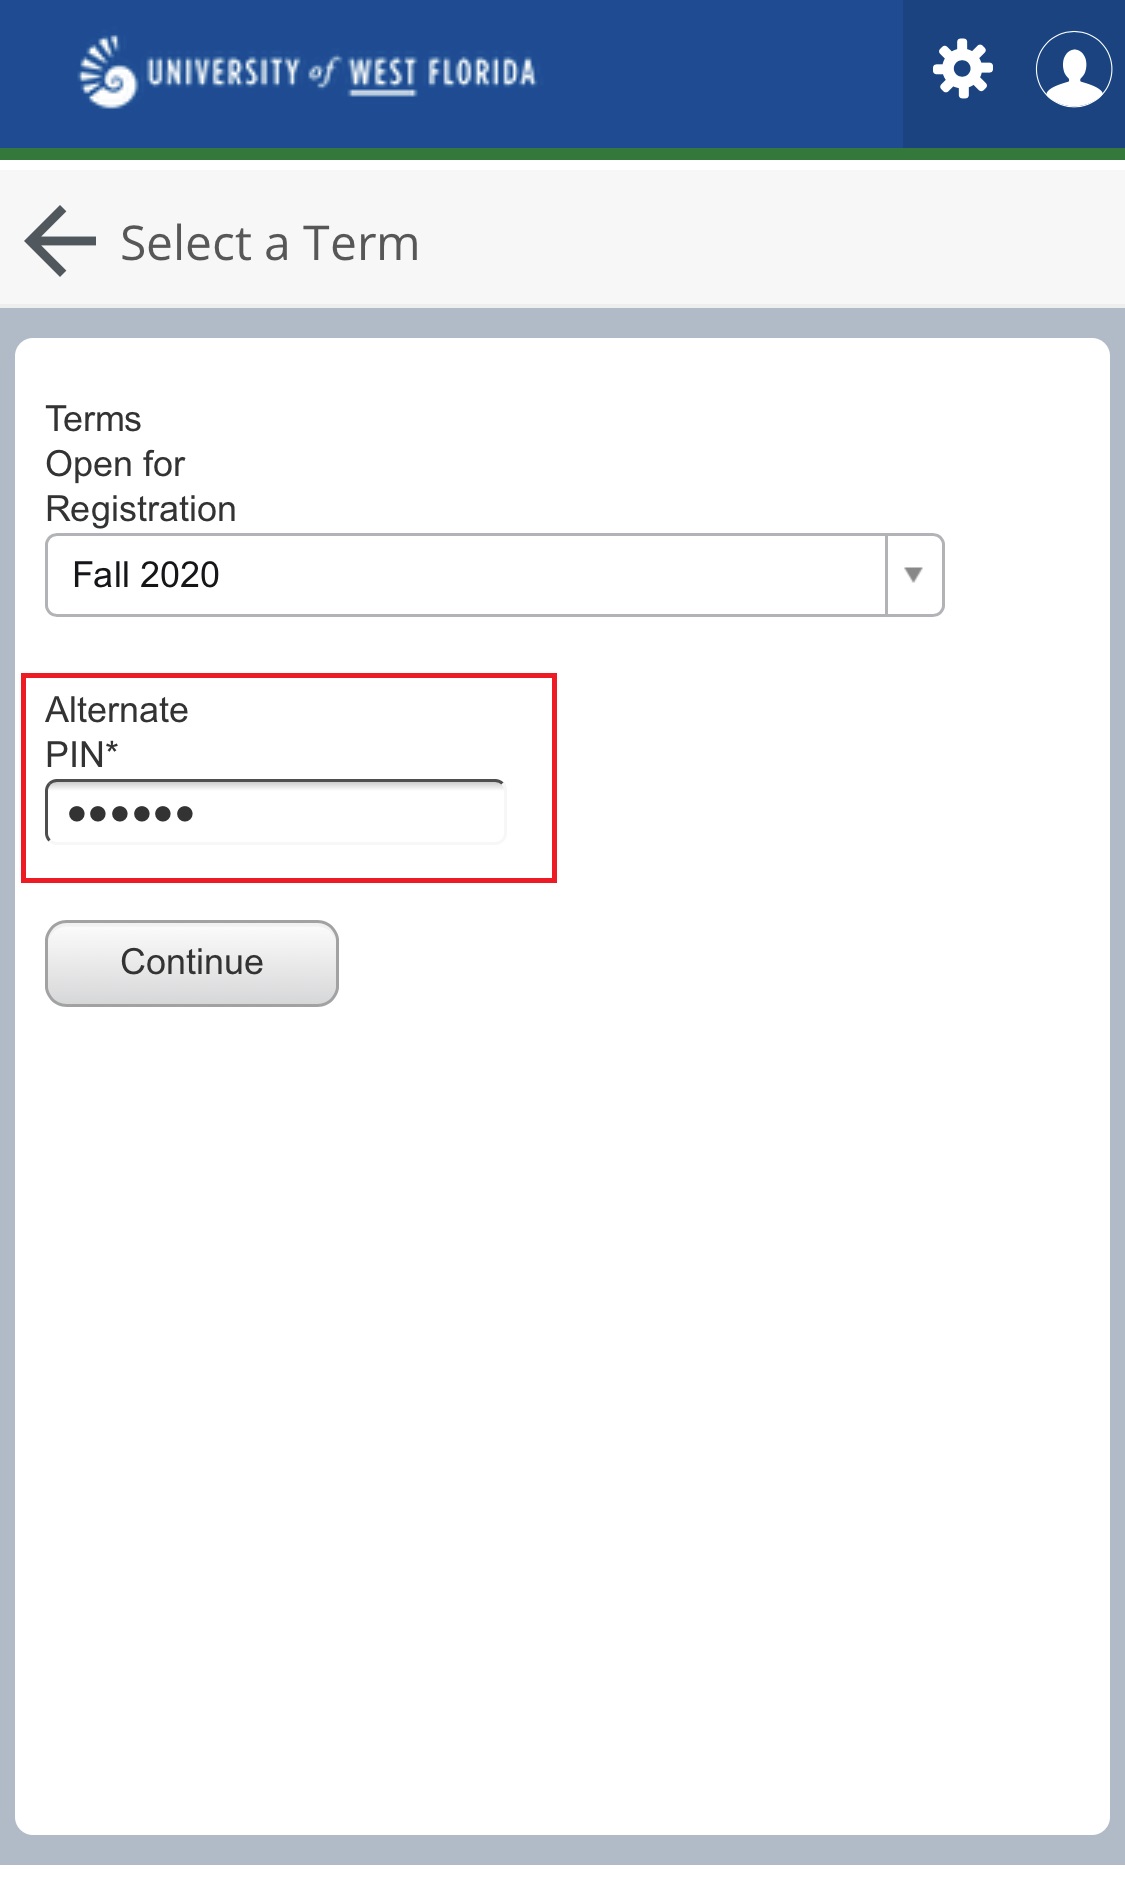 Image Added Image Added
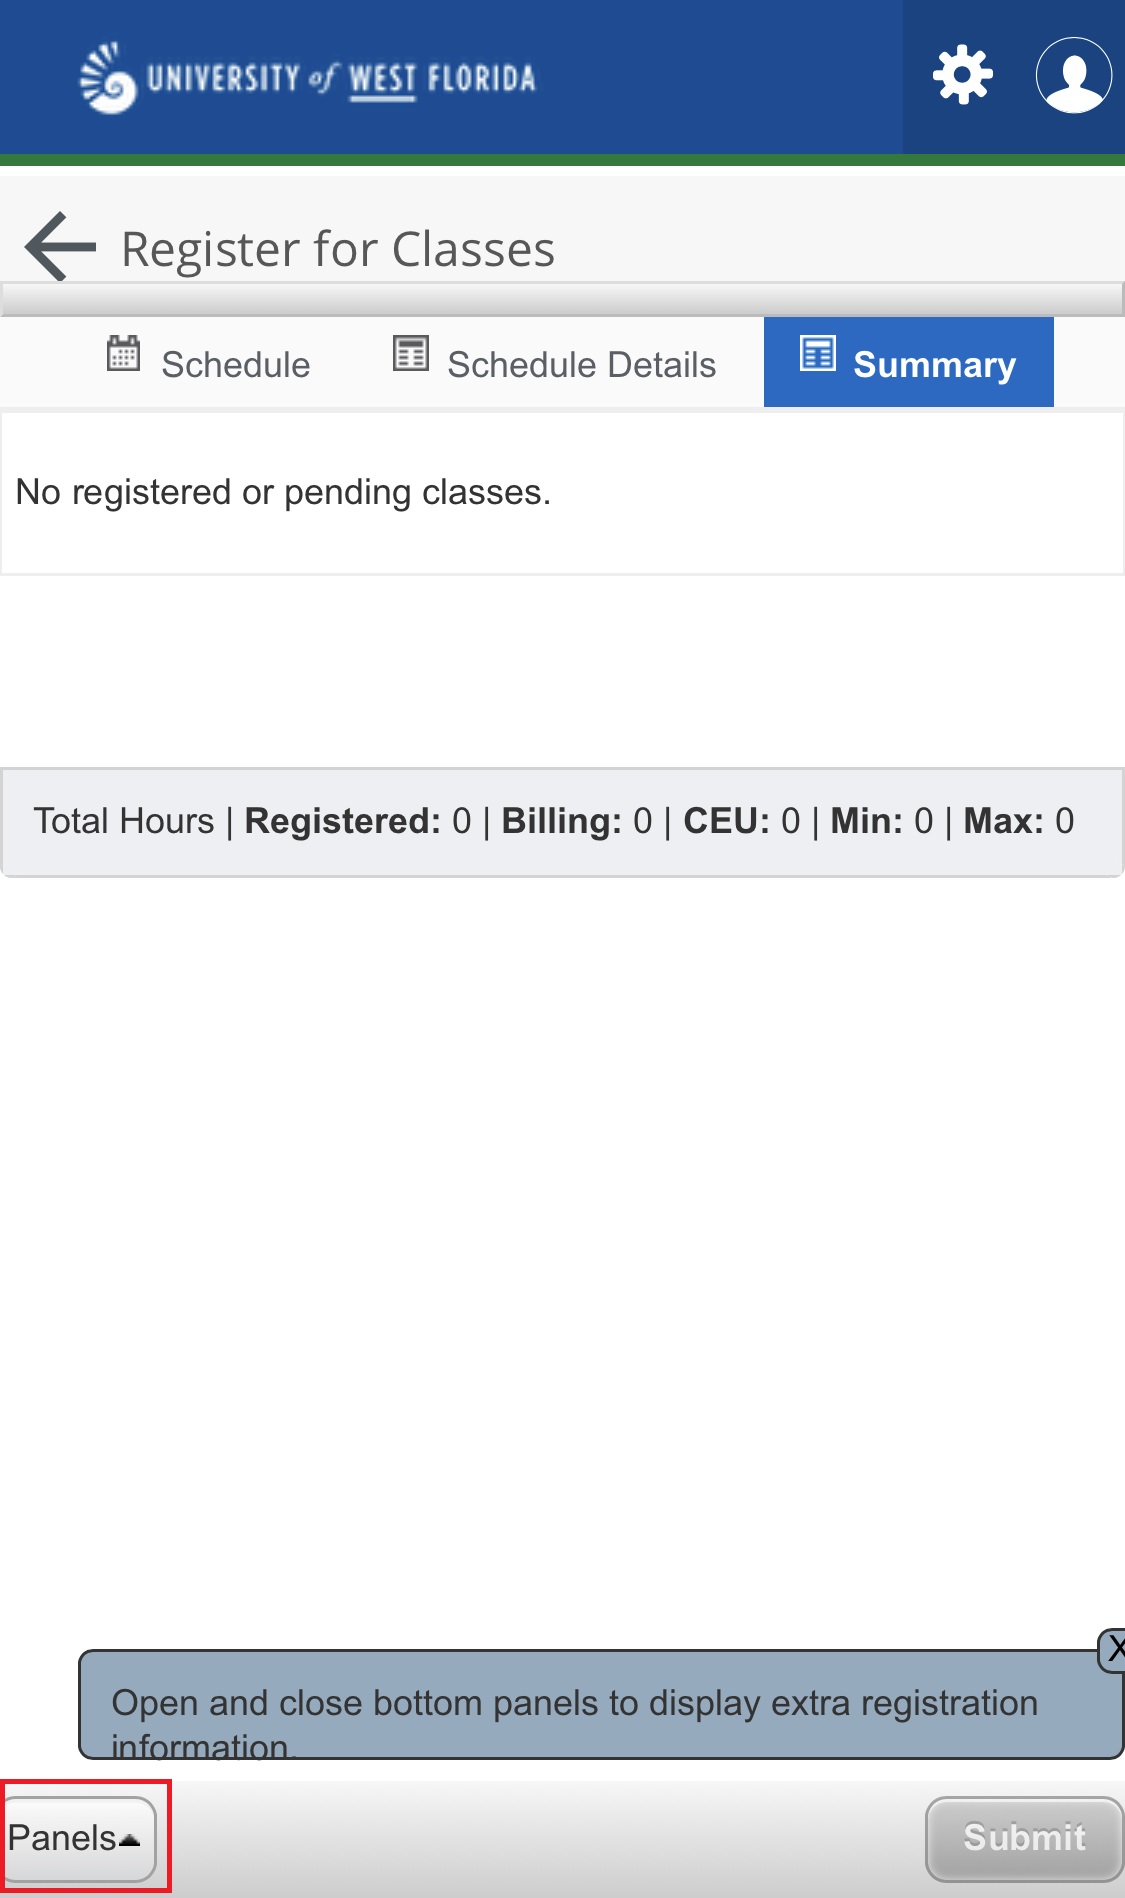
Step 4 - Select the "Panels" tab on the bottom left of the screen."
- Select the
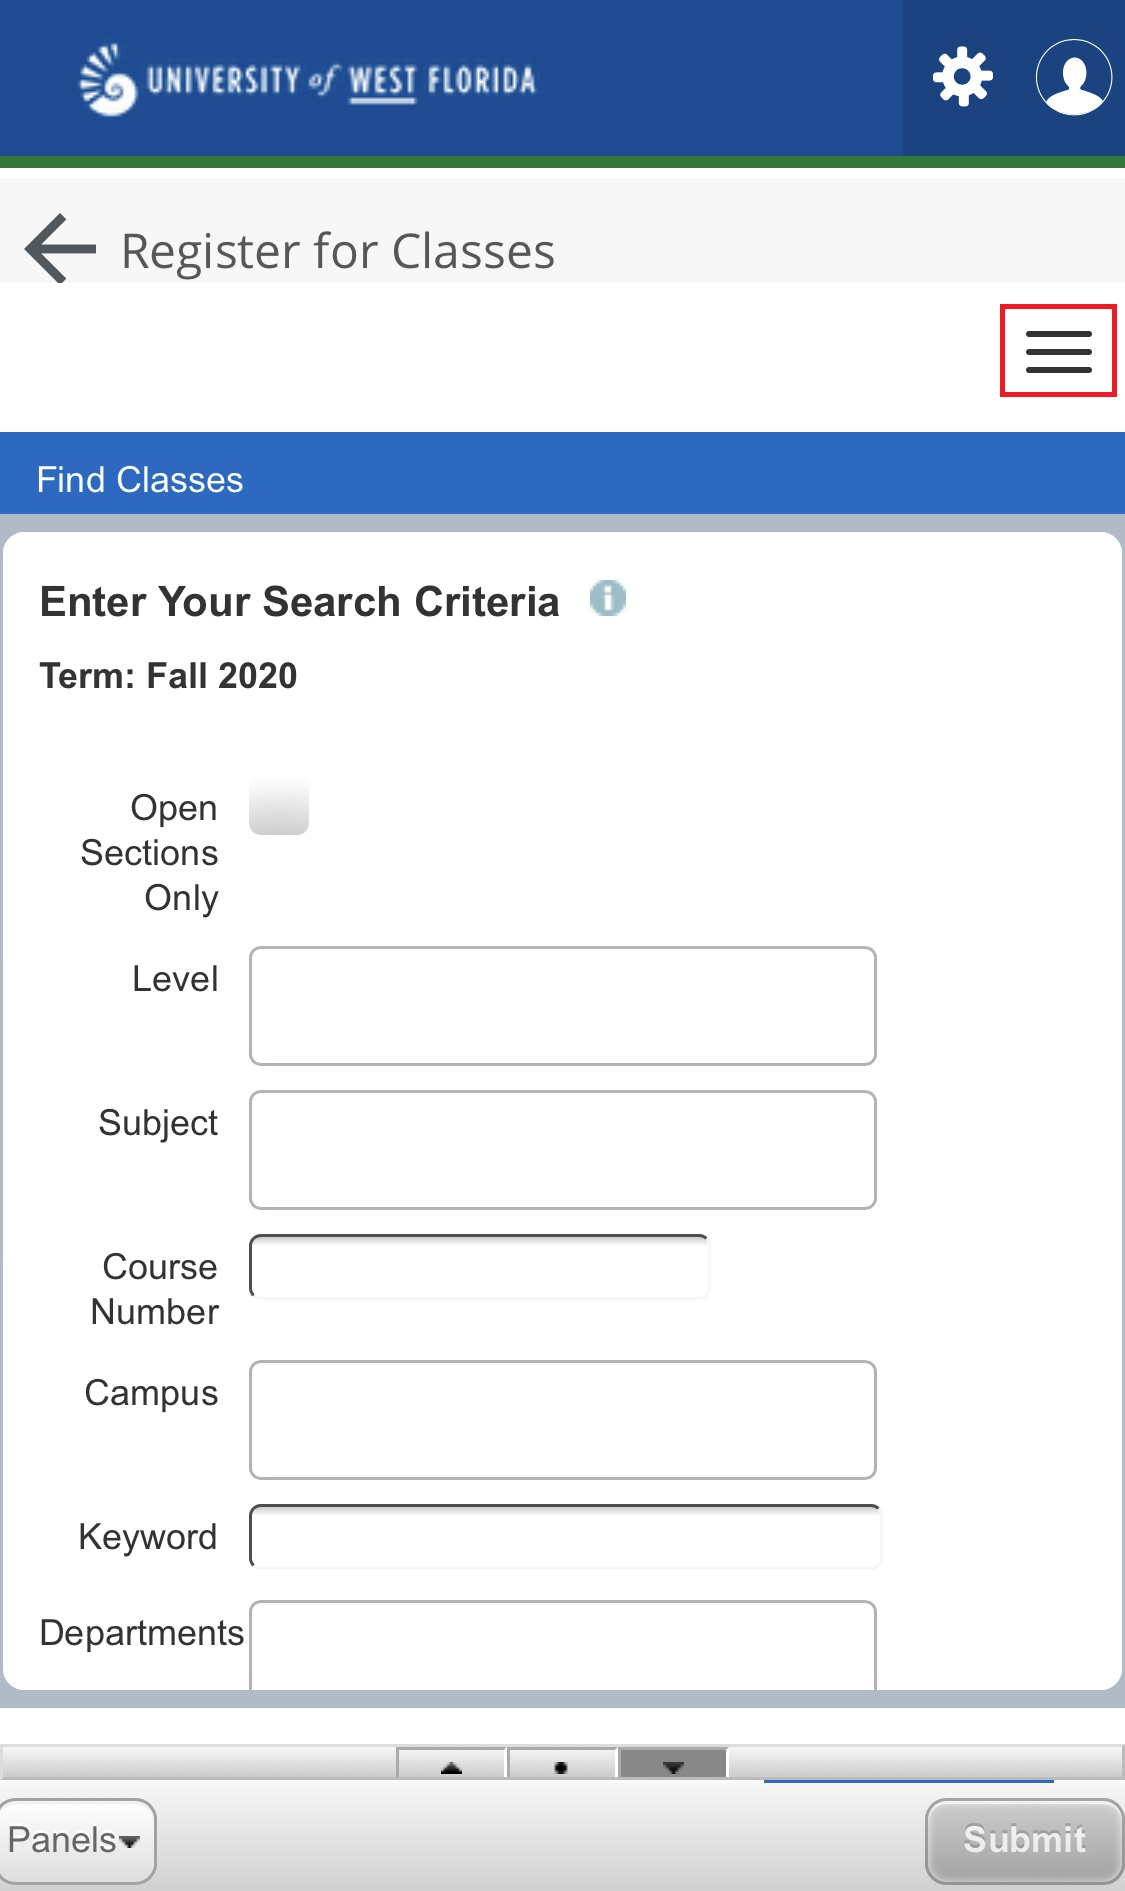
 Image Added button on the top-right corner of the screen. Image Added button on the top-right corner of the screen. - Lastly, tap the "Plans" option on the top of the screen.
Under the Plans option, assigned Degree Works Plan title and/or Plans that you have customer-created should display.  Image Added Image Added  Image Added Image Added 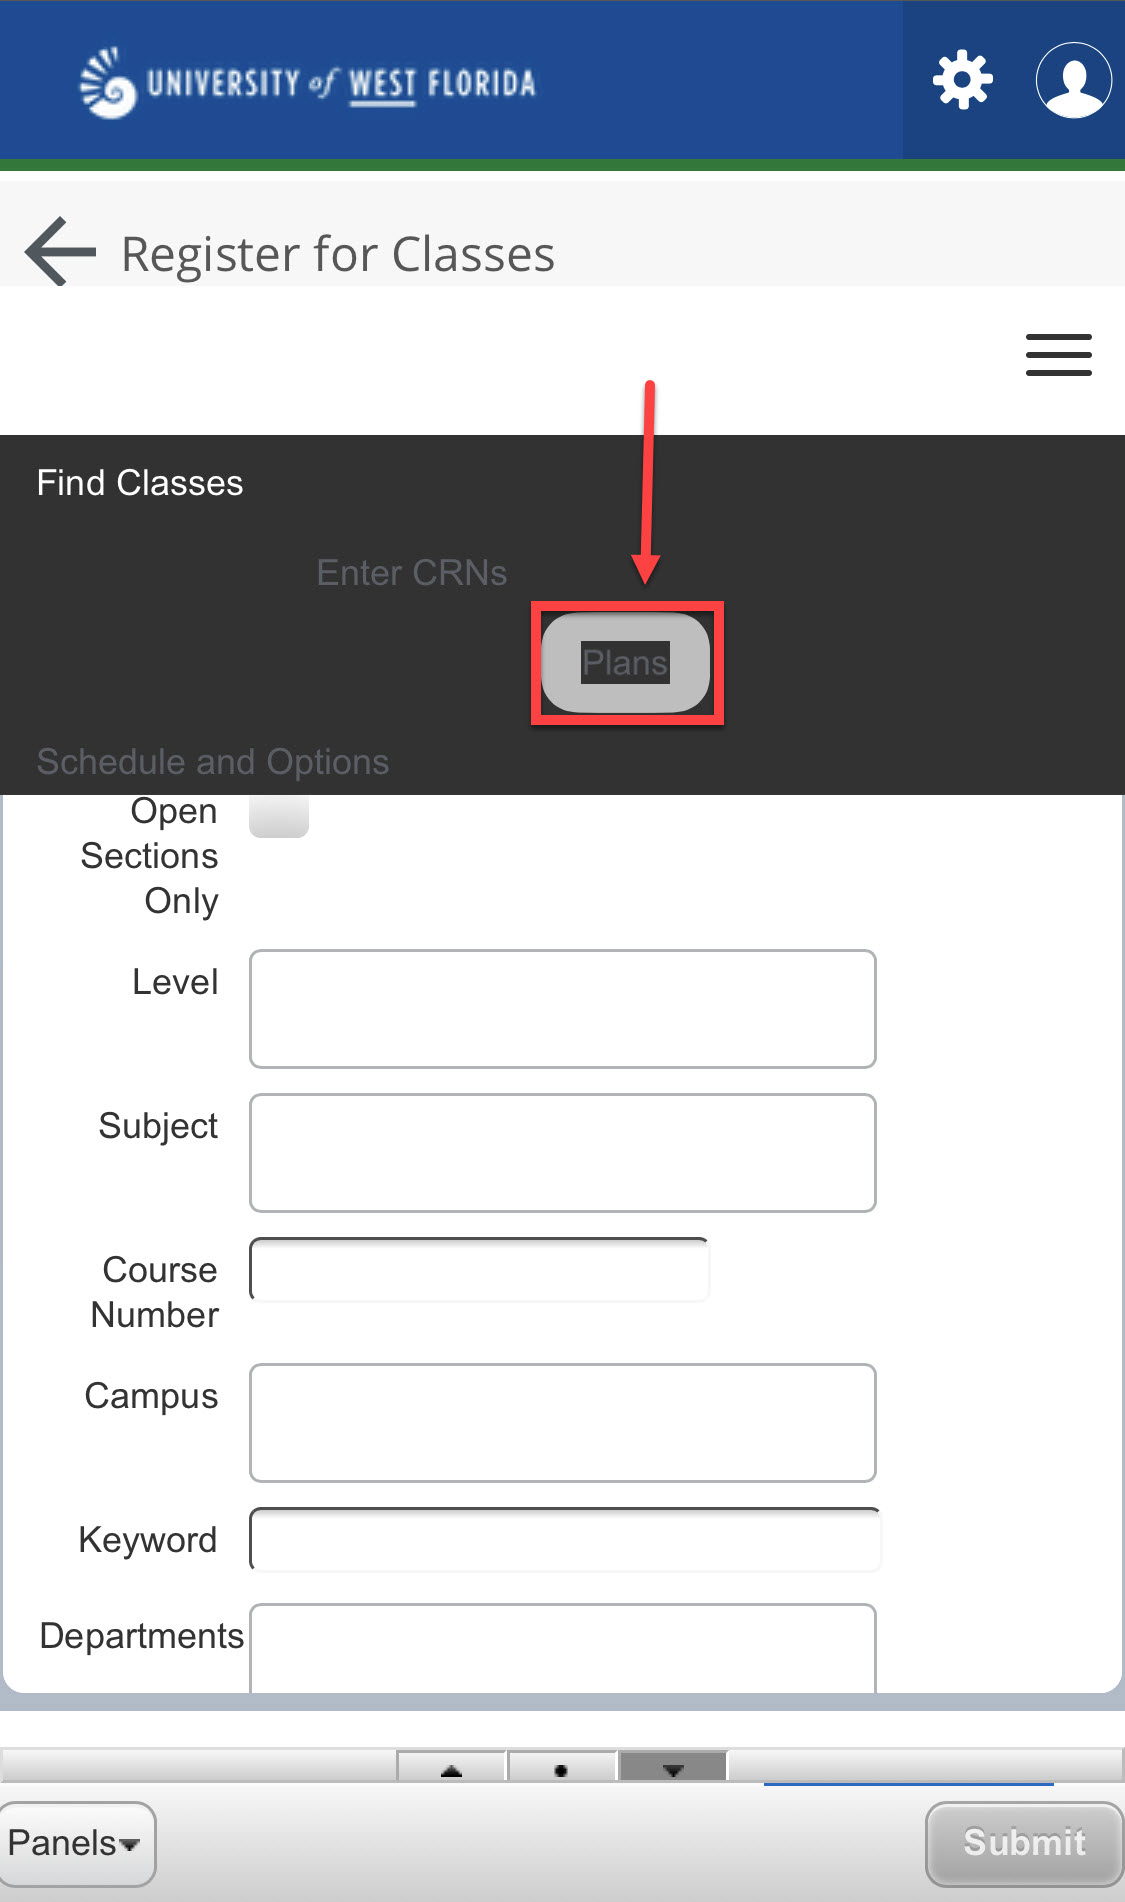 Image Added Image Added
Step 5 Select the drop-down arrow next to the Degree Works SEP Plan or Custom-plan title. Courses for that semester should then appear.  Image Added Image Added
Step 6 To view offered sections for the chosen semester, select the "View Sections" button to the right of the course. This will open a new screen with available sections. 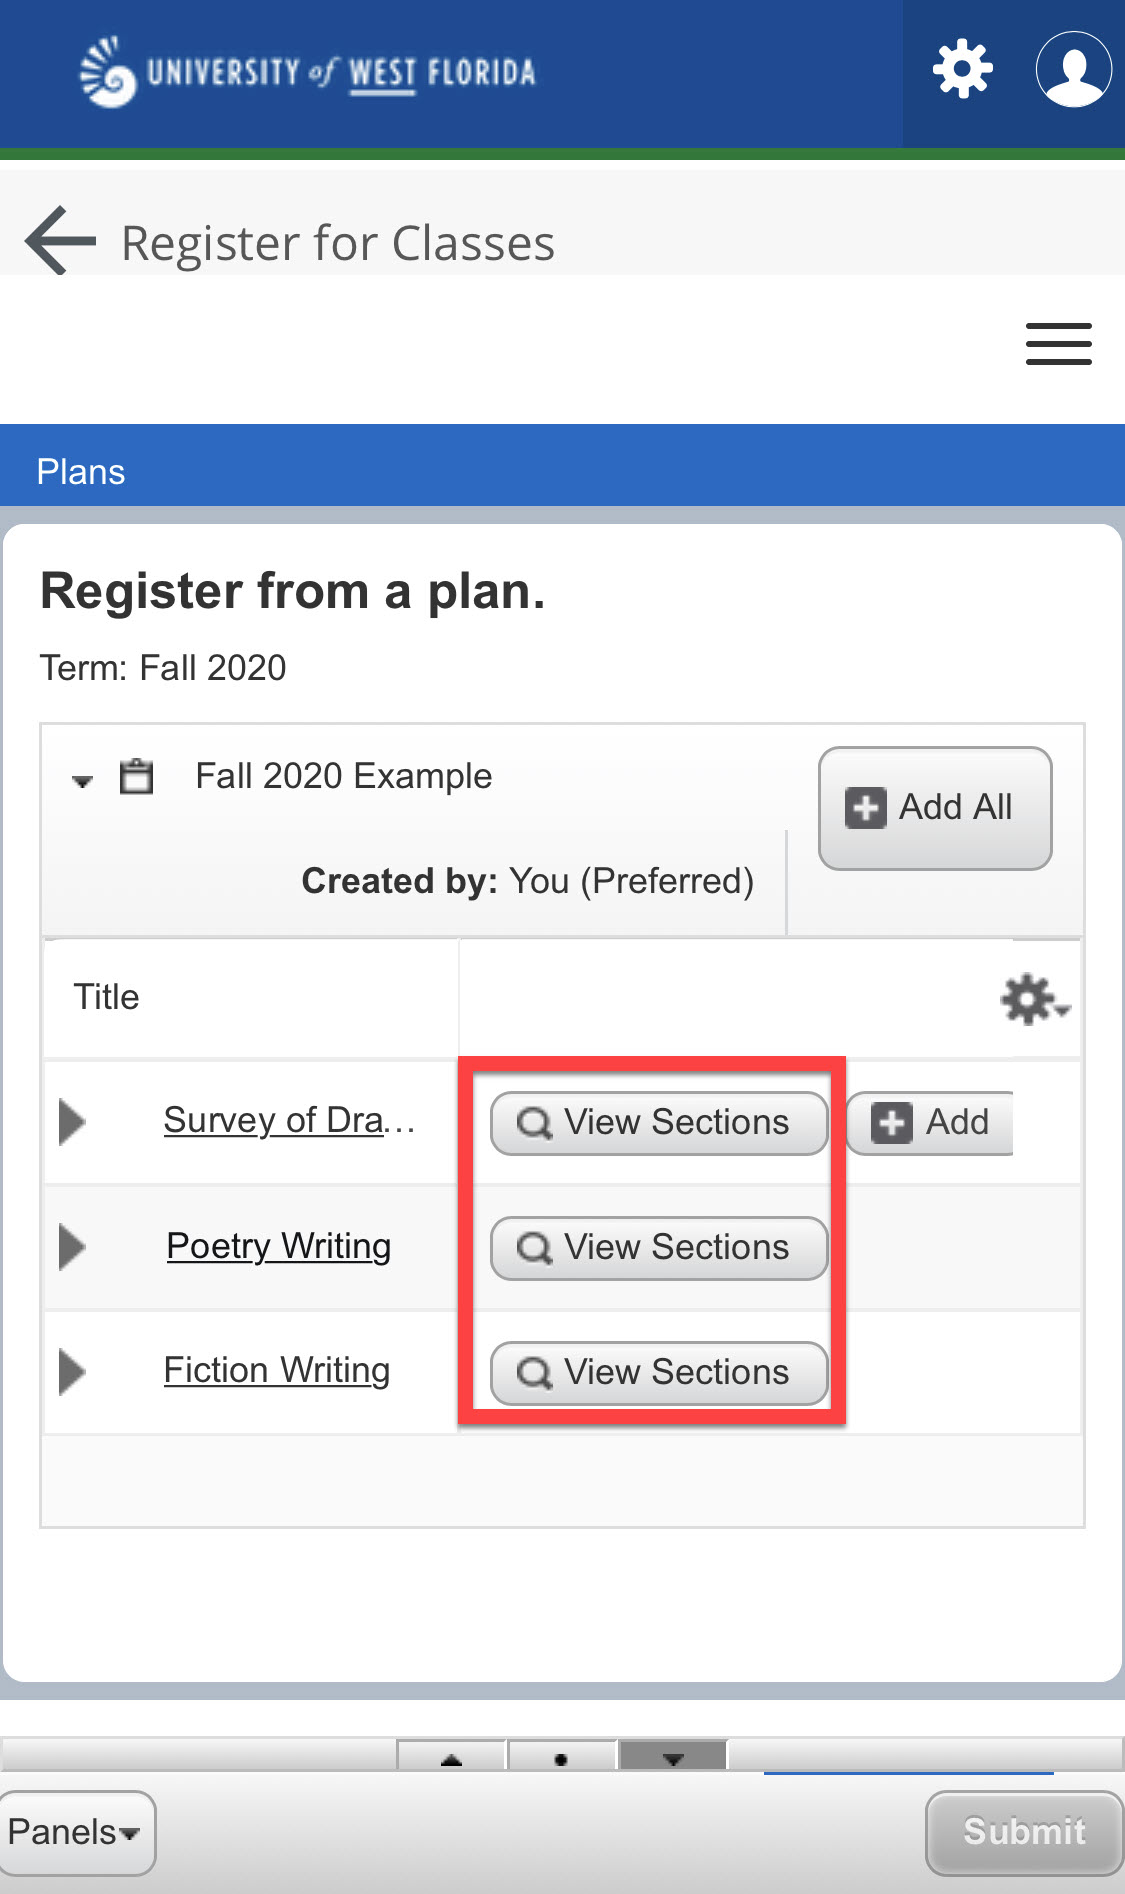 Image Added Image Added
Step 7 When you are ready to select a section, click on the "Add" button on the right side of the screen. That will add the section to the Registration Summary in the bottom right. Then, click "Submit." 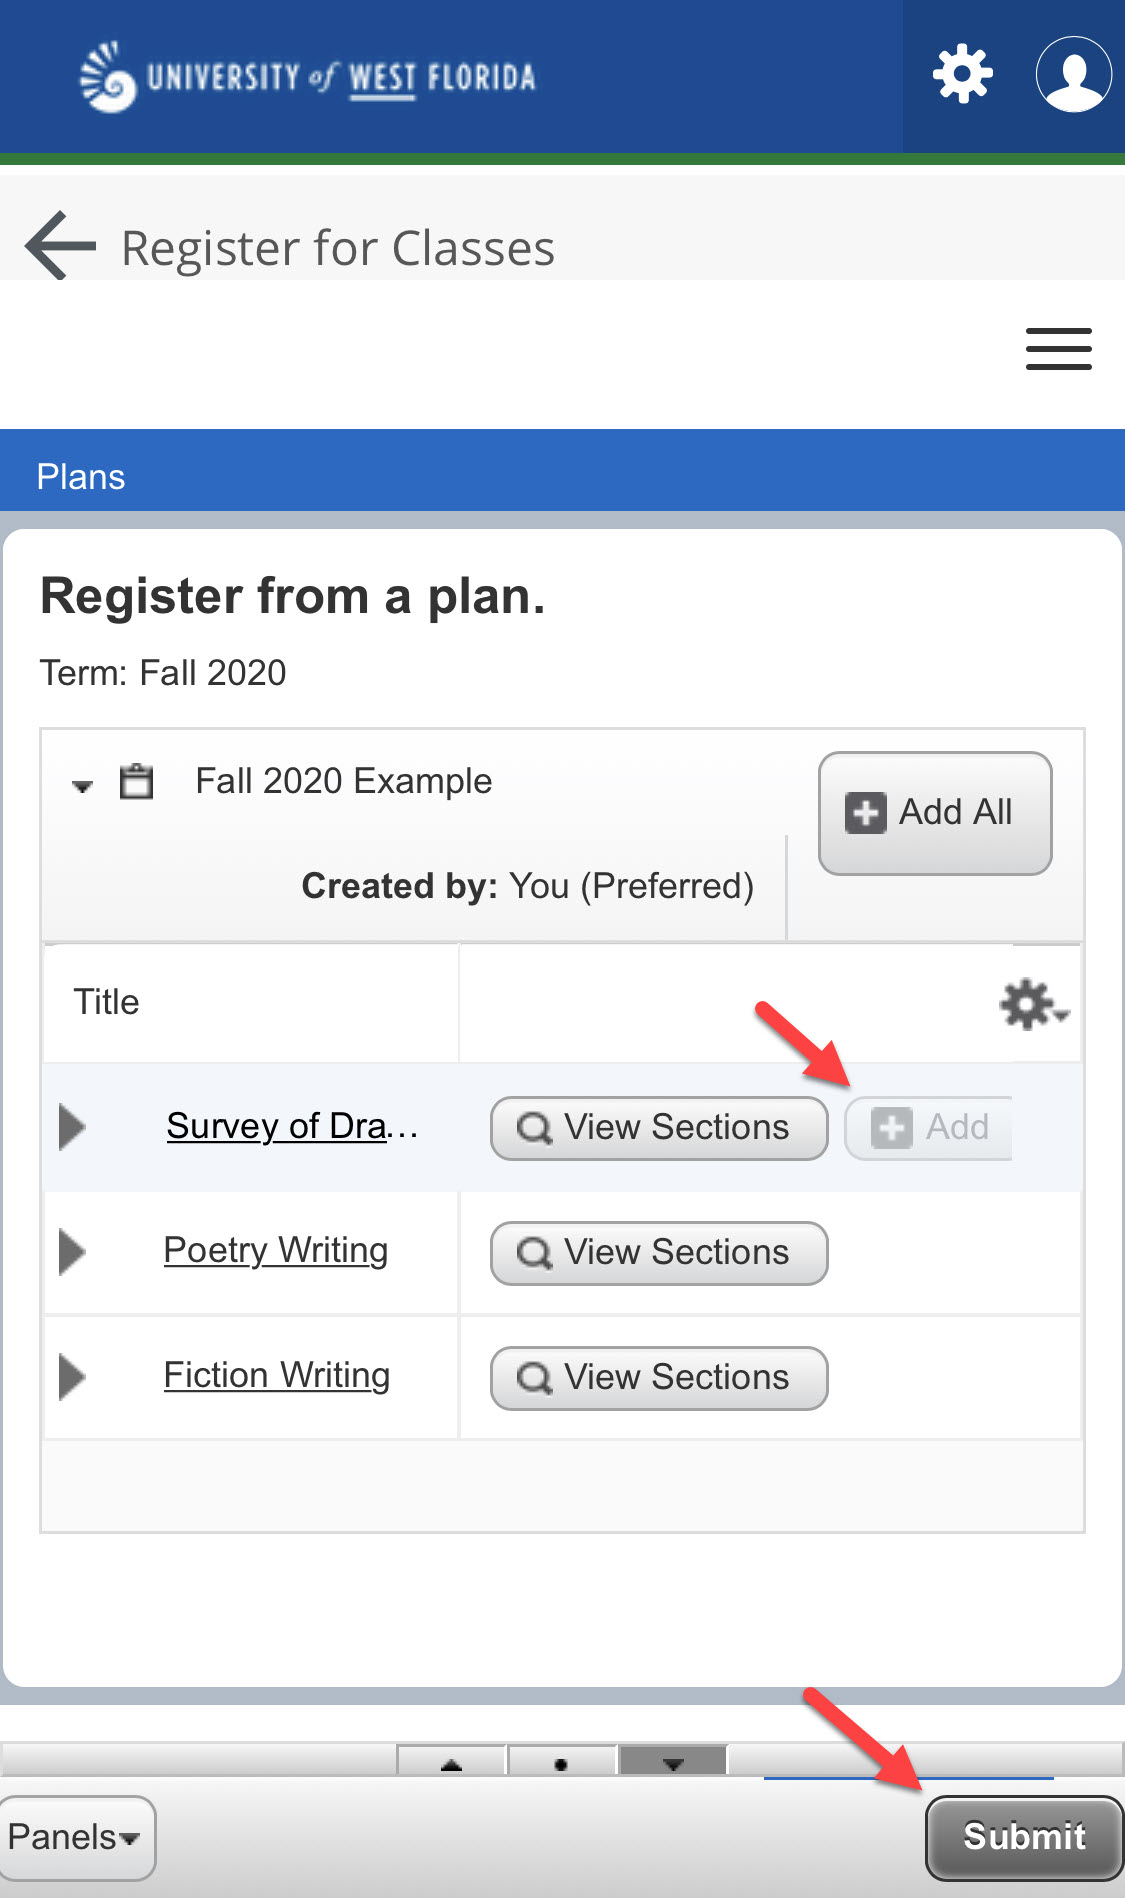 Image Added Image Added
|
| Info |
|---|
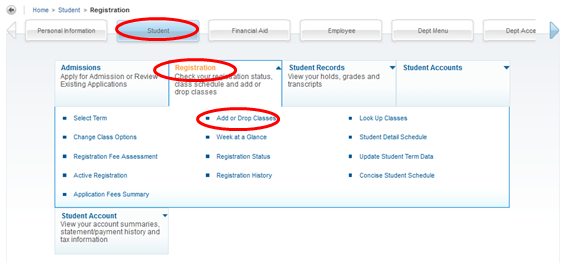
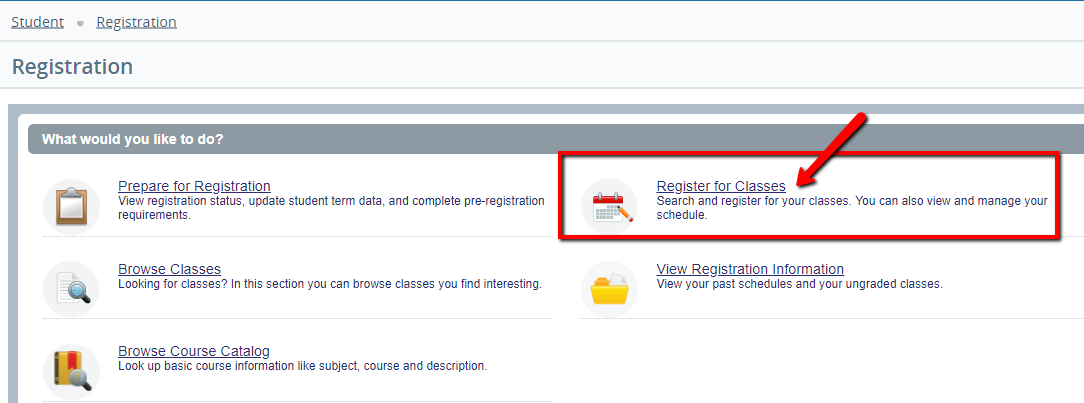
| Desktop RegistrationStep 1 Access the Registration menu and select the "Register for Classes" option. 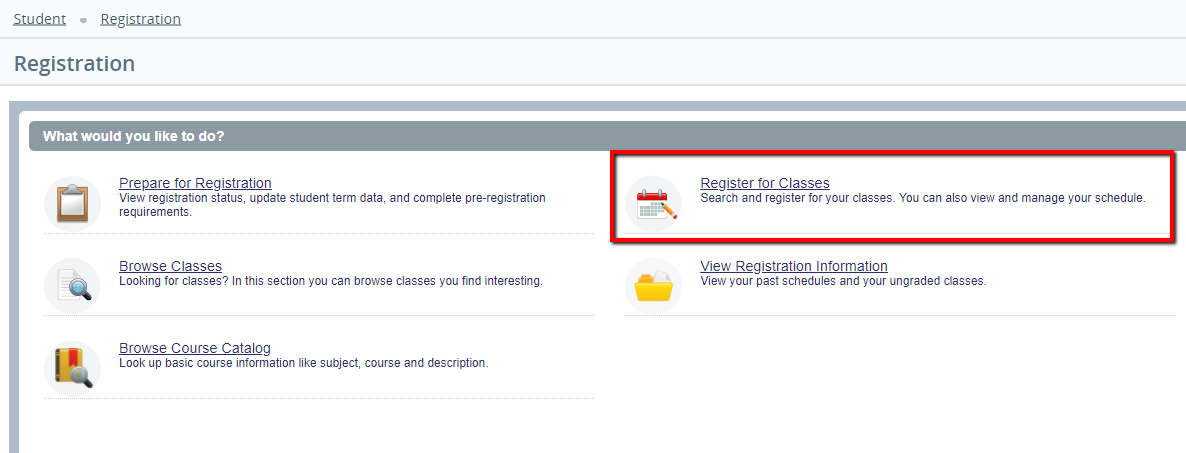 Image Added Image Added
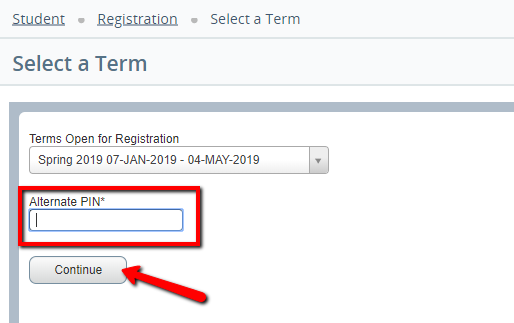
Step 2 Select the term you would like to register for. Then, enter your Registration PIN and select "Continue." 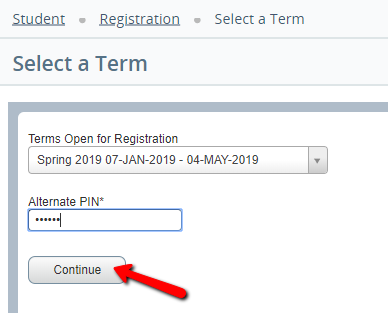 Image Added Image Added
Step 3 Select the "Plans" tab from the options listed at the top. Under the Plans option, the assigned Degree Works Plan title should display 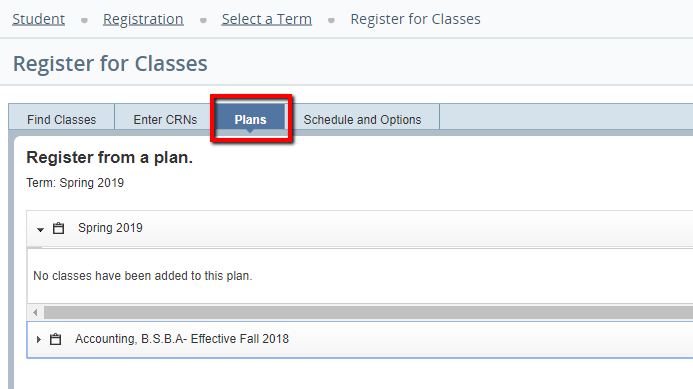 Image Added Image Added
Step 4 Select the drop-down arrow next to the Degree Works SEP Plan title. Courses for that semester should then appear. 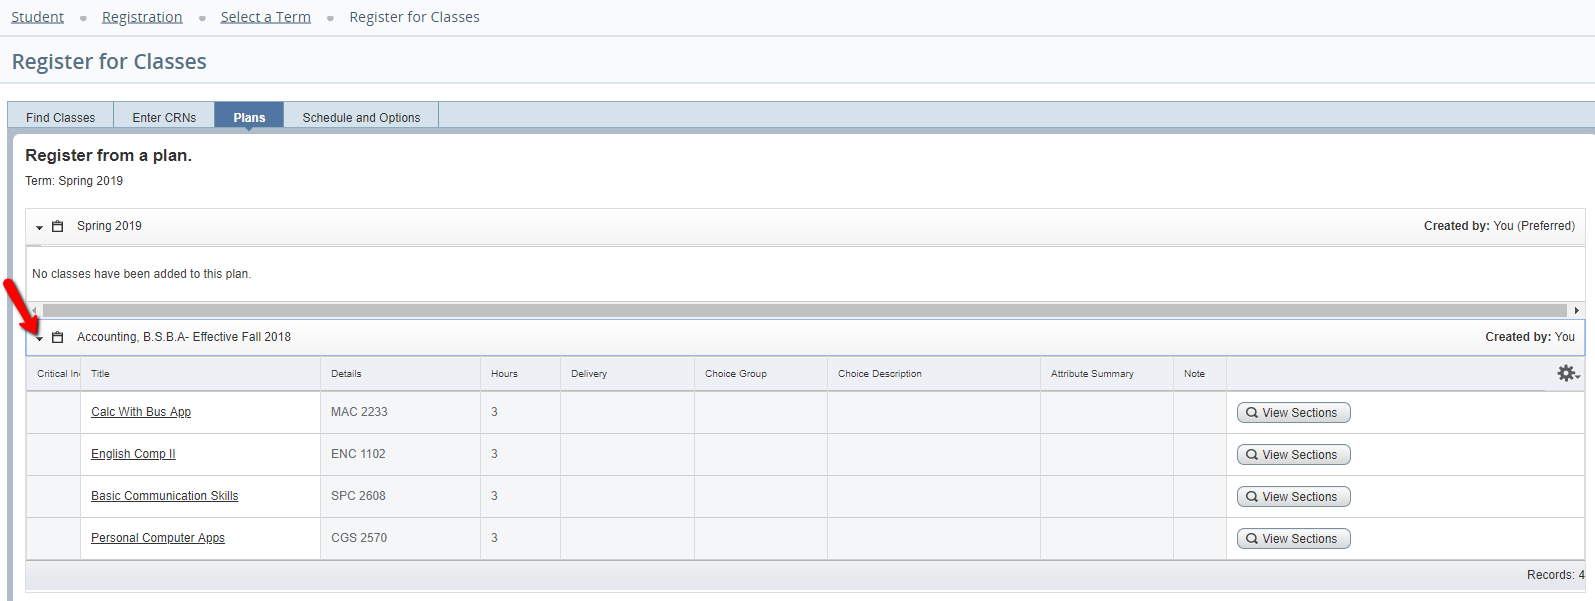 Image Added Image Added
Step 5 To view offered sections for the chosen semester, select the "View Sections" button to the right of the course. This will open a new screen with available sections. 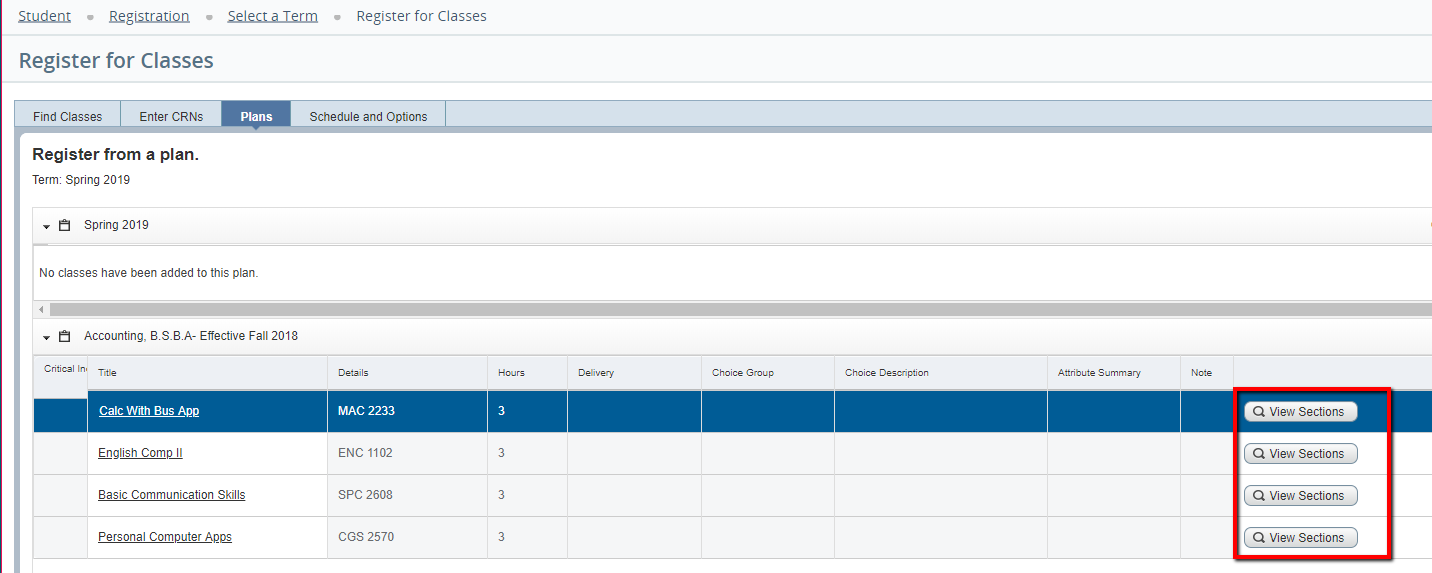 Image Added Image Added
Step 6 When you are ready to select a section, click on the "Add" button on the right side of the screen. That will add the section to the Registration Summary in the bottom right. Then, click "Submit."  Image Added Image Added
Step 7 To register for other classes from the Degree Works Plan, select the "Return to Plan" button, and select another course. 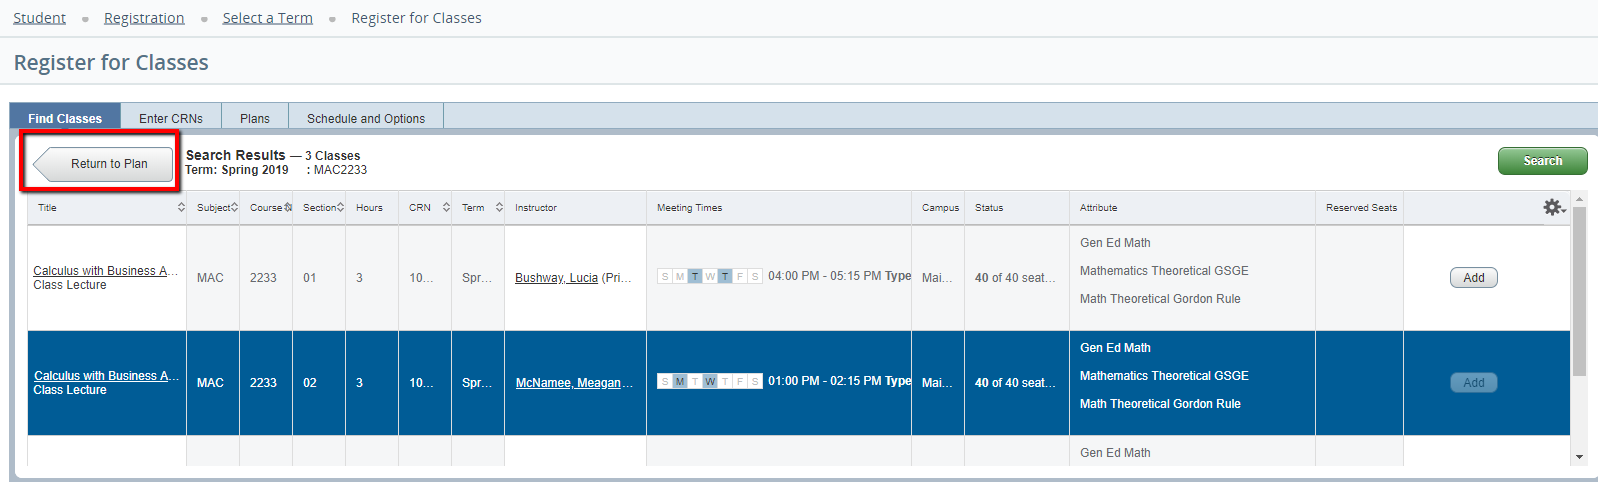 Image Added Image Added
|
WaitlistingThe same registration restrictions apply to waitlists as to adding a course (i.e. pre-requisites, co-requisites, etc.) If you are already on a waitlist for a course and wish to add an open section, you must drop the waitlisted course in order to add the open section. To add yourself to the waitlist for a closed course with waitlist seats available, follow steps 1-5 above, then: | Info |
|---|
| Mobile Registration- Make sure that the course has a waitlist and that there are seats available.
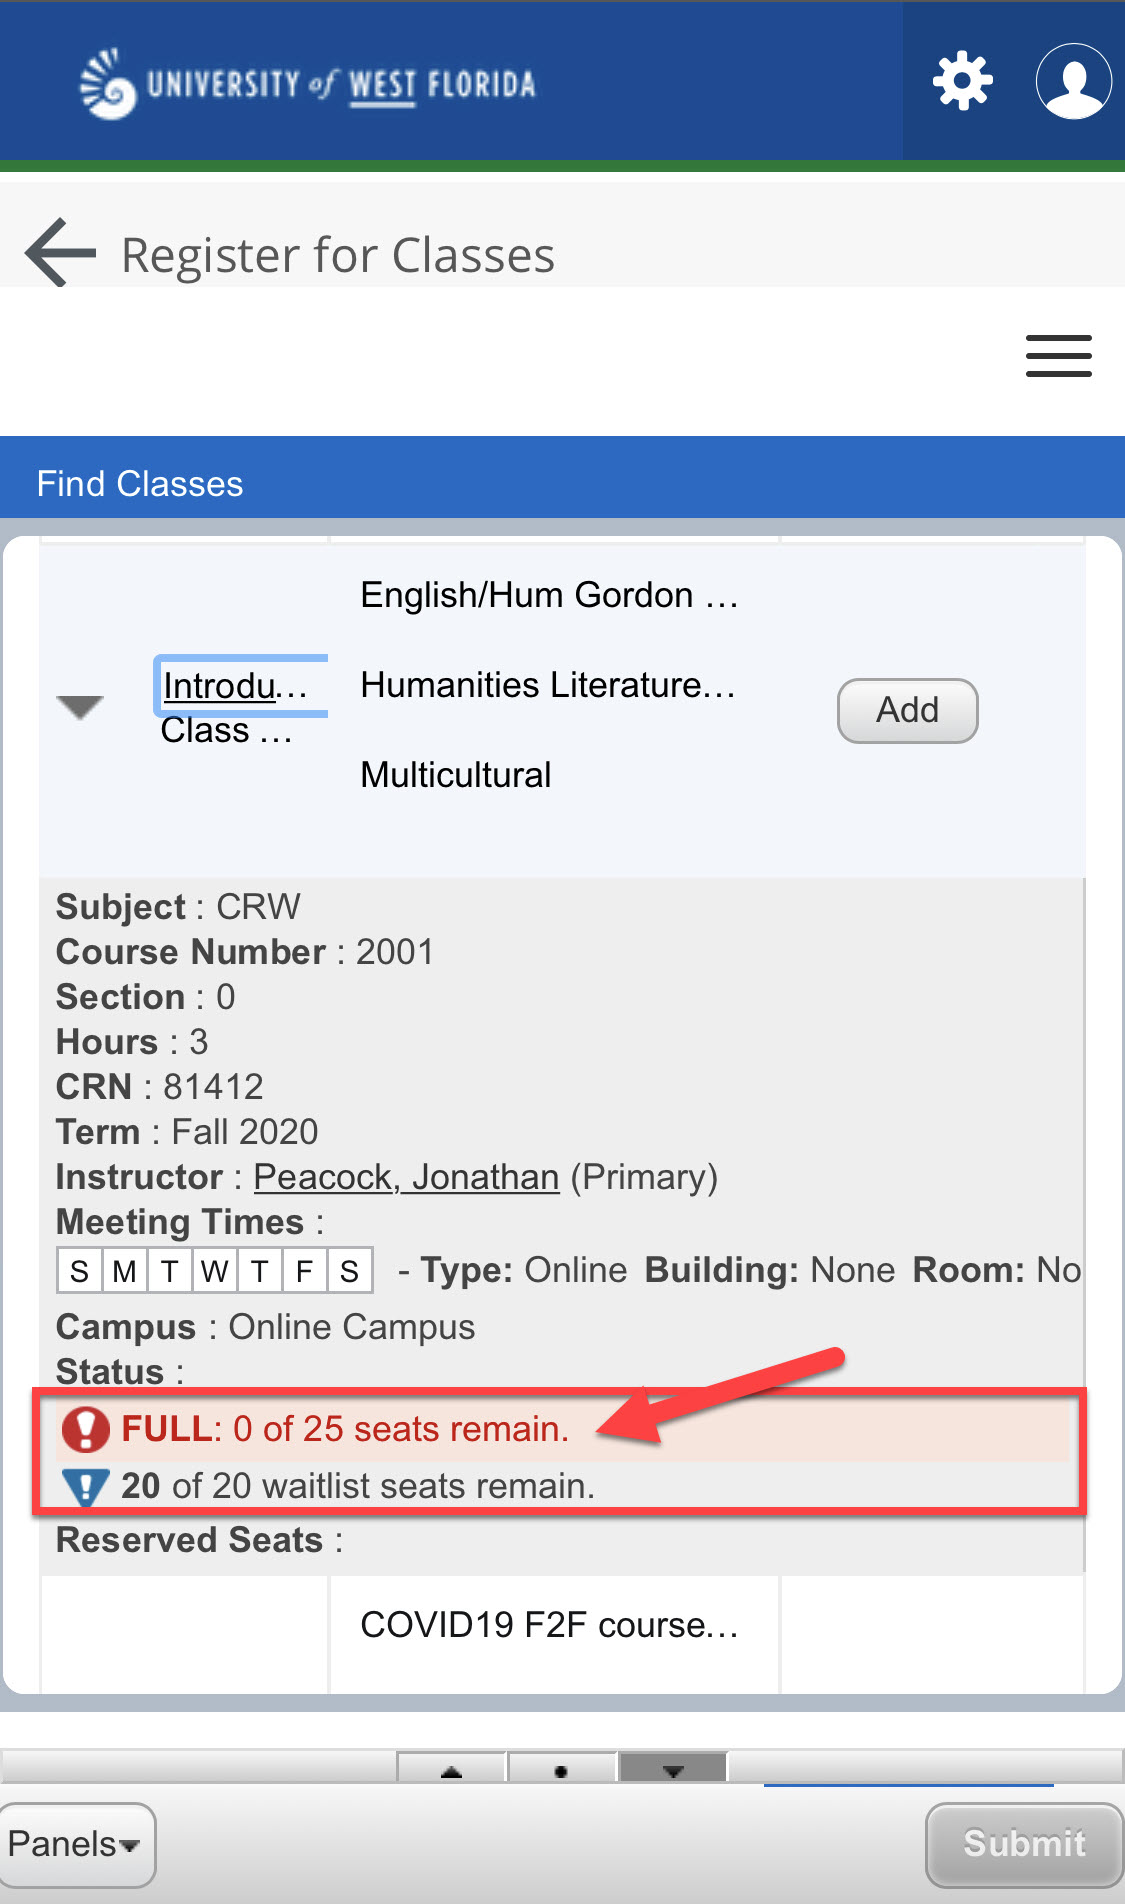 Image Added Image Added
- Click on the "Add" button next to the CRN with the open Waitlist.
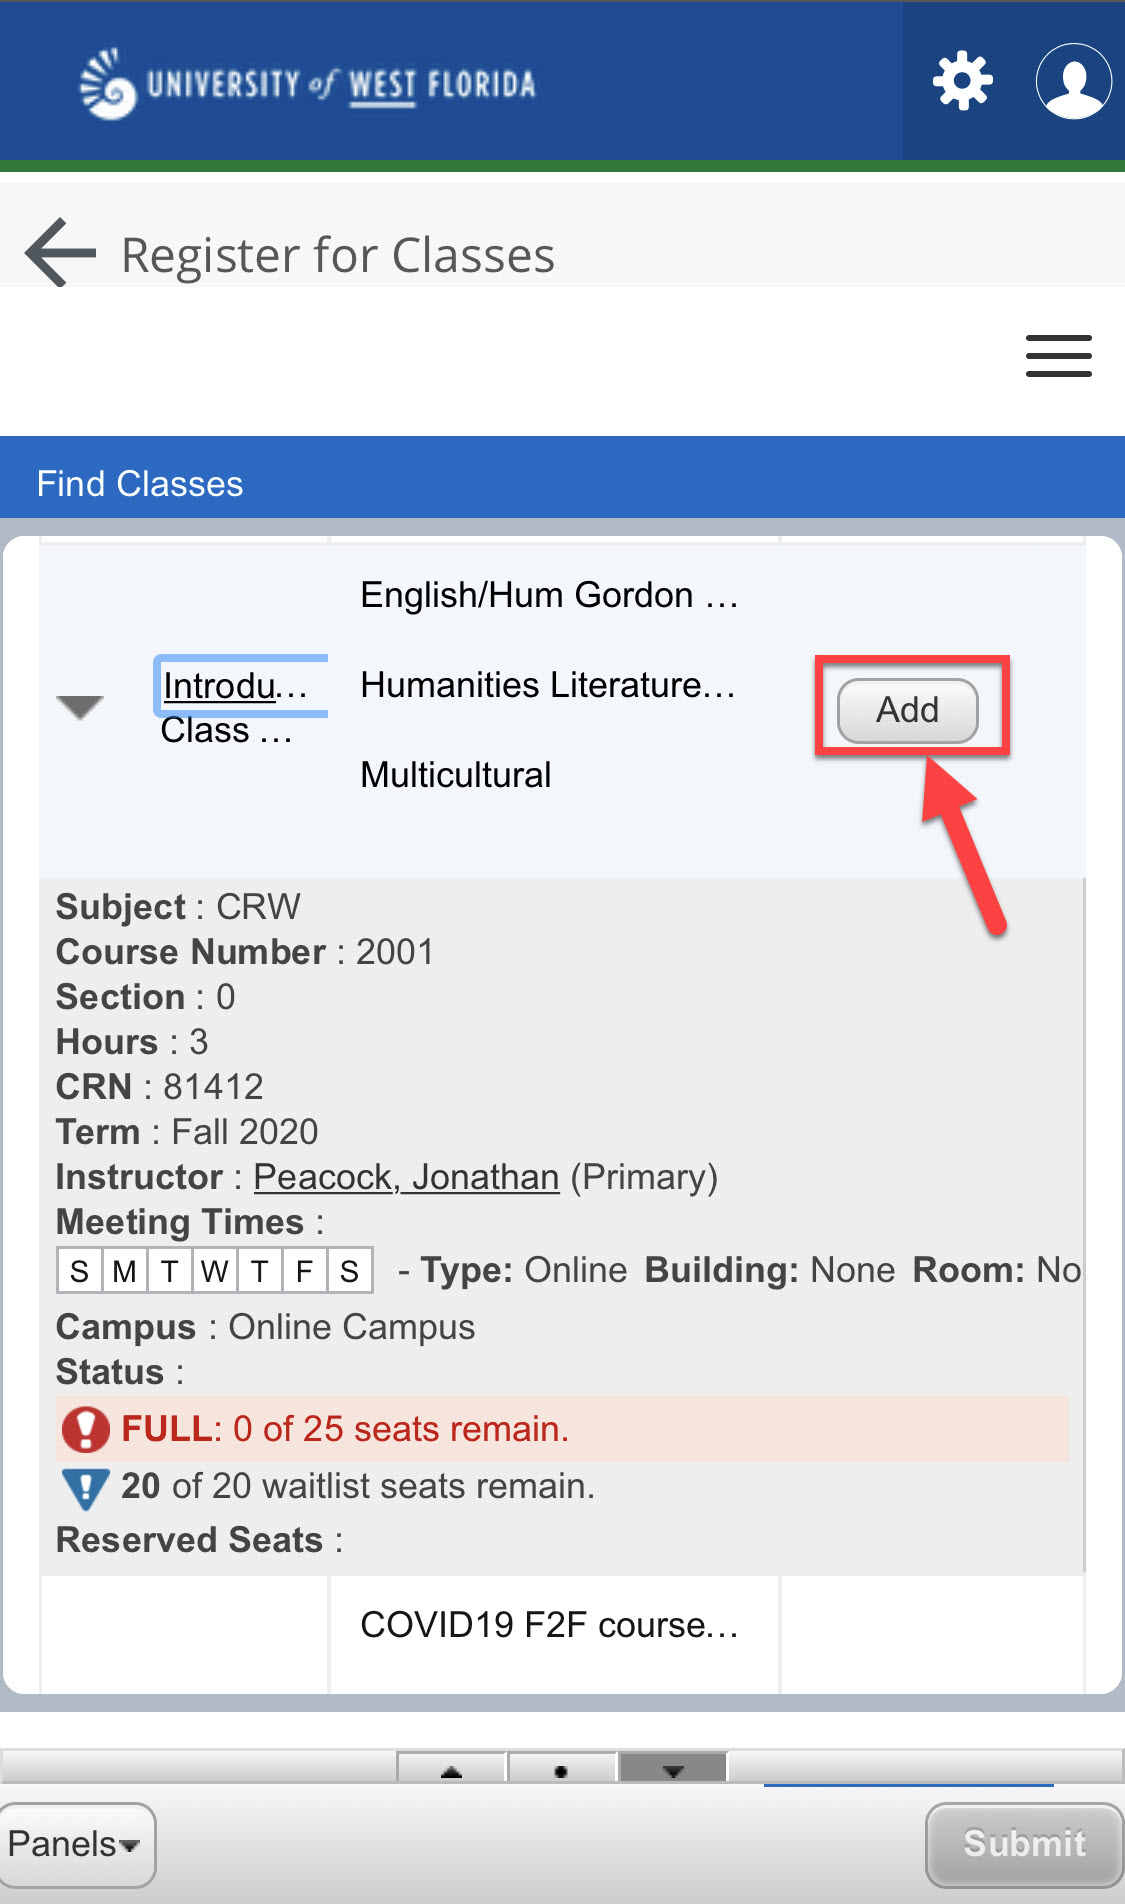 Image Added Image Added
- The course will then appear in the Summary window in the bottom right of the screen.
Click on the "Submit" button.
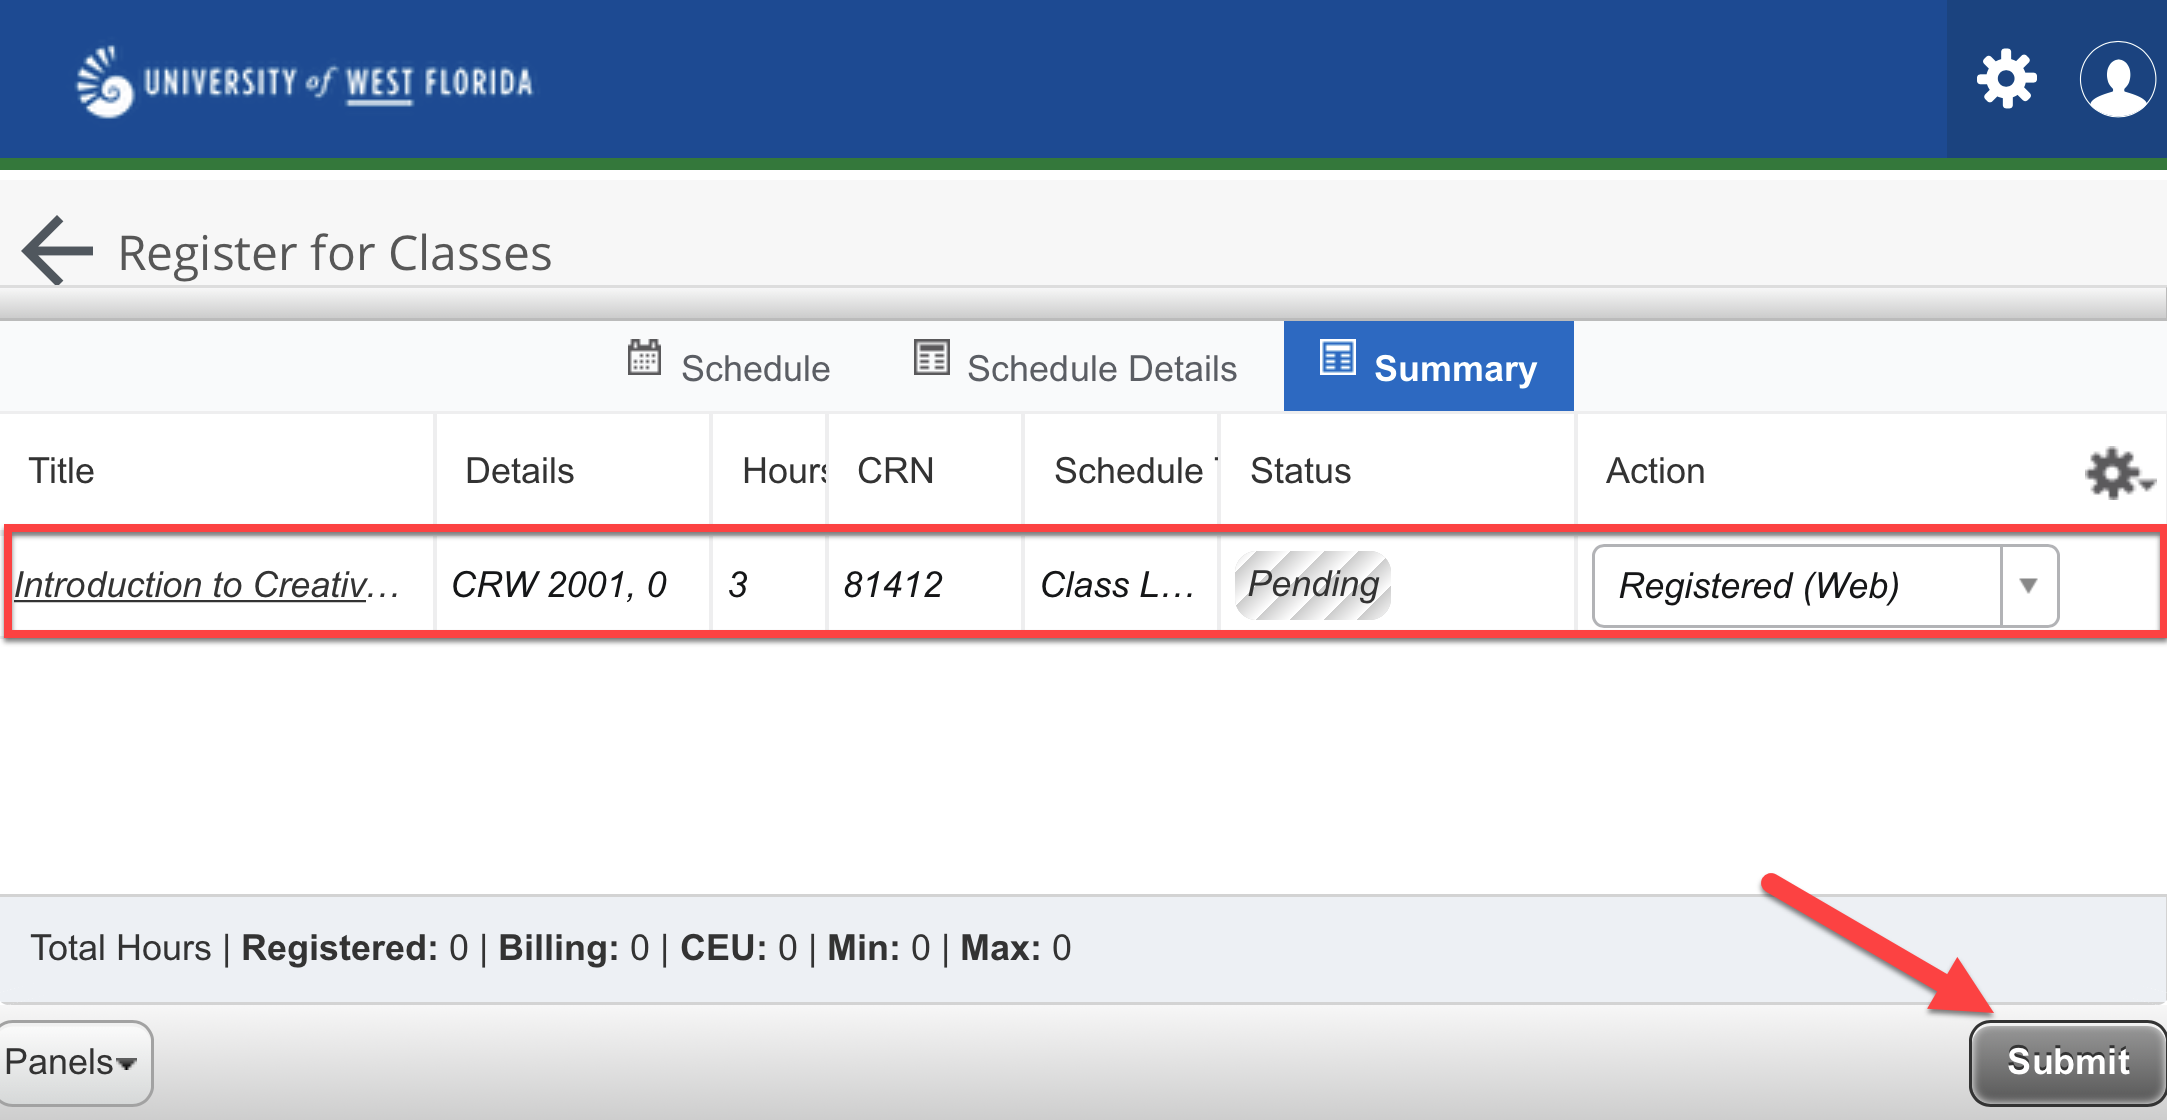 Image Added Image Added
- You will receive an error stating the course is closed. If a waitlist is available, there will be an option to select "Waitlist" from the drop-down menu next to the error message. Select the Waitlist option, and then click "Submit."
 Image Added Image Added
- If successful, the course will appear in the Registration Summary with a green Waitlisted status.
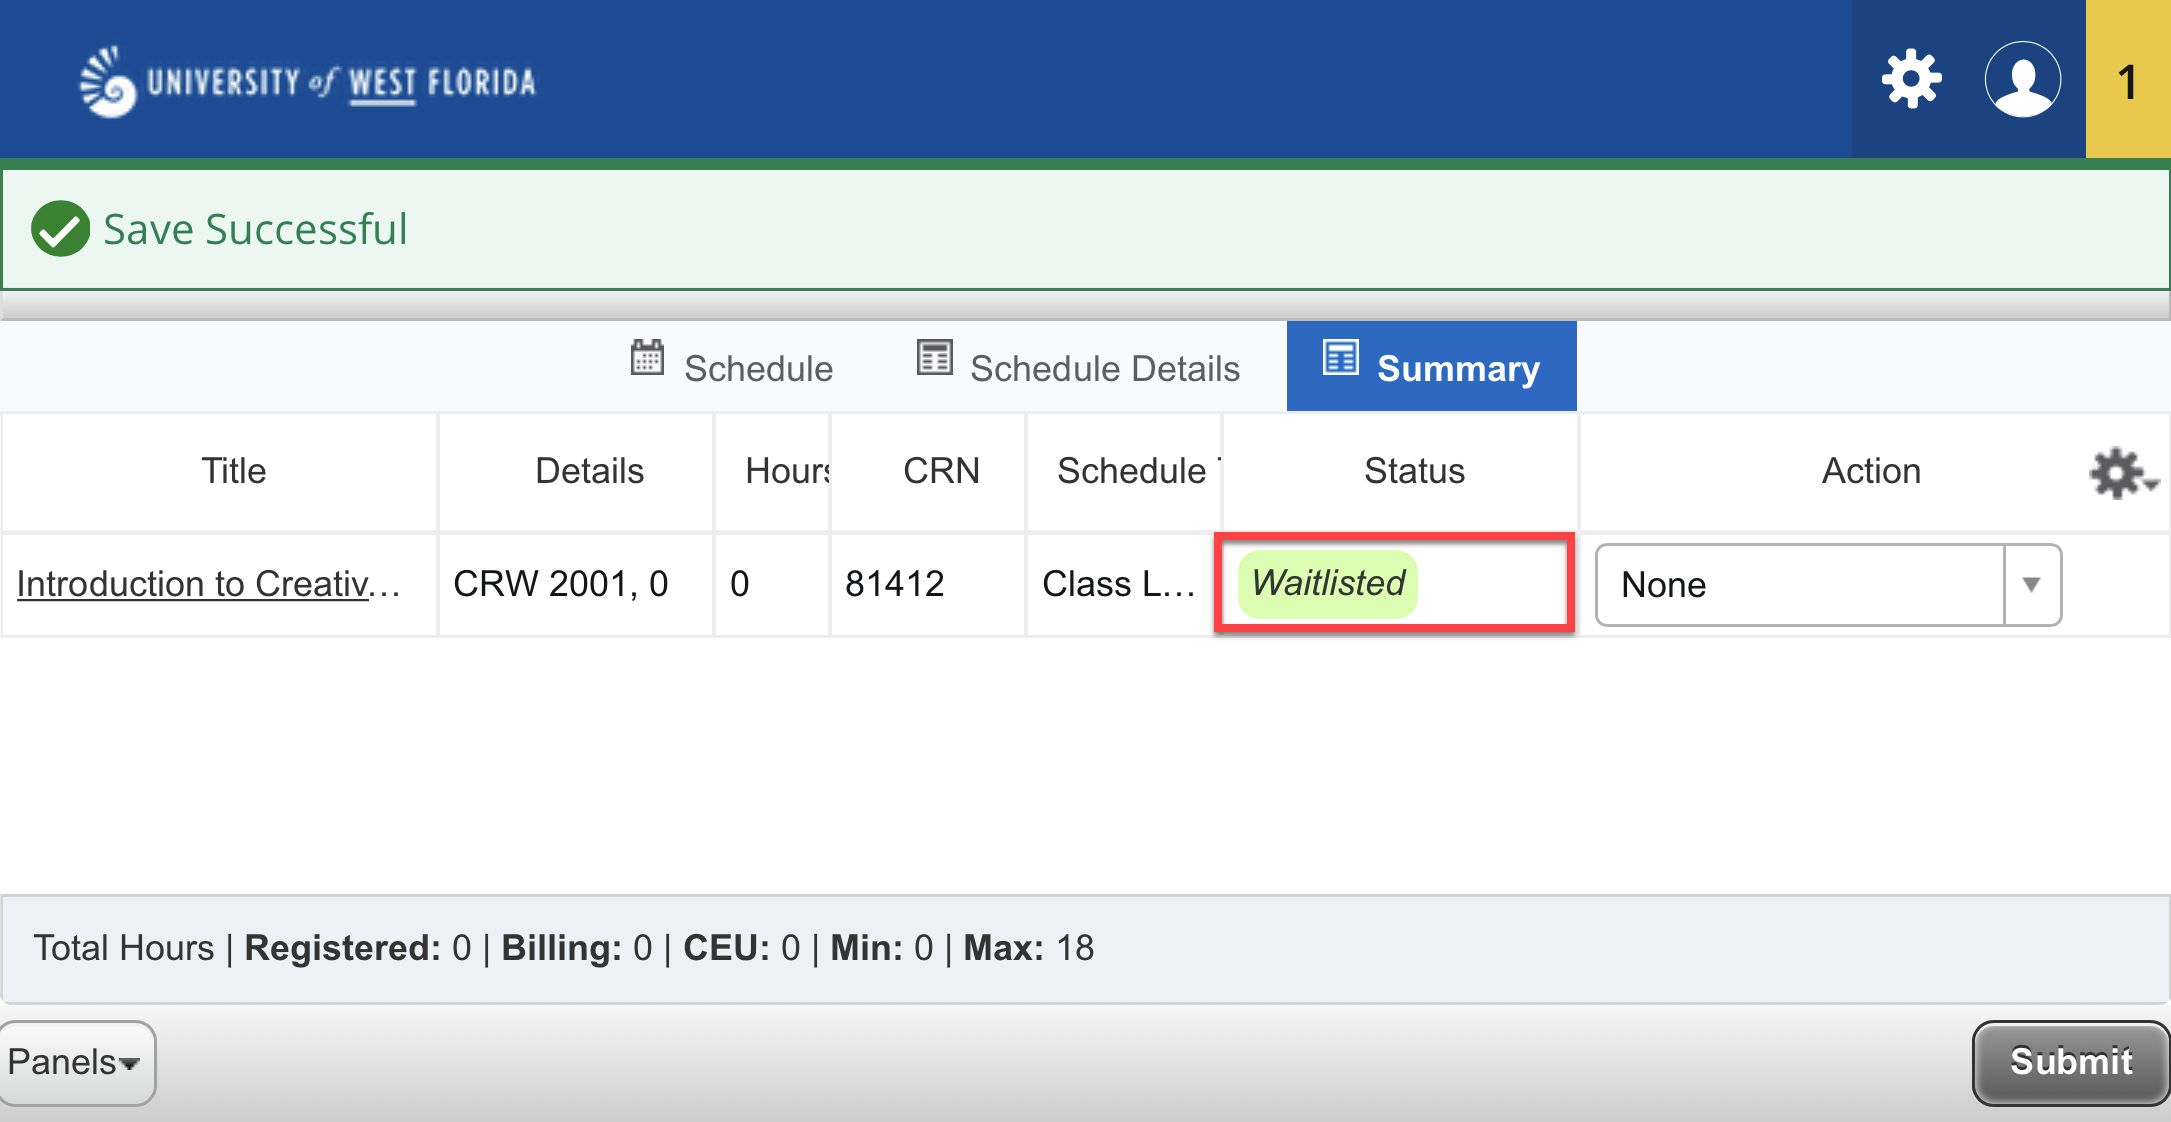 Image Added Image Added
- For additional information on waitlisting, please see Using Waitlists.
|
| Info |
|---|
Desktop Registration- Make sure the course has a waitlist and there are seats available.
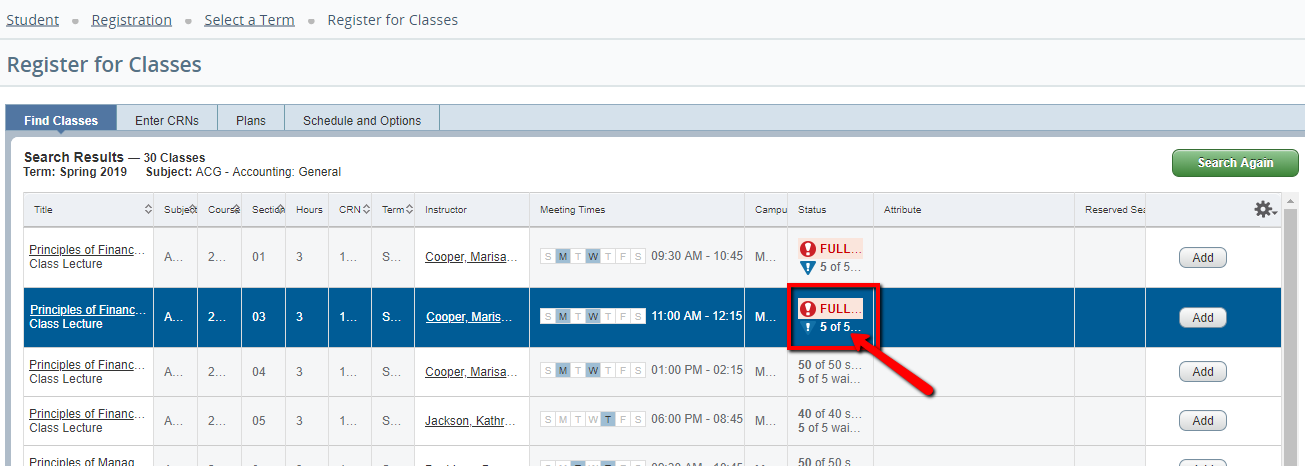 Image Added Image Added
- Click on the "Add" button next to the CRN with the open Waitlist.
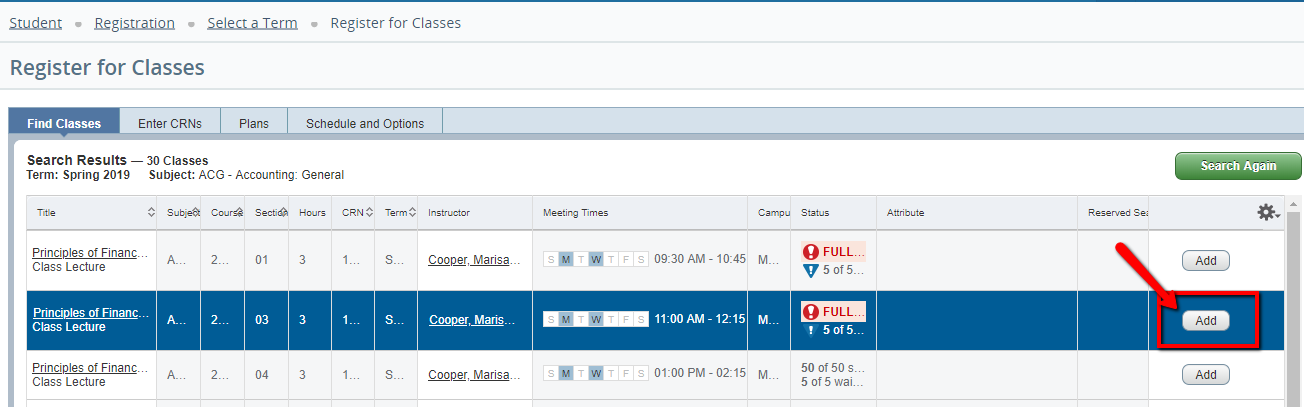 Image Added Image Added
- The course will then appear in the Summary window in the bottom right of the screen. Click on the Submit button.
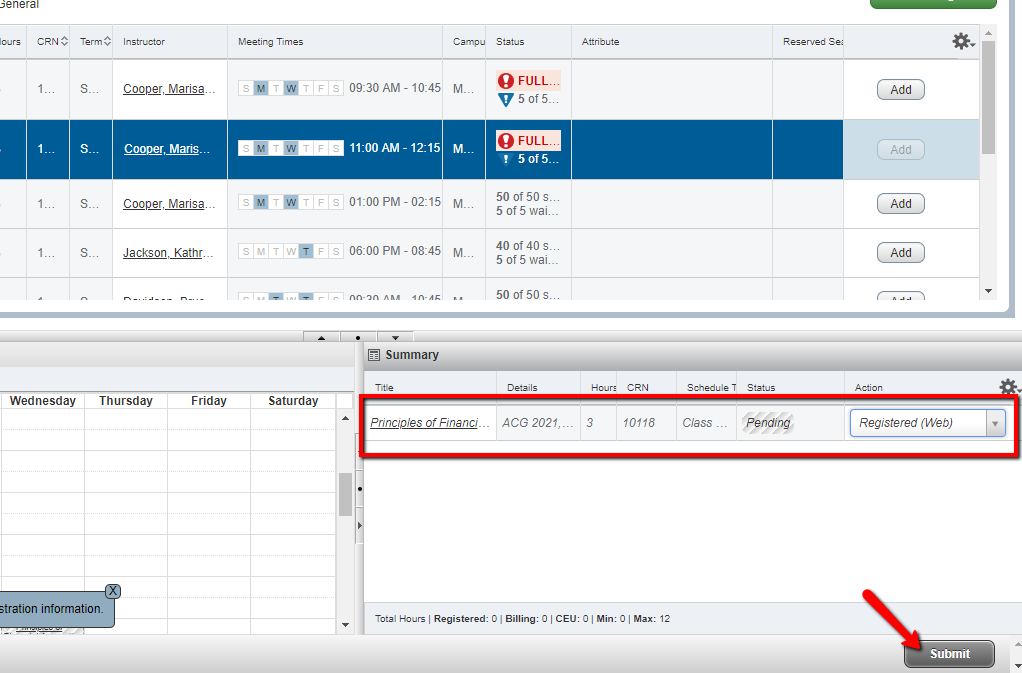 Image Added Image Added
- You will receive an error stating the course is closed. If a waitlist is available, there will be an option to select "Waitlist" from the drop-down menu next to the error message. Select the Waitlist option, and then click "Submit."
 Image Added Image Added
- If successful, the course will appear in the Registration Summary with a green Waitlisted status.
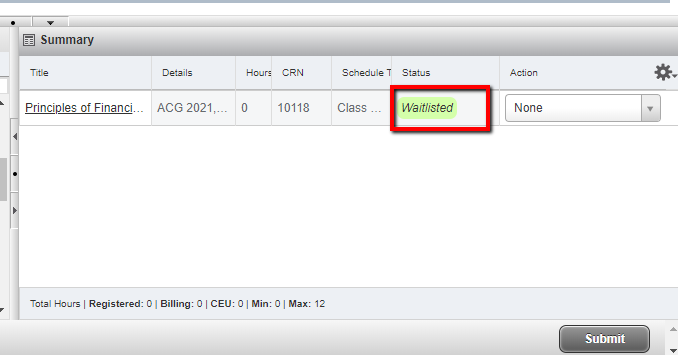 Image Added Image Added
- For additional information on waitlisting, please see Using Waitlists.
|
FAQs
| Expand |
|---|
| title | Why can't I register? |
|---|
| All students are required to meet with their advisor prior to registration in order to receive an Alternate PIN which will allow them access to registration. If a student has not met with his/her advisor, he/she will need to do so in order to gain access to registration. In addition to PINs, all students have an assigned time in which they can register. Students will not be allowed to register prior to their time ticket. Students may also have various holds preventing registration. Students are able to view holds via the Registration Status link in SSB. Students should contact the appropriate office to determine how to have their hold removed. |
| Expand |
|---|
| title | Are there restrictions as to the number of credit hours a student may take each term? |
|---|
| Yes. - Undergraduates may take a maximum of 18 credit hours each term. Student-athletes, J1, or F1 visa holders must take a minimum of 12 credit hours each term. Students on Academic Probation may only take 14 credit hours while on probation.
- Masters students may take a maximum of 12 credit hours each term. Student-athletes, J1, or F1 visa holders must take a minimum of 9 credit hours each term.
- Specialist/Doctoral level students may take a maximum of 12 credit hours each term. J1 or F1 visa holders must take a minimum of 9 credit hours each term.
|
| Expand |
|---|
| title | How do I register for an internship, directed study, or other variable hour course? |
|---|
| Students registering for any variable class (such as internships, directed studies, applied music, dissertations, etc.) must contact the department offering the courses to obtain a Variable Credit Hour Registration Form. The form must be completed by the department and submitted to the Office of the Registrar by the end of drop/add. The Office of the Registrar will create the section of the course and register the student upon receipt of the form. |
Previous/Next StepsPrevious Steps
Viewing Student Registration Information Viewing Holds Viewing your Advising PIN in MyUWF
Searching for Course Offerings Understanding/Changing Grade Modes
Next Steps
Using Waitlists
Dropping Courses Withdrawing After Drop/Add Viewing a Student Schedule
|