Activate Zoom in your course
- Click on Zoom in the course navigation. If it is not listed, enable it by managing the course navigation links in course Settings.
- Authorize with LMS: Click Authorize to pair your Canvas account to your Zoom account. This will only need to be done once.
- Click the pencil icon to set your time zone.
- In the drop-down menu, select your time zone.
- Click Update.
What does the Zoom app in Canvas look like?
In the Canvas course navigation, click Zoom to open the Zoom app in Canvas. On the right, you’ll see the blue Schedule a New Meeting button.
Below that button, you’ll see tabs for Upcoming Meetings, Previous Meetings, Personal Meeting Room, and Cloud Recordings.
The image shows a list of upcoming meetings, with start time, topic, meeting ID, and buttons for starting or deleting meetings.

Schedule a Meeting
- Select Zoom in the course menu.
- Select Schedule a New Meeting.
- Enter the details for your meeting.
- Topic: The default name is your course title. Please prove a descriptive name.
- Description: Option information may be listed here.
- When: Set the date and time for your time zone.
- Duration: Set the meeting duration. Meetings may extend past the expected length.
- Time Zone: The time zone selected in setup will be displayed.
- Recurring Meeting: Check the box if your meeting is recurring at the same time either Daily, Weekly, Monthly, or No Fixed Time. Note: When you schedule a recurring meeting, each meeting occurrence creates as an independent event that appears. This means that if you need to modify all instances of a meeting, you must edit each event individually in the UWF Zoom Web Portal. Pre-assigned rooms are removed if your edit a meeting. You must re-add them after you make changes.
- Registration: Check the box to require attendees to enter a name and email address (Optional).
- Security: A passcode will be pre-populated. You may require a Waiting Room and turn off the Waiting Room once your meeting is underway.
- Video: The default setting for video is off (Recommended). Participants and hosts may choose to enable video once the meeting has begun.
- Audio: Both audio and telephone is enabled so participants have an option when internet connectivity is poor (Recommended).
- Meeting Options:
- Mute participant upon entry is checked by default (Recommended).
- Instructors may prefer to enable meeting recording automatically.
- If “only authenticated users can join” is enabled then all participants must have a UWF Zoom account (Recommended after add/drop period).
- Enable join before host (Not Recommended). The recording/polls/other data can be spread across multiple users accounts and not on the hosts account. By design, it goes to the first person joining the meeting who is set as temporary host.
- Alternate Hosts: Teachers enrolled in your Canvas course site who have completed Zoom Setup will be listed as alternate hosts.
- Click Save.
You can view details about your recurring meetings in the list of upcoming meetings.
Polls
Depending on your Zoom account settings, breakout rooms and polls may not be enabled by default. To enable these features, you log into the UWF Zoom Web Portal and change your meeting settings.
Once your meeting is scheduled, you may download a spreadsheet template (CSV file) [1] to use to import [2] poll questions [3] for your meeting. If you do not need a poll or made an error, you may delete the poll [4].
Pre-assign Breakout Rooms
Zoom LTI for Canvas does not allow Canvas instructors to pre-assign students to breakout rooms while the stand-alone version of Zoom does. To pre-assign breakout rooms, you will create a meeting in Canvas and manage the breakout room assignment via the UWF Zoom Web Portal.
- Schedule your meeting and check the box to require authentication for the meeting (and all occurrences).
- Once the meeting is created, login to the UWF Zoom Web Portal.
- Click on the meeting title you just created.
- Click Edit this Meeting. If the meeting is recurring, you will be asked if you would like to edit the meeting series or just the occurrence.
- Under Meeting Options, check the box by Breakout Room pre-assign:
- Enter the breakout room names and participants’ email addresses as their ArgoNet username followed by @students.uwf.edu This can be uploaded with a CSV.
- Save the meeting.
Breakout room assignments will not display in Zoom LTI in Canvas. Editing meeting information will remove saved pre-assigned breakout room information. Please re-add the CSV file after editing the meeting information.
Note: To ensure students are properly assigned to a breakout room, use email addresses with the correct format and direct your students to launch the meeting from the Zoom page in Canvas.
For more information on Zoom breakout rooms, please see the Zoom Support Center
How do I create a CSV for using UWF email addresses and assign them to a breakout room?
- Log into your Canvas course.
- Click Grades.
- Click the Actions menu [1], then click the Export link [2]. When the export is completed, Canvas will download the CSV file automatically to your computer.
- Open the downloaded file.
- Copy the first five columns (A-E) of the gradebook export to a new worksheet.
- Place your cursor in cell F3. Your cursor should be in the cell to the right of the section name of the first student.
- In Cell F3, type =D3&”@students.uwf.edu” to combine the NetID with the email domain.
- Copy and fill the formula for all students.
- If you would like to create breakout rooms based on section assignment, copy the section column and the newly created email address column to the Zoom breakout room template CSV.
- Save the Zoom breakout room template as a CSV file.
For more information on MS EXCEL and concatenation and ampersand, view this Linkedin Learning course on Combine data using CONCATENATE, CONCAT, and TEXTJOIN functions and the ampersand (&) character.
Canvas Course Calendar, Dashboard, Inbox, and Notifications
- Canvas users are notified by Canvas Conversation (Inbox) and a Canvas Calendar Event whenever a meeting is created or deleted. When you schedule or edit a meeting, the Canvas Calendar updates automatically.
- If the course is active (published and within course start and end dates), enrolled students will receive a Canvas Conversation message about the meeting. Students can select the Join URL to join the meeting at the correct time.
- Although as an instructor, you will not see your scheduled Zoom meetings on the Canvas Dashboard (in List View). Students enrolled in your course will see reminders for Zoom meetings on the Canvas Dashboard.
Start a Meeting
If you have scheduled a Zoom meeting using the Zoom for Canvas Integration, you can start the meeting from within Canvas.
Once Zoom is added to a Canvas course, you can access Zoom from Course Navigation.
- In the Course Navigation bar, click the Zoom link.
- Click the Upcoming Meetings button.
- Locate the Meeting ID you want to begin and click the Start button.

Manage Recordings
Recordings are preserved for 180 days or until policies are changed. It is recommended that you download your course recordings and upload them into Panopto (mp4 video) which has unlimited storage.
Security and Link Sharing
Please caution your students against sharing Zoom links. Zoom links are unique to the participant (student) and the meeting. The Zoom link will also include the meeting password. Since the link includes participant information, when a link is shared, then two participants with the same name will appear in the participant panel. This has implications if you are using the Attendance Report for awarding participation points. Here is a link to the Zoom Privacy Statement.
Generate Zoom Meeting Attendance and Polling Reports
Zoom will save data from past meetings which you have hosted, allowing you to generate Meeting Reports (which may include participant names, email addresses, and the time during which they were in the Zoom meeting) or Polling Reports (which may include any polls run during the meeting, along with participants’ answers).
To generate a Report in the Zoom Canvas integration:
- Click on Zoom in the Course Navigation bar.
- Select the Previous Meetings tab.
- Click on the Report button for your chosen meeting.
- Select either the Meeting Report tab to generate Meeting Report data, or the Poll Report tab to generate a Poll Report.
Enable AI Auto-Captioning
This new feature allows hosts to use live AI-powered transcripts during a meeting. The transcripts are displayed at the bottom of the Zoom meeting window. Participants have the option of turning their view of the transcripts off if they find them distracting. The transcripts are also available as a separate VTT file along with your recorded meetings.
You must enable this feature in Settings for your Zoom account. Once enabled, you can turn automatic transcripts on for any meeting that you host.
The CTLT has created a video walk-through of the process OR you can review these detailed step-by-step written tutorials from Zoom instead.
Did you forget to turn on the transcripts?
You can automatically get audio transcriptions for recordings for any meeting or webinar recorded to the cloud without turning on live transcripts during the meeting. Turn this feature on in your Zoom Account Recording Settings. Read more about this feature.
Canvas Instructor Guides
- Using Zoom with Canvas
- How do I add Zoom to a Canvas course?
- How do I schedule a Zoom video meeting?
- How do I invite others to join a meeting?
- How do I start a meeting?
- How do I record a meeting?
- How do I know if students have joined the meeting?
- How do I mute and unmute all participants?
- How do I turn my camera on and off and use the Zoom controls?
- How do I share my screen?
- How do I manage and share the recording?
Student Guides
FAQs
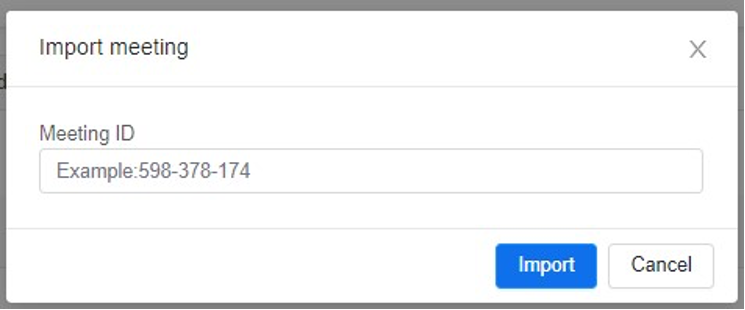
Yes. Navigate to the Import meeting function in the Zoom section of your canvas course and enter the meeting ID that you would like to import. Once imported, the meeting and recordings will be available in the course.