Geographic Information Science is a field that requires basic computer literacy. The goal of these pages is to help students who are interested in GIS to be certain that they have mastered skills that are necessary to their success in future GIS courses and beyond. One of the criteria for enrollment in GIS courses at the University of West Florida is viewing this material and providing evidence that you possess these minimum competencies through a written exam. This page is part of the Basic Computer Skills series. Here you will learn the following concepts:
Resize windows and navigate among multiple windows.
Differentiate between local and remote access.
How to take a screenshot of your computer screen.
Resize windows and navigate among multiple windows
How to Resize a Window

Before a window can be resized, make sure it is not maximized. A maximized window cannot be resized. If the window is maximized, click the Maximize / Resize button, as shown in the example below. Also, keep in mind that not every window can be resized.
- Once a window is not maximized, you should be able to move the mouse cursor to any edge or corner of the window until a double-headed arrow appears.
- Once this arrow appears, click the mouse and drag it up, down, left, right, or diagonally if you are at the corner of the window to make the window larger or smaller (depending on what edge of the window is being dragged). If this double-headed arrow does not appear, the window cannot be resized.
- Below is an animated example showing a double-headed arrow on the bottom, left, and corner of a window and how clicking and holding the mouse with this arrow allows you to resize a window. If you only want to make the window horizontally bigger, move the cursor to the left or right edge of the window until it turns into the double-headed arrow. If you want to make the window vertically bigger, do the same thing at the top or bottom of the window. If you want to resize both horizontally and vertically, use one of the corners of the window.
Moving a window using the mouse

Once a window has been resized so it is not fullscreen, it can be moved anywhere by clicking and holding the left mouse button down on the title bar and then dragging it to where you want it displayed. Below is a visual example showing how this is accomplished. When clicking the title bar at the top of the window try to click on an empty portion of the title bar or the title of the window. Other buttons that may be on the window like the minimize, maximize, and close will perform the action of those buttons.
Note: With Apple MacOS, the maximize/resize button is represented as a yellow button found in the top left corner of the window.
Tip: If you do not see the minimize, maximize, or close buttons, try moving your mouse to the top of the screen. With newer versions of Windows and programs, some developers hide these options for a cleaner look. |

The above gifs were obtained from http://www.computerhope.com/. There are additional free tutorials about computer basics that could be helpful to a computer beginner.
Differentiate between local and remote access
Local Access
In a Local Area Network (LAN) or on the Internet, this is the computer you are using. As opposed to remote, which means off-site or "somewhere else," local means on-site or "what's in front of you."
Remote Access
Remote access refers to the ability to access a computer, such as a home computer or an office network computer, from a remote location. This allows students to work off site, such as at home or in another location, while still having access to UWF software and data. Remote access is also known as remote login.
Most of the time, remote software just shows the application window on the local desktop, giving the impression that the application is running on the client machines.
For more details about UWF's Argo Apps (remote access tools) view the ArgoApps Help Confluence pages.
How to take a screenshot of your Windows computer screen
Using Keyboard Shortcuts

Taking a screenshot is simple, regardless of which version of Windows you’re running. There are only a few steps — assuming you haven’t fiddled with the default keyboard controls — and you should already have access to all the image-editing software you need.
Read more: http://www.digitaltrends.com/computing/how-to-take-a-screenshot-on-pc/#ixzz4fwH0NP59
- Capture the image in one of two ways:
- Press the Print Screen (often shortened to “PrtScn”) key, typically located in the upper-right corner of your keyboard, to capture a screenshot of your entire display.
- press Alt + Print Screen to capture a screenshot of the active window.
- Open Paint or other image-editing software
- Paste your screenshot
- Save your screenshot
If you’re on a laptop, you may need to press Fn + Print Screen if your laptop has another feature assigned to that particular key. |
Using Windows Snipping Tool
Sometimes the easiest way to make a copy of something is to take a snapshot of your screen—this is what Snipping Tool does.
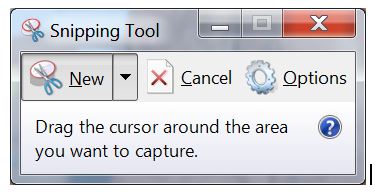
Capture all or part of your PC screen, add notes, save the snip, or email it from the Snipping Tool window. You can capture any of the following types of snips:
- Free-form snip. Draw a free-form shape around an object.
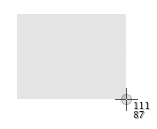
- Rectangular snip. Drag the cursor around an object to form a rectangle.
- Window snip. Select a window, such as a browser window or dialog box, that you want to capture.
- Full-screen snip. Capture the entire screen.
After you capture a snip, it's automatically copied to the Snipping Tool window. From there you can annotate, save, or share the snip. The following procedures show how to use Snipping Tool.
- Open Snipping Tool - Select the Start button, type snipping tool in the search box on the taskbar, and then select Snipping Tool from the list of results.
- Capture a snip - In Snipping Tool, select Mode (in older versions, select the arrow next to the New button), choose the kind of snip you want, and then select the area of your screen that you want to capture.
- Annotate a snip - After you capture a snip, you can write or draw on or around it by selecting the Pen or Highlighter buttons. Select Eraser to remove the lines you've drawn.
- Save a snip - After you capture a snip, select the Save Snip button. In the Save As box, type a file name, location, and type, and then select Save.
- Share a snip - After you capture a snip, select the arrow next to the Send Snip button, and then select an option from the list.
How to take a screenshot of your Mac computer screen
You can capture your entire screen or just a selected portion of it. The screenshot is automatically saved to your desktop.
Using Keyboard Shortcuts to take a screenshot of your entire screen
- Press Shift-Command (⌘)-3.
- Find the screenshot as a .png file on your desktop.
Using Keyboard Shortcuts to take a screenshot of a selected portion of your screen
- Press Shift-Command-4. The pointer changes to a crosshair.
- Move the crosshair to where you want to start the screenshot, then drag to select an area.
- While dragging, you can hold Shift, Option, or Space bar to change the way the selection moves.
- When you've selected the area you want, release your mouse or trackpad button. To cancel, press the Esc (Escape) key before you release the button.
- Find the screenshot as a .png file on your desktop.
Using Keyboard Shortcuts to take a screenshot of a window
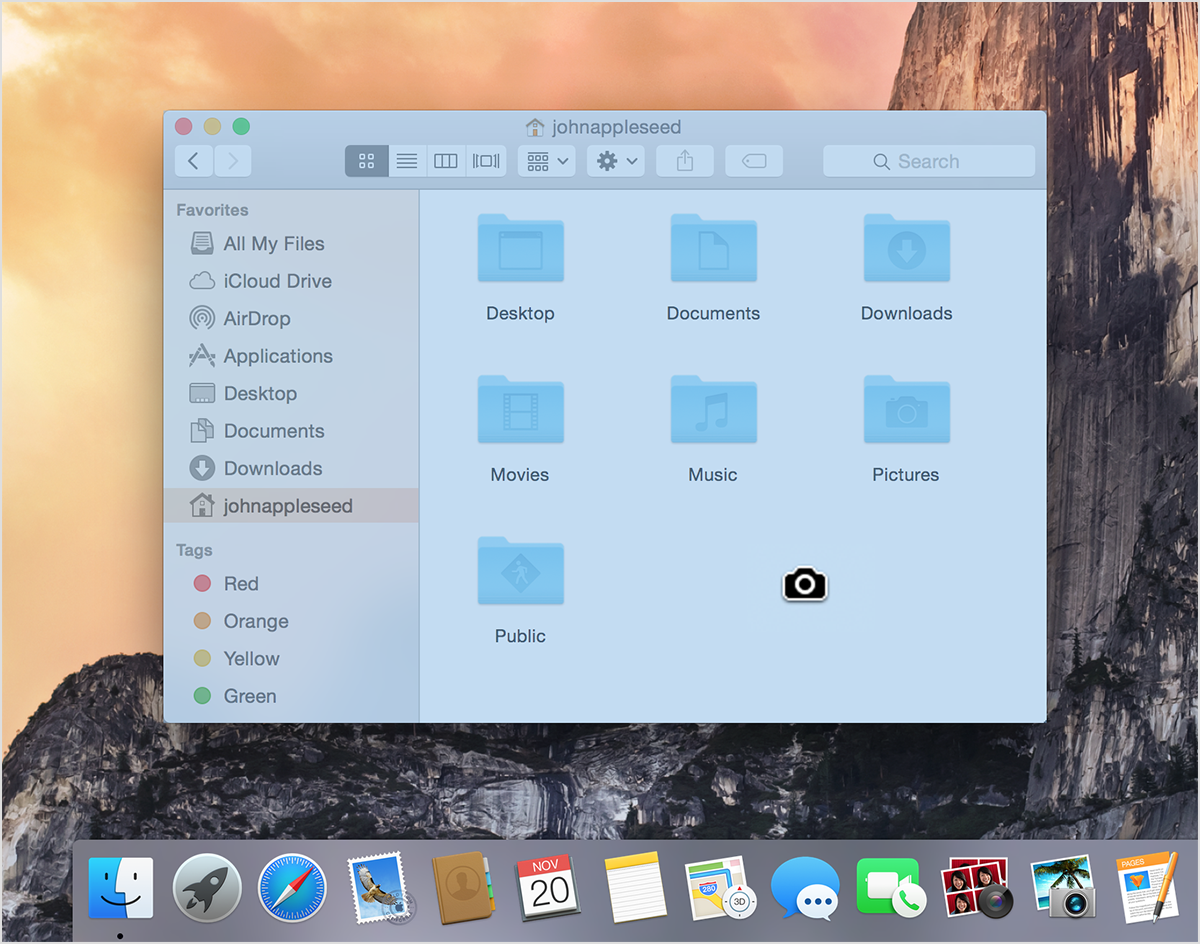
- Press Shift-Command-4. The pointer changes to a crosshair.
- Press the Spacebar. The pointer changes to a camera.
- Move the camera over a window to highlight it.
- Click your mouse or trackpad. To cancel, press the Esc (Escape) key before you click.
- Find the screenshot as a .png file on your desktop.
Continue to next module of training:The Internet and Cloud Services
Related articles
Related articles appear here based on the labels you select. Click to edit the macro and add or change labels.
|