Overview
This article will show how to set an alias for an active ArgoNet account.
Setting the Alias in MyUWF
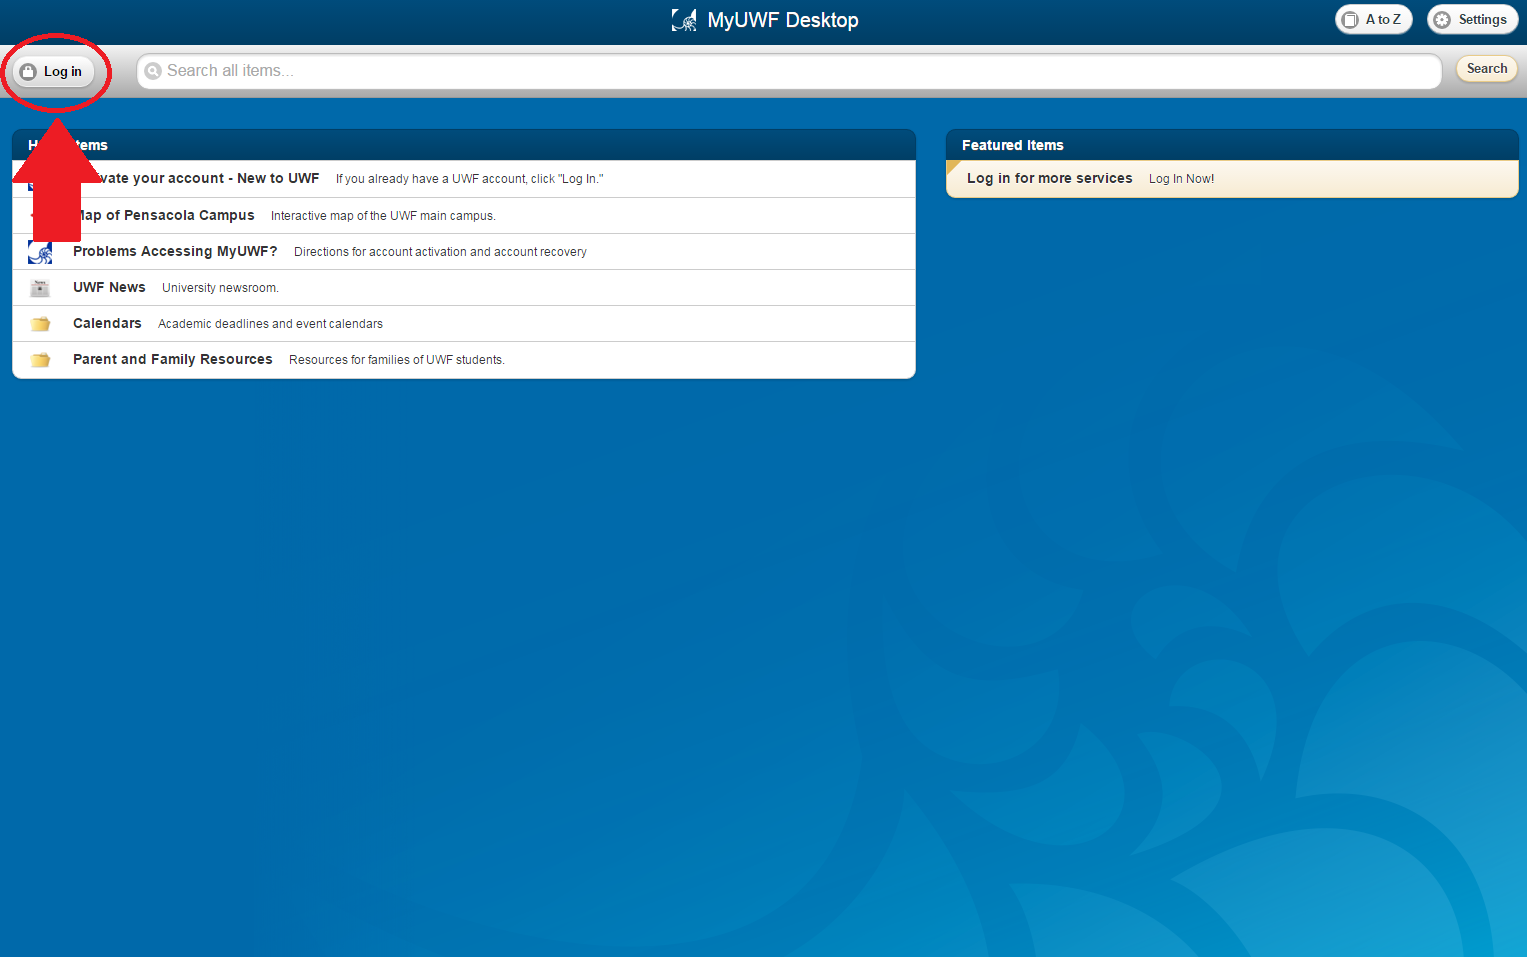
Step 1
Sign into MyUWF using your ArgoNet account credentials.
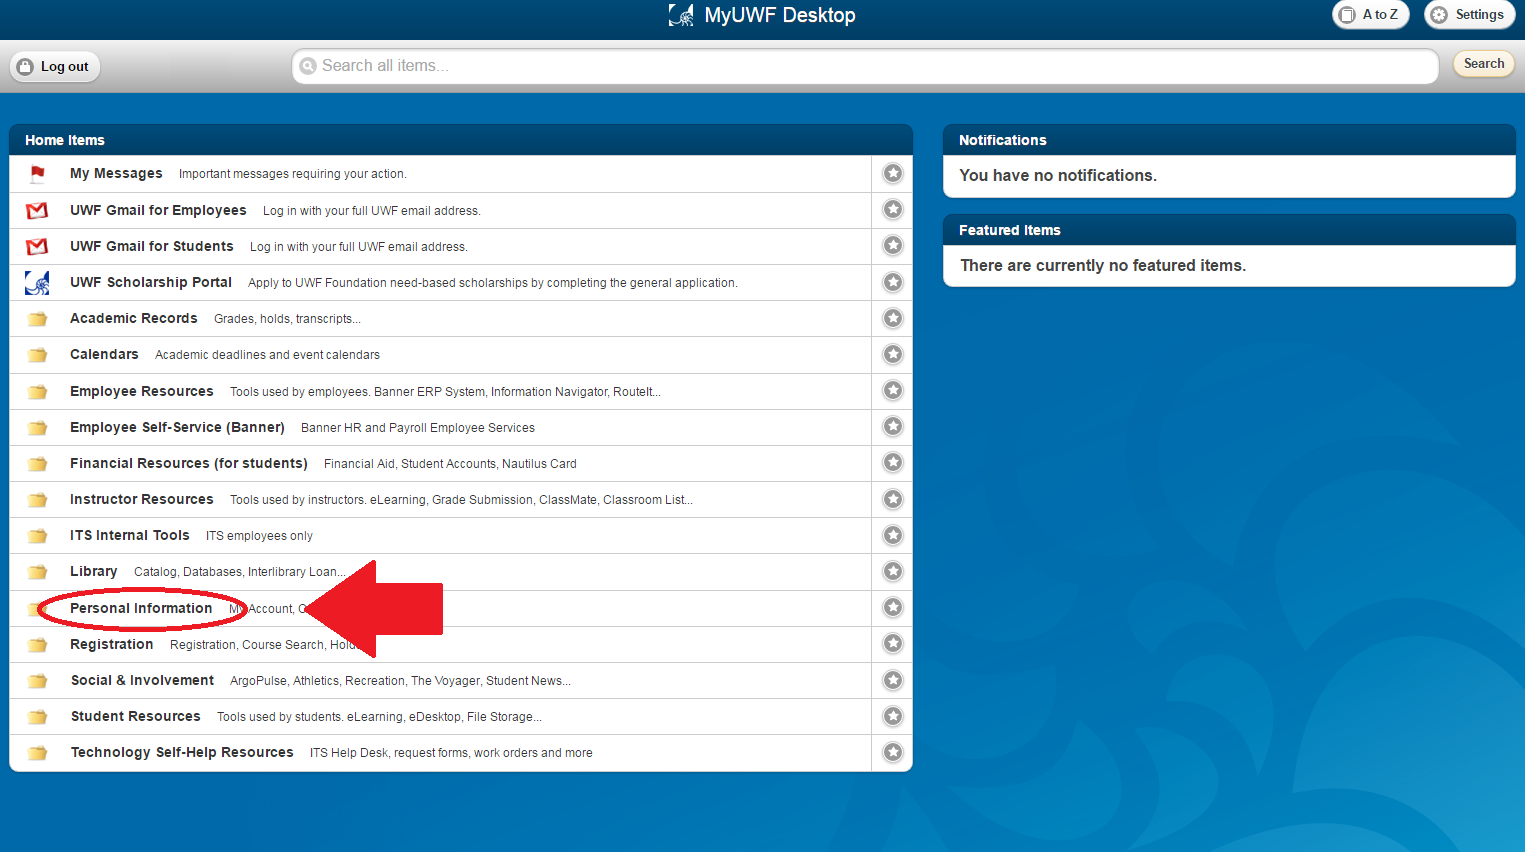
Step 2
Select the Personal Information folder on the MyUWF Desktop.
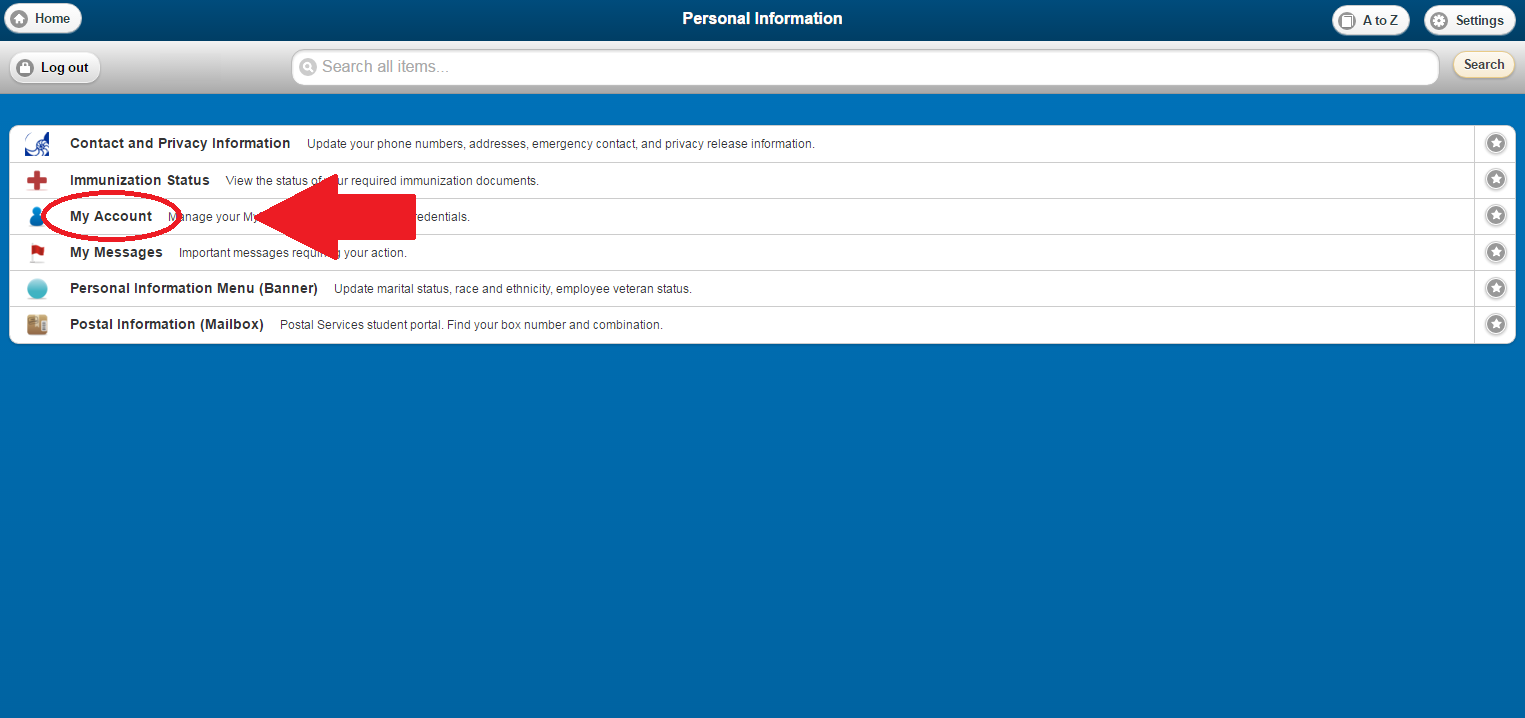
Step 3
Select the My Account application.
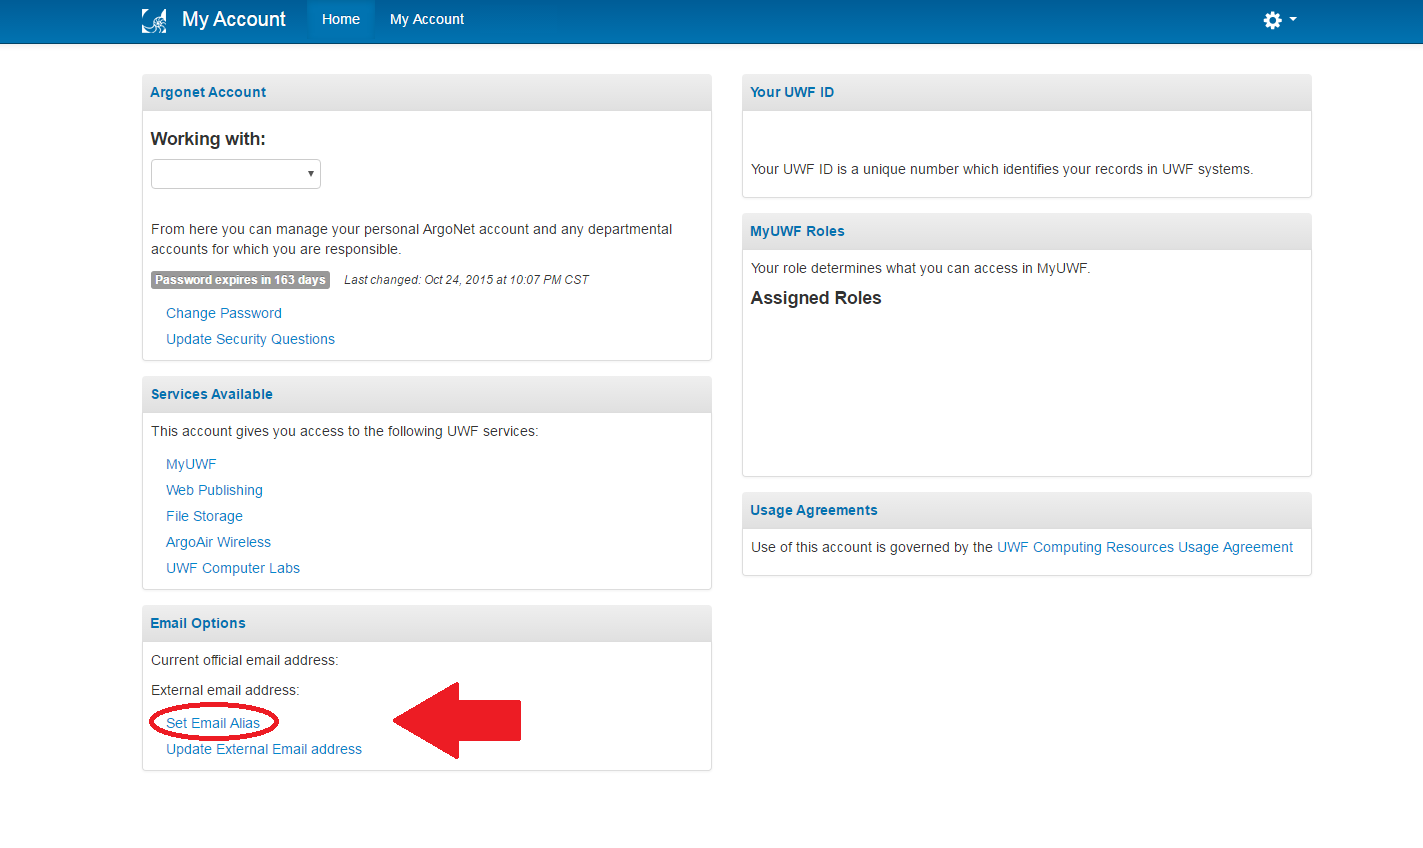
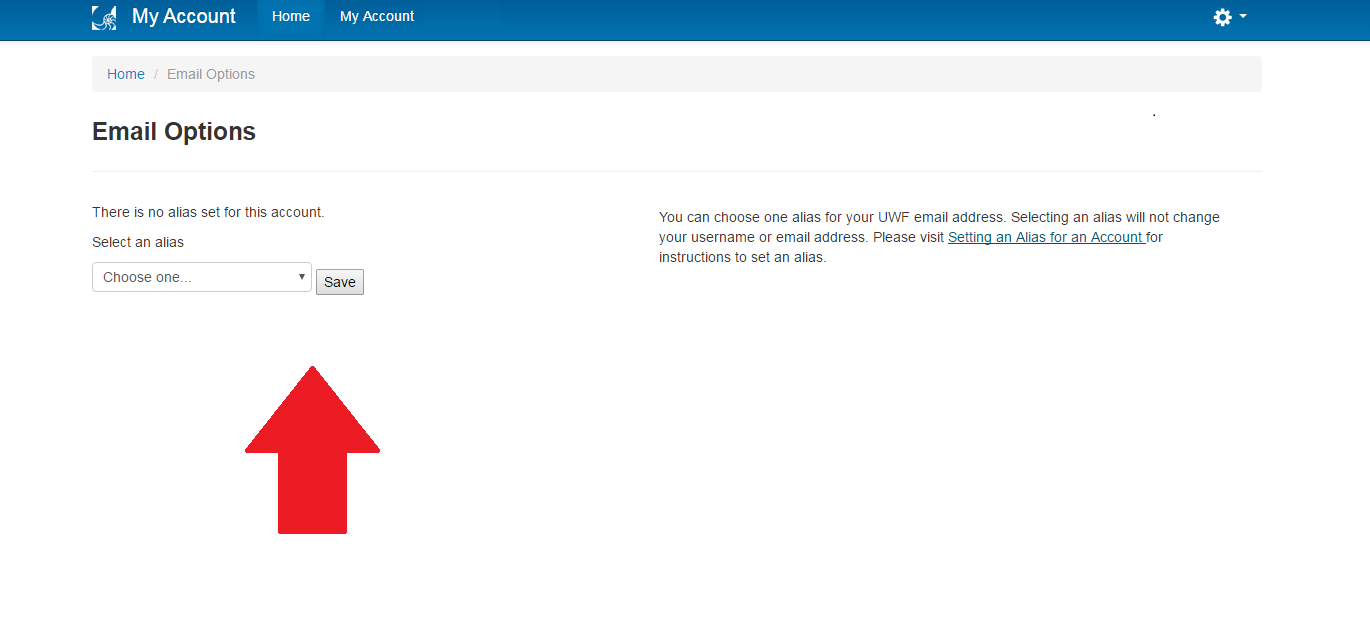
Step 4
Click on Set Email Alias.
Step 5
Select an alias from the dropdown menu and click the Save button.
Step 6
You have now successfully added an alias to your account. If you will be sending from the alias in Gmail (See steps below for configuration), please contact the ITS Help Desk by submitting an IT Help Request to have the alias set as your official email address.
Setting the Alias in Gmail
Step 1
Open your official UWF Gmail account.
Step 2
Go to the Gear in the upper-right hand corner, and select Settings

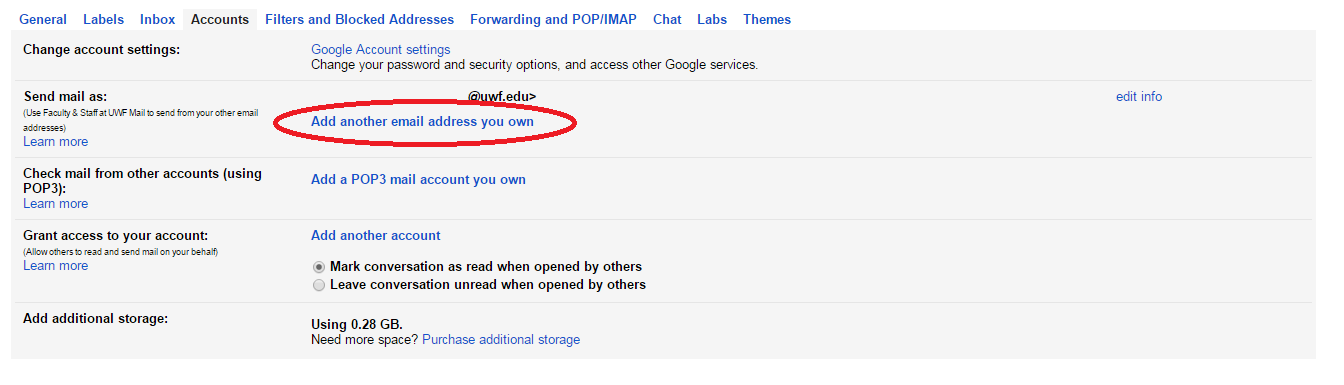
Step 3
In the Accounts tab, select Add another email address you own.
Step 4
In the pop up box, type in the alias you saved on your account in the Email address section. Click Next Step after this information is entered.
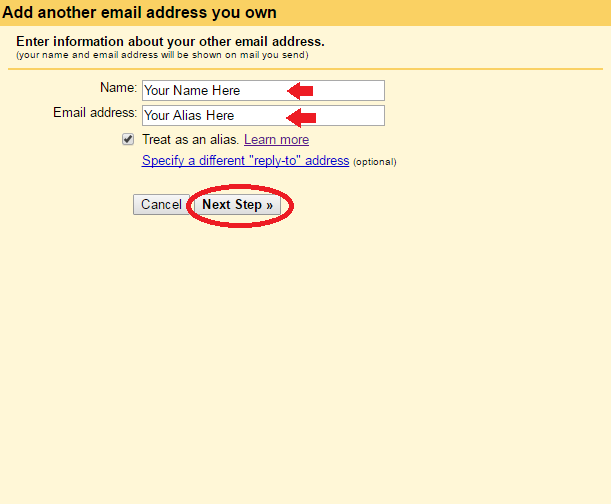
The pop up box may state that you need a verification code in order to apply the alias. Click the Send Verification option to send an email to your official UWF email with a verification code.
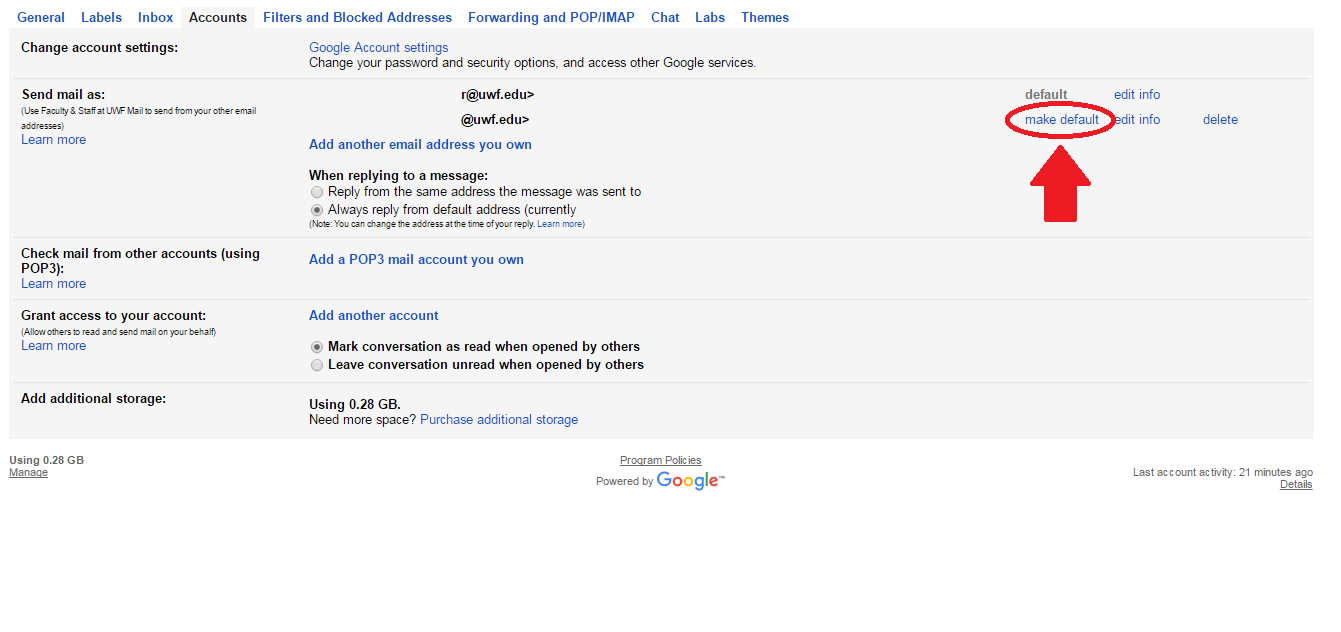
Step 5
The pop up box will close. Your alias will be displayed under your email address in the Send mail as section. Select the make default option next to the alias.
Step 6
Your emails will now be sent from the alias.