Overview
This article outlines the procedure of Connecting to ArgoAir on an Ubuntu or Linux Mint 17.3 based machine.
Instructions
Step 1
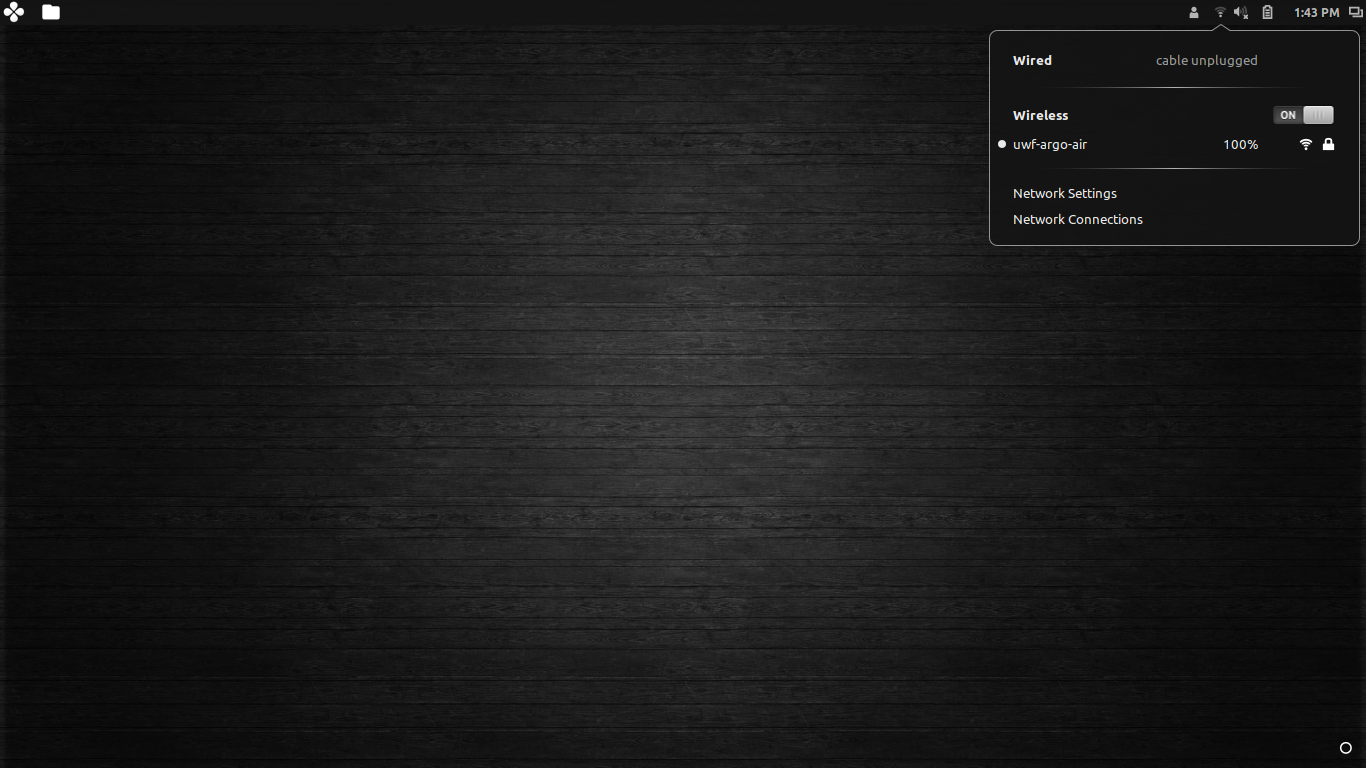
Navigate to the Network Manager, an applet included in the default panel.
Step 2
Select Network Settings. This will bring up a menu that will populate with available wireless networks. NOTE: Do NOT select "uwf-argo-air" in the menu at this stage. (See FAQ for details.)
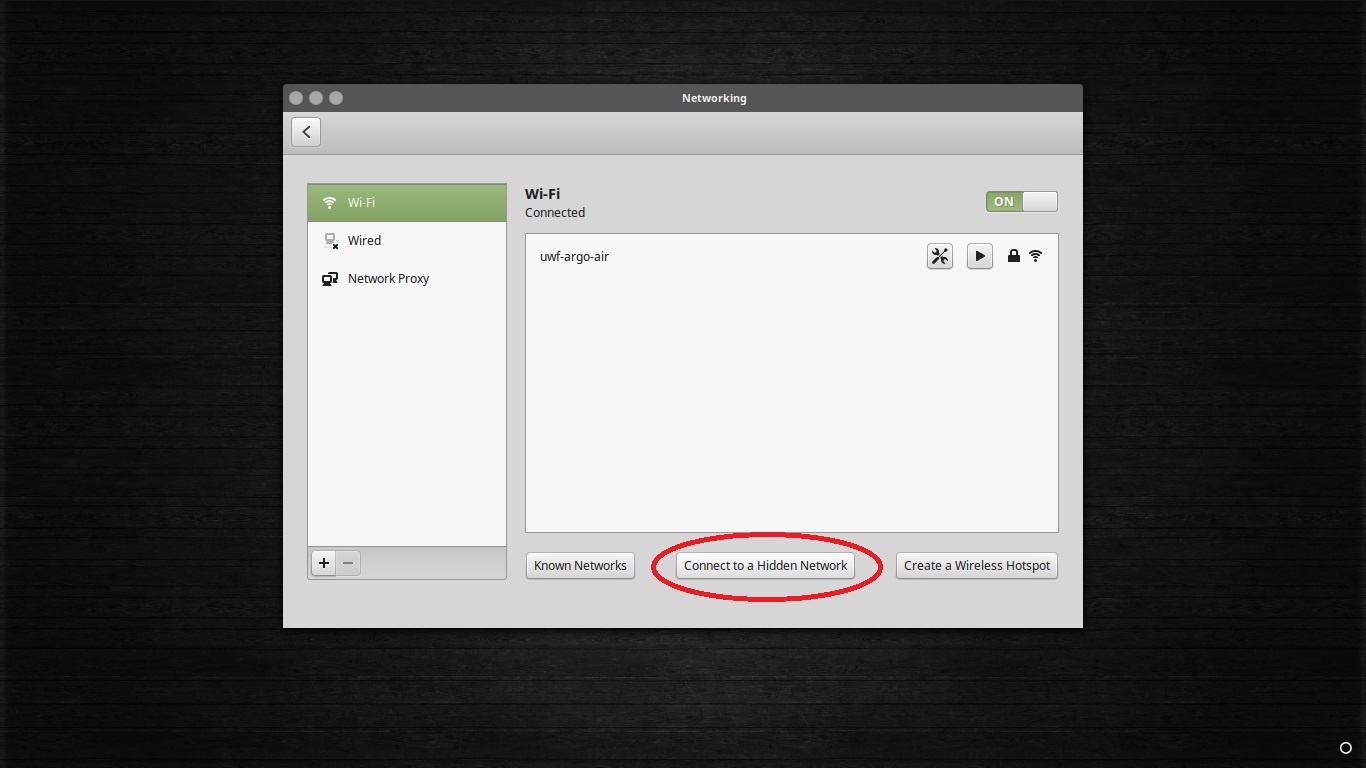
Instead, select "Connect to a Hidden Network."
Step 3
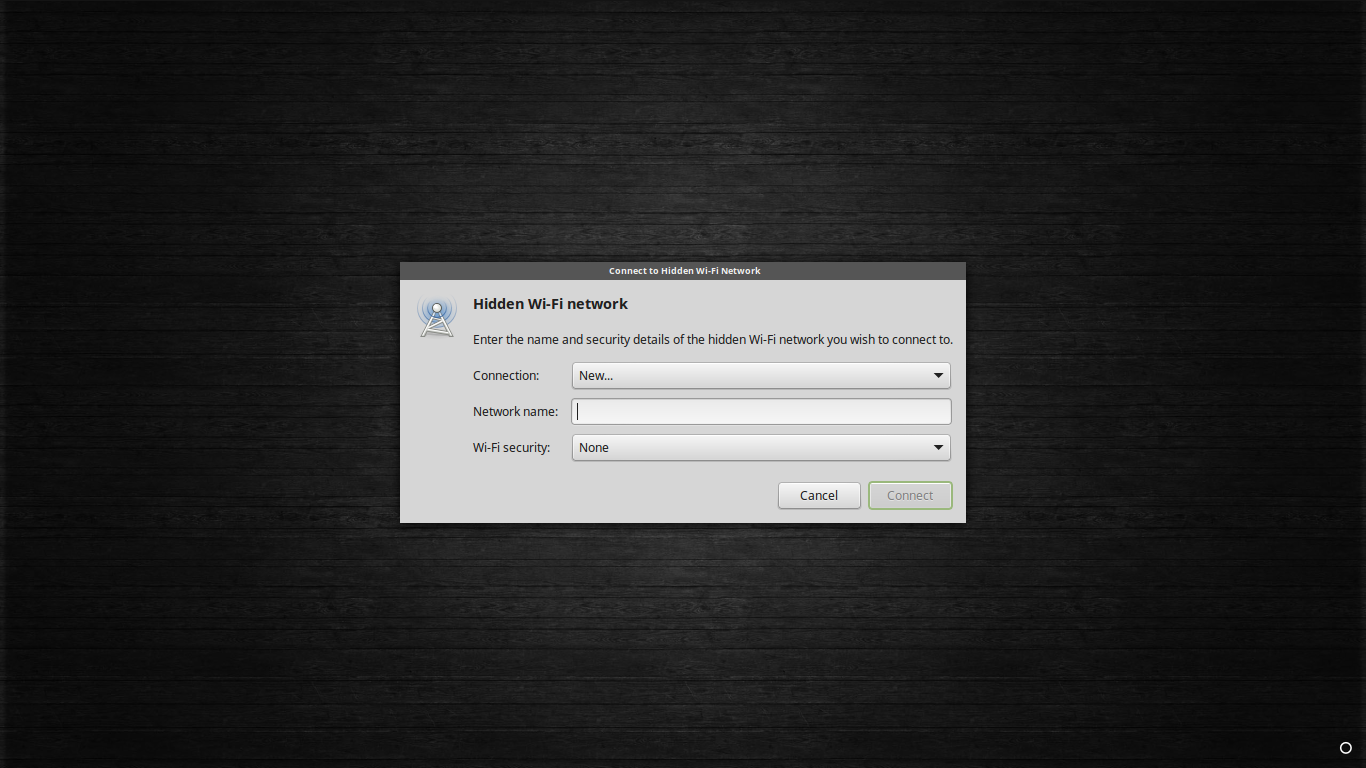
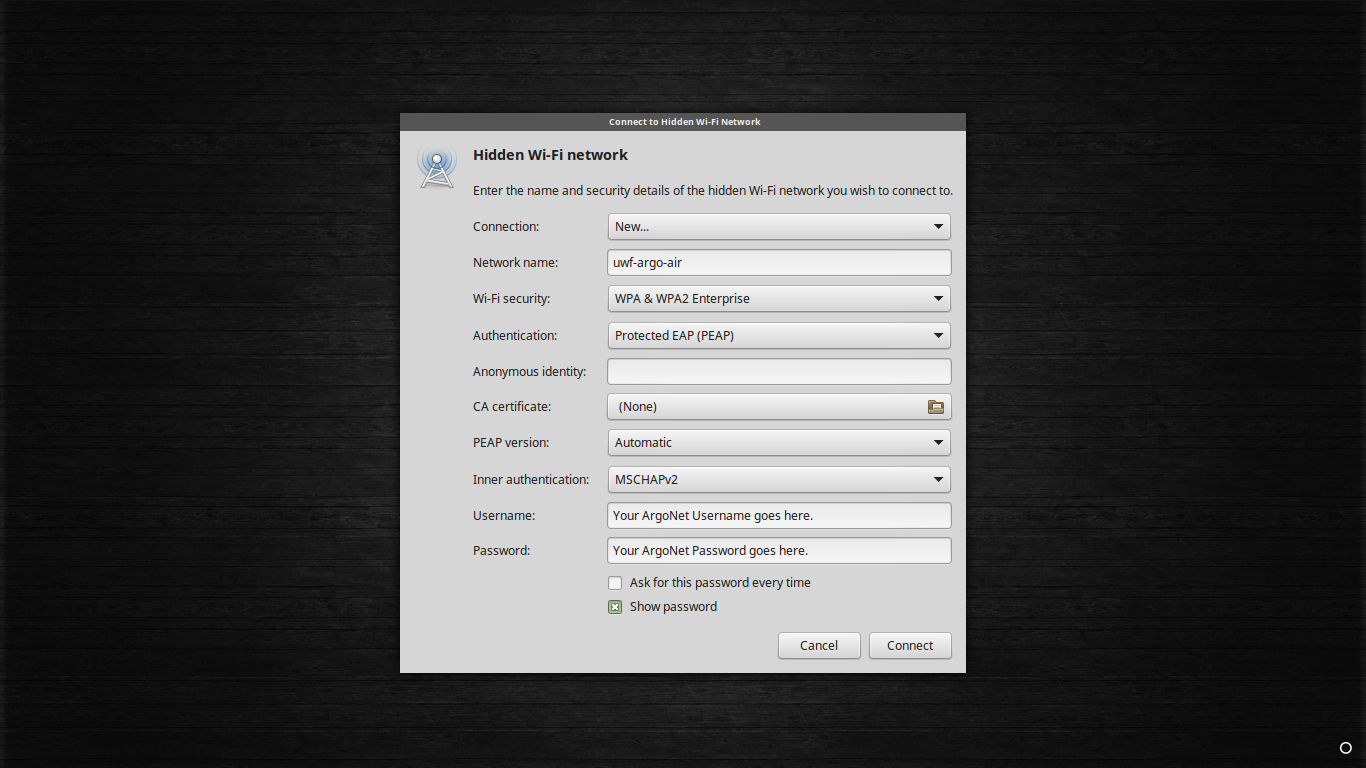
In the menu that appears, select the "New..." option in the Connection dropdown menu.
Type "uwf-argo-air" as the Network Name.
Step 4
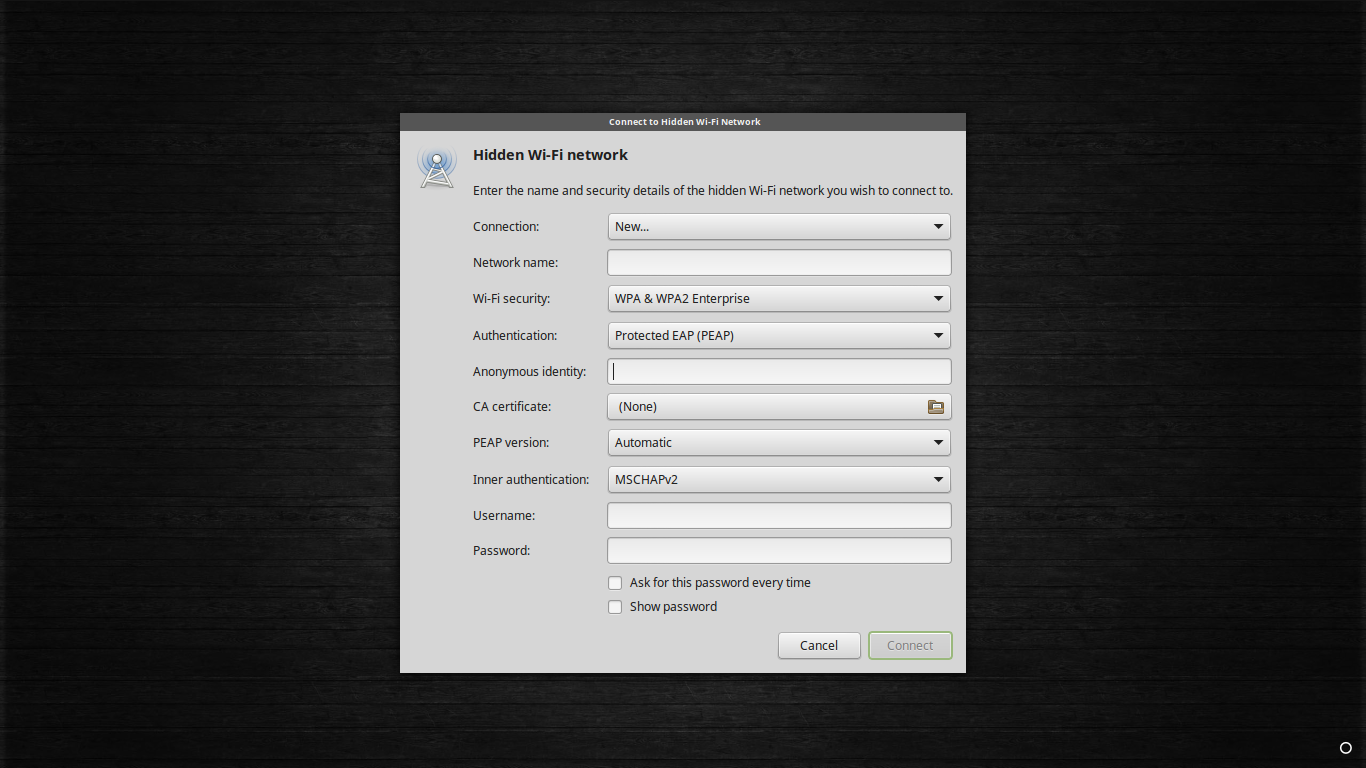
Select "WPA & WPA2 Enterprise" in the Wi-Fi security dropdown menu.
After selecting the security type, more fields should appear.
For the Authentication field, select PEAP in the dropdown menu.
Step 5
For the fields that have not been adjusted, select as follows:
- The Anonymous Identity field needs to remain empty.
- The CA Certificate needs to remain as (None).
- The PEAP version needs to be Automatic.
- The Inner authentication needs to be MSCHAPv2.
- The Username field needs to be the ArgoNet username.
- The Password field needs to be the ArgoNet password.
Step 6
Verify that all of the fields have been entered correctly. After doing so, select the "Connect" option in the bottom right corner of the window.
Step 7
At this point, the computer should connect to ArgoAir.