This page will replace Creating a Google Group for E-mail Distribution.
Overview
UWF students, faculty, and staff can create Native Google Groups, without needing to gain approval from ITS. Please note that Native Google Groups should be used primarily to manage contact lists. These contact lists can be used for emailing people, sharing files, or inviting individuals to Google Calendar events.
Prerequisites
- Learn what Groups are and why some find them useful
- Learn about the differences between Google Contacts, Native Google Groups, and Marina Groups
- Determine if a group already exists that could meet your needs
Instructions
Step 1
Go to Gmail.com and log in to your UWF account.
Log in to a departmental account, if possible!
Whoever creates a Native Google Group will own that group by default. If you create a Native Google Group using your student UWF account, then that account will own that group. The same goes for employees too.
Problem
When people leave UWF, and they owned Native Google Groups, those people will have to transfer ownership of those groups to someone else, before HR processes the necessary separation paperwork. This may become a problem if people forget to transfer ownership, or if these owners leave UWF and their Gmail accounts have already been downgraded.
Solution
Create the account using a departmental Gmail account – departmental Gmail accounts rarely leave, and whoever has access to the departmental Gmail account would have access to the Native Google Group too.
Log in to the departmental account first, then follow the instructions below. After creating the Native Google Group, you could determine who manages the group. Note that the only difference between a Google Group Manager and the Google Group Owner is the Owner changes who owns the group. See Managing Native Google Group membership and settings for additional details.
Step 2
Go to the Google Groups app. Click More to find the Google Groups app, if necessary.

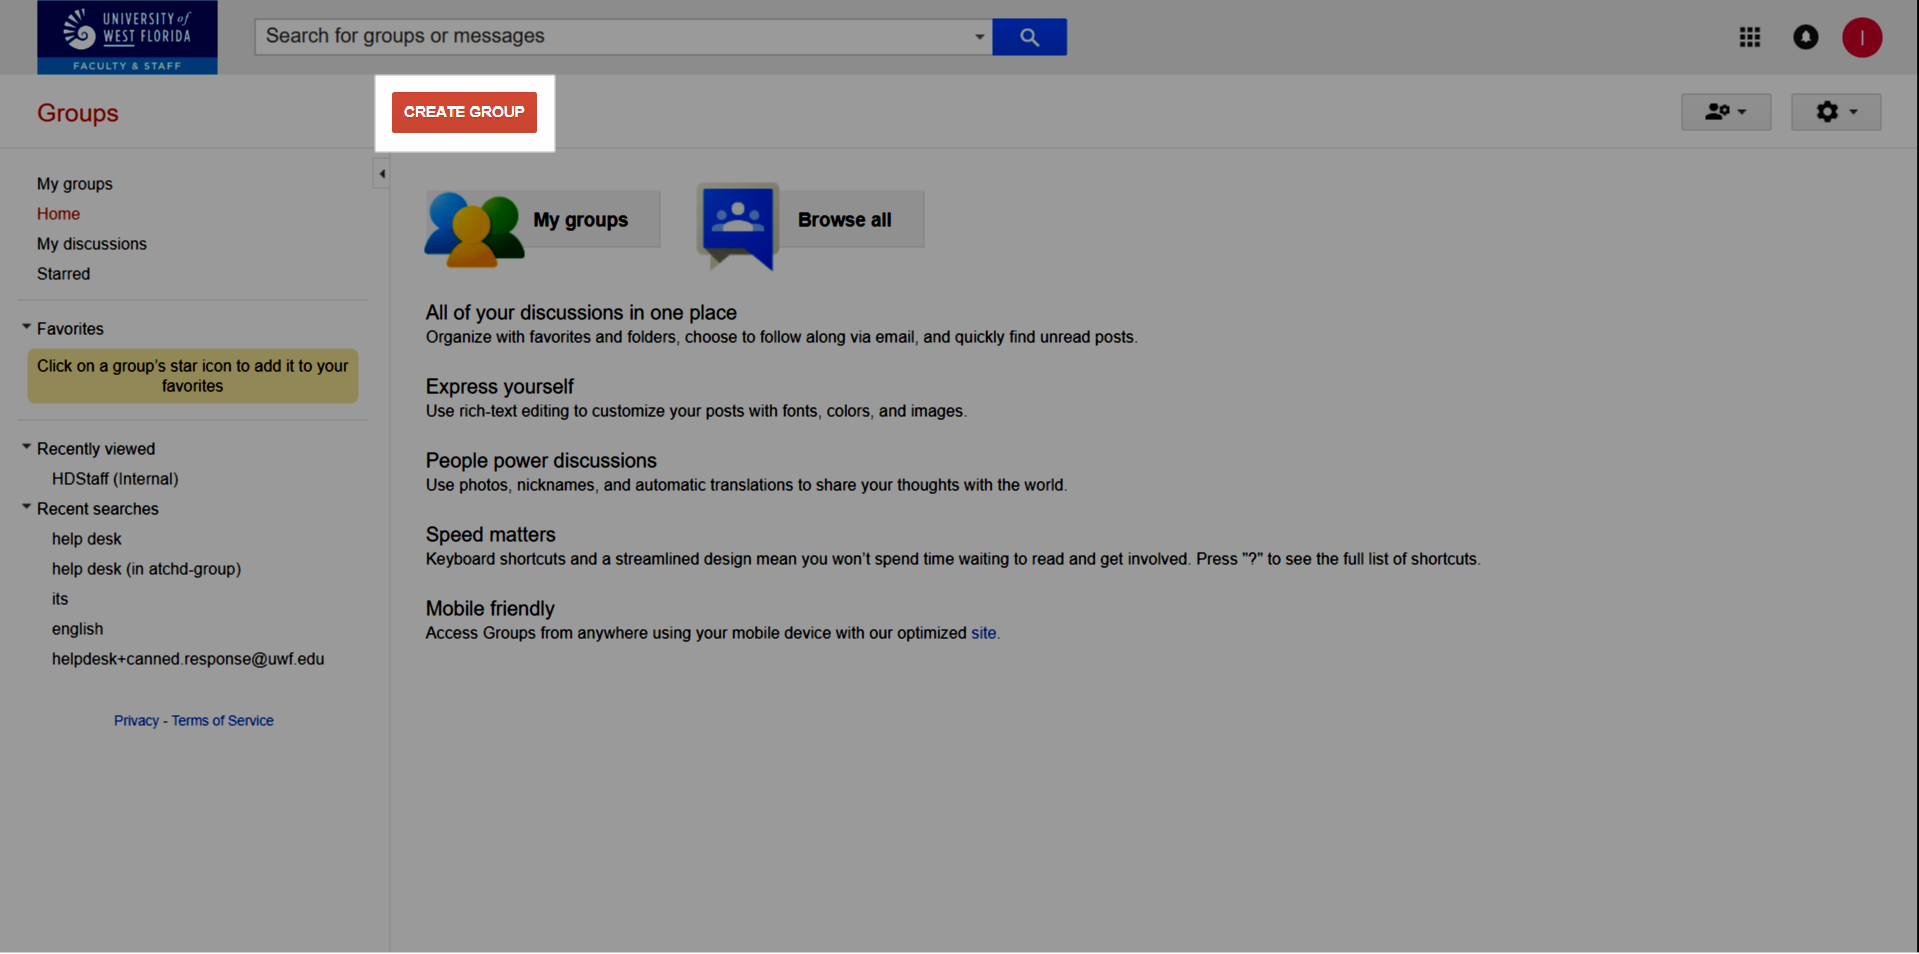
Step 3
Click Create Group.
Steps 4-10
| Screenshot | Step # | Instructions |
|---|---|---|
| 4 | Create a group name. This will become part of the group email address. The group email address file will be inserted automatically while you enter the group name. |
| 5 | Create a description for the group. This description should provide the purpose for the group's existence. | |
| 6 | Choose a group type:
| |
| 7 | Choose who can view topics:
| |
| 8 | Choose who can email the group:
| |
| 9 | Choose who can join the group:
| |
| 10 | Click Create. |

Step 11
Click Save my changes, and then Manage.
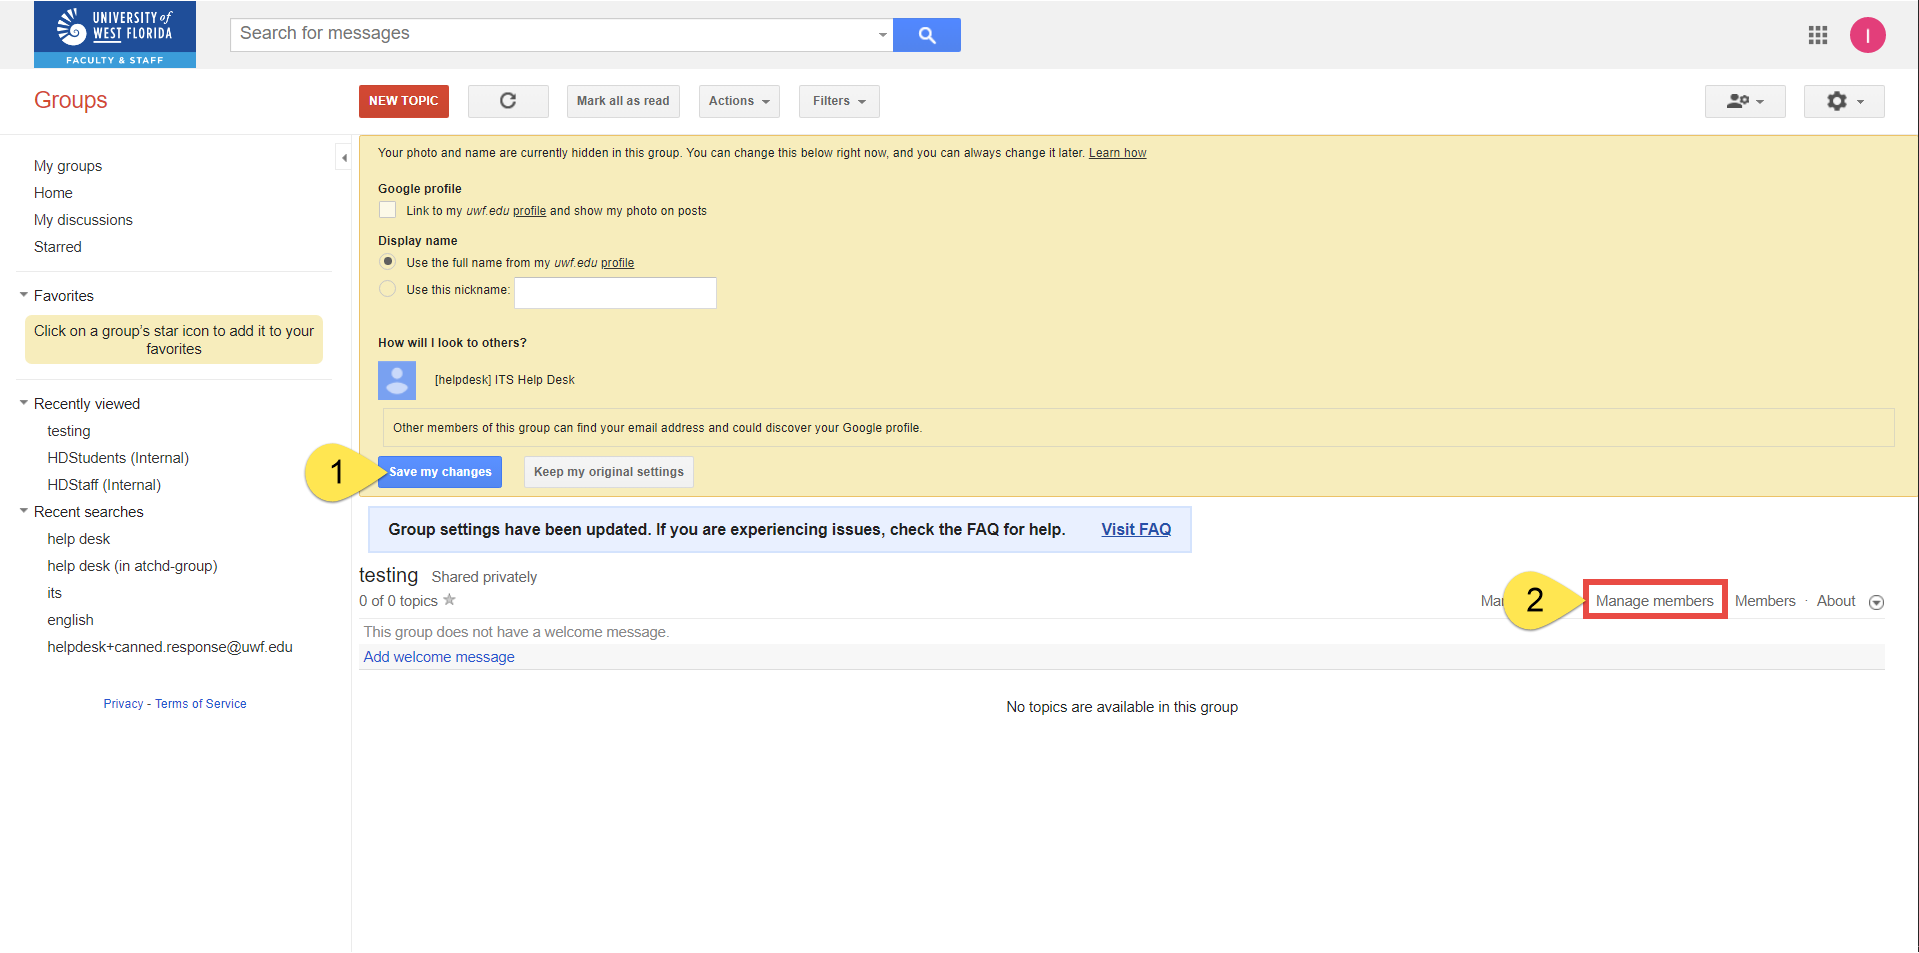
Step 12
Select all, then Actions >> Change delivery setting >> All email.

Step 13
Select all, then Actions >> Set posting permission >> Default group policy.

Step 14
Click Information >> Directory.
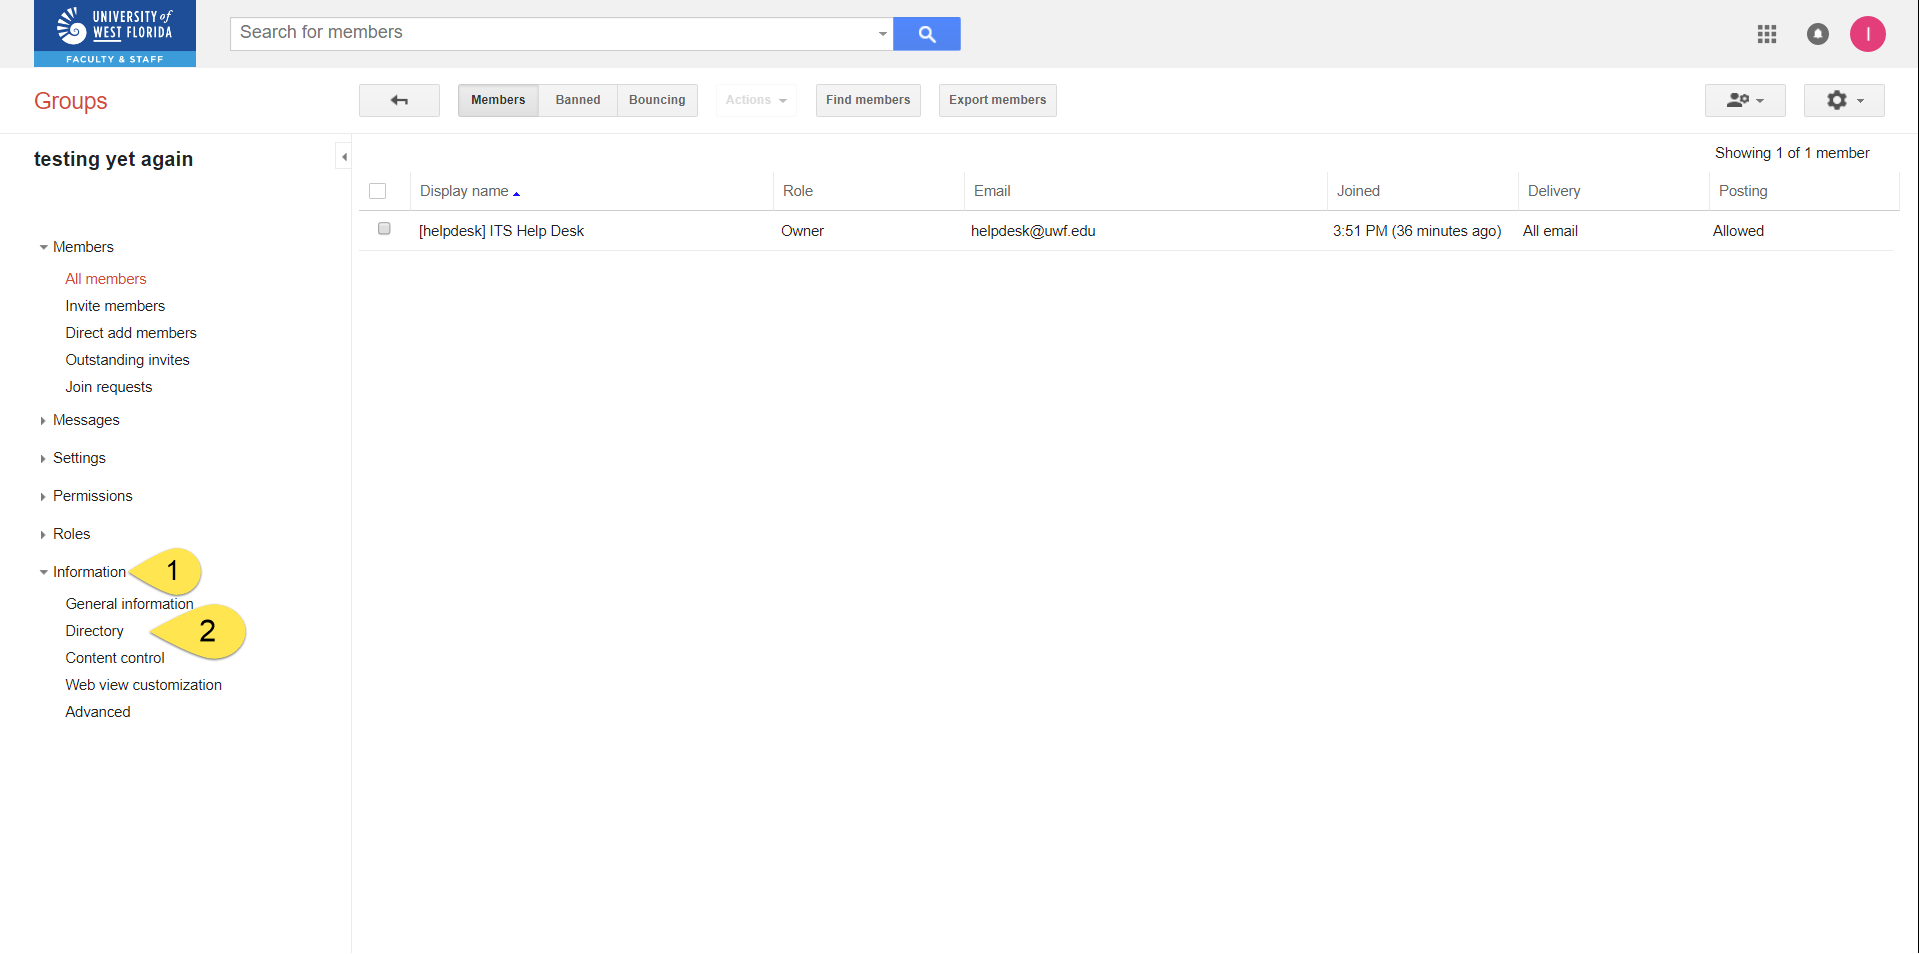
Step 15
Uncheck List this group in the directory. Then click Save.
Step 16
Go to Managing Native Google Group membership and settings to configure the settings for your new Native Google Group.
Related content
← Go back to Groups Guide