This page will replace Creating a Google Group for E-mail Distribution.
Overview
UWF students and staff can create Google Groups, without needing to gain approval from ITS.
Prerequisites
- Learn what Google Groups are and why some find them useful
- Learn about the differences between the Google Groups app and the Groups app in MyUWF
- Determine if a group already exists that could meet your needs
Instructions
Step 1
Go to Gmail.com and log in to your UWF account.
Log in to a departmental account, if possible!
Whoever creates a Google Group will own that group by default. If you create a Google Group using your student UWF account, then that account will own the Google Group. The same goes with employees too.
Problem
This may become a problem because of student/staff turnover. When someone leaves their position, that person will have to transfer ownership of the group to someone else. This may become a problem if someone forgets to transfer ownership, or if the person leaves UWF and their Gmail accounts have been downgraded.
Solution
Create the account using a departmental Gmail account. Log in to that account first, then follow the instructions below. You could then determine who manages the group – the only difference between a Manager and the Owner is the Owner change who owns the group. See Managing Google Group membership for additional details.
Step 2
Go to the Google Groups app. Click More to find the Google Groups app, if necessary.

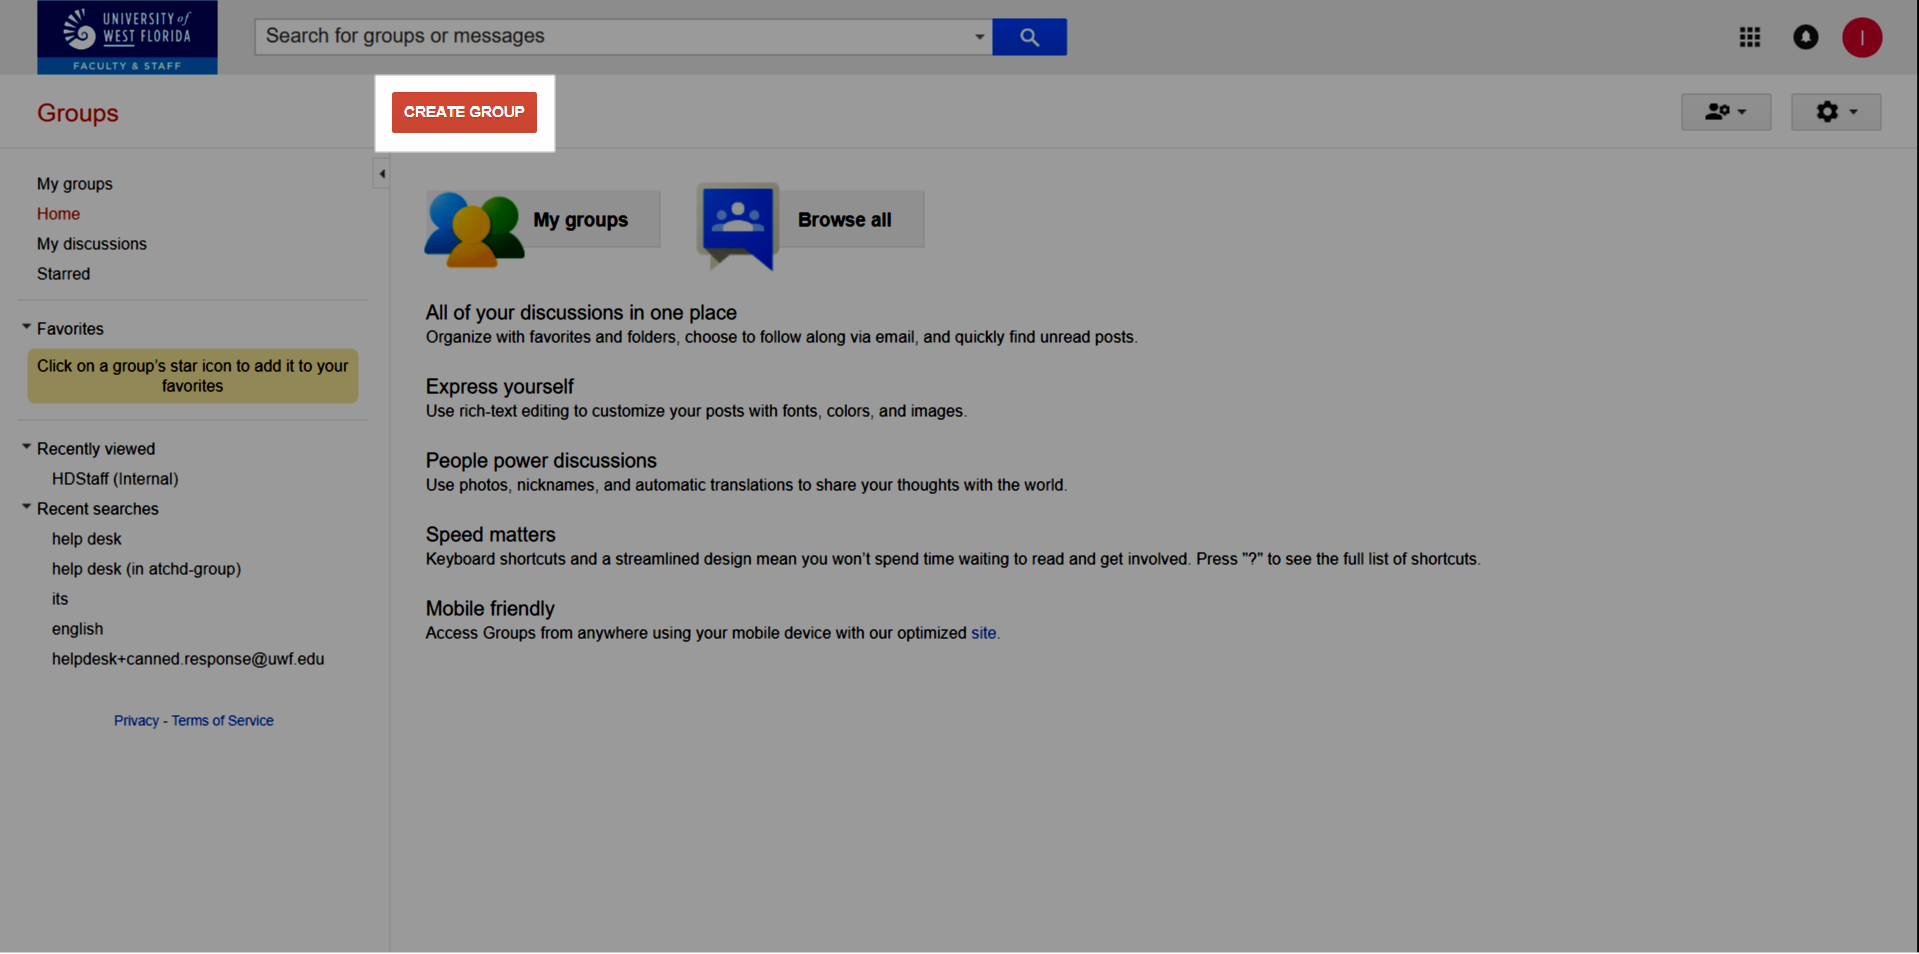
Step 3
Click Create Group.
Steps 4-10
| Screenshot | Step # | Instructions |
|---|---|---|
| 4 | Create a group name. This will become part of the group email address. The group email address file will be inserted automatically while you enter the group name. |
| 5 | Create a description for the group. This description should provide the purpose for the group's existence. | |
| 6 | Choose a group type:
| |
| 7 | Choose who can view topics:
| |
| 8 | Choose who can email the group:
| |
| 9 | Choose who can join the group:
| |
| 10 | Click Create. |

Related content
← Go back to Google Groups Guide
- adding members to group
- allowing cross-domain members