Overview
| Excerpt |
|---|
Schedule Planner is a tool designed to assist students with creating an ideal class schedule, taking in to account any other regularly scheduled events or day/time preferences a student may have. |
For additional help, please see the Using Schedule Planner at the bottom of the page.
...
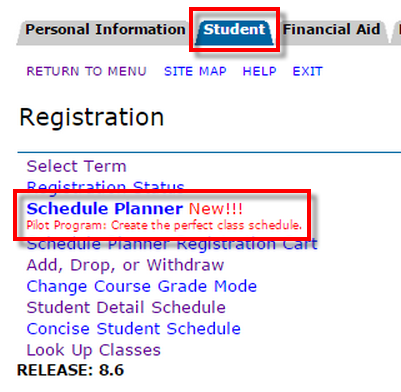
Once in the Registration Menu, select "Schedule Planner" in the "Student" tab.
Step 3
Select the desired term from the drop down menu.

Step 4
A campus can then be selected; multiple or all campuses can also be selected based on preference.
...
- In the top right corner of the page are short Help Videos that provide detailed instructions on how to use Schedule Planner.

- From the Course Status drop down menu, choose the types of courses you wish to be able to view and add to your schedule. The options are:
- Open Classes Only- pending any holds, prerequisites, or other course restrictions, you should be able to register for these courses.
- Open & Full w/ Waitlist Open- this will show open courses and full/closed courses that have seats available on the waitlist. See Using Waitlists for additional information.
- Open & Full- will show ALL courses; open courses, full/closed courses with waitlist space available, and full/closed courses with full waitlists.

Step 7
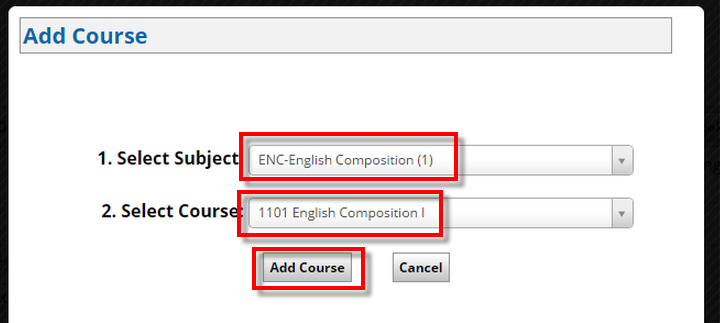
From the home screen, desired courses can be added by clicking on the "Add Course" option. Honors courses are marked with a Star.
For example, if ENC1101 is the desired course, select the subject code "ENC", and the course number "1101". Then, click "Add Course". This course option will then be added to the "Courses" list.

Step 8
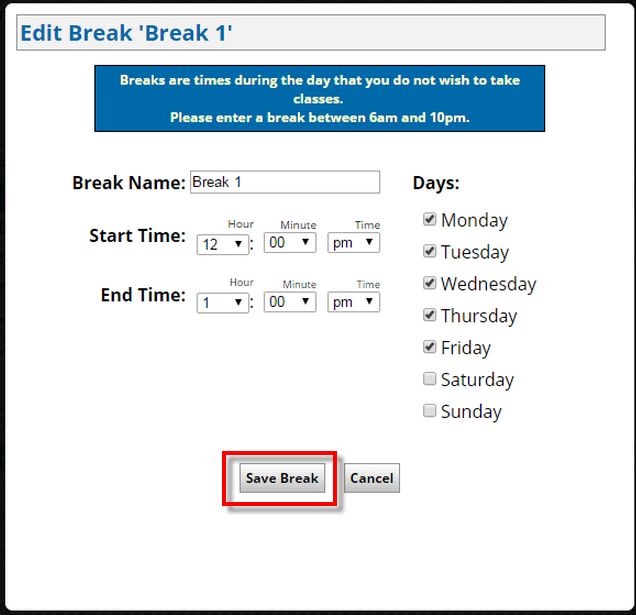
Before generating schedule options, Breaks may be added to the schedule.
...
You may assign you break a name, then input the Start and End times of the break, as well as choose the appropriate days.
Step 9
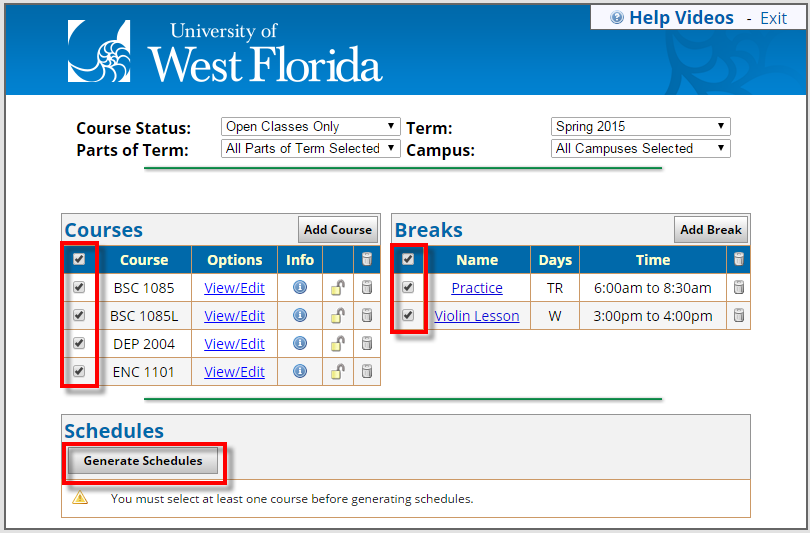
Once the Breaks and Courses have been added, clicking "Generate Schedules".
- Make sure all desired classes have the box checked next to the course number. This will display all possible options with available classes.
- Closed classes will not be considered as a schedule option.
Step 10
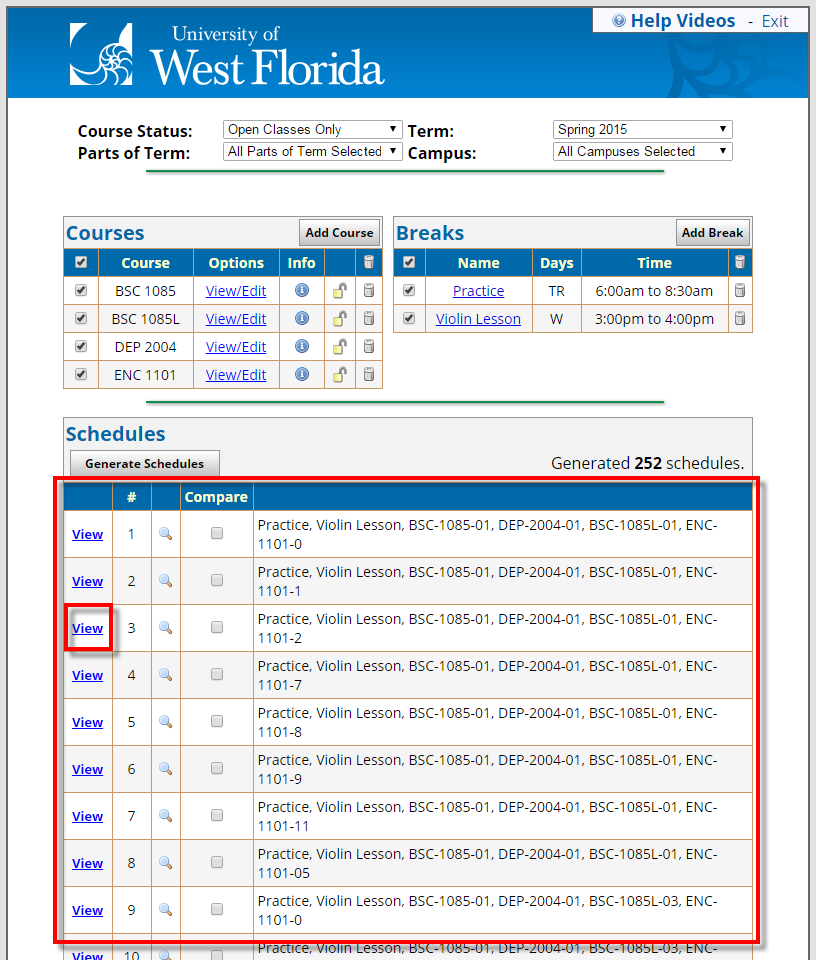
Possible schedules based on the criteria entered (campus, courses, breaks, days/times) will appear in the "Schedules" portion of the home page.
- Click the "View" link to view the details of the generated schedule.
Step 11
You can compare potential schedules by selecting multiple options in the Compare column, the click "Compare".
...
- This will send the courses to the Registration Cart. Adding classes to your cart will automatically save the selected classes and may be viewed by your advisor.
- You may also print the potential schedule by selecting "Print Page".

Step 13
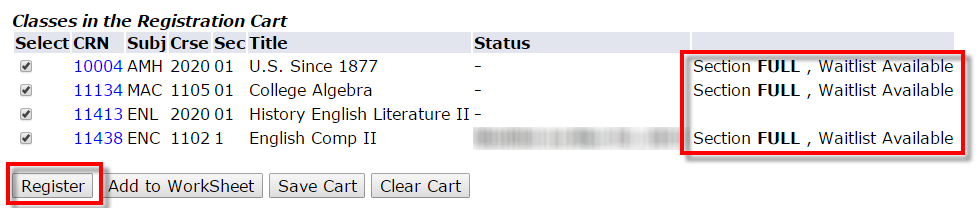
In your cart, you will see the courses you selected. If the course is full, but has waitlist seats available, you will see this in the far, right-hand column.
Once ready to actually register for the courses, click "Register".
- Registered and waitlisted courses should now appear in the MyClasses app and your detailed schedule in MyUWF. See Using Waitlists for more information.
- If you are attempting to register prior to your Time Ticket becoming open, you will receive an error when you click "Register"; please choose the "Save Cart" option (shown below) and attempt to register again when your Time Ticket opens.
- Holds on your account will also prevent registration. For information on both how to view your Time Ticket and Holds, please see Viewing Student Registration Status.
...