Overview
The direct supervisors of the various UWF tutoring services must give their staffs certain privileges so that they may perform certain tasks.GradesFirst User Roles that UWF Tutoring Services Need to Know
GradesFirst uses many user roles restrict certain privileges to certain populations. Although there are many user roles, the direct supervisors of the various UWF tutoring services should know of just four of them:
Tutor – student tutors for the UWF tutoring services
Tutor Manager – managers of the UWF tutoring services
Tutor Administrator – direct Supervisors of the UWF tutoring services
Kiosk Administrator – employees who can step up a GradesFirst Kiosk
Some of the major differences between these user roles are outlined below:
Major Differences
Instructions
Step 1
The direct supervisors of the various UWF tutoring services should already have the "Tutor Administrator" user role in GradesFirst. Review insert link here that explains how people can check their roles. As of August 19, 2014, the following supervisors should have the "Tutor Administrator" user role:
Mamie Hixon, Writing Lab Director
Patricia (Varlene) Hartley, ACE Lab Coordinator
Step 2
Have a list of new hires handy. You will need their names and UWF Gmail address (e.g., abc12).
Step 3
Open any web browser (Internet Explorer, Firefox, Chrome, Safari, etc.). Go to uwf.gradesfirst.com.
Step 4
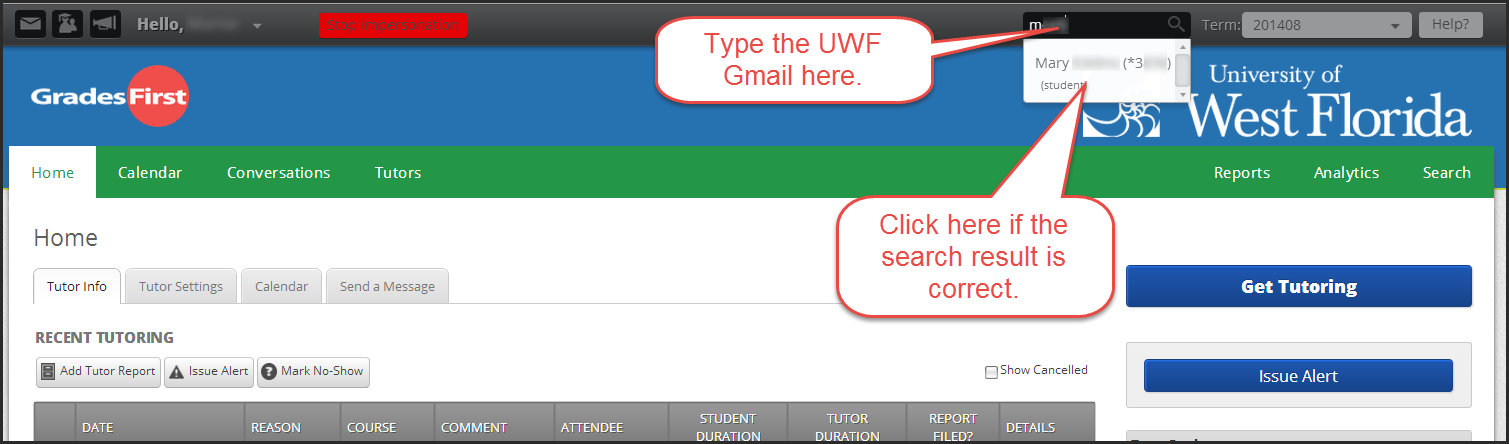
Click on the magnifying glass in the top right corner of the screen.

Step 5
The magnifying glass should have changed into a search field. Type the UWF Gmail of a new hire in this field (e.g., abc12). When you are finished typing, only one result should appear below the search field, and the search result should contain the new hire's name and the last four digits of his or her UWF student ID number. Click the result if it is correct.
*If typing the UWF Gmail address doesn't yield the correct result, delete the address and type the student's first and last name.
Step 6
The new hire's profile page should appear. Click on the "Edit User Settings" link on the right side of the screen.

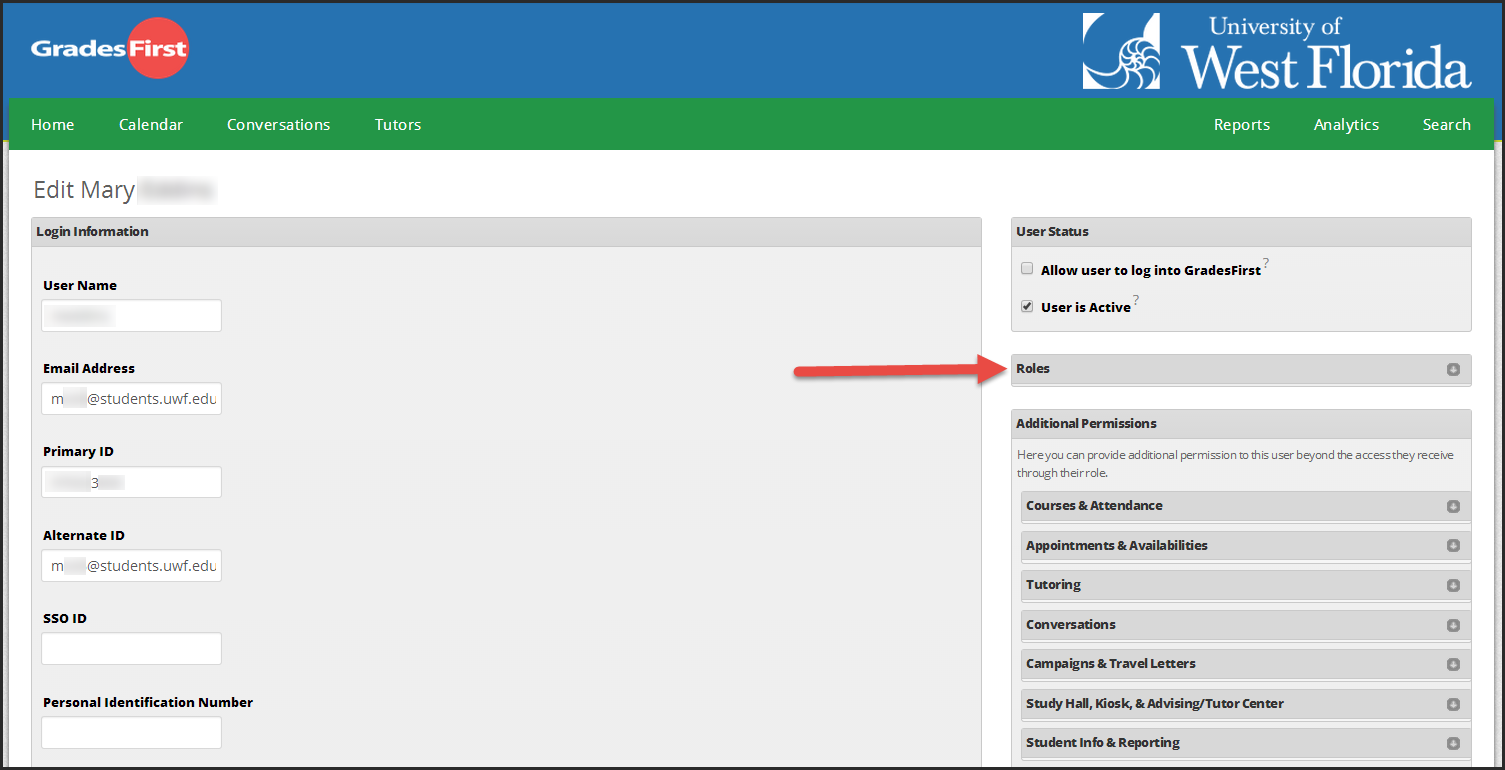
Step 7
You should be on the "Edit (Student)" page. Click on the "Roles" heading on the right side of the screen.
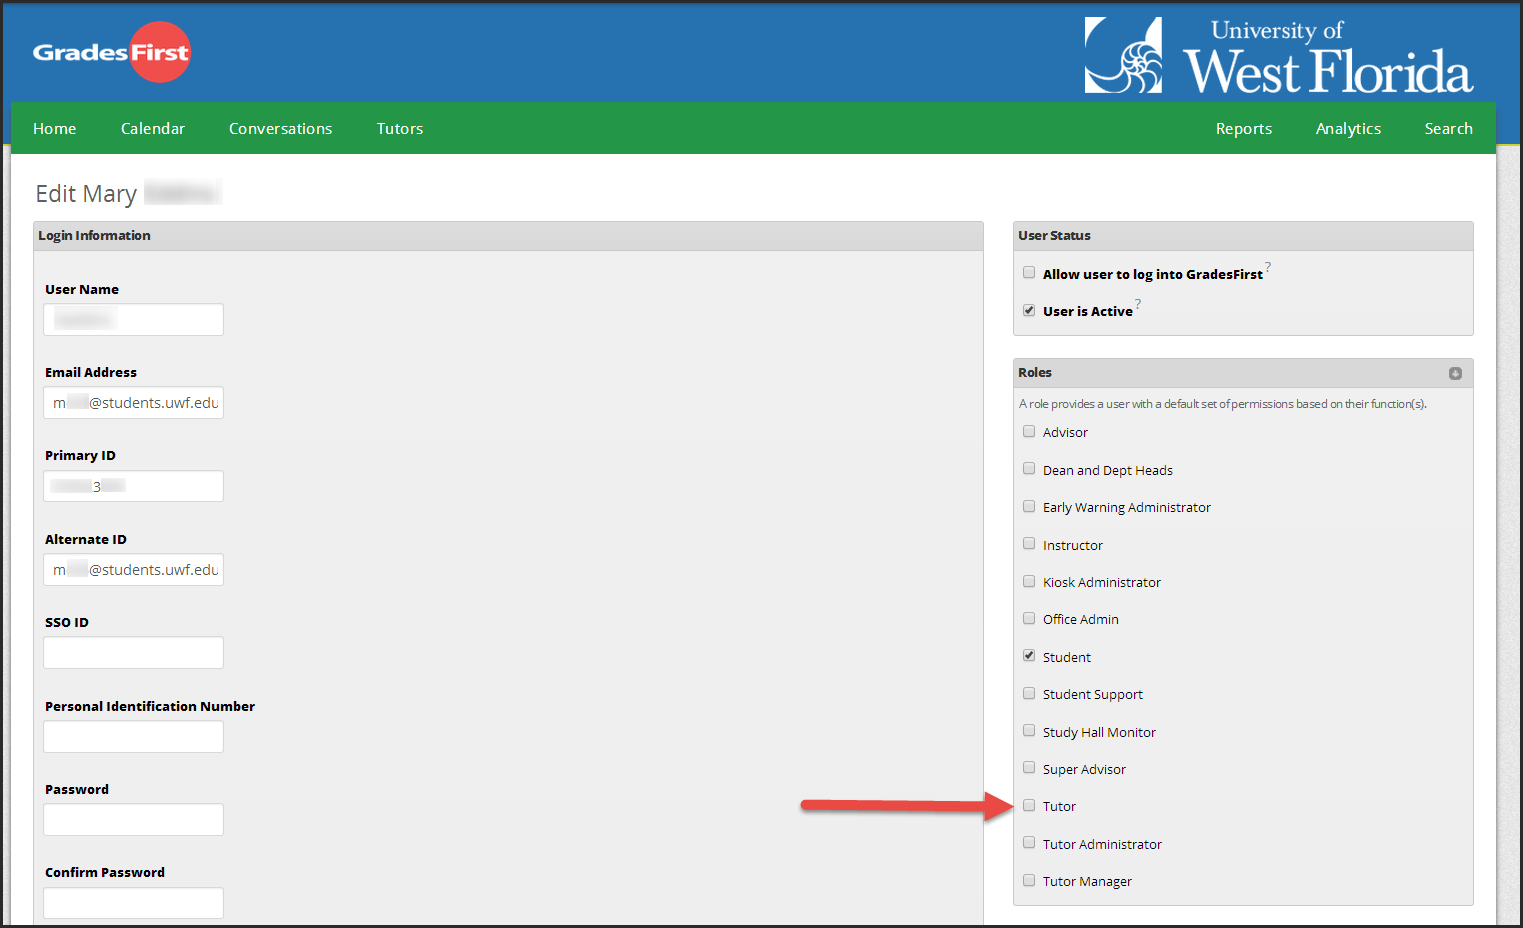
Step 8
A menu should extend from the "Roles" heading. Check the box beside the "Tutor" role.
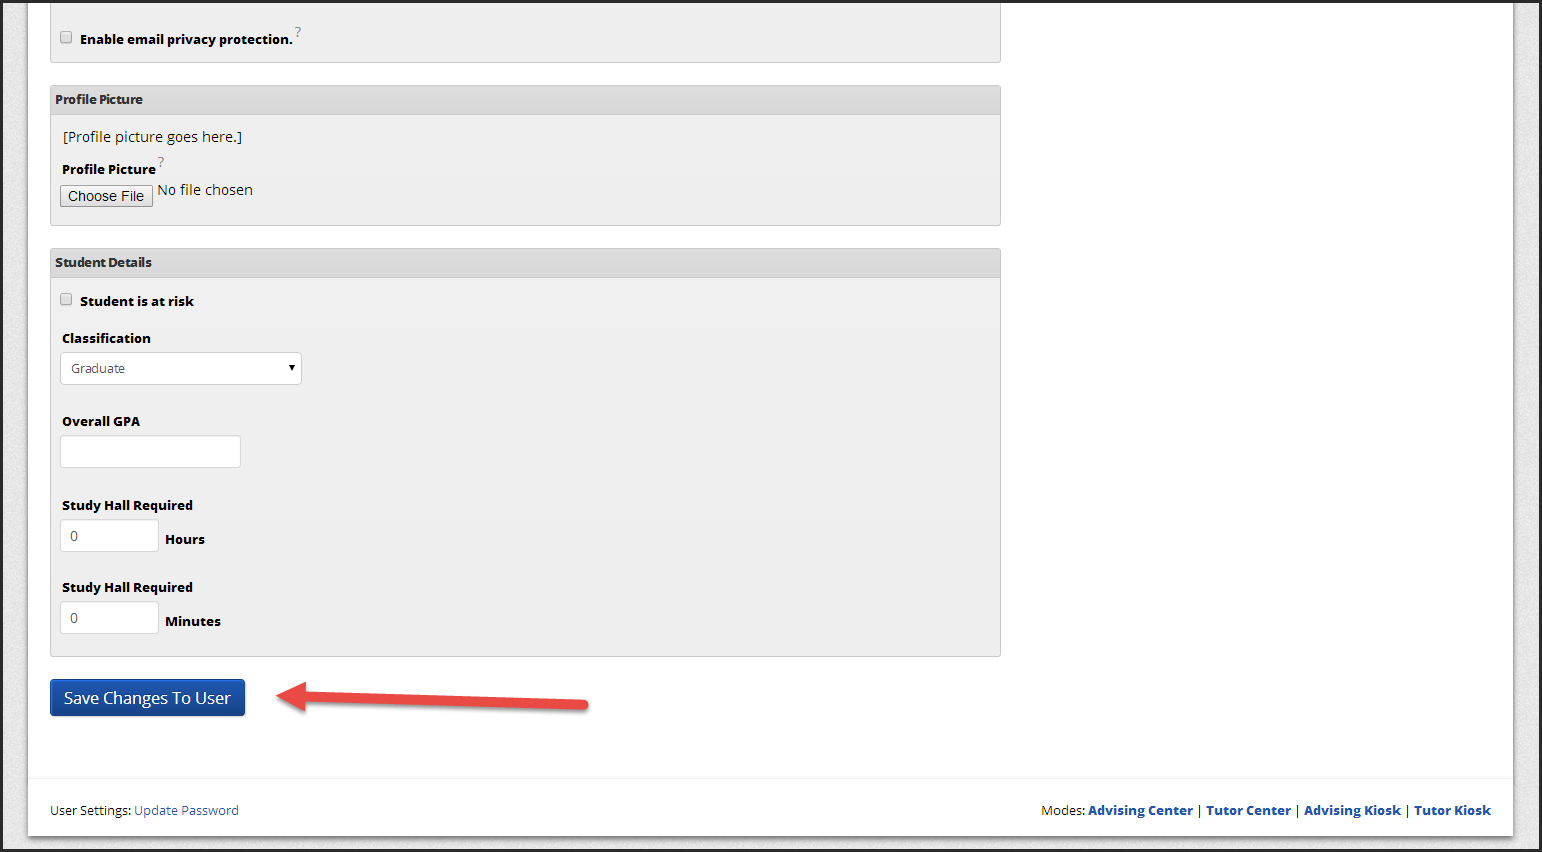
Step 9
Scroll down to the bottom of the page. Click the blue "Save Changes to User" button.
Step 10
The new hire should now be able to schedule appointments.
Step 11
To add more new hires, go to step 4 and follow the instructions.
FAQs
Previous/Next Steps
(Enter text here)
Contributors
Interested Parties
| Process Owner | Academic Affairs |
|---|---|
| Status | DRAFT |
| Last Reviewed | |
| Last Edited | |
| Notes | |
| Template | BPL Procedure v.1.0.1 |