This article outlines the procedure of Connecting to Argo Air on an Ubuntu or Linux Mint 17.3 based machine. |
Navigate to the Network Manager, an applet included in the default panel.

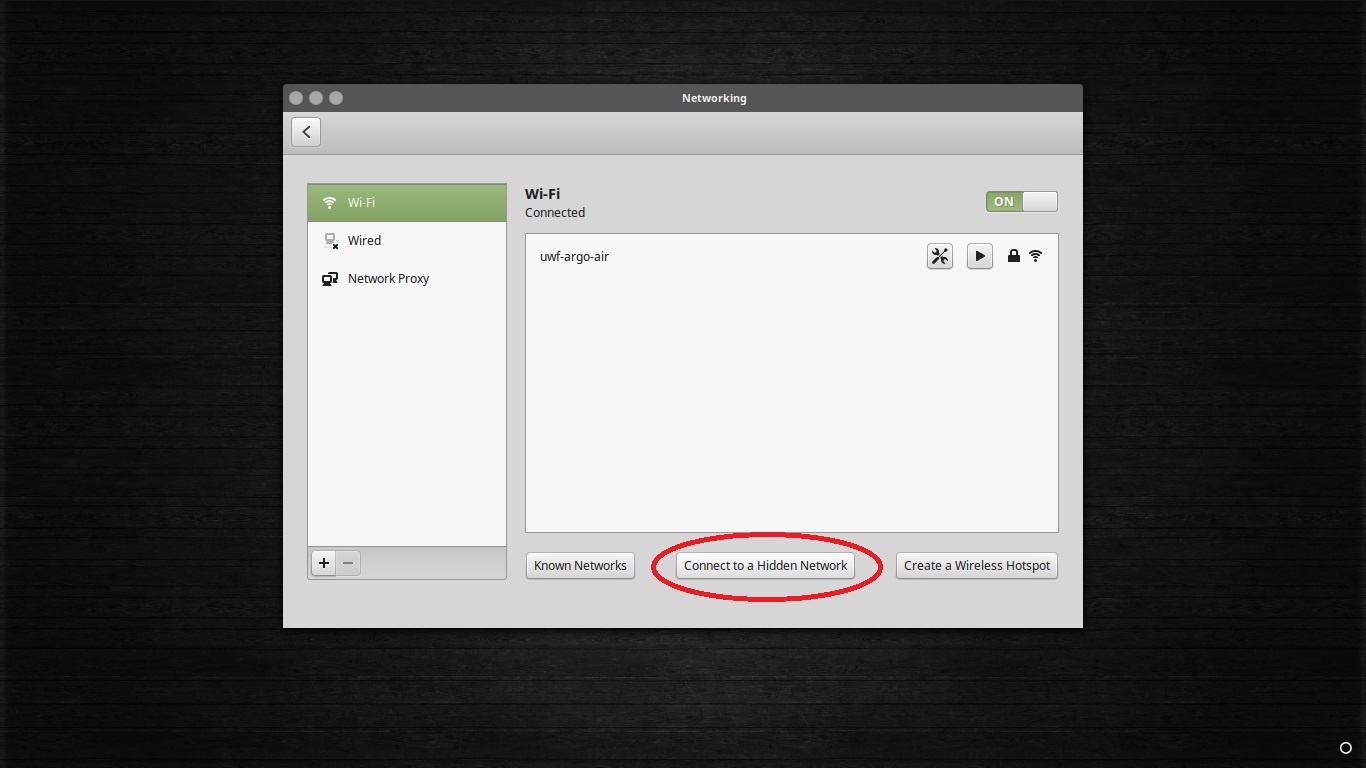
Select Network Settings. This will bring up a menu that will populate with available wireless networks. NOTE: Do NOT select "uwf-argo-air" in the menu at this stage. See FAQ for details.
Instead, select "Connect to a Hidden Network."

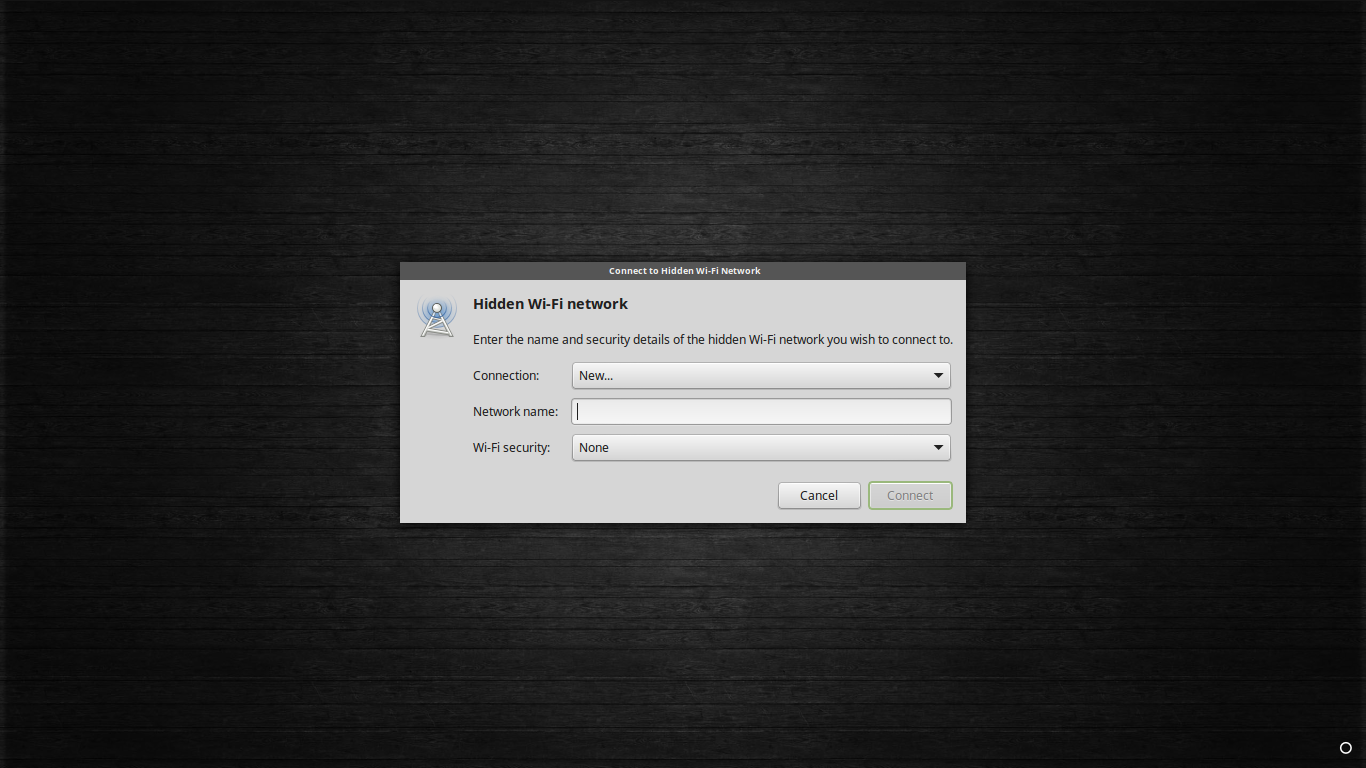
In the menu that appears, select the "New..." option in the Connection dropdown menu.
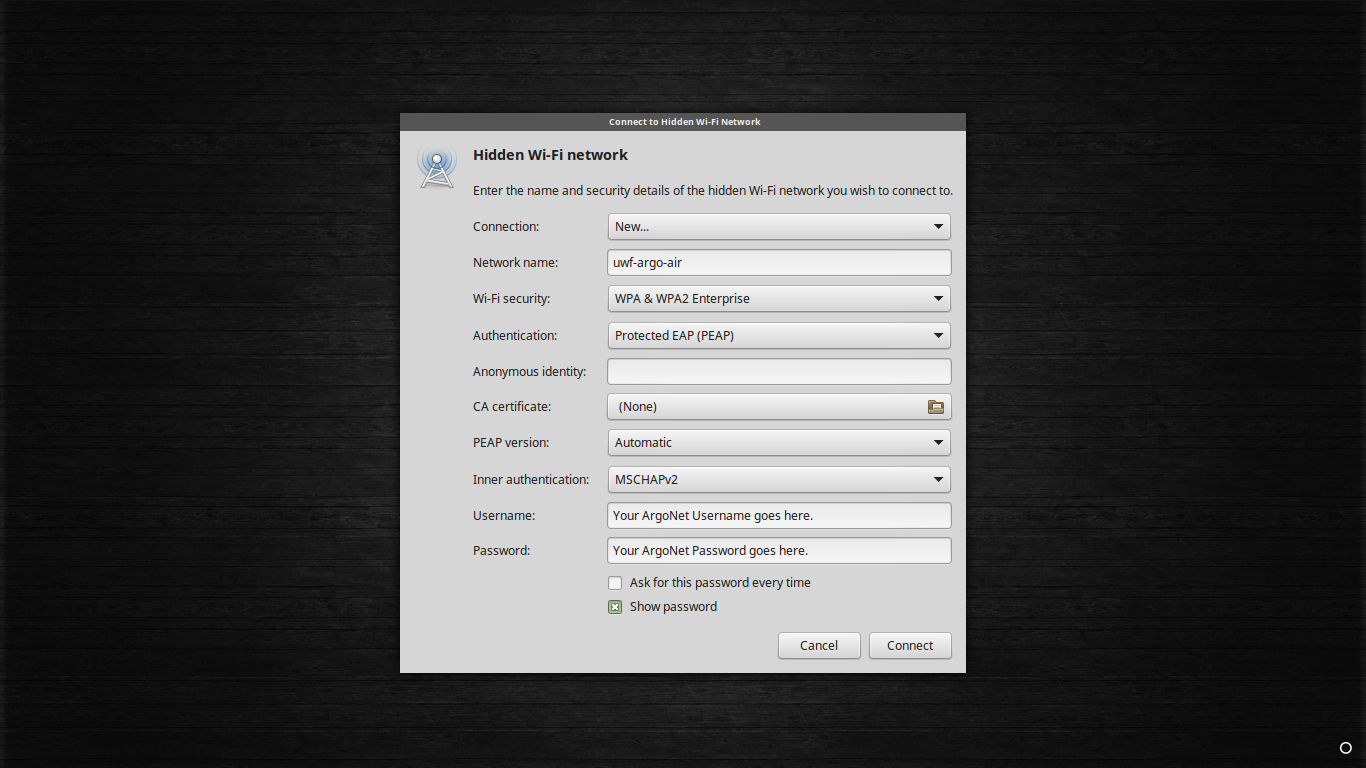
Type "uwf-argo-air" as the Network Name.

Select "WPA & WPA2 Enterprise" in the Wi-Fi security dropdown menu.
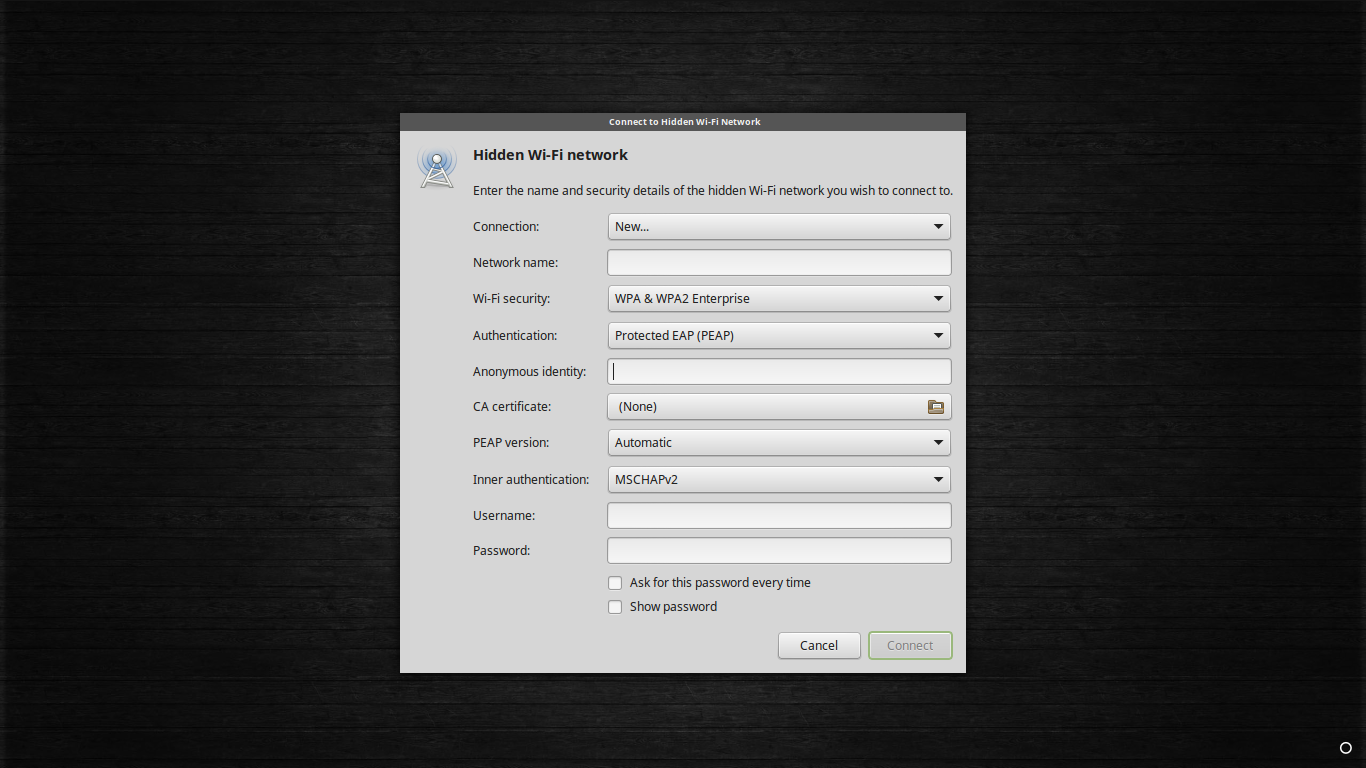
After selecting the Security type, more fields should appear.
For the Authentication field, select PEAP in the dropdown menu.

For the fields that have not been adjusted, select as follows:

Verify that all of the fields have been entered correctly. After doing so, select the "Connect" option in the bottom right corner of the window.
At this point, the computer should connect to Argo Air.
Use an expand section for each FAQ that you want to include. Copy and paste the expand section to create a new question. Make sure to edit the title of the expand section. Please remove this section if there are no FAQs.
Selecting uwf-argo-air from the Networking box will cause the computer to attempt to connect to Argo Air without submitting the proper ArgoNet credentials. This will cause it to stay in a "Connecting" state. Once set up, selecting uwf-argo-air in the Networking box will allow the computer to send the proper credentials. |