Overview
This classroom is equipped as a point-to-point video-teleconferencing system (or VTC system). This system handles bi-directional video and audio transmission to/from UWF’s Pensacola and Fort Walton Beach campuses. This article provides an overview of the room's features, capabilities, and operation instructions. |
Hardware Standards
Microphones
- Wireless micro headset microphone
- Ceiling-mounted array microphone
- 18" Lectern-mounted cardioid microphone
Audio playback devices
- Classroom speakers
- Wireless earbud headphones
Peripherals
- Lectern PC
- SMART Podium with pen
- Crestron touch panel
- Document camera
- Blu-Ray player
- Projector
- Cisco video conference system
- 2 65" video conference displays
Instructions
Activating the System
Step 1
Touch the Crestron Touch Panel to wake system. Touch again on the Touch to Begin page.
Step 2
Select Video Conference Mode to use VTC functionality. Otherwise, select Local Mode if utilizing room as a standard eClassroom.
ADD SCREENSHOT HERE.
ADD expand macros or links to VTC or Local Mode documentation
Step 3
Wait for system to initialize and bring you to the main interface page. The following should occur automatically:
- Both displays at the front and back of the room should turn on.
- The projector should turn on.
- The projector screen should lower.
Dialing a Room
Step 1
Select the room your course is paired with in the Directory pane.
Document where instructors/facilitators can find this info. I think it is safe to say we can specify 4/460 since this is a unique room.

Step 2
Verify room is correct. Press Dial.
Step 3
Press Dial to initiate the connection. Wait for both rooms to connect. Once the rooms are connected, you should see the video feed from the FWB camera on each display.
Add screenshot of dialing in progress
If required, you may disconnect from a VTC session by pressing the disconnect button on the main interface. |
Adjusting Microphone Settings
Step 1
Press Mics button on left side of touch panel.
Add screenshot
Step 2
Adjust volume sliders for each mic respectively. Confirm with remote facilitators if mic levels are adequate (if necessary).
The mics can be muted by selecting the blue Speaker icon below each microphones' volume control slider. |
Adjusting Volume
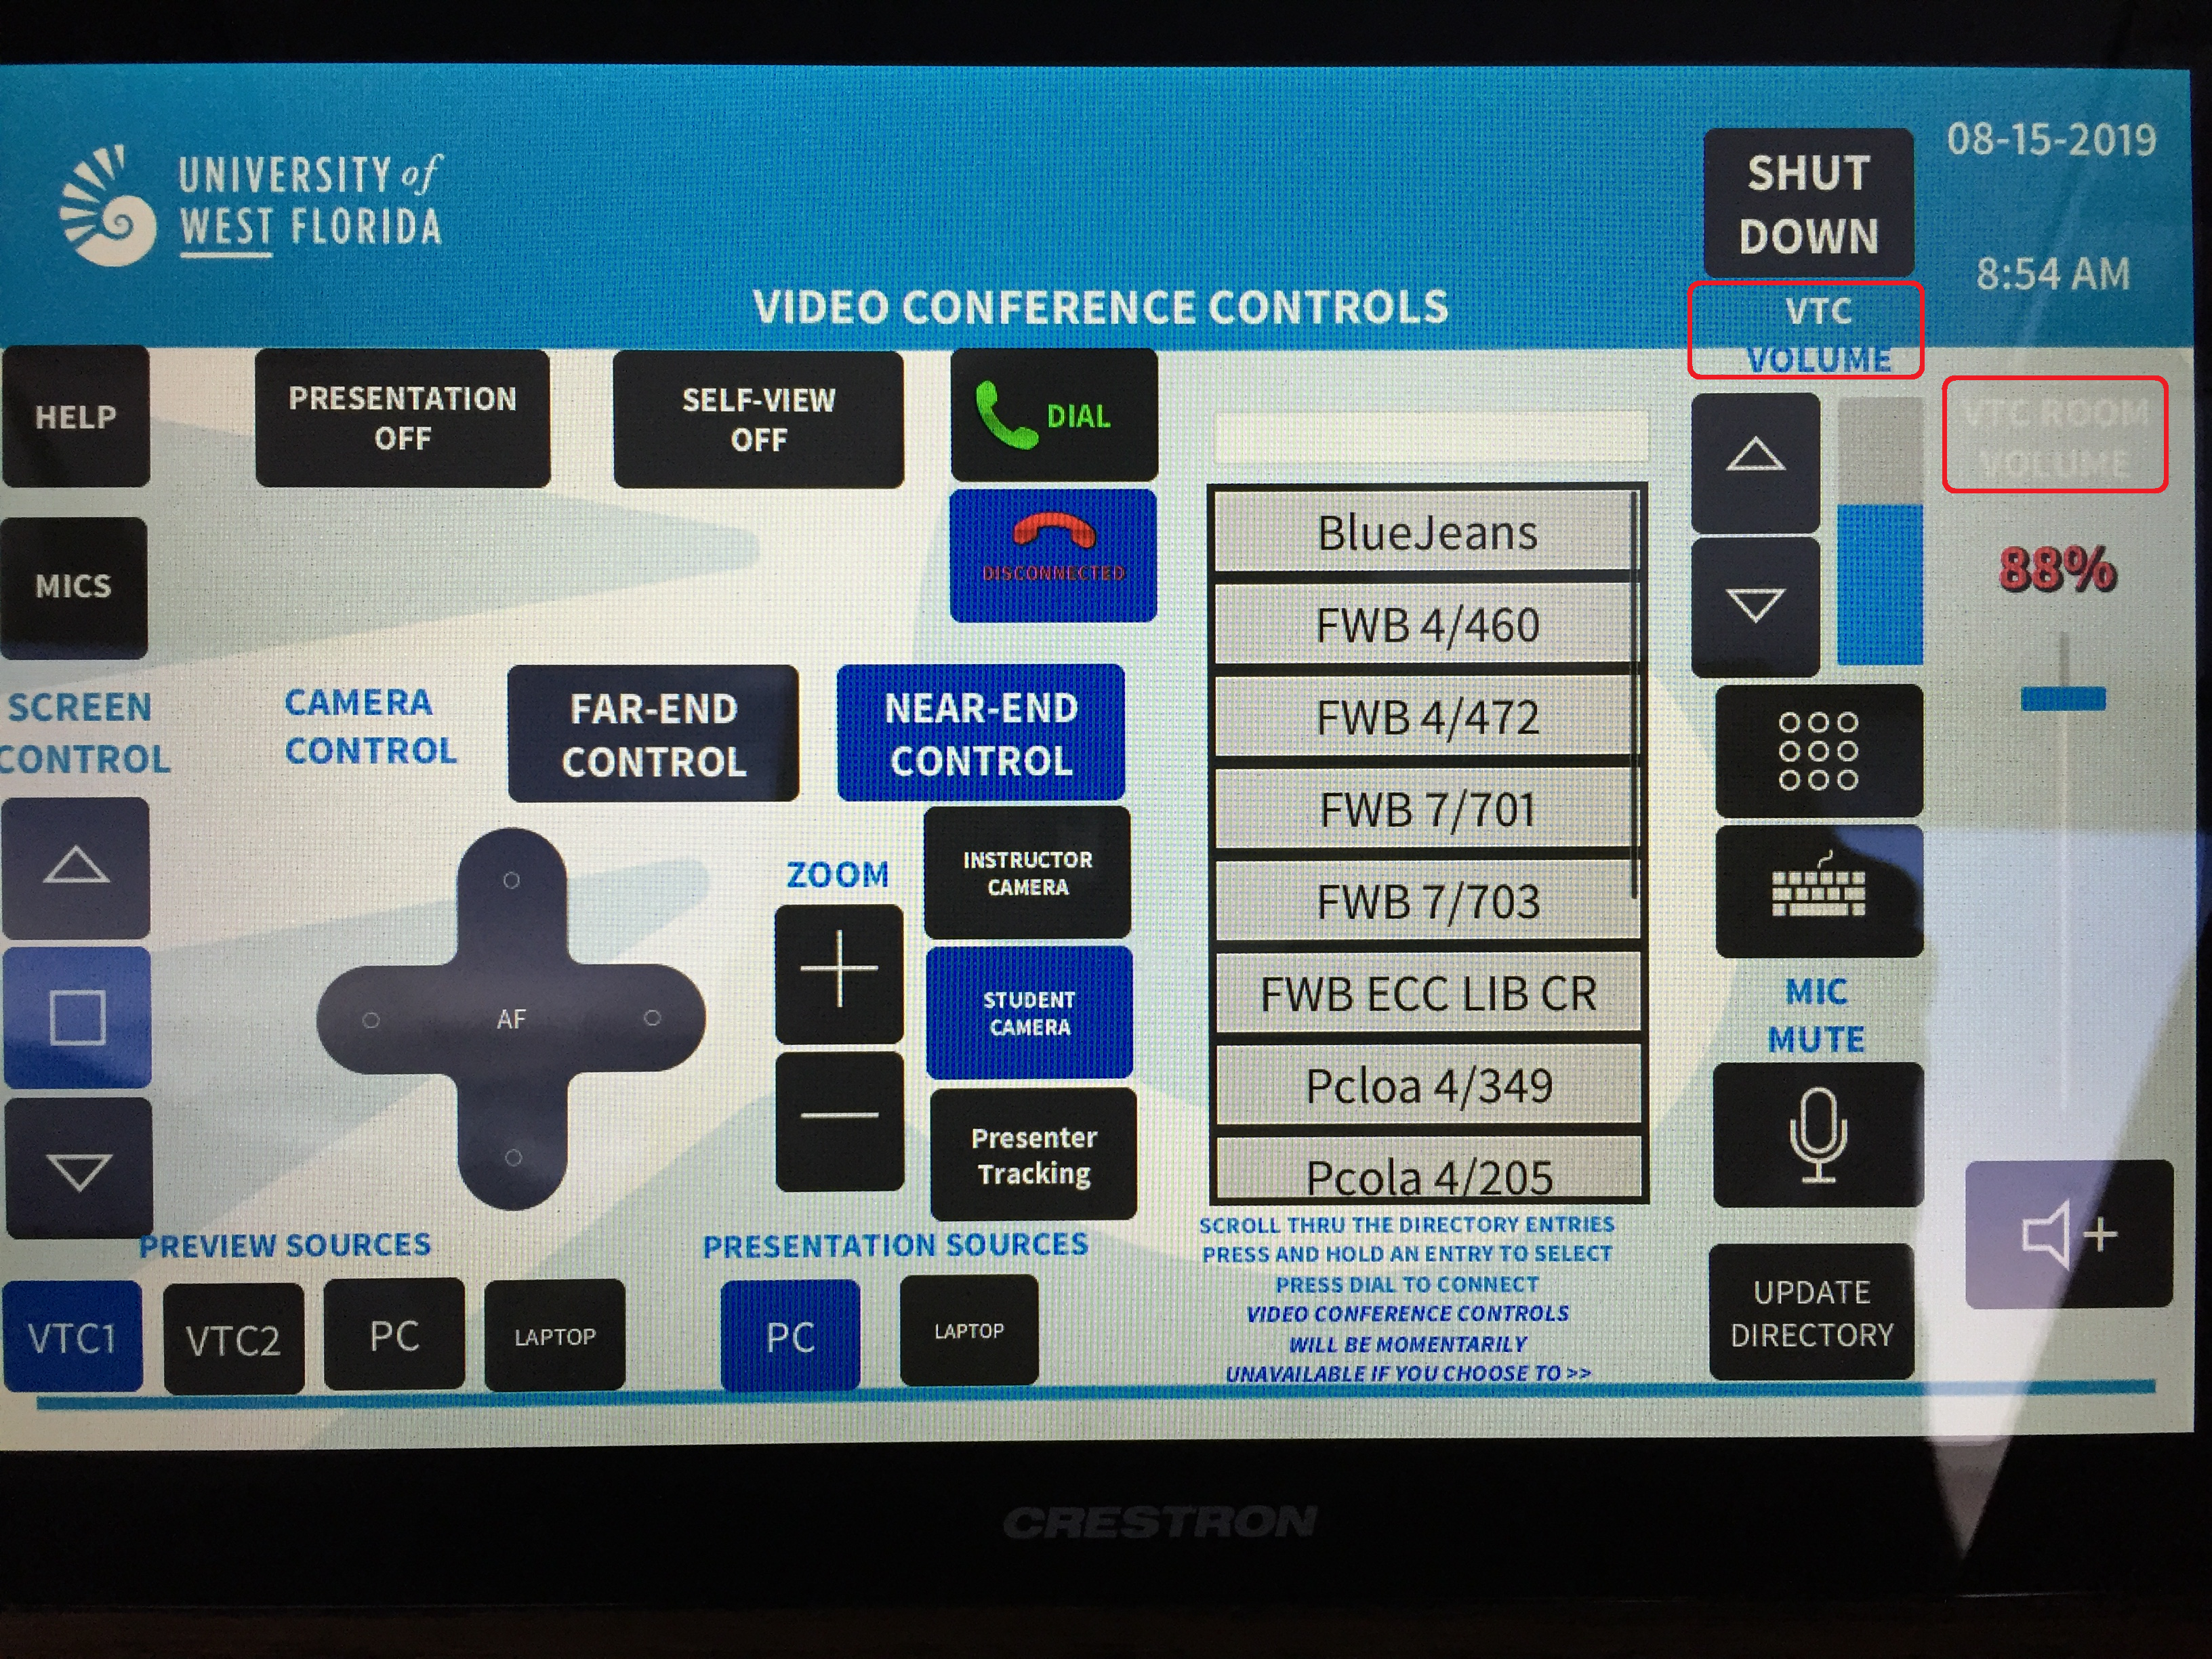
Adjust the VTC Volume slider to adjust the audio volume of the sound being transmitted from the FWB classroom.
Adjust the VTC Room Volume slider to adjust the volume of local devices in the room (such as the Blu-Ray player, and the lectern PC).

Adjusting Camera Settings
Each room has a camera control section. These settings allow the instructor to adjust the camera position, zoom, and presenter tracking. Furthermore, each room can control the cameras of its paired room remotely. This means you can remotely control the cameras that are located in FWB and vice-versa.
Instructor Camera - Located at back of classroom (facing the instructor).
Student Camera - Located at front of classroom (above the instructor).
Press the Near End Control button and select a camera to adjust the local camera’s position, zoom, and presenter tracking option.
Press the Far End Control button and select a camera to adjust the remote camera’s position, zoom, and presenter tracking option.

Adjusting View Settings

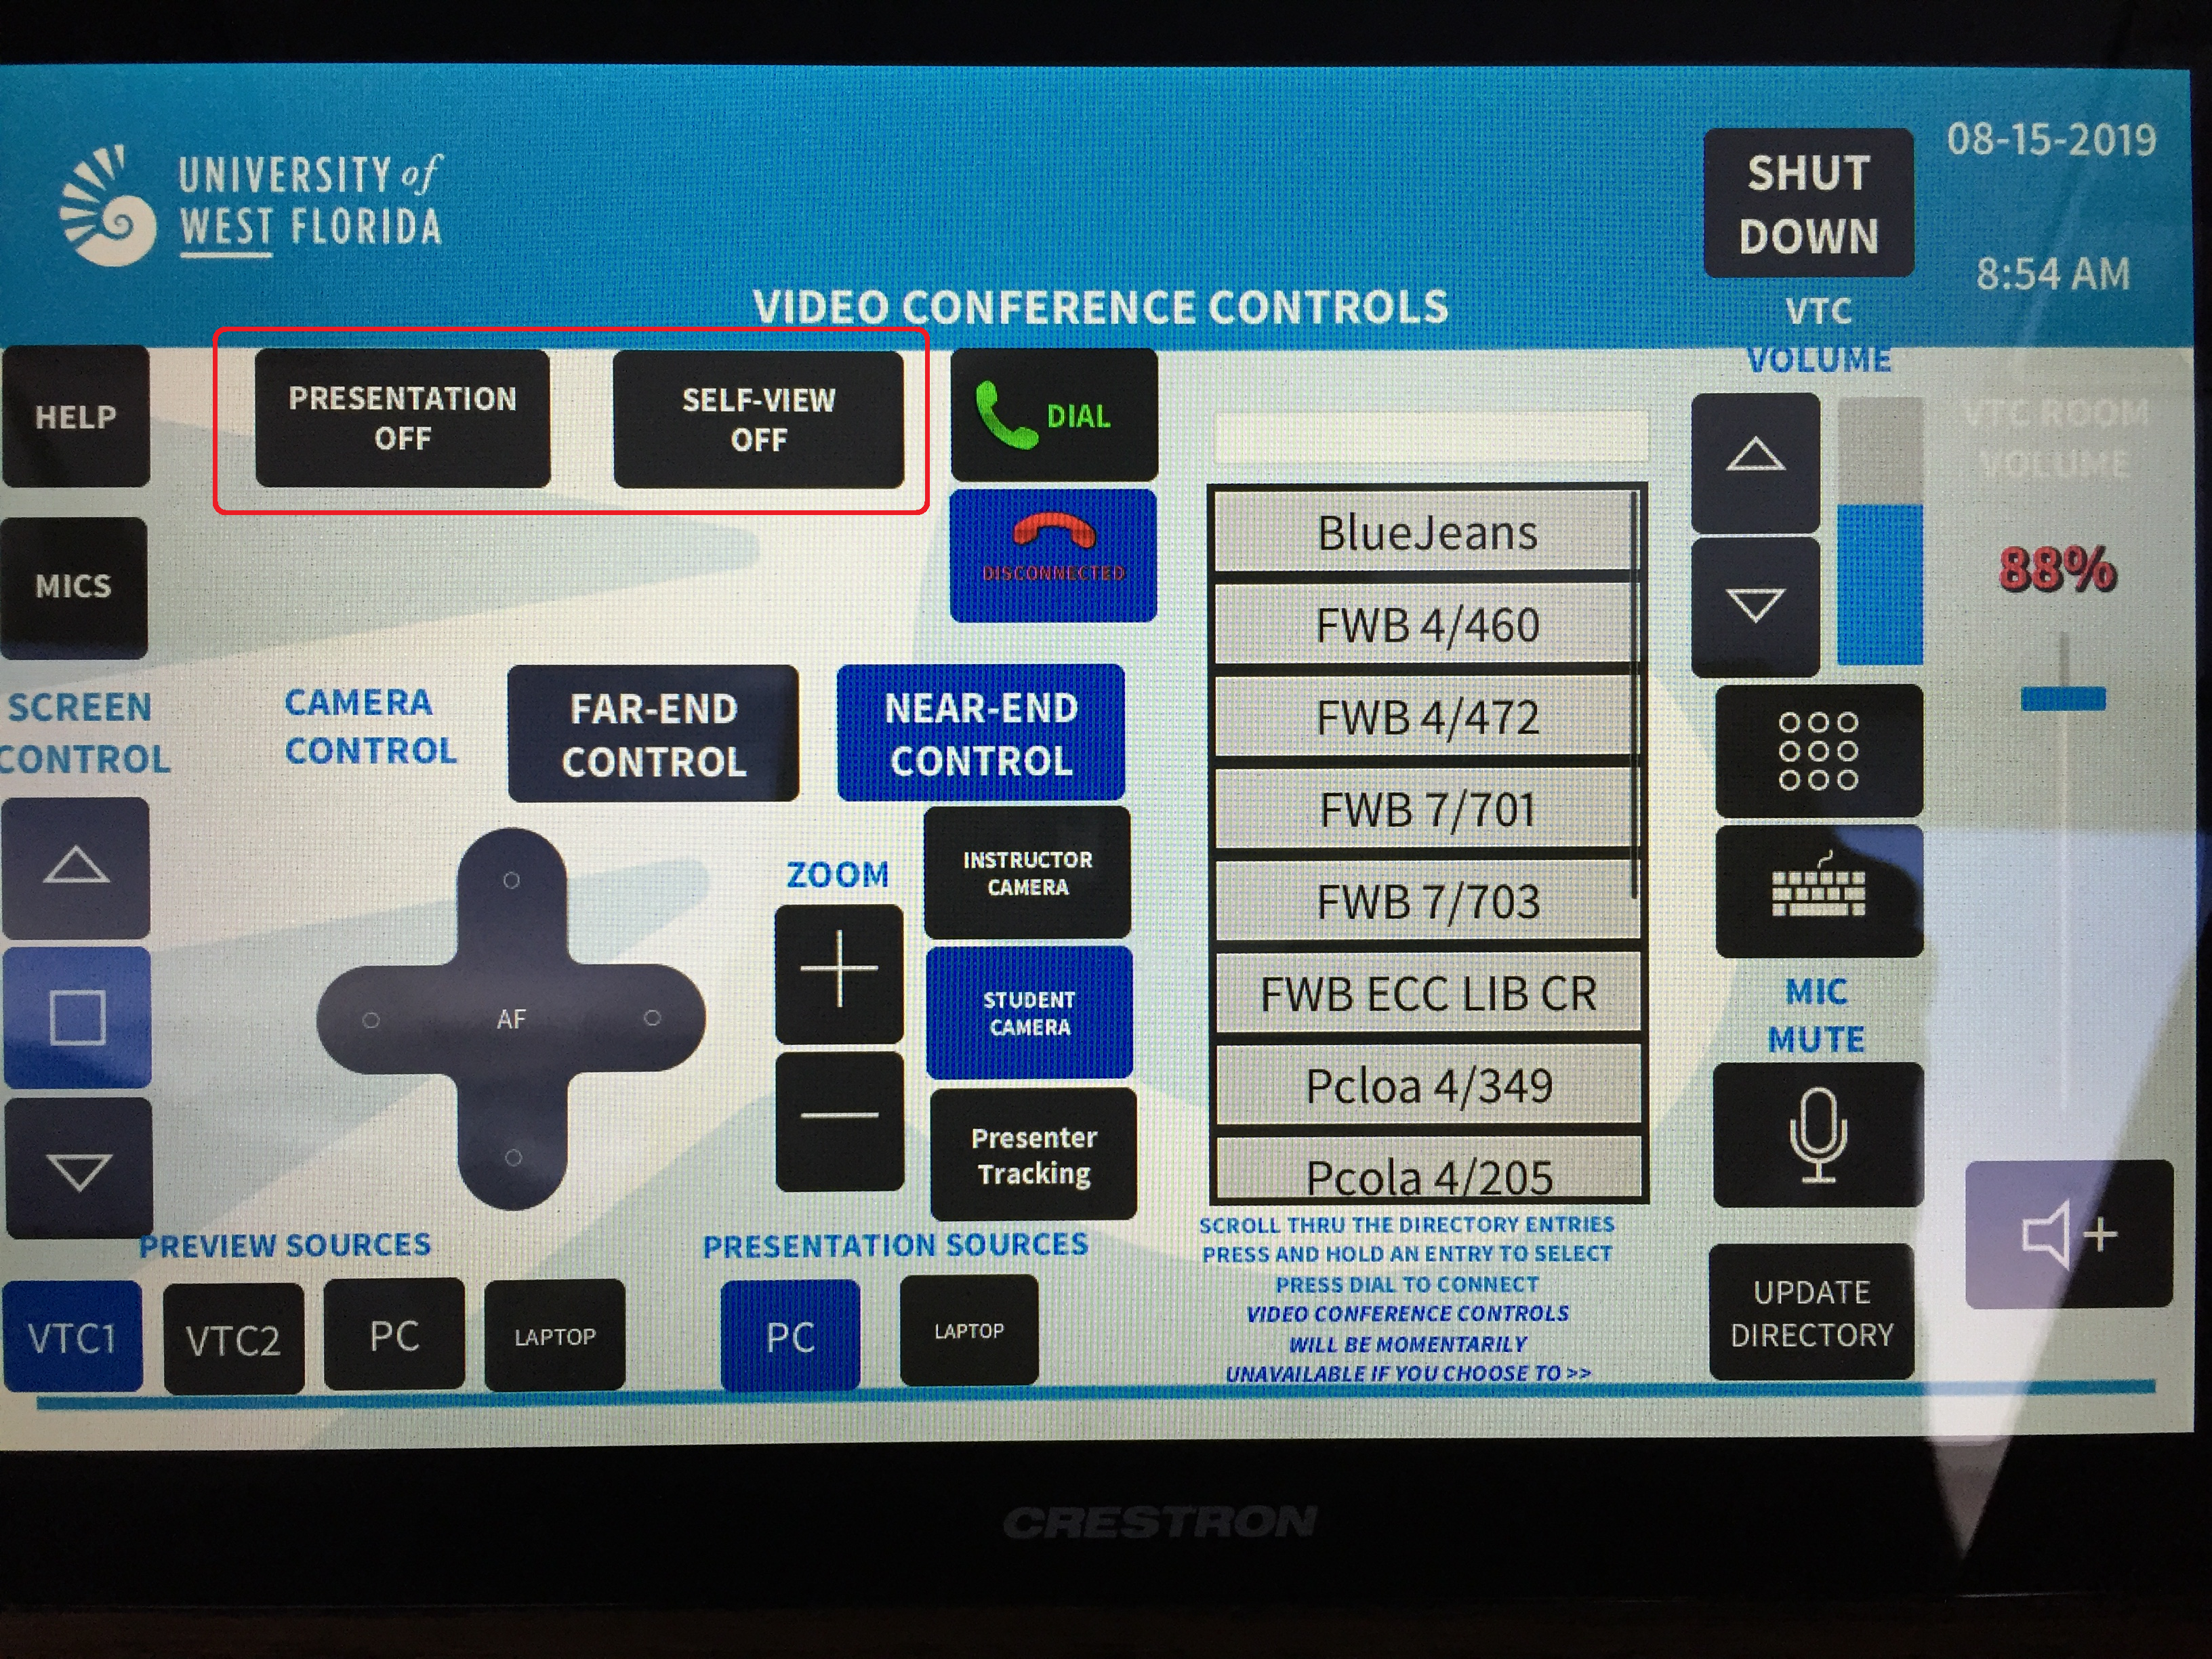
The Presentation (1) button will display the selected Presentation source (2) when turned on.
Add screenshots and numbering for easy identification
The Self-Vew (1) button will allow the instructor to view their own camera’s video feed on each display in the room.
When this is enabled, the Change-Layout button is displayed. After each press, this allows the self-view window position to be adjusted.
Add a screenshot/photo of the self-view window in a different place
Preview and Presentation Sources
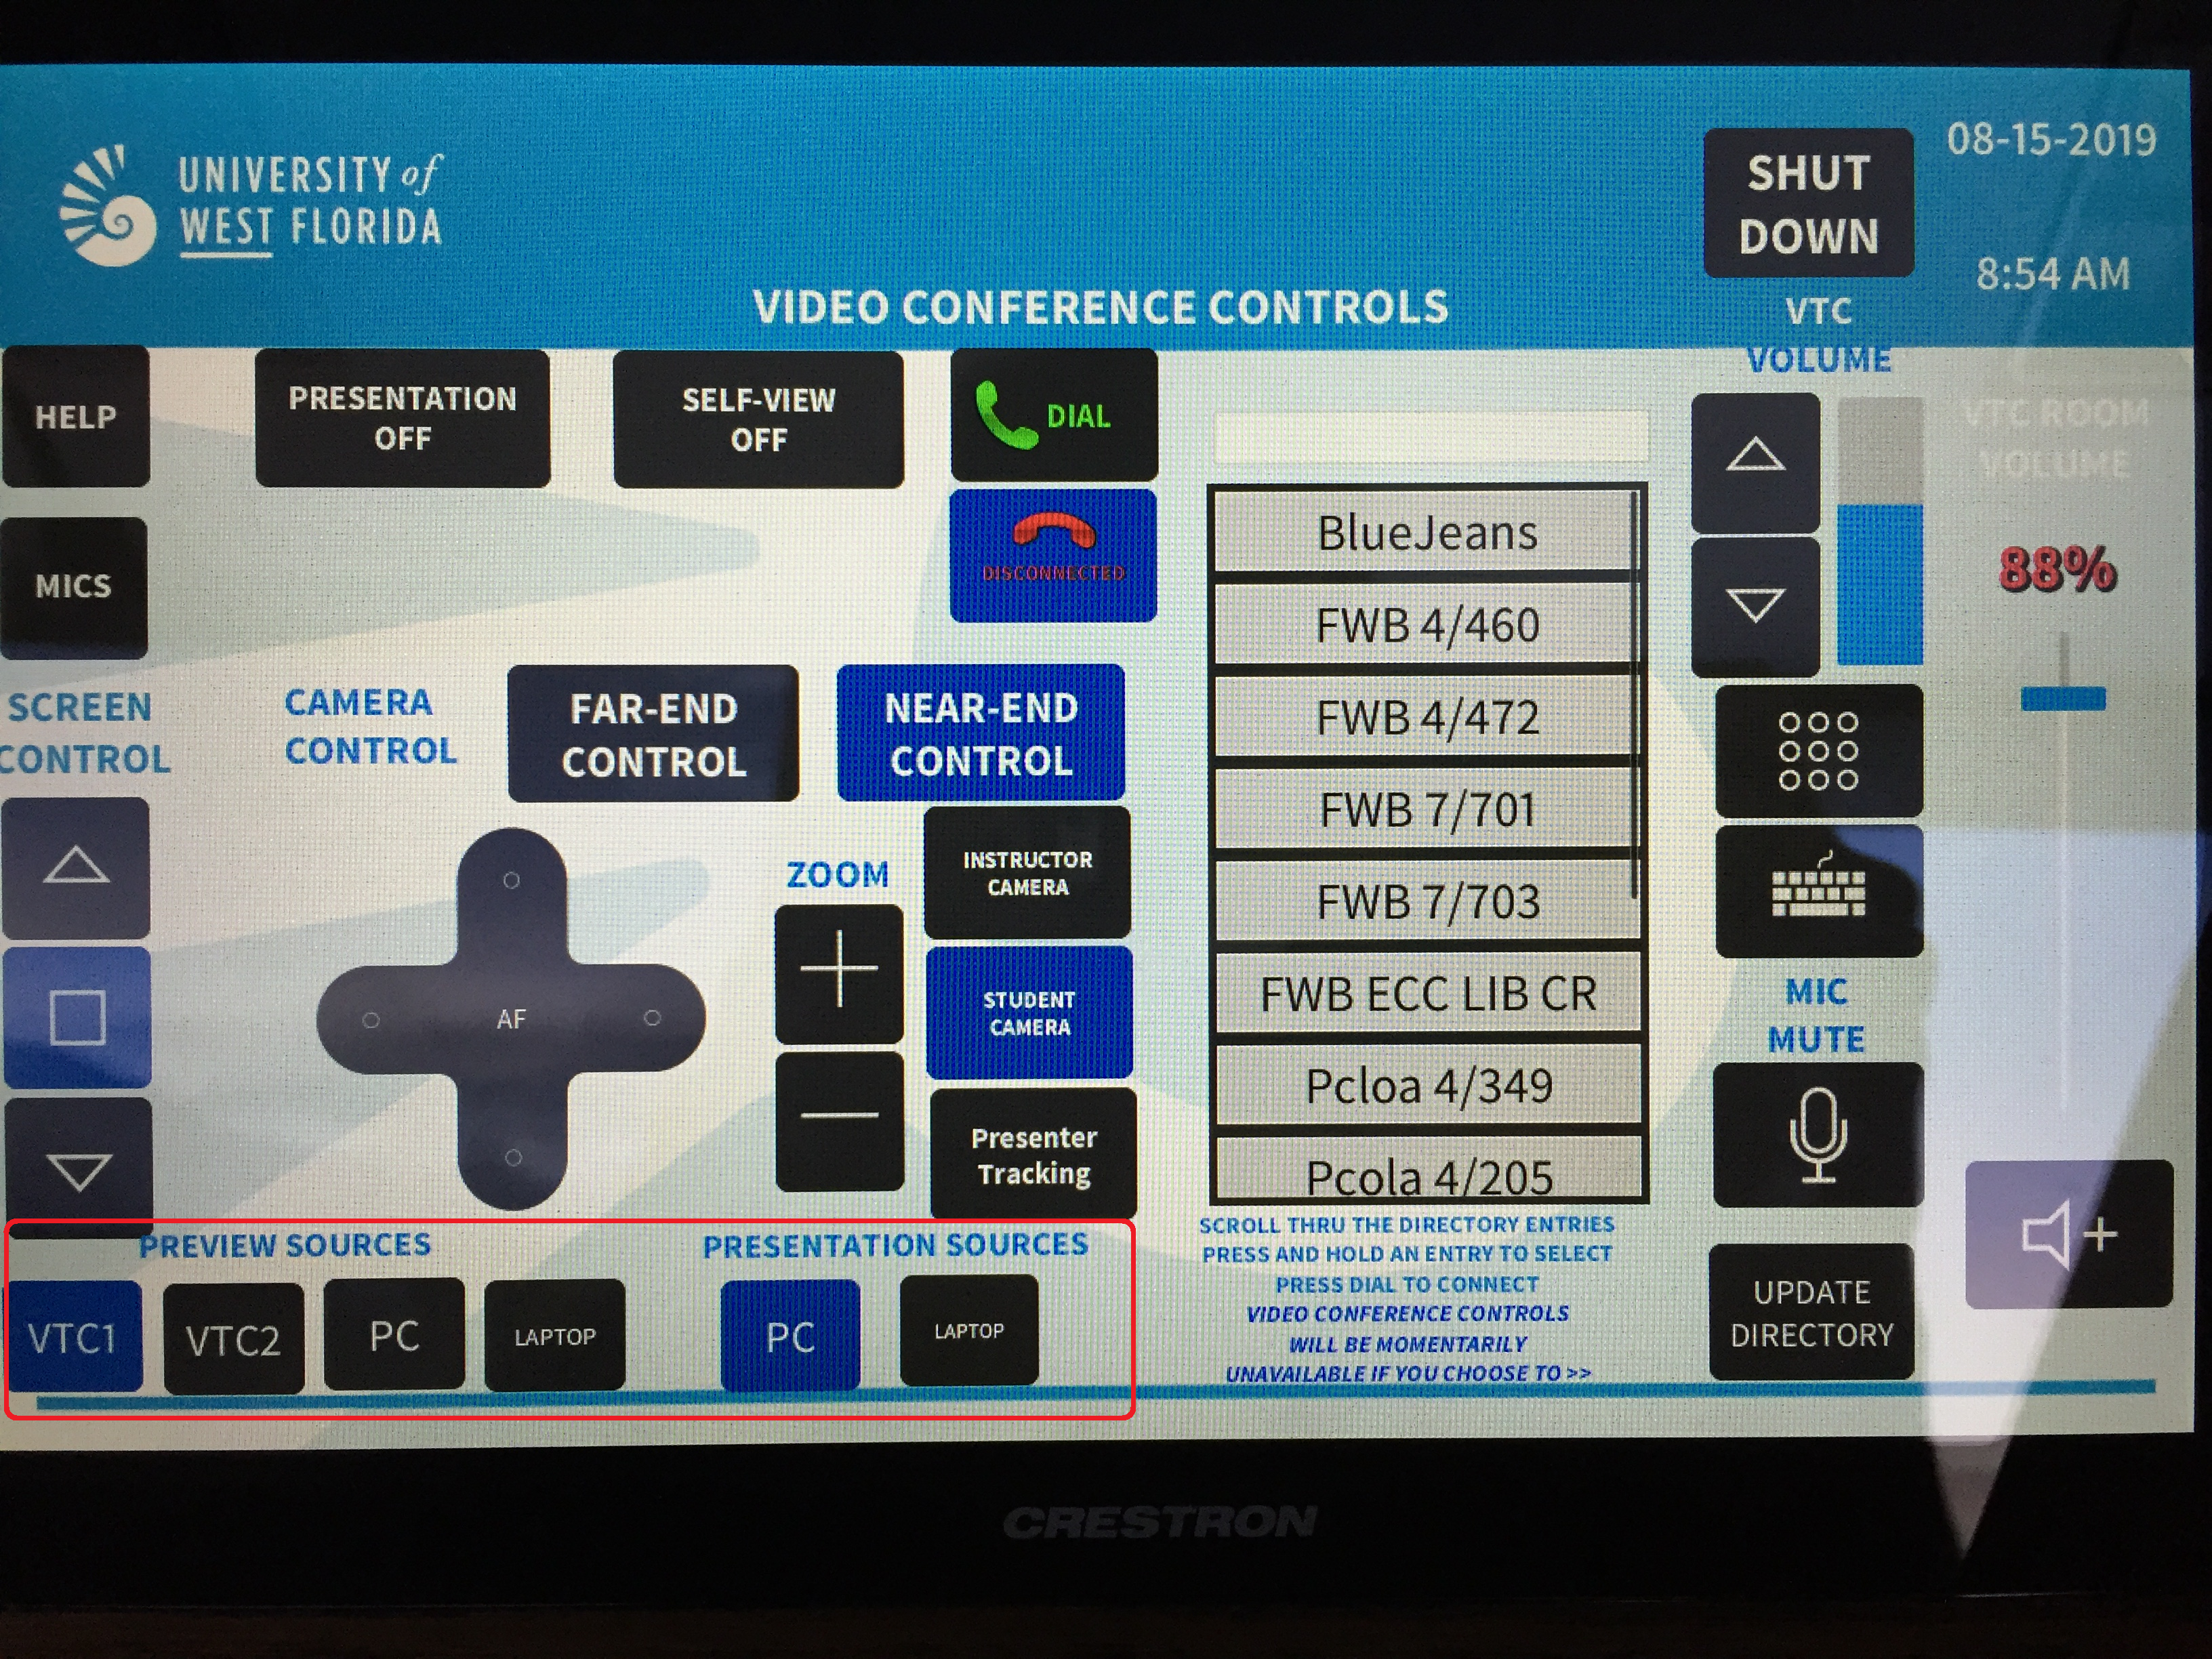
Preview Sources - Sources that are sent to the Lectern’s SMART Monitor:
- VTC1 - Display VTC of local classroom.
- VTC2 - Display VTC of other classroom.
- PC - Lectern PC
- Laptop - External Laptop or HDMI capable device.
Presentation Sources - Sources that are sent to the Projector:
- PC - Lectern PC
- Laptop - External Laptop or HDMI capable device.

Shutting Down the System
Step 1
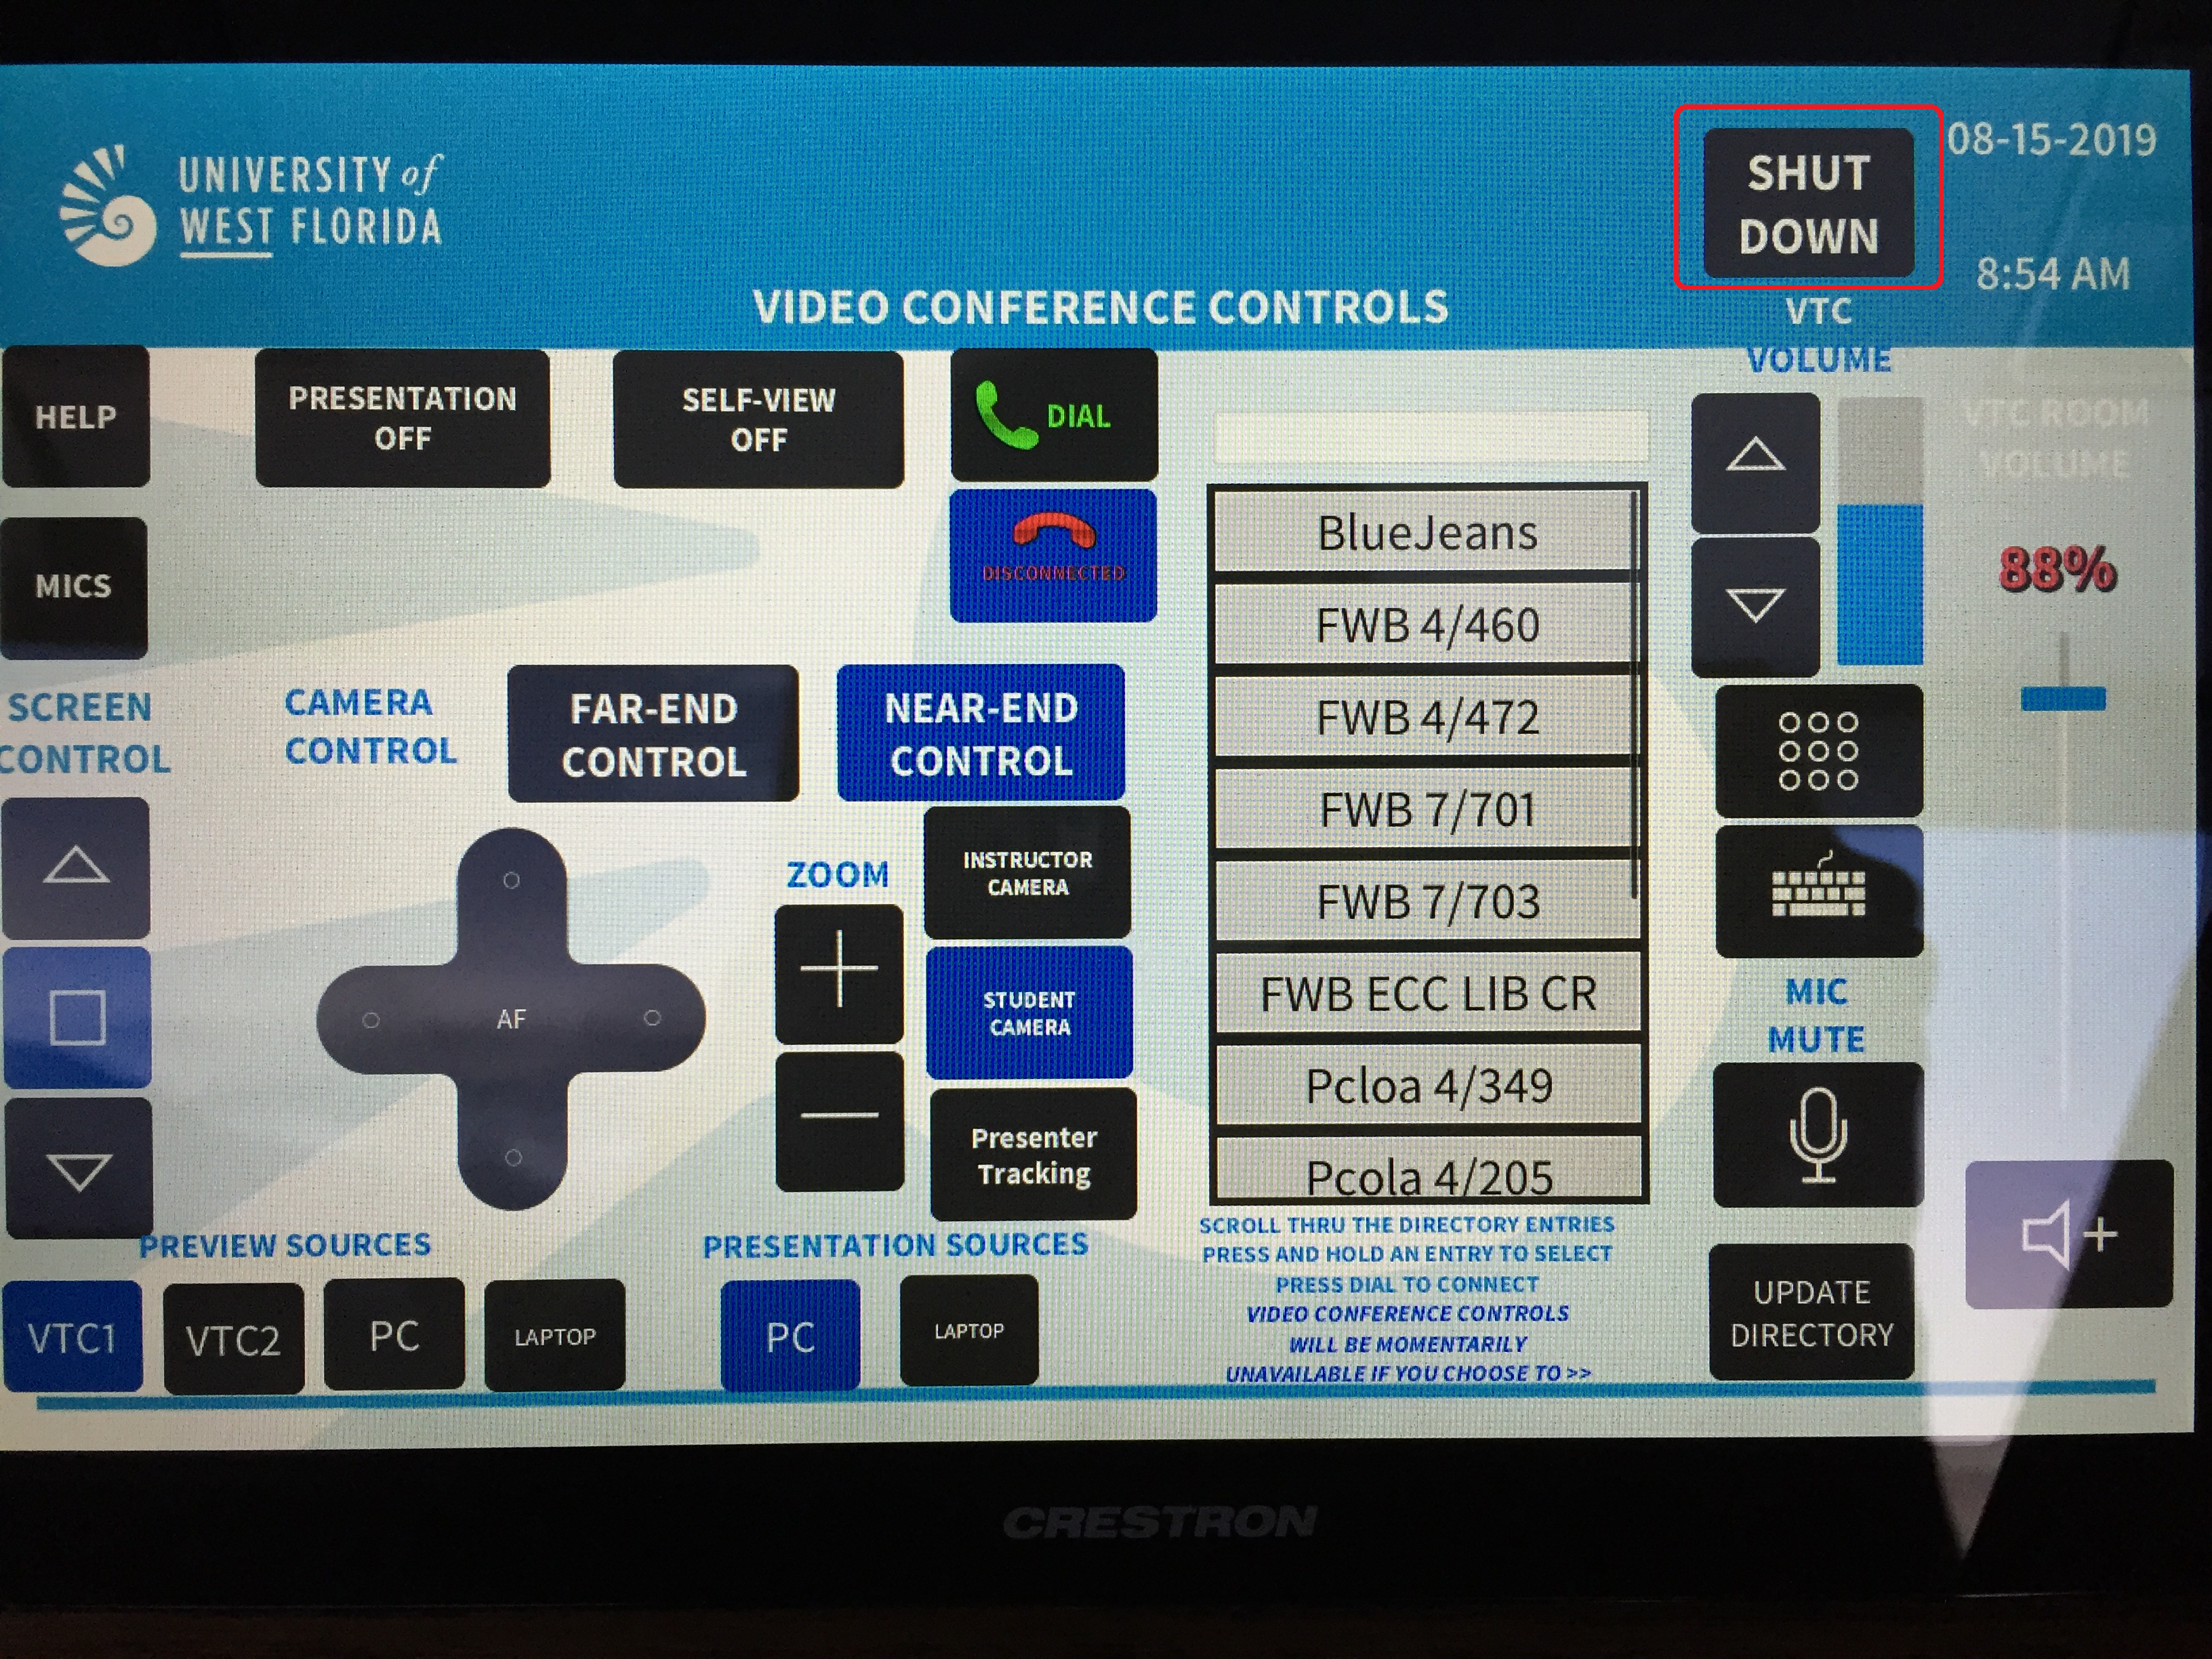
Press Shut Down in the top right corner of the touch panel.
Step 2
Press Yes to confirm.
Step 3
Verify that the projector screen raises, both displays turn off, and the projector turns off.

Contributors
This section shows all the users who have updated this particular page, or any pages that fall below it in the hierarchy of pages. (Processes and sub-processes)
Interested Parties
This section shows all users who are contributors, or who have added themselves, or have been added as a watcher of this process or any descendant pages.
|
Made with BPL Procedure Template v.1.2 02/02/2017 See the "Creating a new business procedure " procedure for step-by-step instructions on how to use this template!