Overview
After creating a Native native Google Group, you may have to add new members. You can change the roles of these new members, so that they could also can adjust the group membership and the roles of the other members.
Instructions
| Anchor | ||||
|---|---|---|---|---|
|
Getting to your
Nativenative Google Group's "Settings" page
| Tip | ||
|---|---|---|
| ||
You 'll have to get to your Native must first navigate to your native Google Group's Settings page first, before configuring the additional settings detailed on this Confluence page. All the settings Owners of native Google Groups should review all settings listed on this Confluence page are recommended. |
Step 1
Log in to Gmail.com. Be sure you're logging into with the account that owns your the Google Group.
Step 2
Go to the Google Groups app. Click More to find the Google Groups app, if necessary.
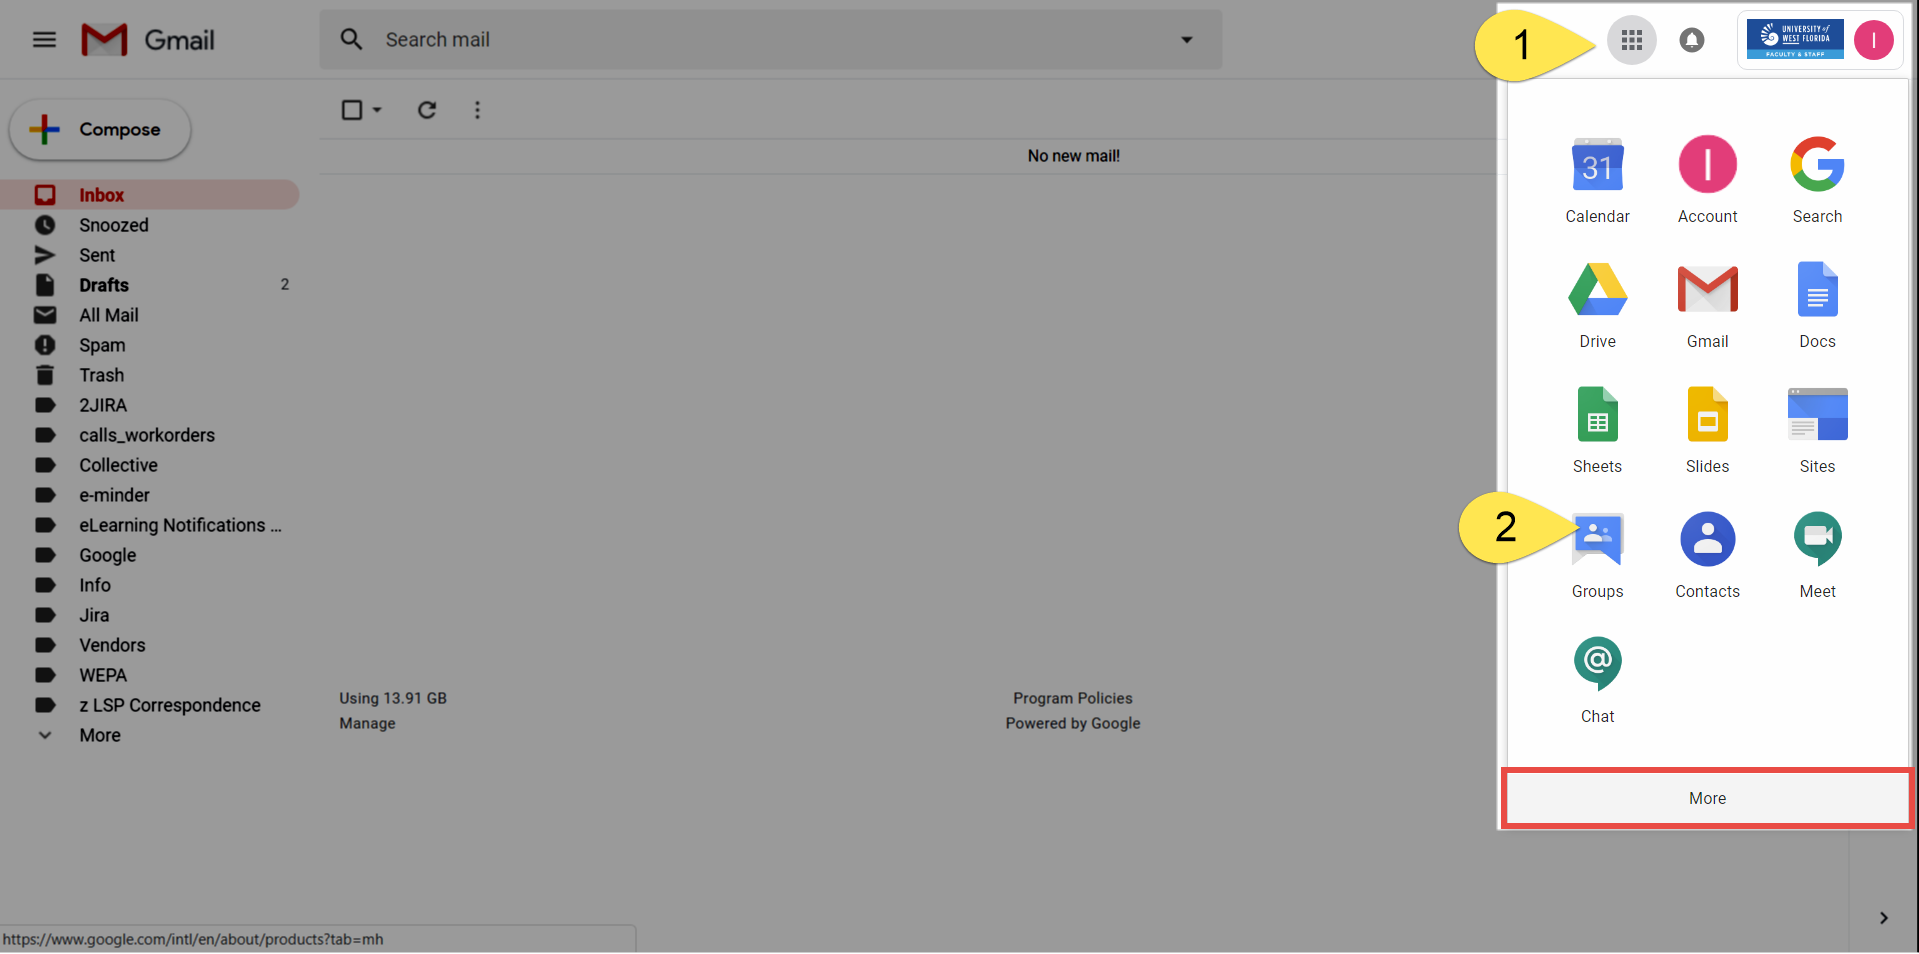
Step 3
You should already be in the My groups section. Search for the group you 're wanting want to change. Click the settings icon.
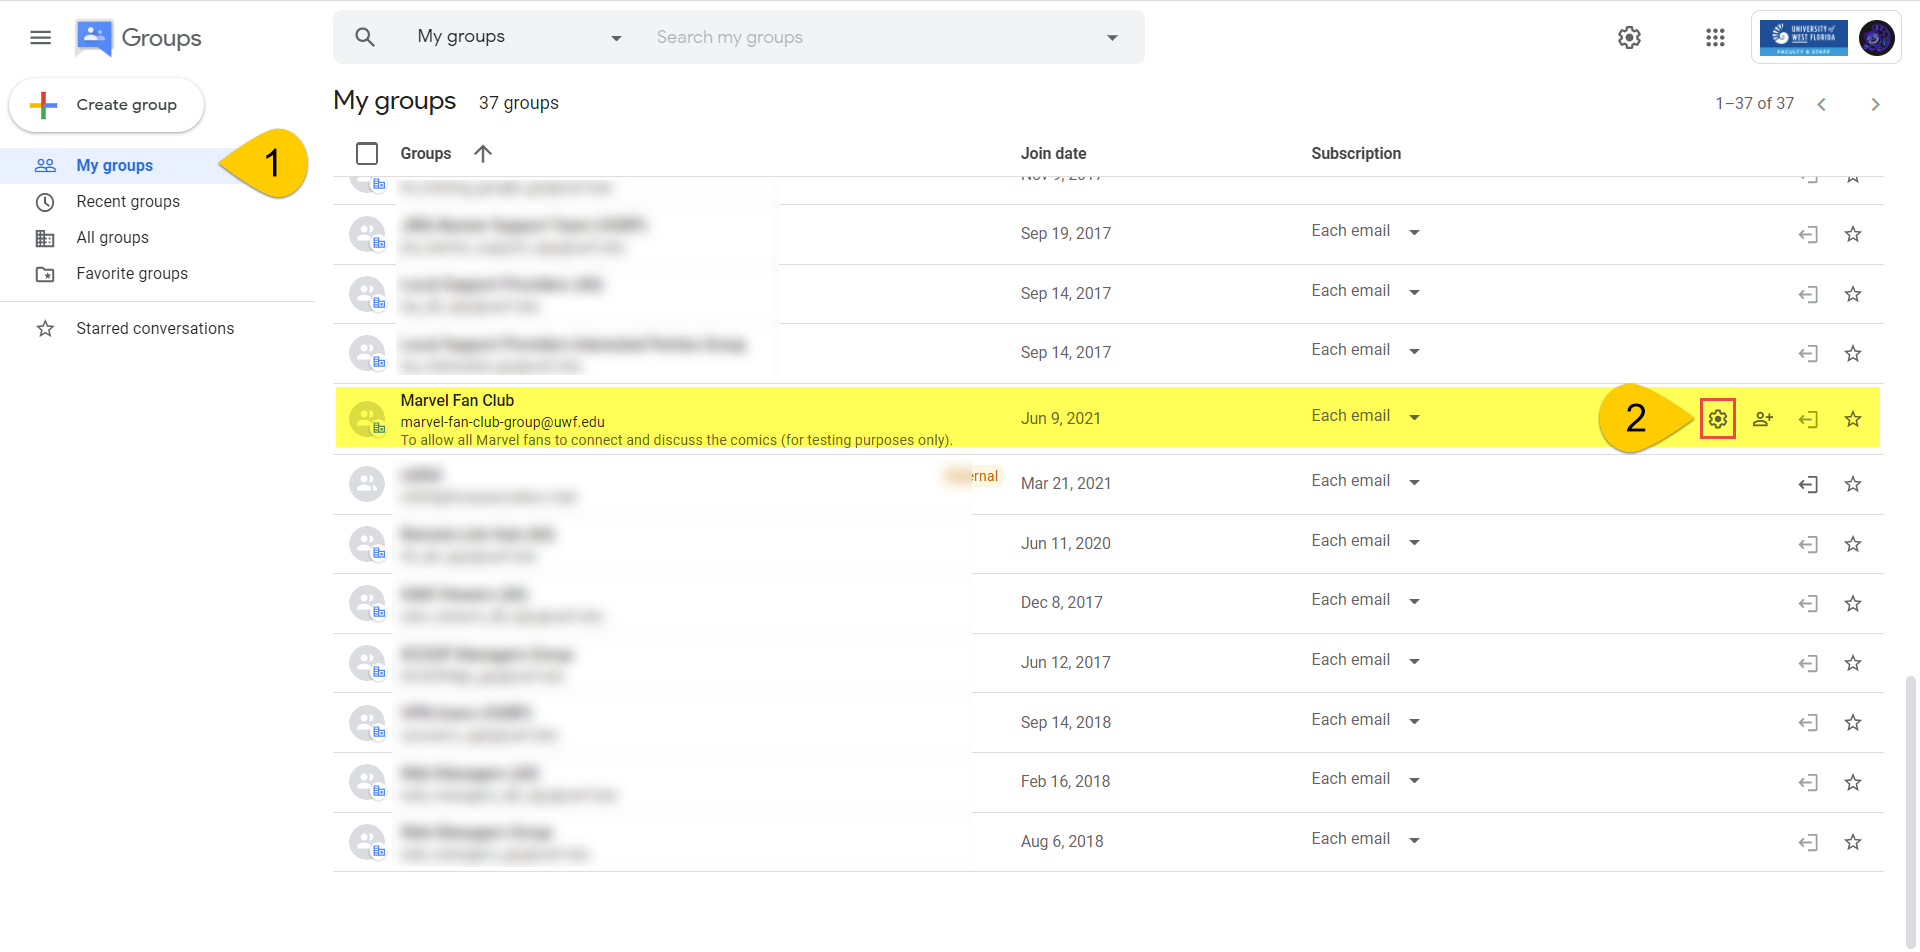
You should see your groups group's name on the left-hand side, with a bunch of settings underneathwith several setting underneath.

| Anchor | ||||
|---|---|---|---|---|
|
Configuring a Google Group for multiple domains/organizations
| Tip |
|---|
Enable this setting if you want UWF students and employees, or non-UWF users in your native Google Group. |
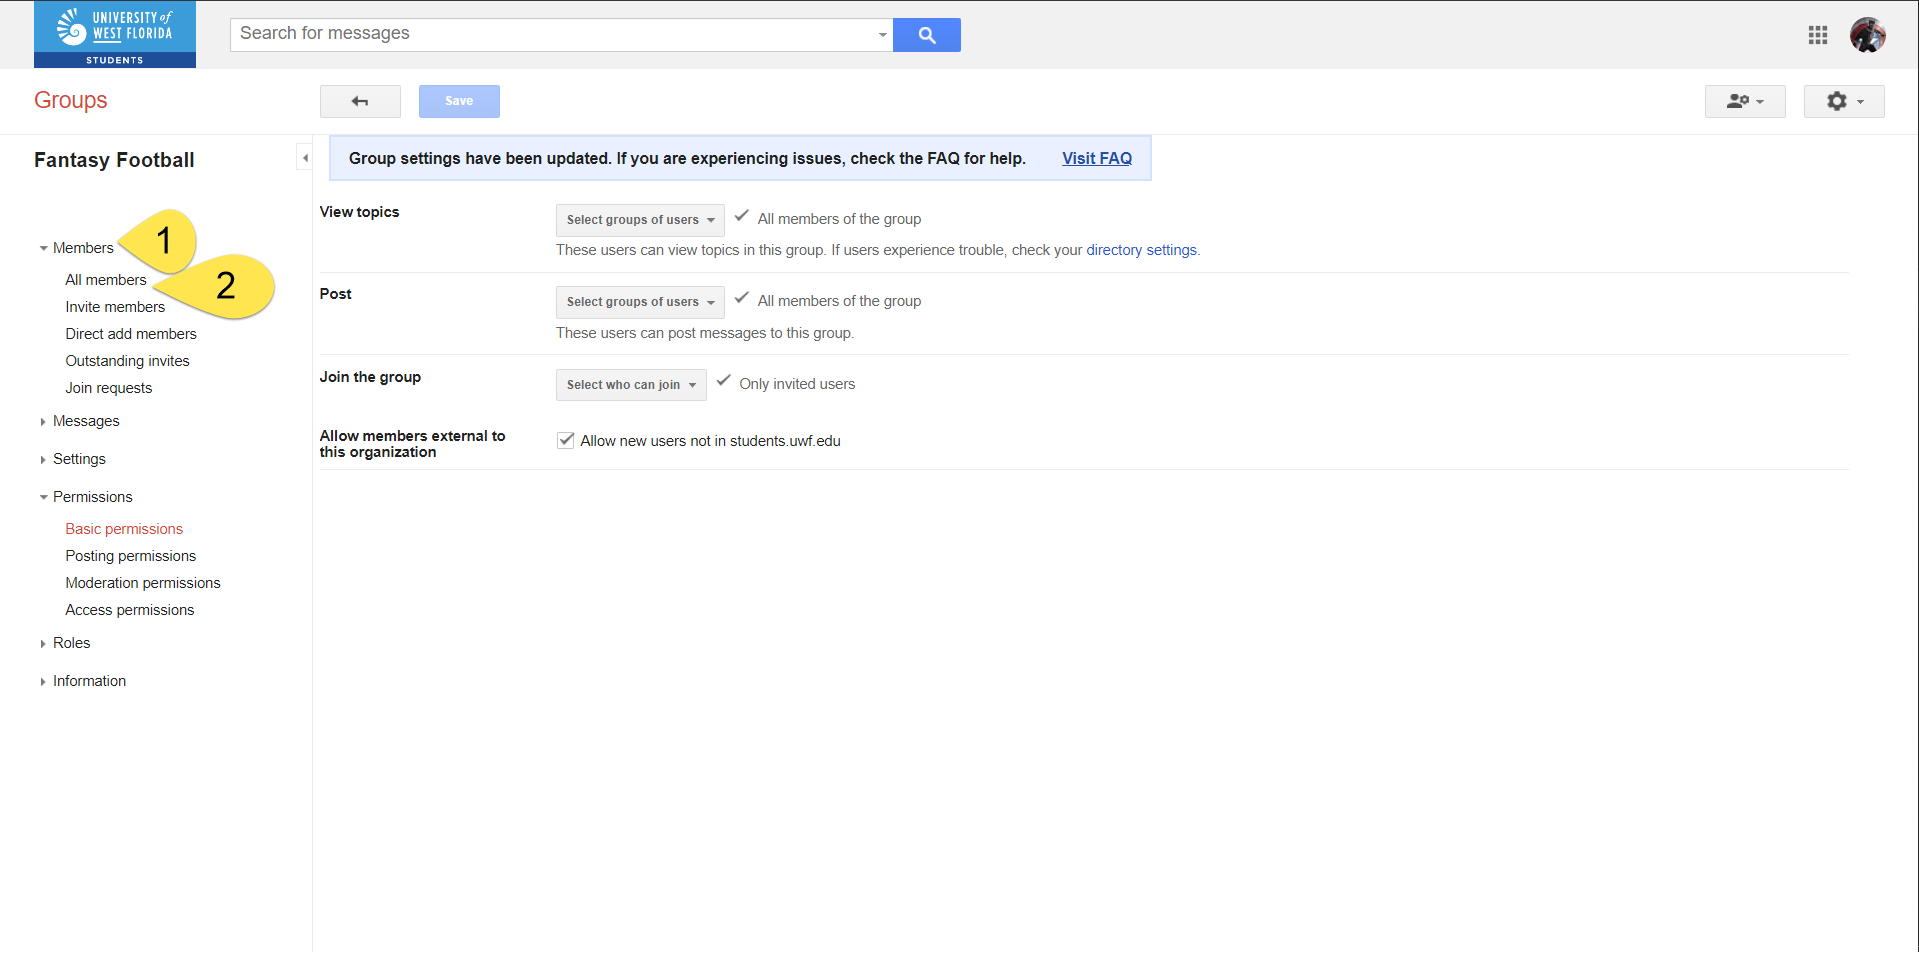
Step 1
Go to the Groups settings section, and scroll down until you see Allow external members. Click On.

Step 2
Click Save changes.

Inviting members
Step 1
Click Members.

Step 2
Click Add members.

Step 3
| If you choose to invite members | If you choose to add members directly |
|---|---|
|
* Visit Set who can view, post, & moderate to see the roles members can have in a Google Group. ** Visit Manage your subscriptions & global settings to see the subscription options. |


Changing
aone member's role, subscription frequency, and posting permissions
.Step 1
Click Members.
Step 2
Click the drop-down menus to change a member's role, subscription frequency, and posting permissions. The updates are saved after each change you make.

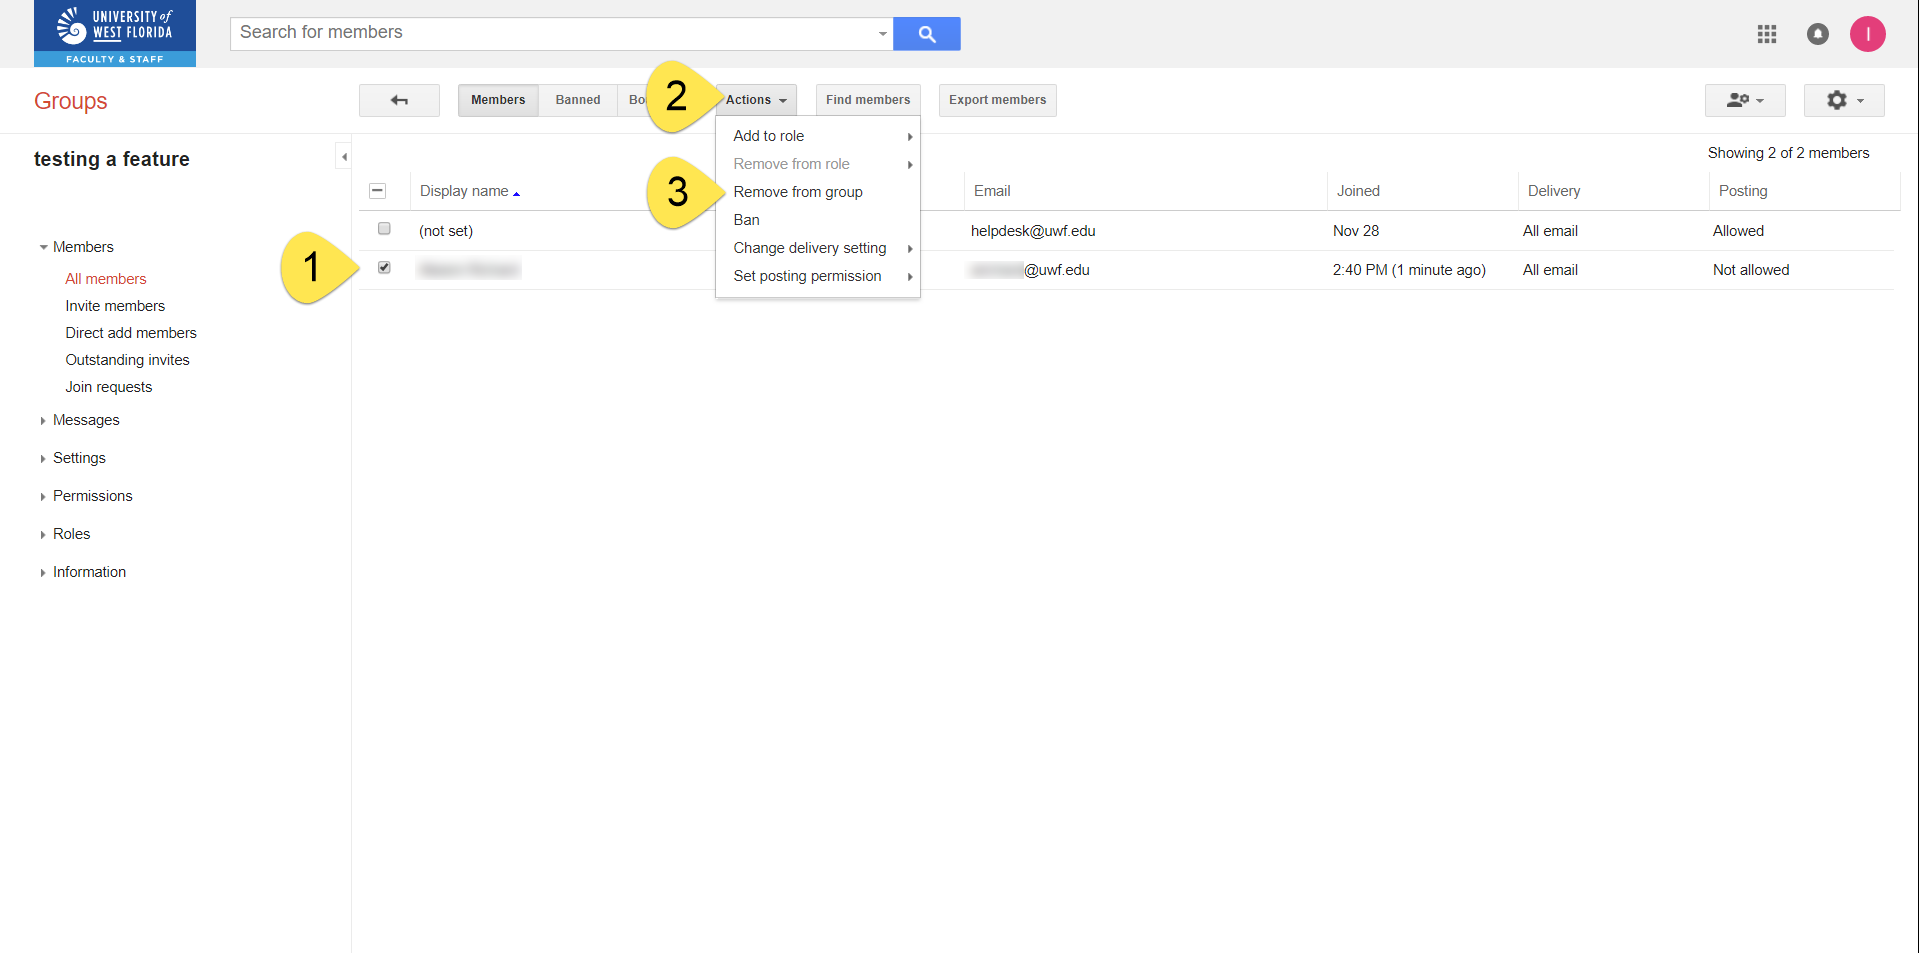
Changing multiple members' roles, subscription frequencies, and posting permissions
Step 1
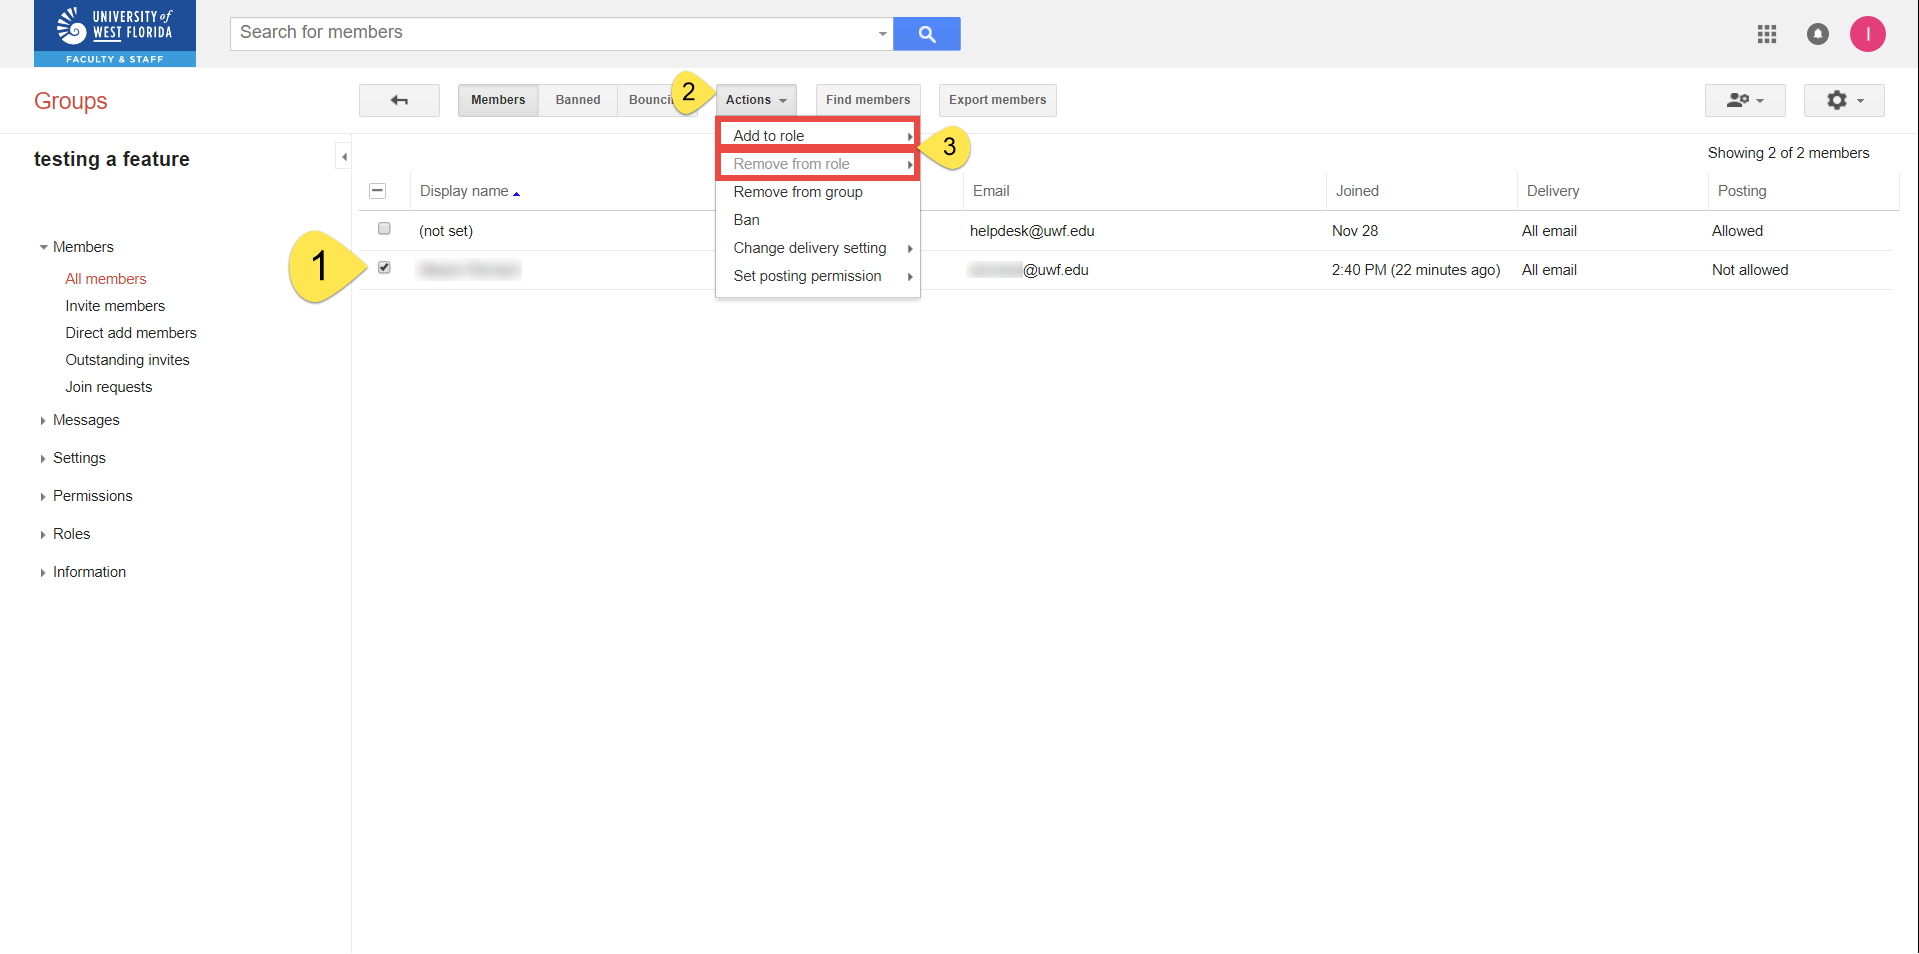
Click Members
>> All members first.
Step 2
Select the members that you would like to change the roles for, then click Actions >> Add to role OR Remove from role and choose the role to add/remove.
| To change all members in the group... | To change some of the members in the group... |
|---|---|
Check the box at the top left of the list, then pick the settings you'd like to change.
| Click the user's avatar, to change that avatar to a checked box. Then pick the settings you'd like to change.
|


Setting member privacy
Step 1
Click Member privacy. Ensure that these settings are configured to meet your specifications.

Step 2
Click Save changes.

Setting posting policies
| Tip |
|---|
Configure these settings to choose how your members can post content to your group. In most cases, you should at least enable Allow Email Posting, so that members can simply reply to the native Google Group emails they receive. |
Step 1
Click Posting policies. Review and change these settings to fit your needs.

Step 2
Click Save changes.

Setting email options
Step 1
Click Email options. Review and change these settings to fit your needs.

Step 2
Click Save changes.

Removing (or banning) members
| Tip |
|---|
|
Step 1
Click Members.
Step 2
Select the members you want to remove (or ban).
Click the Remove member button (or the Ban member button).

Step 3
Click OK.

Deleting a native Google Group
| Tip |
|---|
Deleting a native Google Group is permanent and cannot be reversed. |
Step 1
Click Delete group on the left-hand side, and then the red Delete group button on the right-hand side.
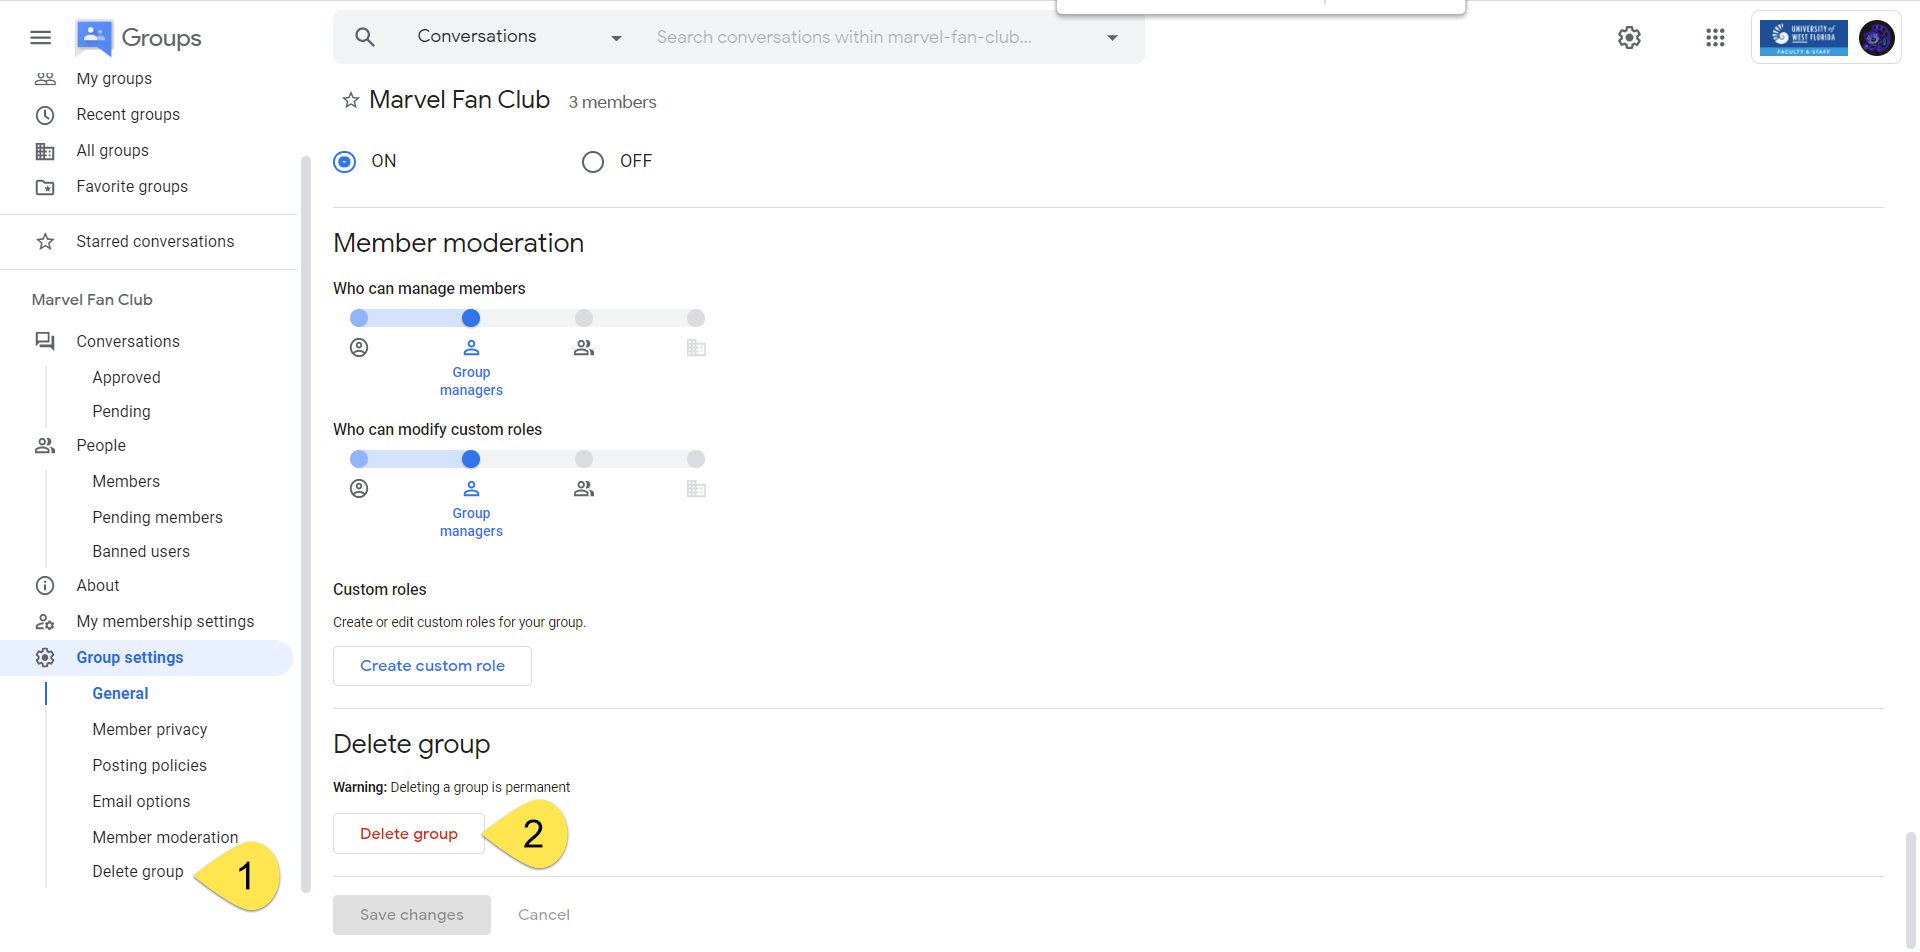
Step 2
Click OK.

| Expand | ||
|---|---|---|
| ||
Step 1Click Settings >> Email options.
Step 2Adjust these settings to fit your needs. You could leave these settings unchanged, if you wish. Click Save. |

| Expand | ||
|---|---|---|
| ||
Step 1Click Information >> General Information.
Step 2Check Allow posting by email, then Save.
|


| title | Removing members |
|---|
Step 1
Click Members >> All members.

Step 2
Click the members you'd like to remove, then click Actions >> Remove from group.
| Include Page | ||||
|---|---|---|---|---|
|
| Panel | ||||||||||||
|---|---|---|---|---|---|---|---|---|---|---|---|---|
| ||||||||||||
|