Overview
| Excerpt |
|---|
This classroom is equipped as a point-to-point video-teleconferencing system (or VTC system). This system handles bi-directional video and audio transmission to/from UWF’s Pensacola and Fort Walton Beach campuses. This article provides an overview of the room's features, capabilities, and operation instructions. |
Hardware Standards
Microphones
- Wireless micro headset microphone
- Ceiling-mounted array microphone
- 18" Lectern-mounted cardioid microphone
Audio playback devices
- Classroom speakers
- Wireless earbud headphones
Peripherals
- Lectern PC
- SMART Podium with pen
- Crestron touch panel
- Document camera
- Blu-Ray player
- Projector (74/109)
- 1 86" Display (FWB 4/460)
- Cisco video conference system
- 2 65" video conference displays (74/109)
- 2 75" video conference displays (FWB 4/460)
Software Standards
- Windows 10 Operating System
- Microsoft Office 2019
- SMART Notebook 19 (Basic Mode)
- TurningPoint (Clickers)
- Chrome (recommended), Edge, and Internet Explorer Browsers
- VLC Media Player
- Google Drive for Desktop
- Foxit Reader
Instructions
Activating the System
Step 1
Touch the Crestron Touch Panel to wake system. Touch again on the Touch to Begin page.

Step 2
Select Start under Video Conference Mode to use VTC functionality. Otherwise, select Start under Local Mode if utilizing room as a standard eClassroom.
ADD SCREENSHOT HERE.
ADD expand macros or links to VTC or Local Mode documentation

Video Conference Mode
Step 3Wait for the system to initialize and bring you to the main interface page. The following should occur automatically:
- Both displays at the front and back of the room should Cameras, Displays, and Projector will turn on.
- The projector should turn on.The projector screen should lower.
screen will lower.
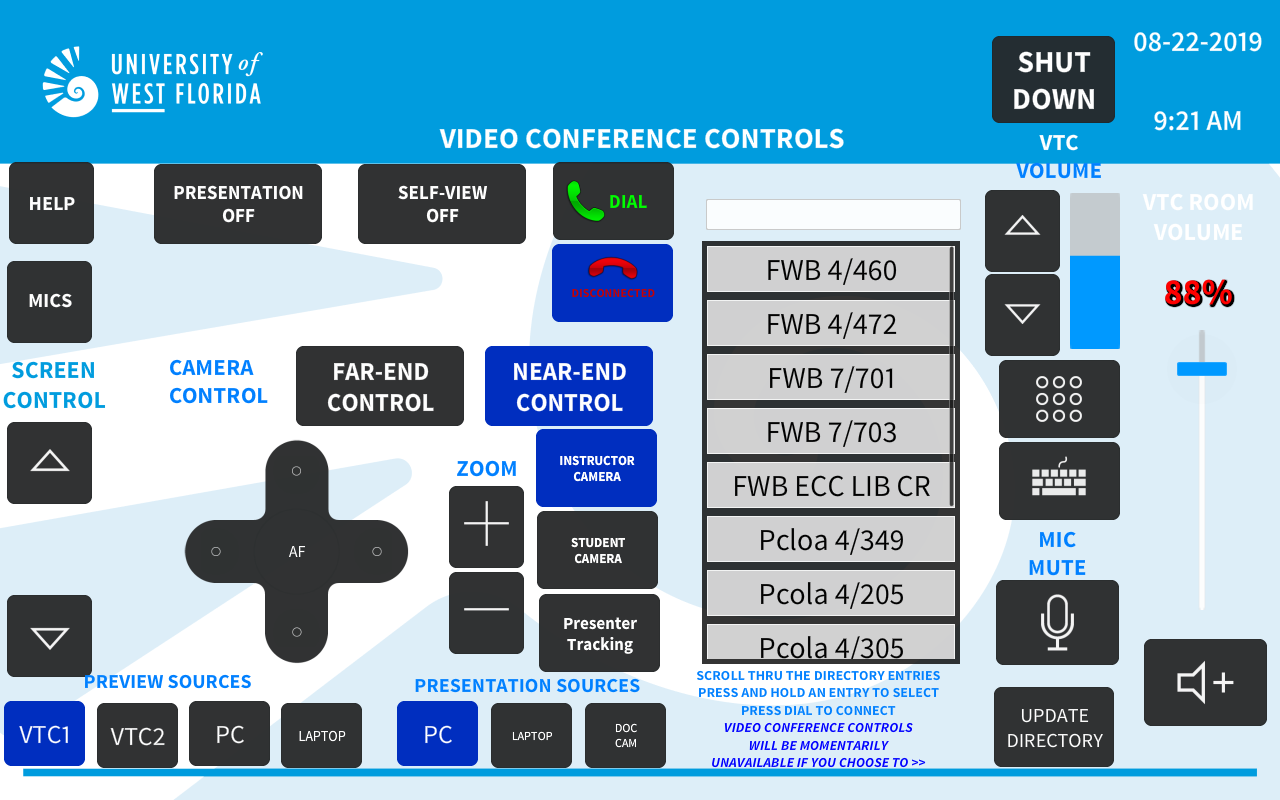
Once the system has initialized, the following screen will display:

Dialing a Room
Step 1
- Select the room your course is paired with in the Directory pane
Document where instructors/facilitators can find this info. I think it is safe to say we can specify 4/460 since this is a unique room.

Step 2
Verify room is correct. Press Dial.
- Select Dial.
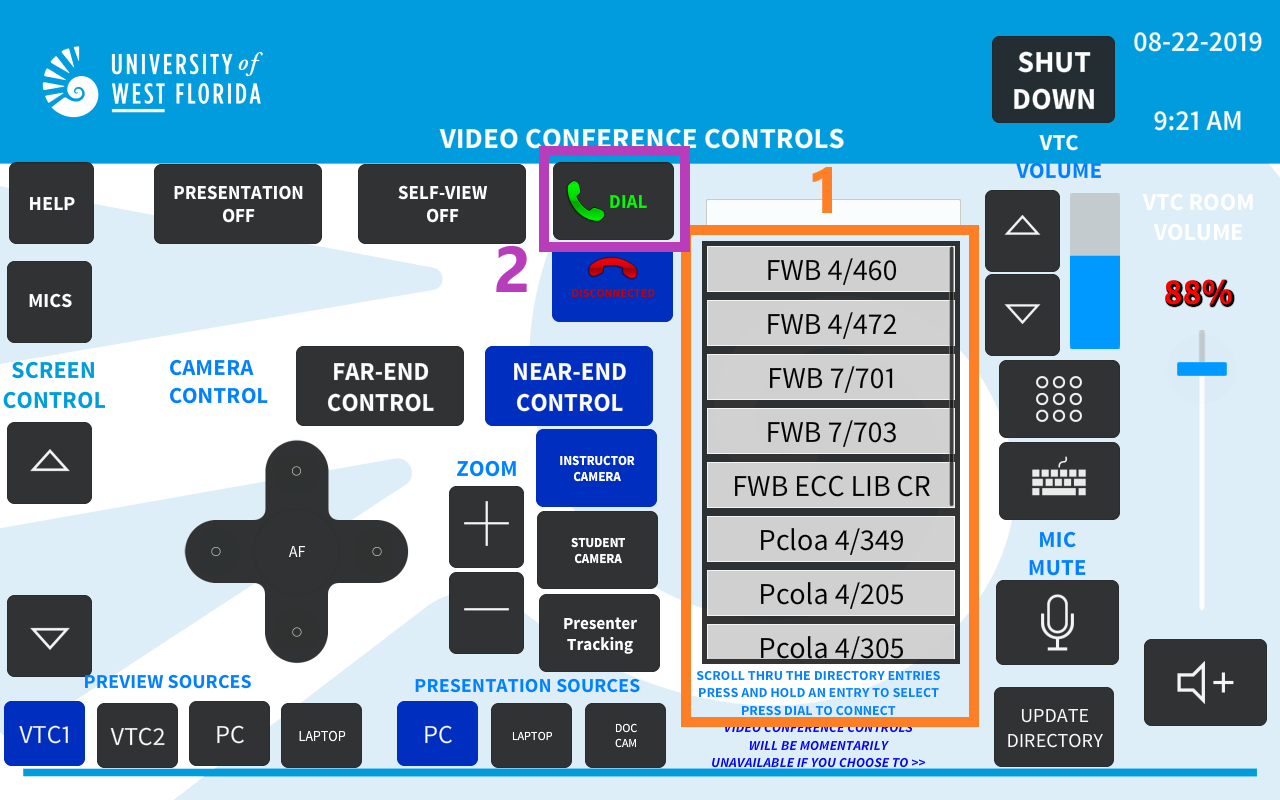

Step 3
Press Dial to initiate the connection. Wait for both rooms to connect. Once the rooms are connected, you should see the video feed from the FWB remote camera on each display.
| title | Note |
|---|

Adjusting Microphone Settings
Step 1
Press Mics button on left side of touch panel.
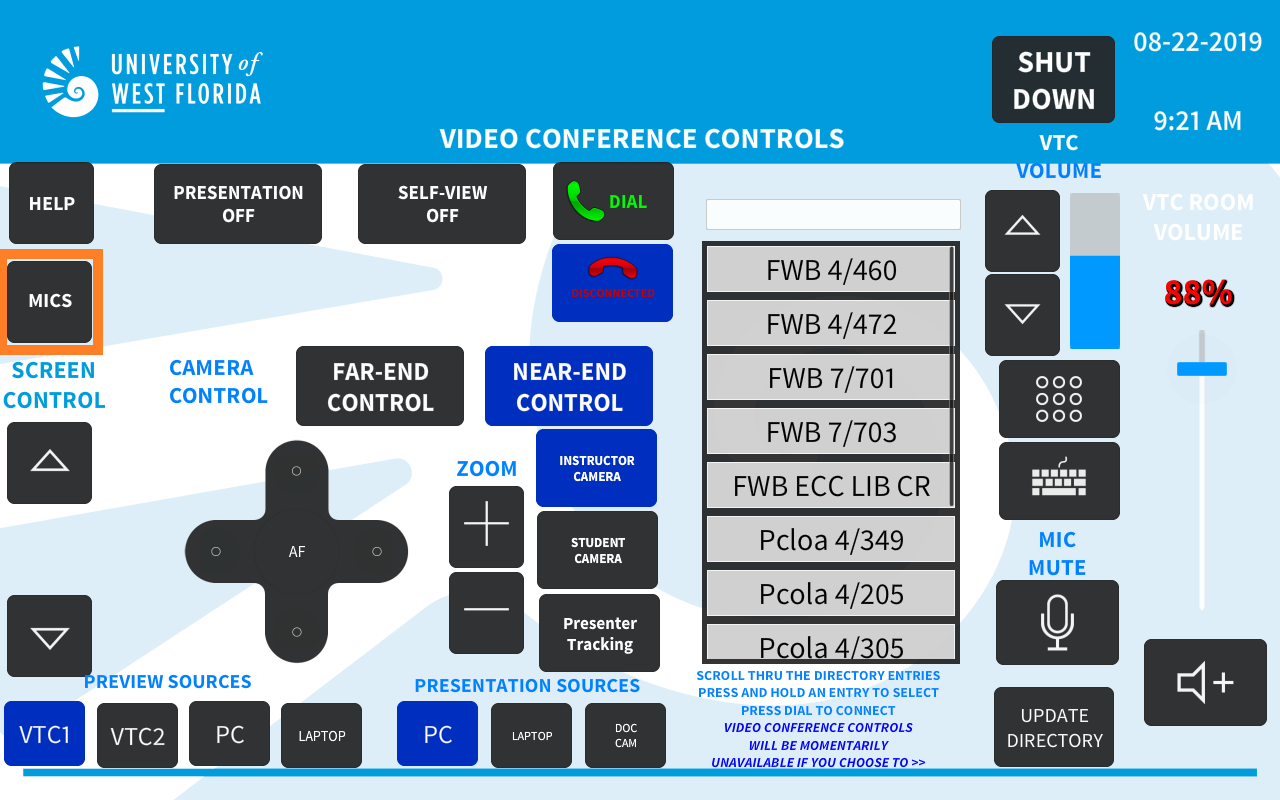
Step 2
Adjust volume sliders for each mic respectively. Confirm with remote facilitators if mic levels are adequate (if necessary).

| Info | ||
|---|---|---|
| ||
The mics can be muted by selecting the blue the Speaker icon below each microphones' volume control slider. |

. A blue speaker with an X indicates the device is muted. |
Muting All Outgoing Audio
Outgoing audio during a call may be muted for room privacy.

- Select the microphone button under Mic Mute.
Adjusting Volume
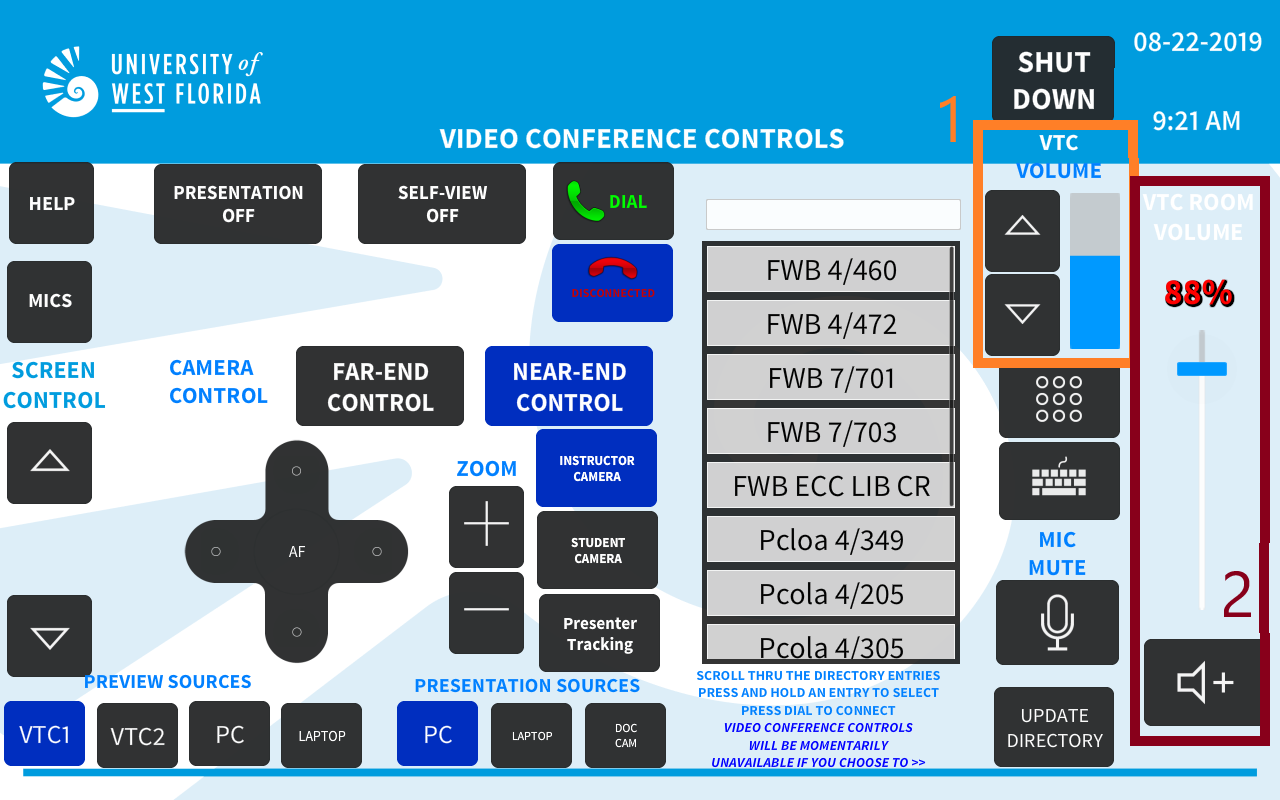
- Adjust the VTC Volume slider to adjust the audio volume
- coming from the
- remote classroom.
- Adjust the VTC Room Volume slider to adjust the volume
- devices in the local room (such as the Blu-Ray player,
- lectern PC, or laptop).
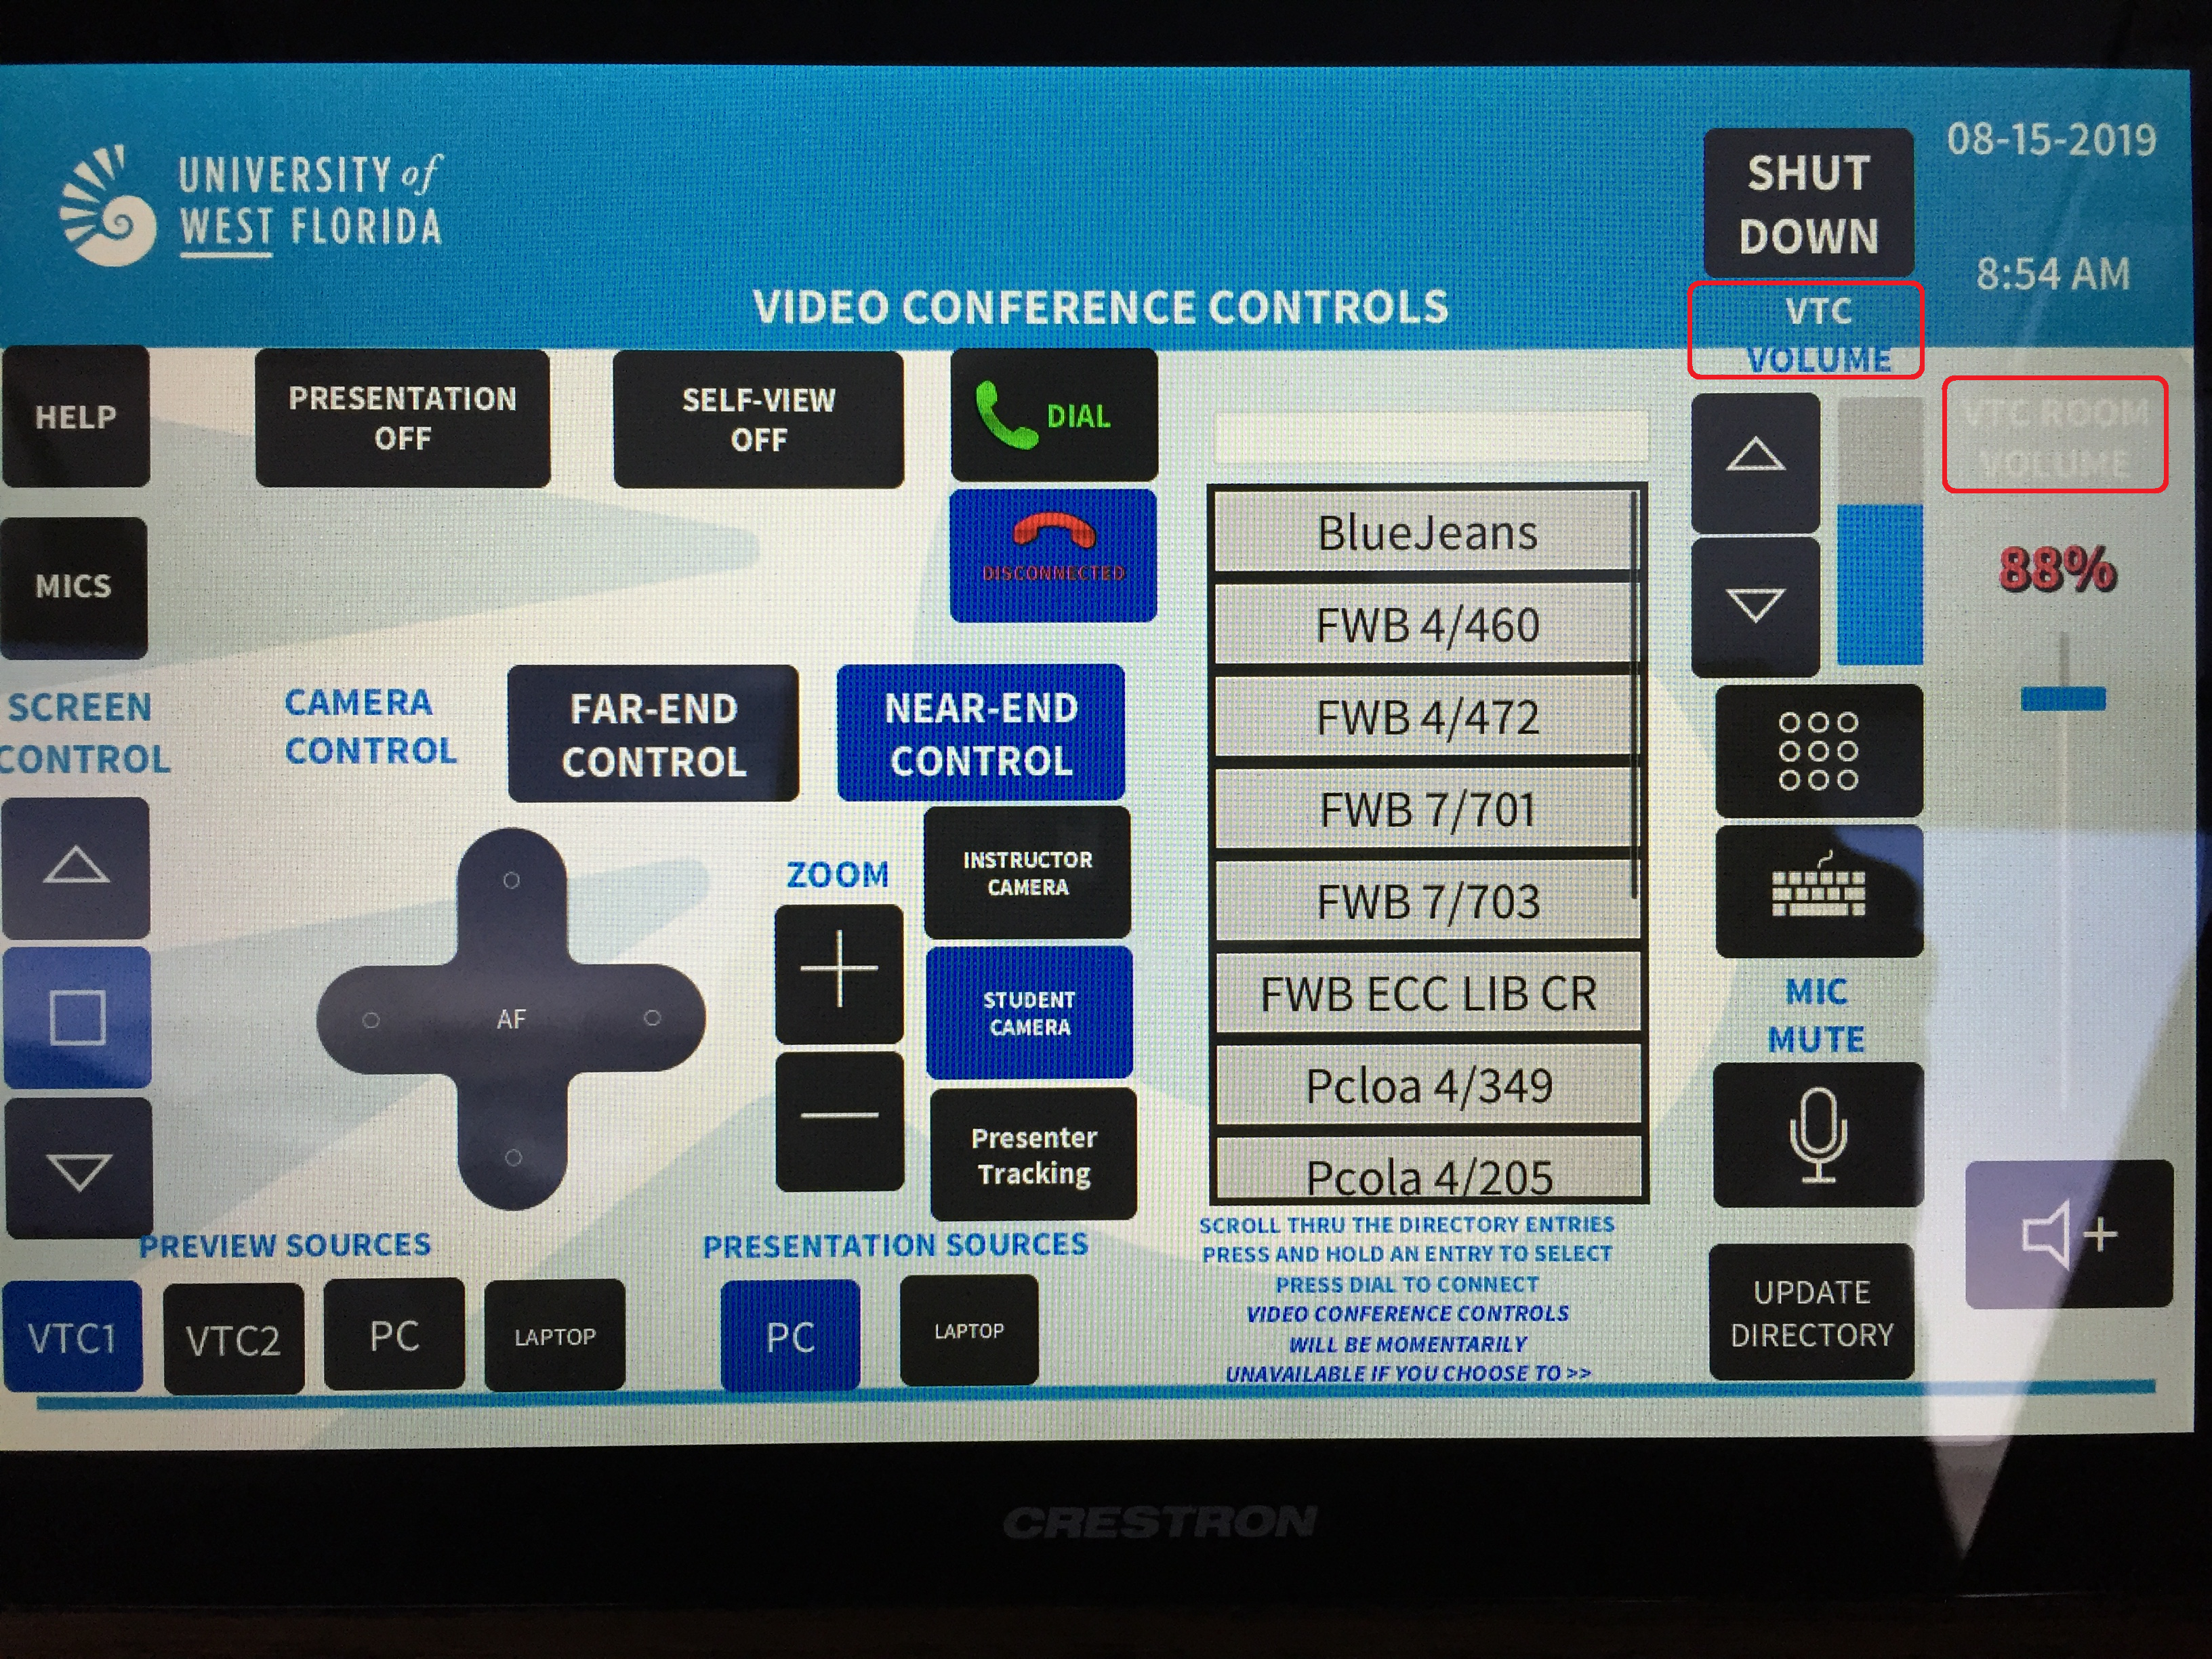
- The room may also be muted by pressing the Mute button below the VTC Room Volume slider.
Adjusting Camera Settings
Each room has a camera control section. These settings allow the instructor to adjust the camera position, zoom, and presenter tracking. Furthermore, each room can control the cameras of its paired room remotely. This means you can remotely control the cameras that are located in FWB and vice-versa.
Instructor Camera - Located at back of classroom (facing the instructor).
Student Camera - Located at front of classroom (above the instructor).
Press the Near End Control button and select a camera to adjust the local camera’s position, zoom, and presenter tracking option.
Press the Far End Control button and select a camera to adjust the remote camera’s position, zoom, and presenter tracking option.

Adjusting View Settings
The Presentation On/Off button will either display the Lectern PC (On) or the VTC system of the room (Off).
The Self-Vew button will allow the instructor to view their own camera’s video feed on each display in the room.
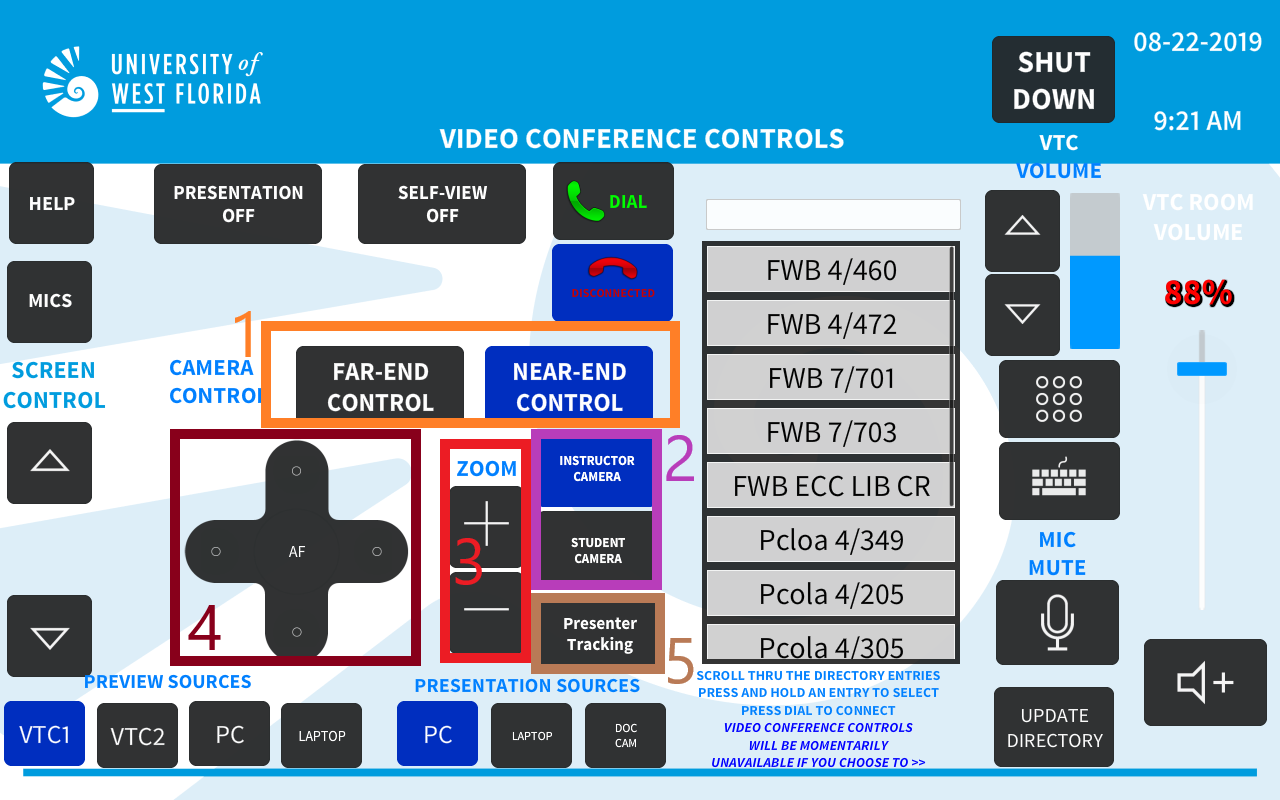
- Select Far-End Control to control the remote camera.
or select Near-End Control to control the local camera. - Select Instructor Camera to control the camera at the back of the classroom facing the instructor.
or select Student Camera to control the camera at the front of the classroom facing the students. - Use the Zoom controls to zoom the selected room camera in or out.
- Use the directional pad to pan and tilt the selected room camera left, right, up, or down.
- See the Presenter Tracking section below for more information.
Using Presenter Tracking
Presenter tracking works by tracking a moving individual across the front of a classroom. This does not physically pan the camera, rather the system digitally zooms and crops the image to focus on the tracked individual. Only one individual may be tracked at a time and the individual must remain within the tracking zone or they will need to return to the tracking set point for presenter tracking to resume. Use presenter tracking with the steps below:
- Ensure only the presenter is standing at the center of the lectern (presenter tracking setpoint).
- Select Presenter Tracking from the Video Conference Controls.
- Verify the camera is tracking via Self-View in the section below.
Adjusting View Settings
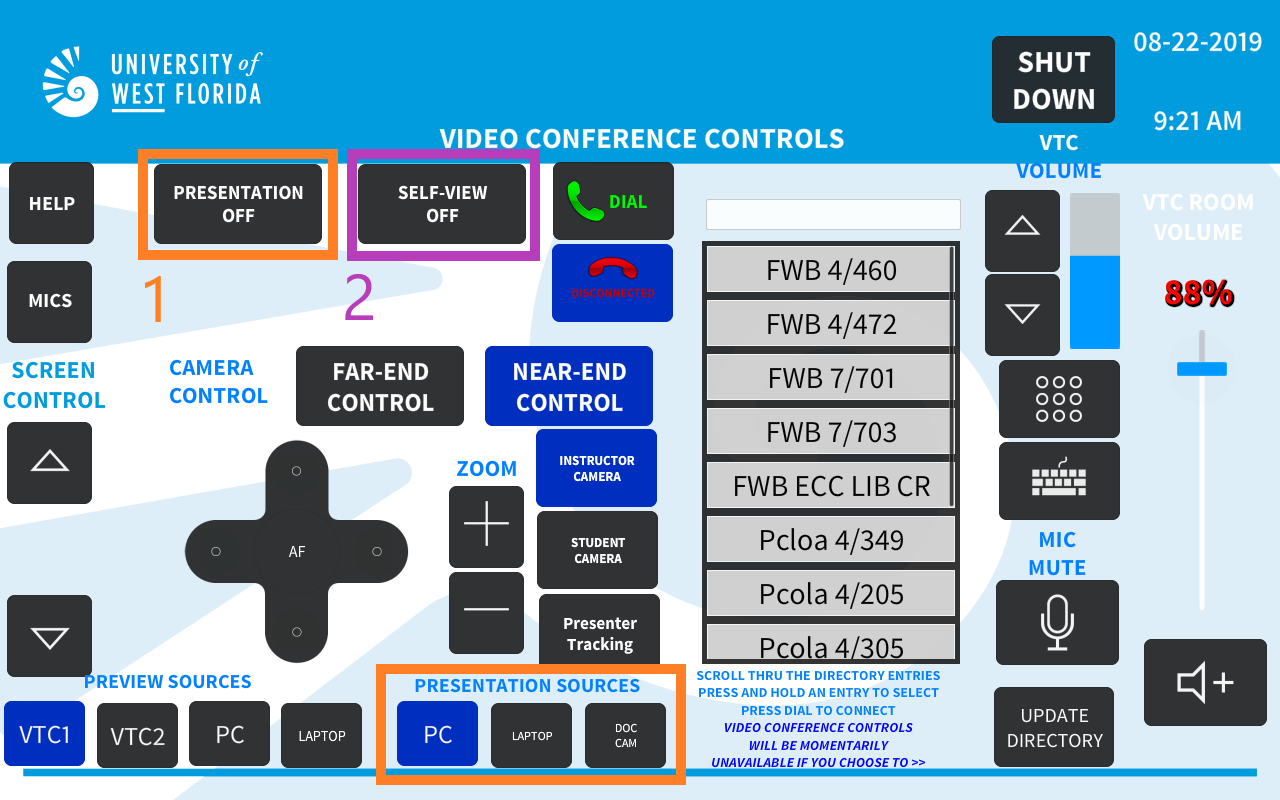
- The Presentation button, when On, will display the selected Presentation Source on the local and remote projectors.
- The Self-View button, when On, will place the local camera feed on each wall display of the local room.
- When this is enabled, the Change-Layout button is displayed. After each press, this allows the self-view window position to be adjusted.

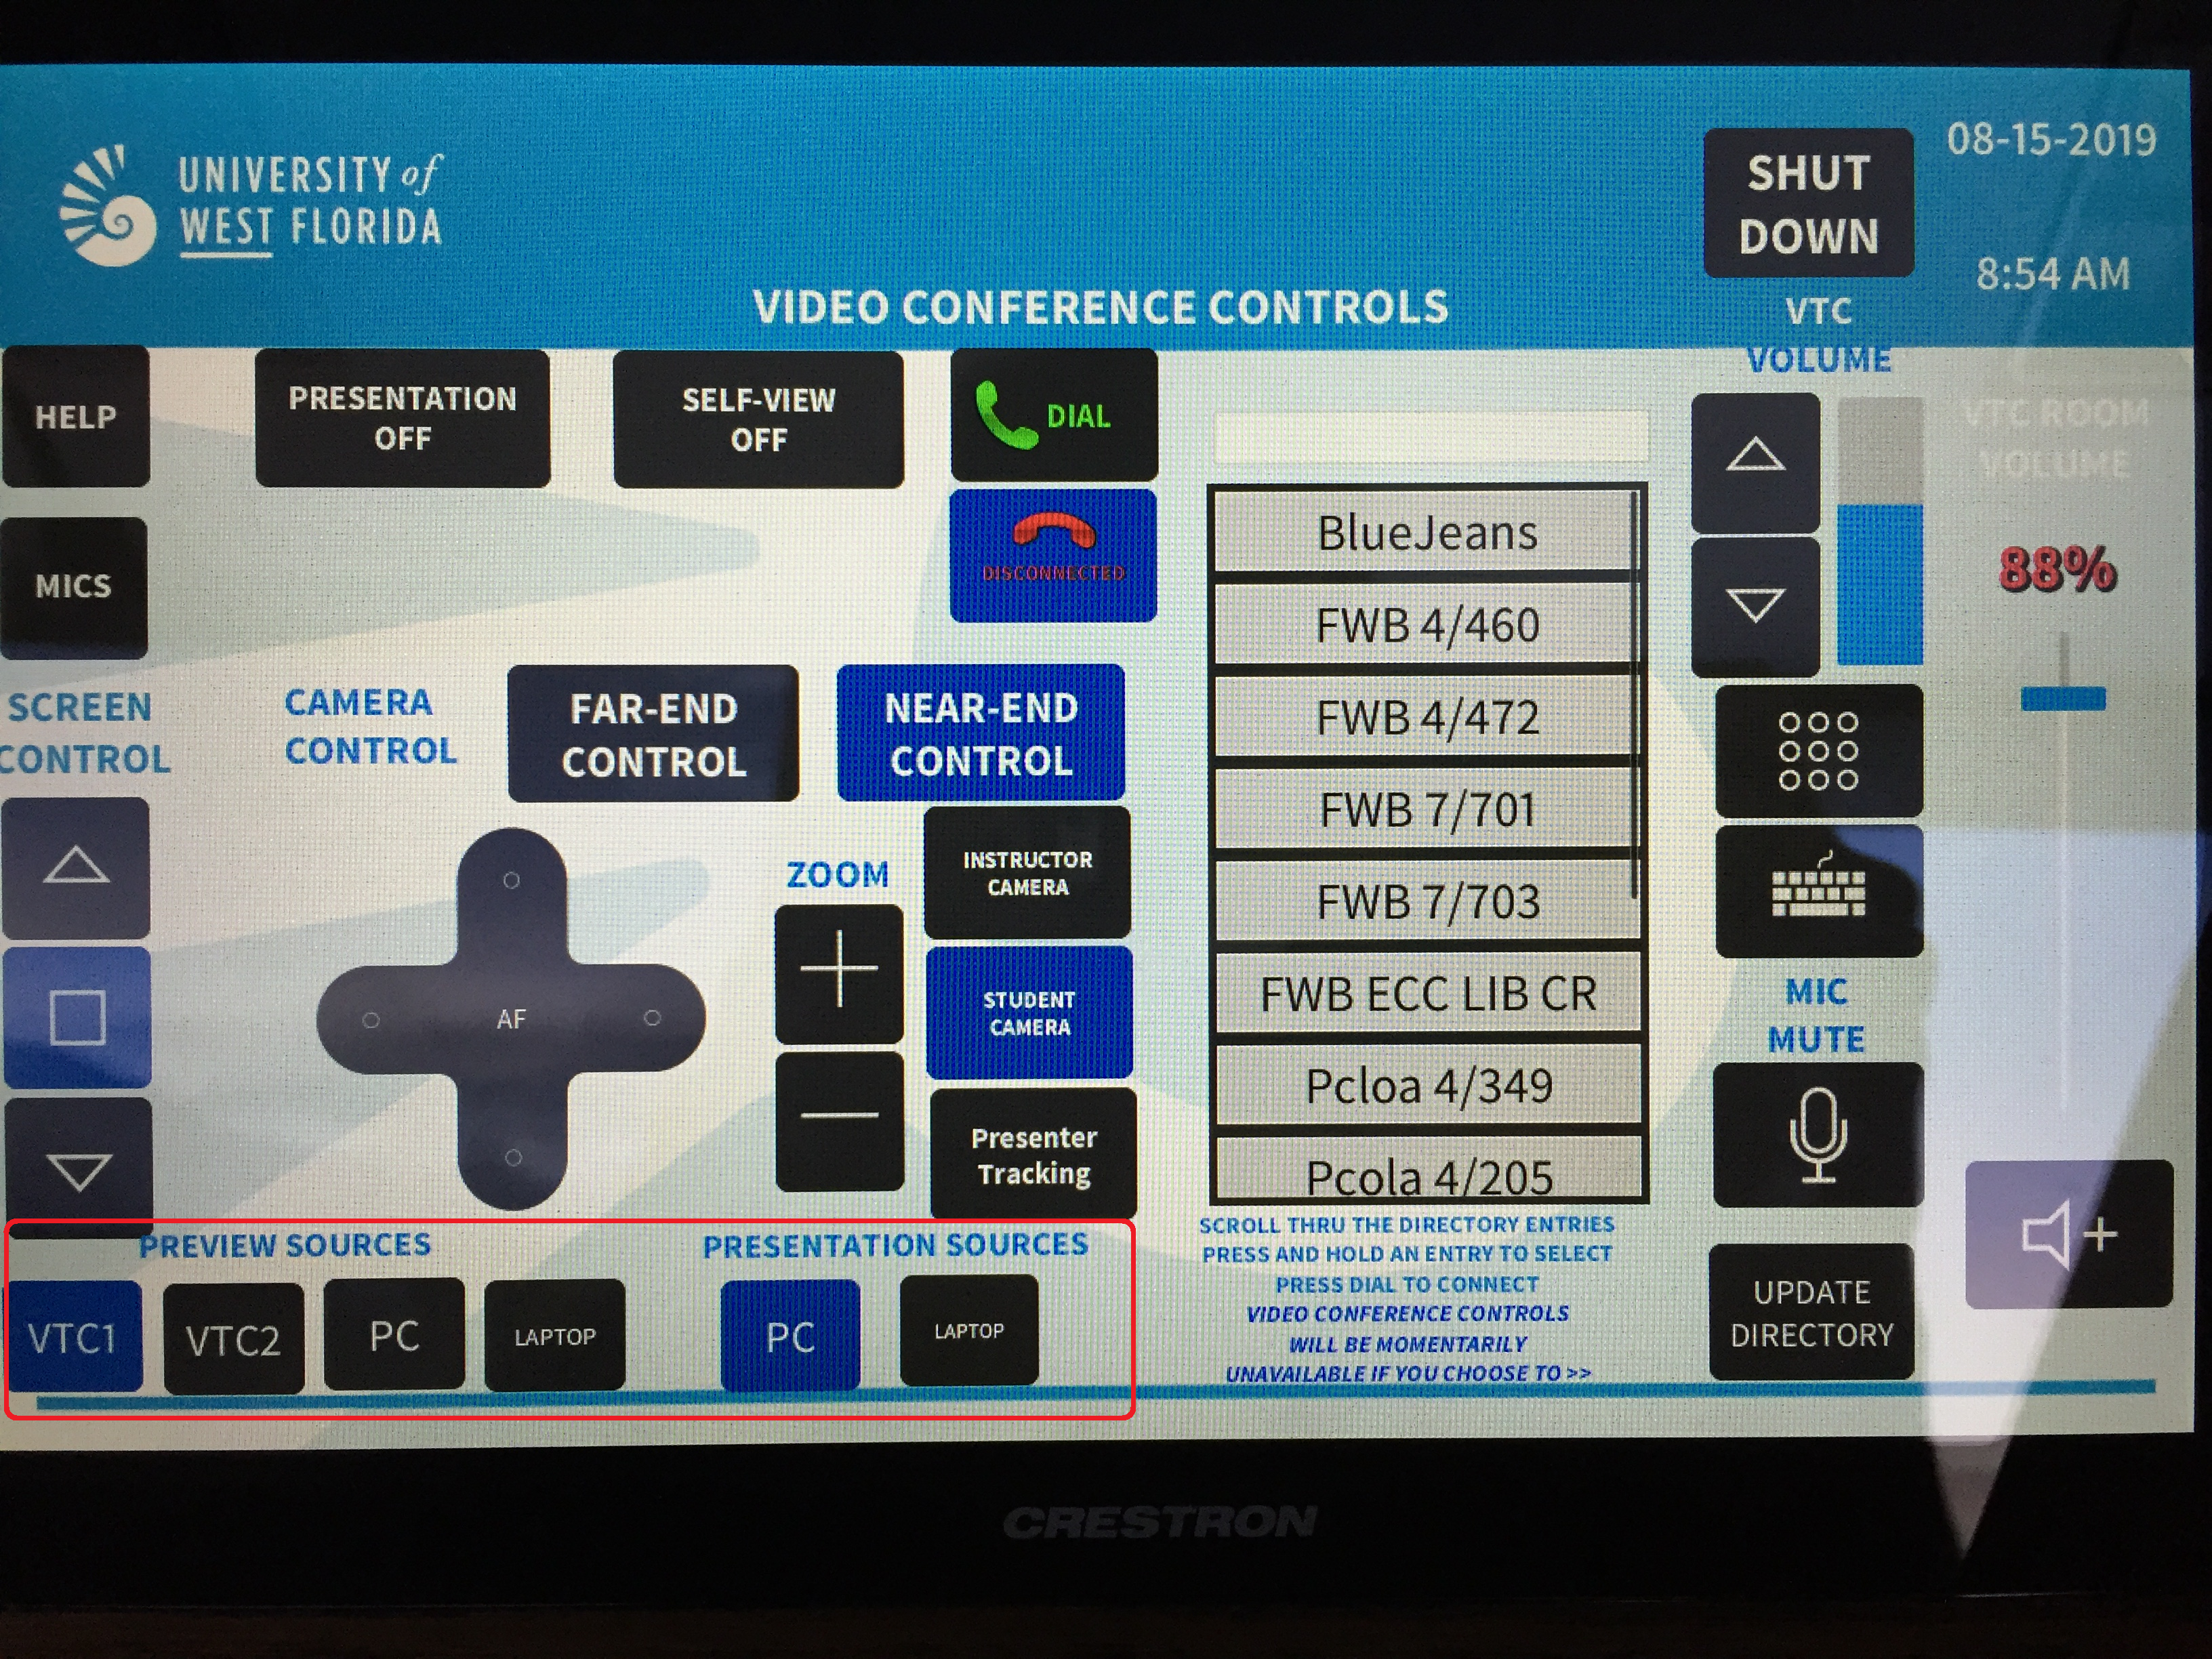
Preview and Presentation Sources
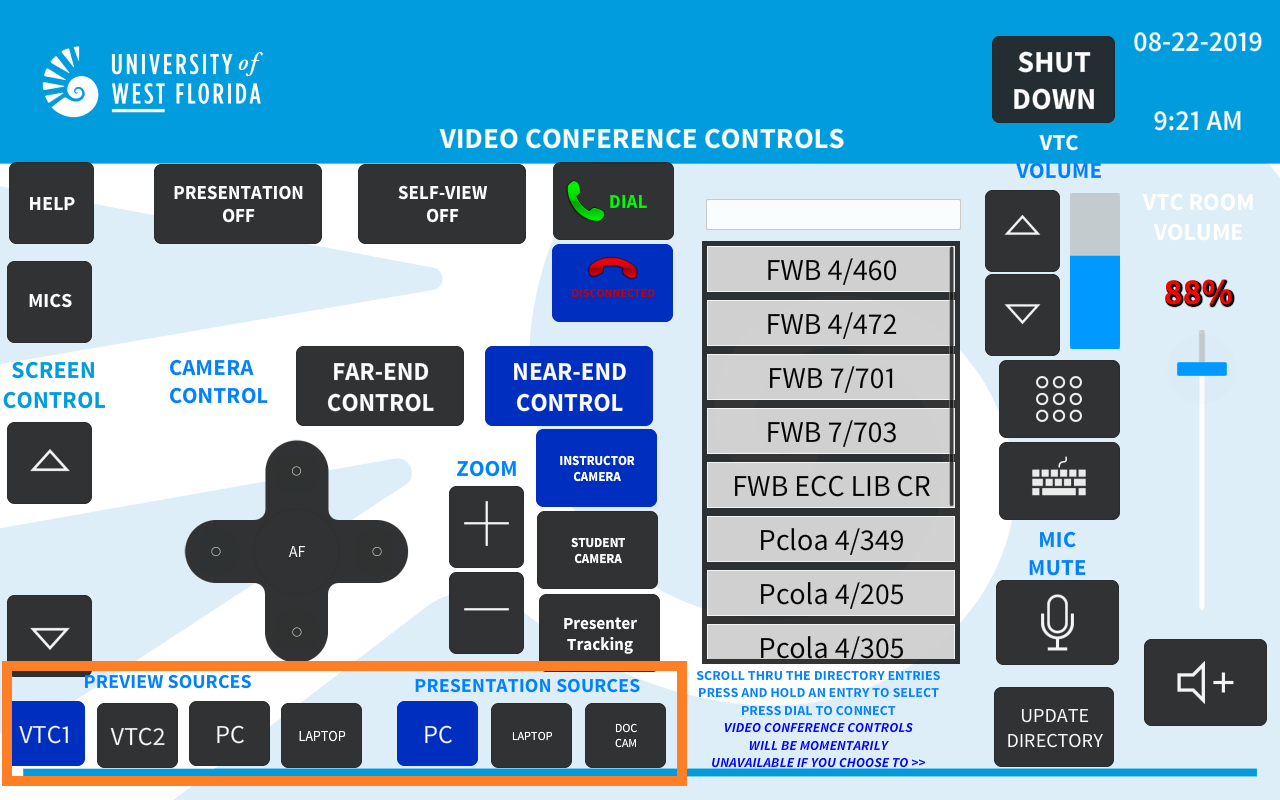
Preview Sources - Sources that are sent to the Lectern’s SMART Monitor:
- VTC1 - Display VTC of local classroom.
- VTC2 - Display VTC of other remote classroom.
- PC - Lectern PC
- Laptop - External Laptop or HDMI capable device.
Presentation Sources - Sources that are sent to the Projector:
- PC - Lectern PC
- Laptop - External Laptop or HDMI capable device.
- Doc Cam - Document Camera located in the lectern drawer.
Disconnecting or Ending a Call

- Select Hangup to end a video conference call.
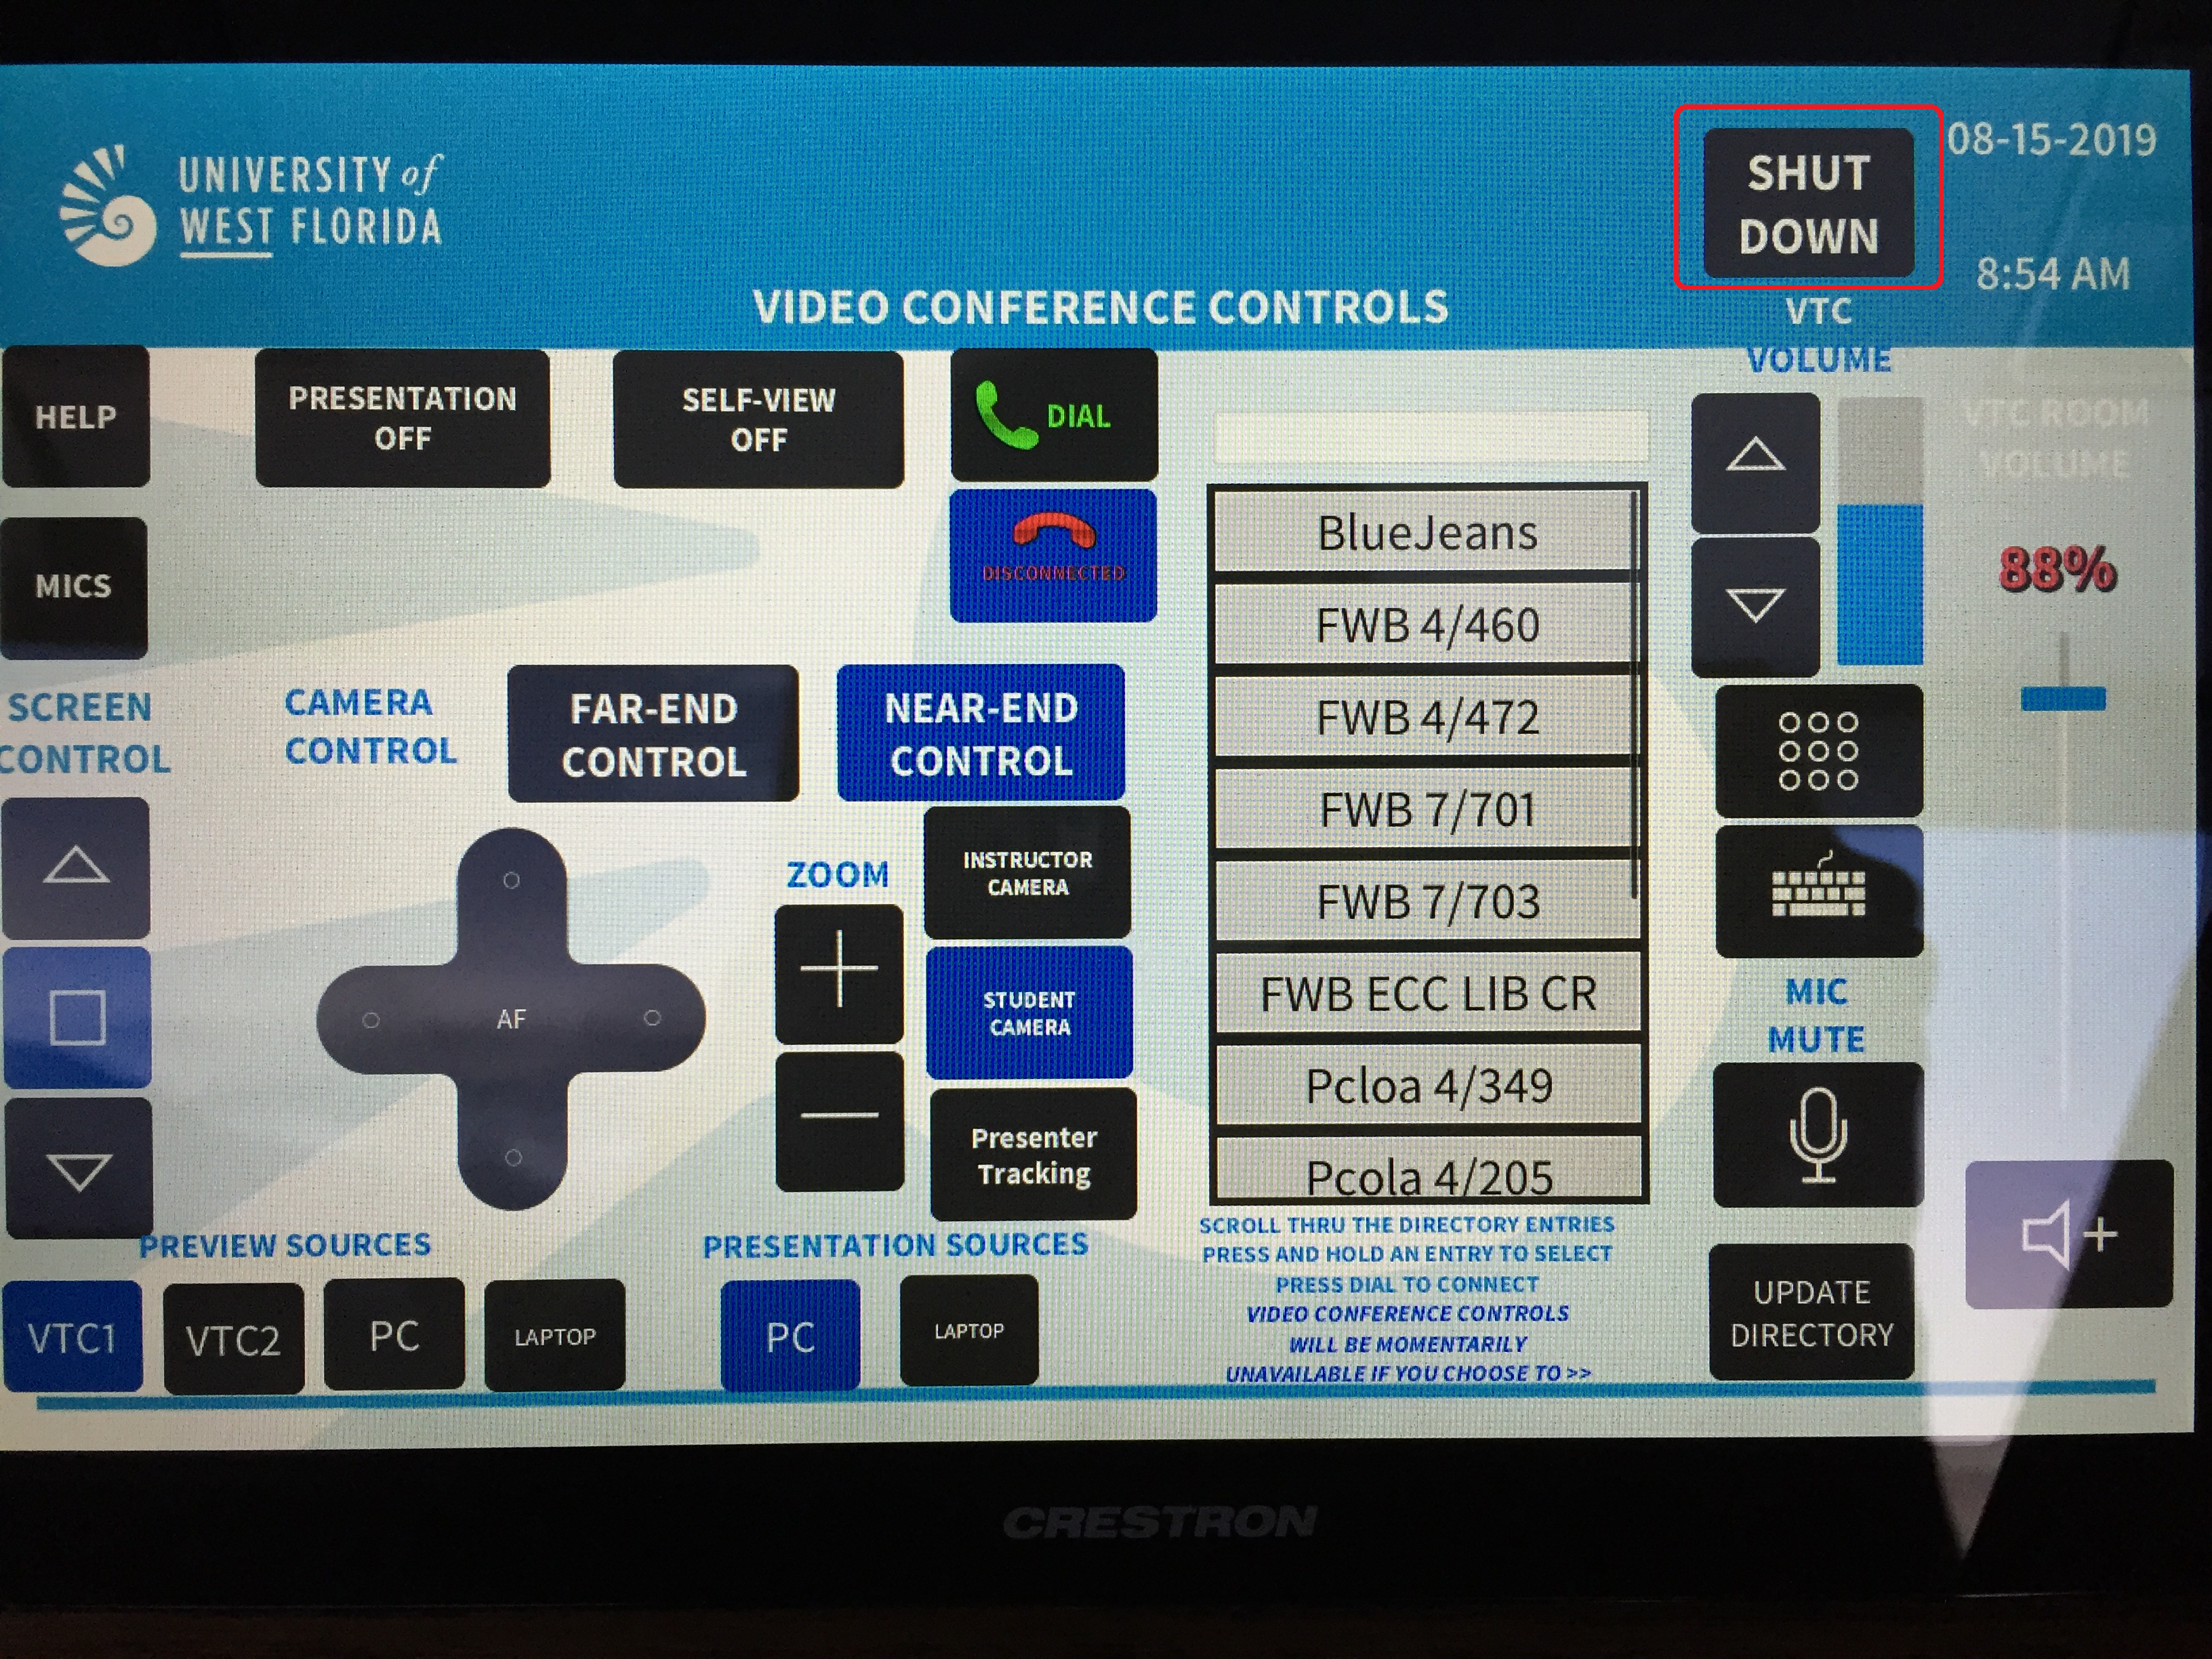
Shutting Down the System or Switching Modes
Step 1
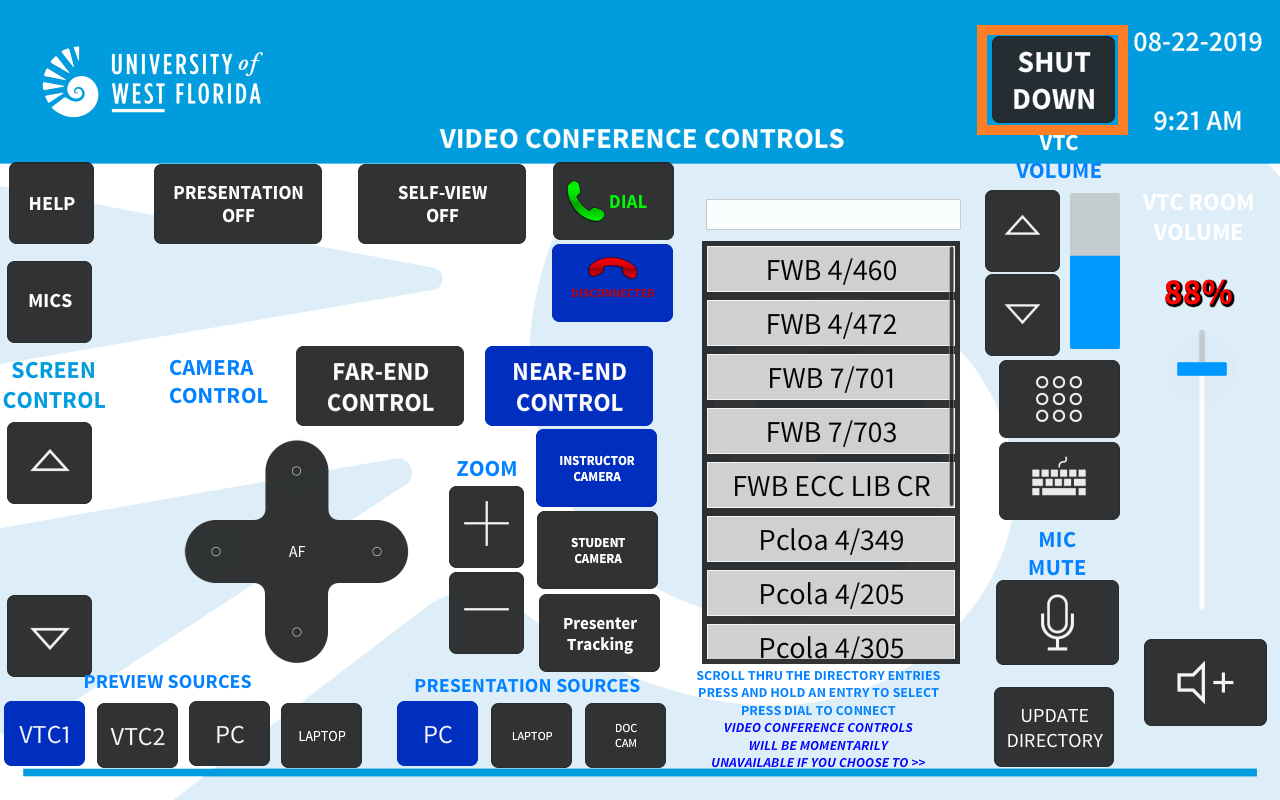
- Press Shut Down in the top right corner of the touch panel.
Step 2
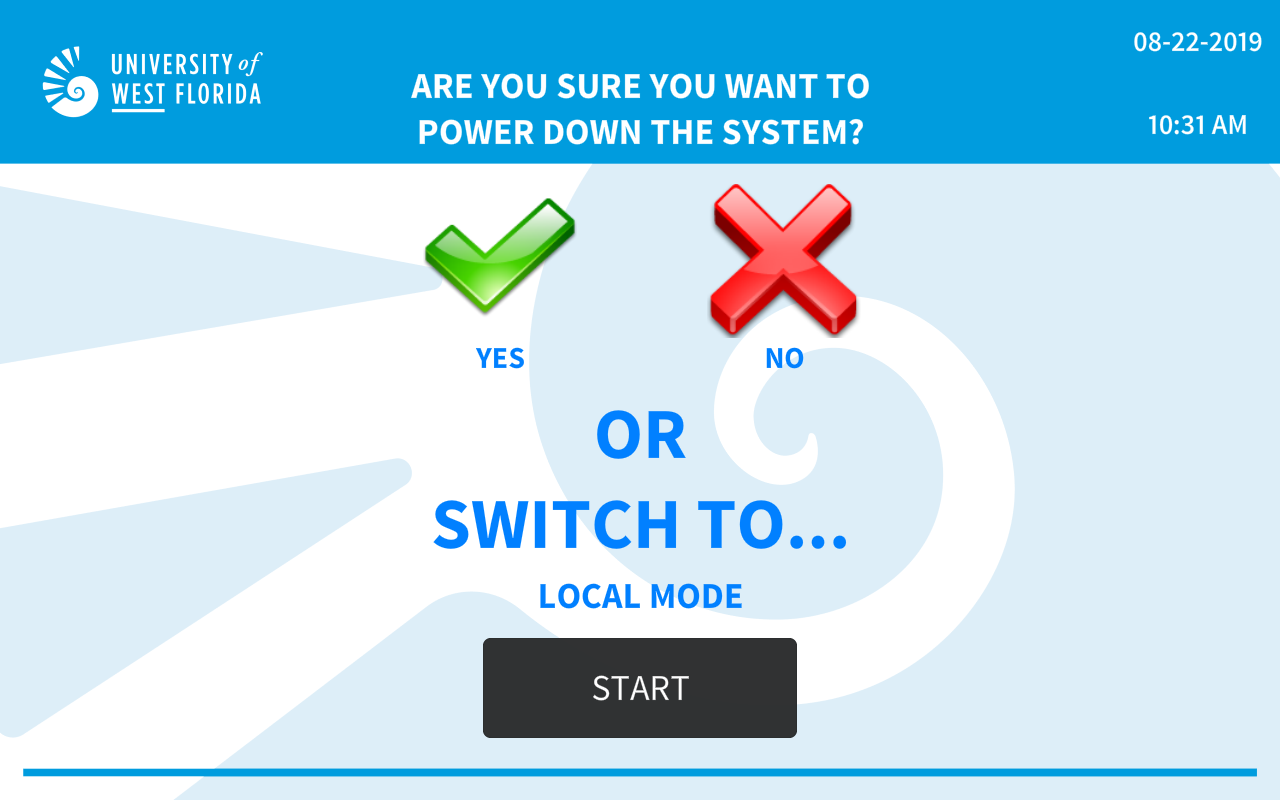
- Press Yes to confirm
- shut down
Or - Press Start to switch to an alternate mode
Step 3
Verify that the projector screen raises, both displays turn off, and the projector turns off.
Contributors
Interested PartiesWait for the system to shut down. The following should occur automatically:
- Cameras, Displays, and Projector will turn off.
- The projector screen will raise.
Facilitator Responsibilities
Facilitators are recommended to follow the guidelines below to ensure a quality experience for instructors and students.
- Arrive early: 15 minutes before class starts to verify room operations
- Be ready: To aid with issues or answer instructor questions
- Report issues: Troubleshoot and resolve or notify the appropriate support
Pages on this topic
| Include Page | ||||
|---|---|---|---|---|
|
| Panel | ||||||||||||
|---|---|---|---|---|---|---|---|---|---|---|---|---|
| ||||||||||||
| ||||||||||||
| Expand | ||||||||||||
| ||||||||||||
| Page properties | | |||||||||||
| Process Owner | ITS | |||||||||||
| Status |
| Last Reviewed | Notes | Template | BPL Procedure v.1.2