Overview
| Excerpt |
|---|
Here you will find instructions on how to view your class schedule using the MyClasses Classmate app in MyUWF. MyClasses Classmate includes access to your Class Schedule, Detailed Course Information (including location), Syllabus (if available), eLearning (if available), Textbooks (if available), access to register a clicker, viewing the final exam schedule, and waitlist status. |
The MyClasses Classmate app may be accessed from your mobile device , as well as your personal computer.
Students may also view their schedule via the Registration Menu app in MyUWF.
Instructions
Step 1
Access the My Classes Classmate app via via MyUWF.
Mobile Device
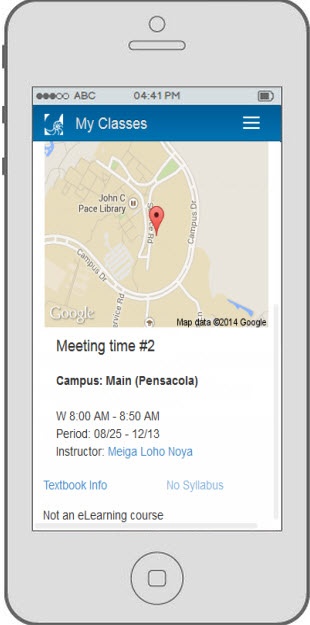
A list of courses will be displayed per term for each term in which you are enrolled, and one term in the past. Tap on a course to display the course details. The course list can be refreshed by clicking the refresh icon above the course listing.
Course Listing View

Course Detail View

Desktop
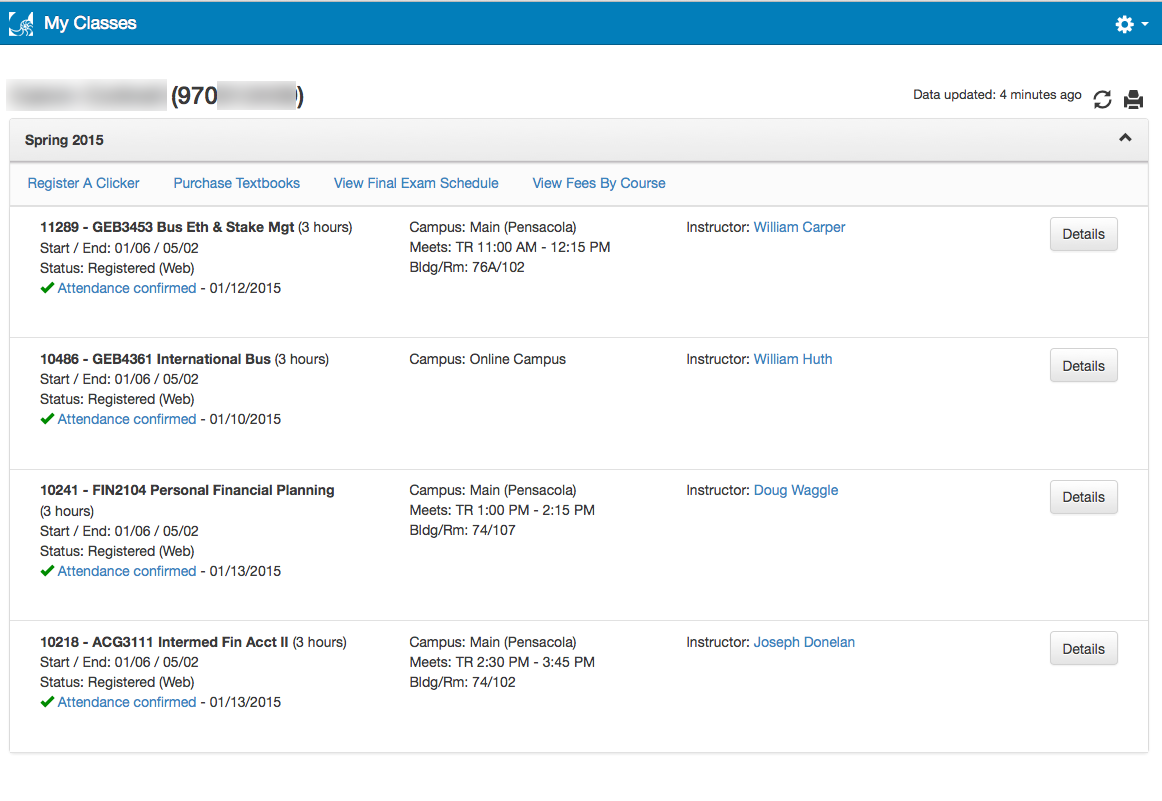
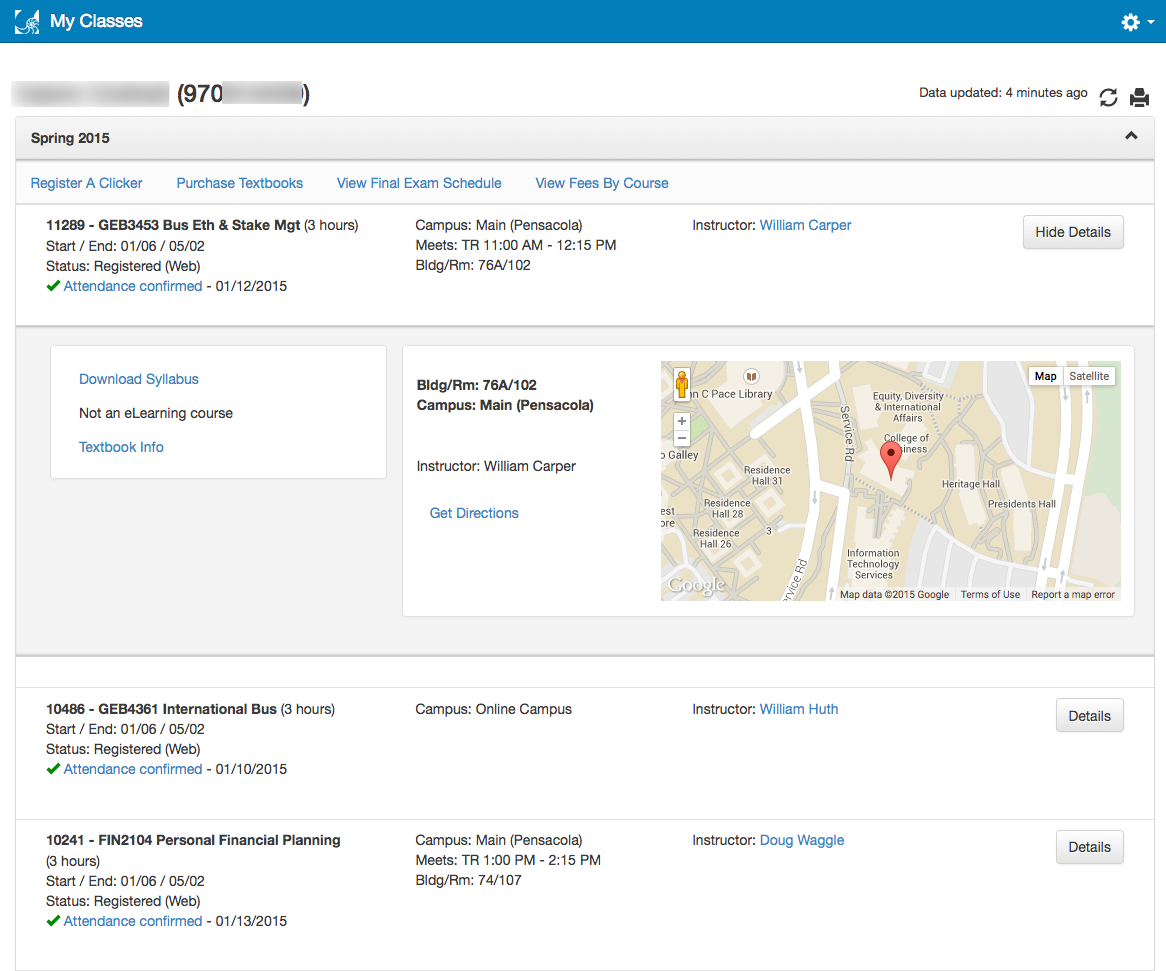
A list of courses will be displayed per term for each term in which you are enrolled, and one term in the past. The course list can be refreshed by clicking the refresh icon above the course listing. including past terms. Click Details to expand the row and show course details. Click the print icon in the upper-right corner for a printer-friendly version.
Course Listing View

Course Detail View

Term Actions
The following options are available from Term Actions beneath the name of the term you've selected:
- Register a clickerView final exam schedule
- Purchase textbooks - Displays a bookstore shopping cart with the textbooks for all the courses in which you are registered for the term.
- View final exam schedule
- View Fees By Course - Displays the cost by course for the term in the Course Fees app.


- Print course schedule - Only available from the desktop version. Displays a printer-friendly version.

- Refresh course list - If you recently added or dropped a course, click the Refresh icon to update the course list.
Course Evaluations
Students may submit course evaluations by clicking the Evaluations button for an individual course.

- Evaluations button TEXT:
- "Evaluations Open" if more than 12 hours remain in the evaluation period.
- "Evaluations Open (X Hours Remaining)" if within last 12 hours of evaluation period


Course Information
The following information is available for each course:
- Course meeting time(s) and campus. A course may have multiple meeting times.


- Credit hours received for successful completion
- Course start and end date
- Part of term the course is in
- View and email the instructor(s) (if an instructor has been assigned).
- Attendance indicator indicators displaying whether you have been marked off for the course attendance census and when/how.


- Current course enrollment status and the method used to determine enrollment (staff, web, etc.) .


Course Details: Syllabus, eLearning, Textbooks
The following information is available in the Details section:
- Syllabus- This link will be disabled and read "No Syllabus" if the instructor has not yet uploaded a syllabus.
- eLearning
- For courses prior to Fall 2018
- If the course is an eLearning course, but hasn't started yet you will see "Not Available in eLearning".
- If the course is not an eLearning course you will see "Not an eLearning Course".
- If the course is an eLearning course and it has started you will see "Available in eLearning".
- For courses on or after Fall 2018:
- If the course is an eLearning course, but hasn't started yet you will see "Available in eLearning on {course start date}".
- If the course is not an eLearning course you will see "Not an eLearning Course".
- If the course is an eLearning course and it has started you will see "Available in eLearning"
- .
- .
- For courses prior to Fall 2018
- Textbook Info- Displays a bookstore shopping cart with the textbooks for the specific course.


- Map displaying the course location. The mobile map is static; the desktop map is interactive.
- Get Directions- Links to Google maps to give you directions to the class.


- Course meeting time(s). If there are multiple meet times, they will be indicated by the headings Meeting Time #1, Meeting Time #2, etc.
Waitlist Status
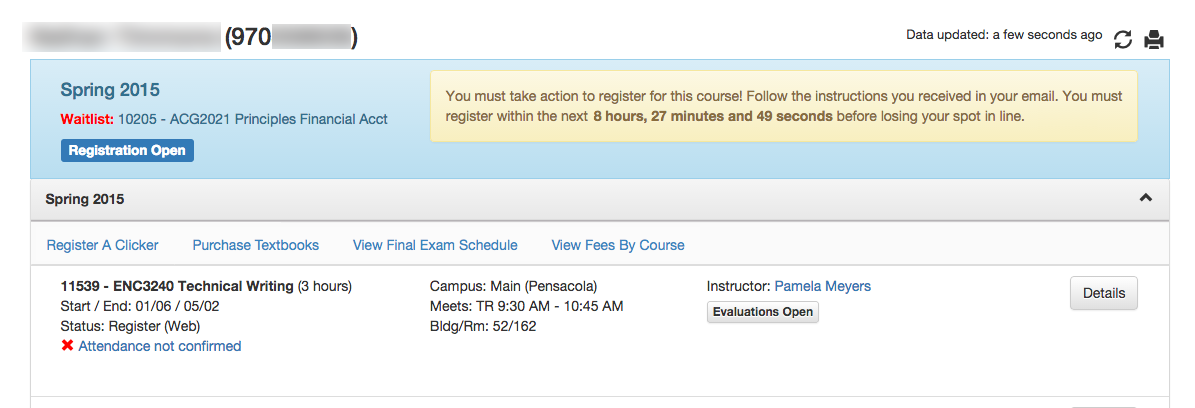
If you have signed up to be on the waitlist for a course, this will be shown at the top of the semester course list in blue. The course listing will show your spot in line as well. View instructions on using waitlists.
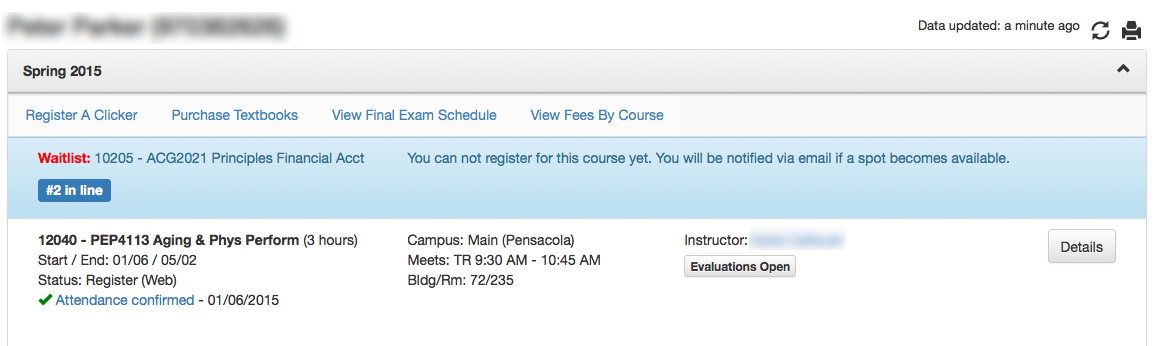

If a spot opens up for you and you need to register for the course, the notification will appear at the top of the page outside of the normal semester lists. It will display a countdown letting you know how much time you have left to register for the course before the spot goes to someone else. You will need to follow the instructions in the notification email in order to register for this course.
Confirming Attendance with Check Me In
You may confirm your own course attendance using a new feature of ClassMate, called Check Me In. During the first week of classes your instructor may choose to allow students to use this feature by providing a QR barcode and/or instructions to enter a 6-digit code into ClassMate. It may look something like this:

Confirming your attendance with a QR code
If your smartphone supports following a URL embedded into a QR code - perhaps using the built-in camera app - then this can be a convenient way to quickly confirm your attendance. The embedded URL will navigate to the "Check Me In" page of ClassMate, auto-filling and submitting the checkin code for you. A message will appear informing you of your current attendance status for the course.
Success Messages

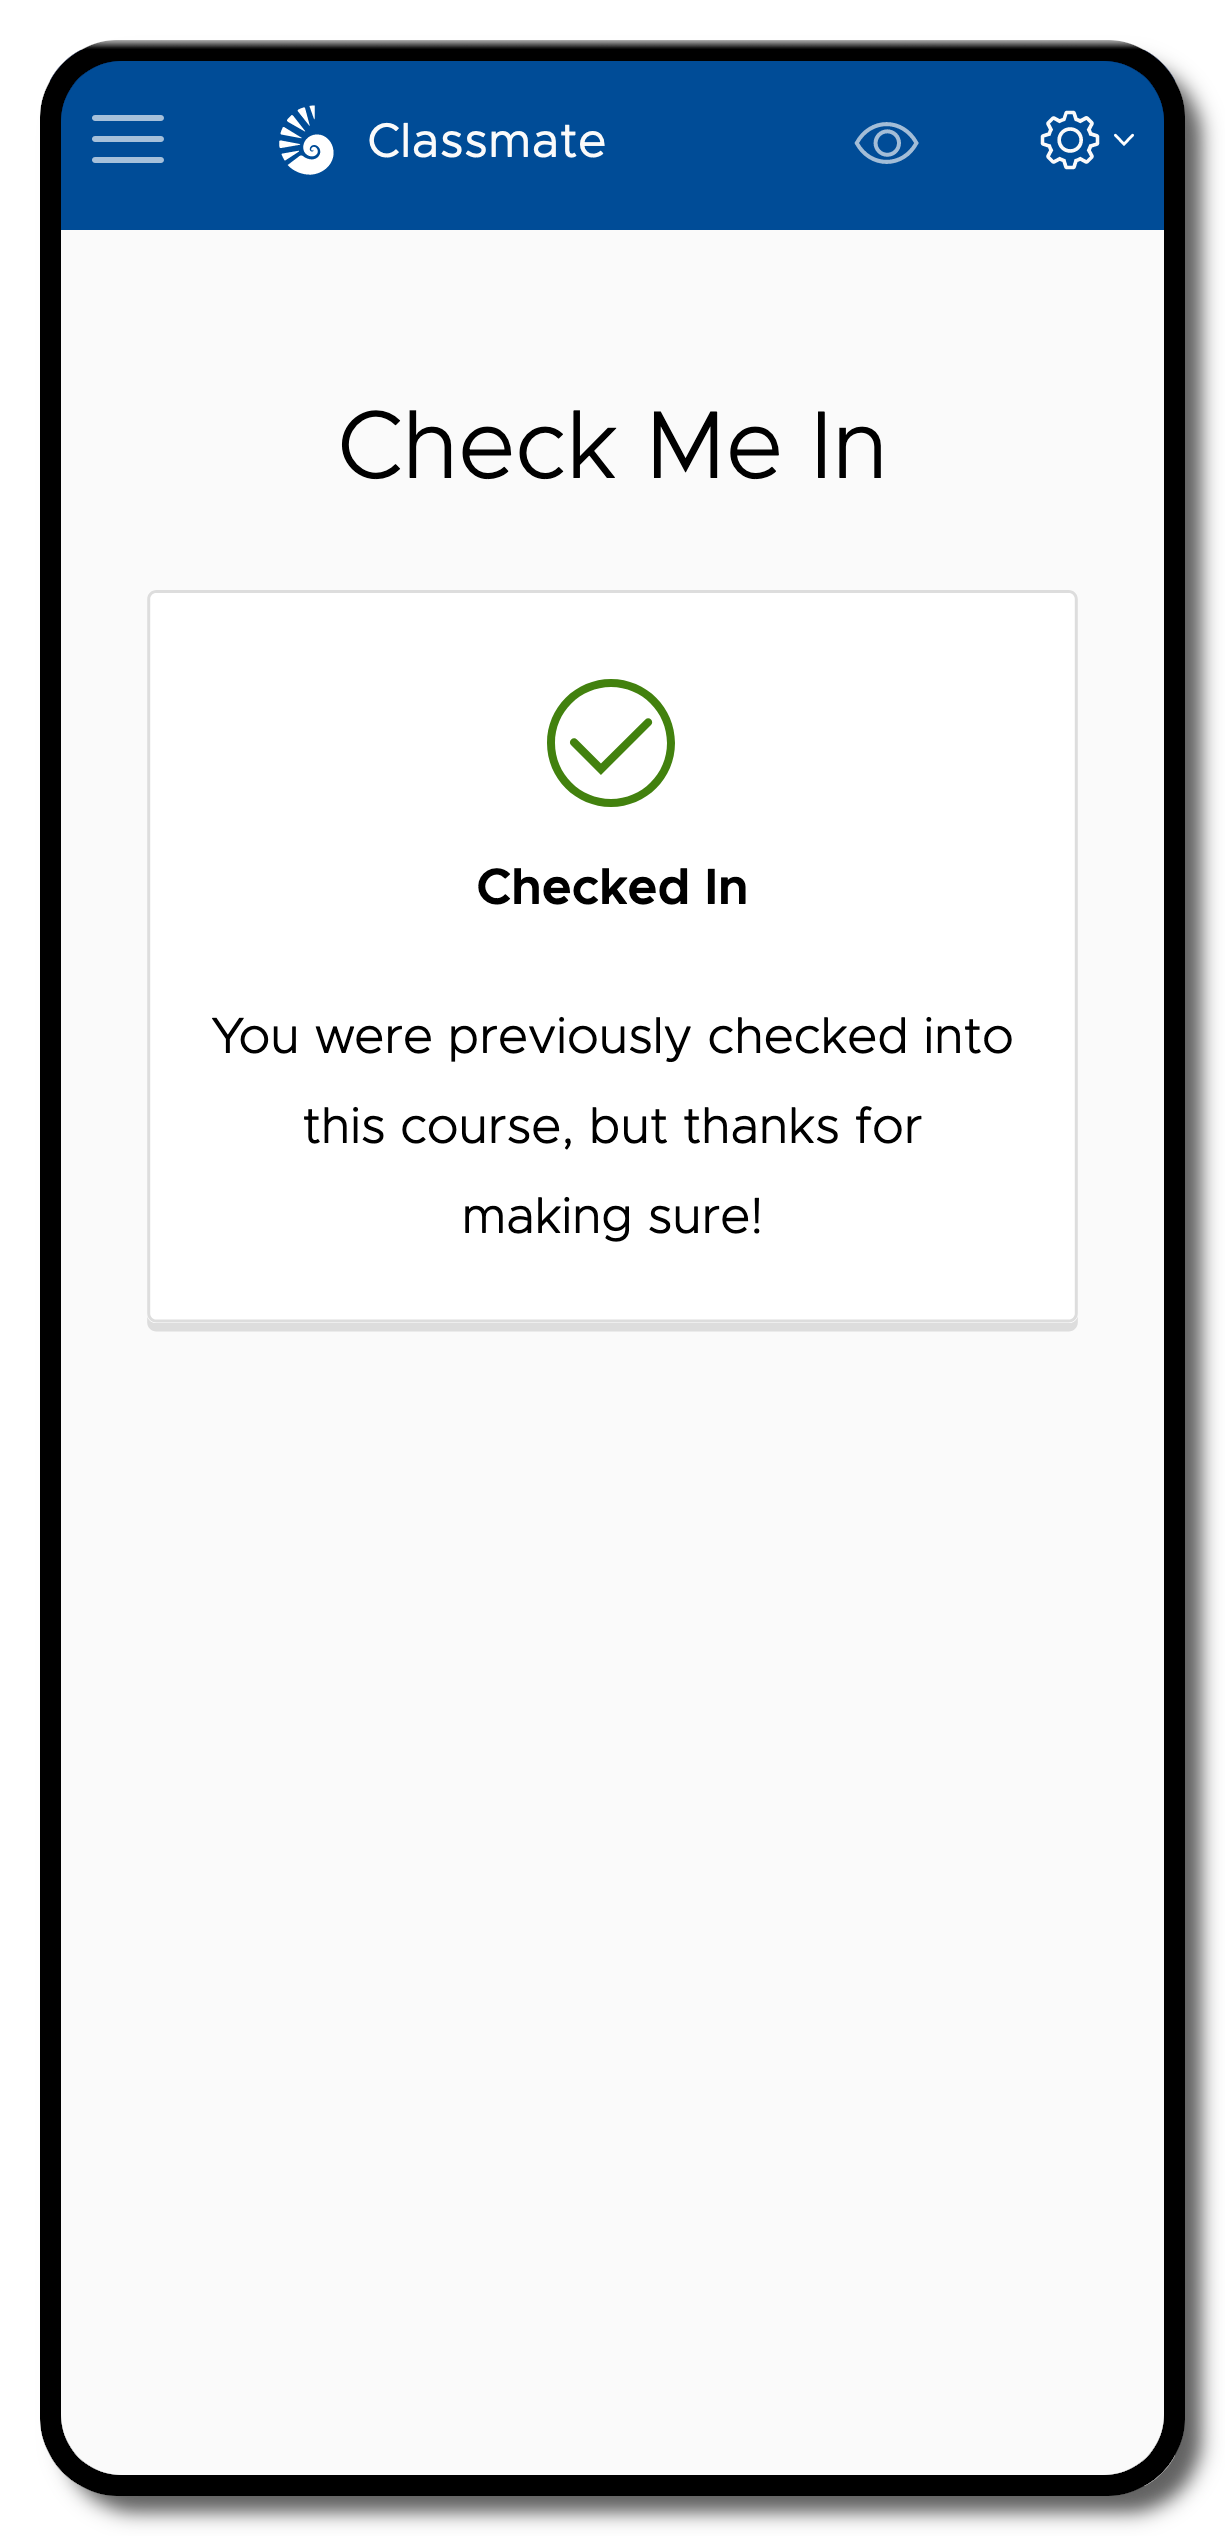
When confirming your attendance in a course for the first time, you will see the first message. If, for instance, in the next course meeting you reconfirm your attendance out of habit - this is okay but also unnecessary. As the second message says, "...thanks for making sure!"
Error Messages


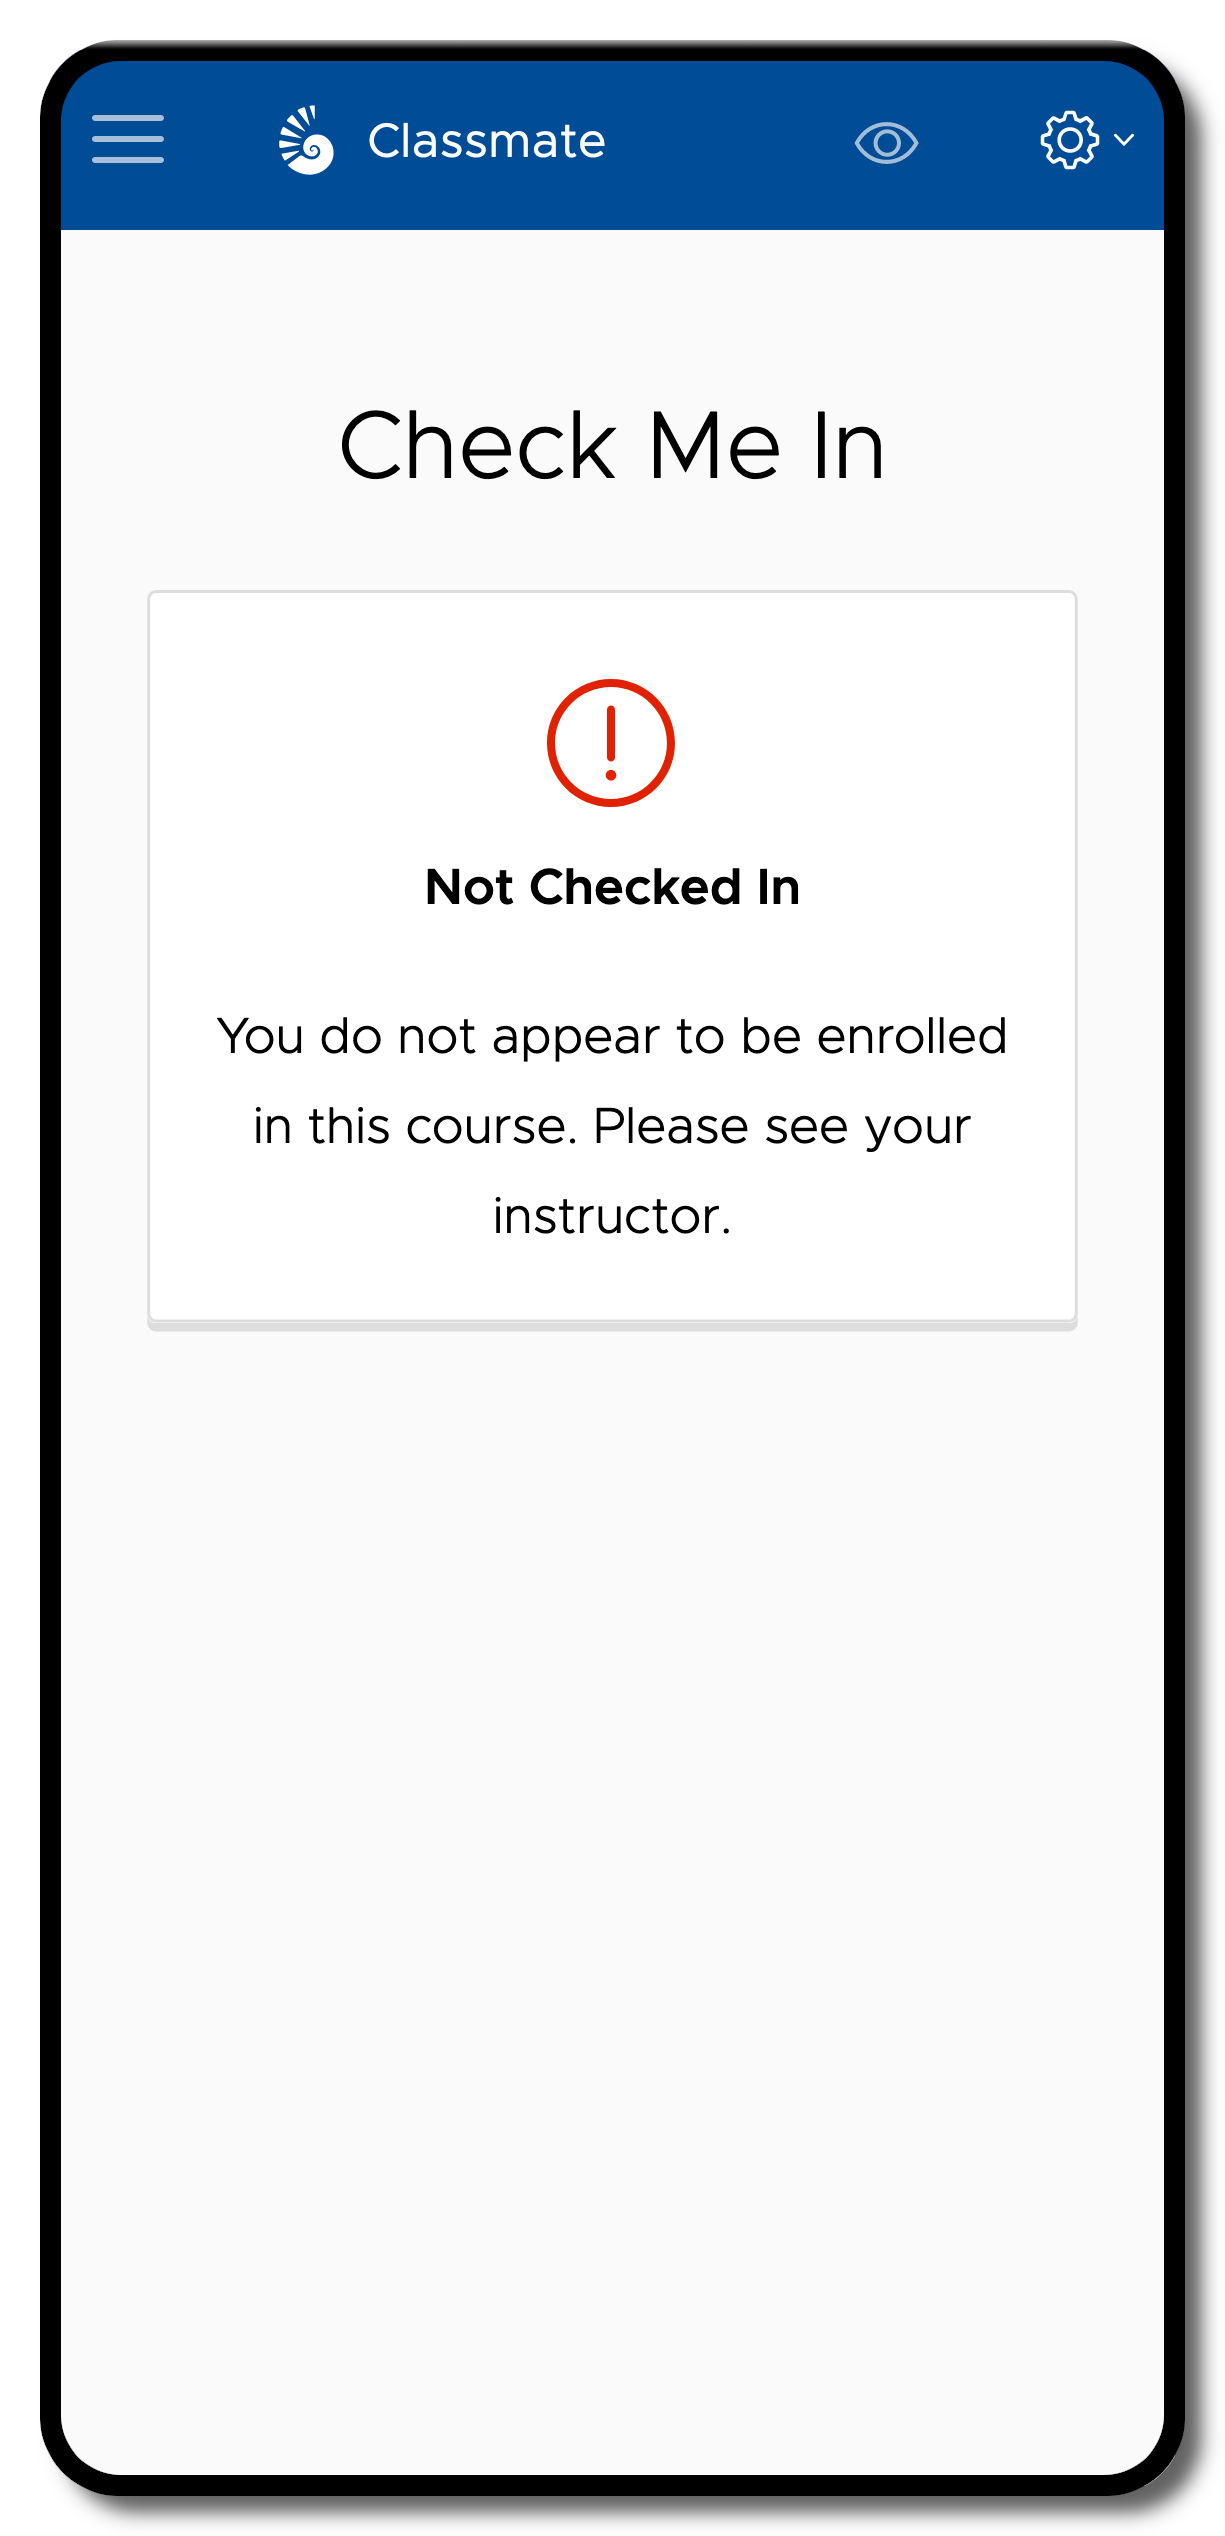
There are a variety of reasons why you may encounter the above error messages while using Check Me In, but in most cases these issues can be resolved by reaching out to your instructor.
Confirming your attendance manually
If you are unable to use the QR code method detailed in the previous section, you may confirm your attendance manually if you have a course check in code provided by your instructor.
Step 1
Access the Check Me In app via MyUWF.

Step 2
Enter in the 6-digit check in code for your course, and click "Check Me In". You should see a green check with the message "Checked In" below. If you see a red check with the message "Not Checked In" please see your instructor.

| Include Page | ||||
|---|---|---|---|---|
|
| Panel | ||||||||||||
|---|---|---|---|---|---|---|---|---|---|---|---|---|
| ||||||||||||
|