Overview
| Excerpt |
|---|
Here you will find instructions on how to register a Turning Point Response Card RF (clicker) from your mobile device as well as your personal computer. |
and ResponseWare license using eLearning. |
Instructions
Students must register their clicker at the beginning of each semesterusing the Turning Point link in eLearning. Registering your clicker links your clicker Device ID to your student number. After registering your clicker device, when you use your clicker to log attendance, assessments, or other interactions with a Turning Point presentation, the information is logged under your name and student number for your instructor or presenter.
Step 1
Access the MyClasses app in Login to MyUWF.
Step 2
Click Term Actions and select Register A Clicker.
Mobile Device

Desktop

Step 3
If you do not have a clicker registered the on-screen message will read, "You do not have a clicker currently registered for this semester".
If you already have a clicker registered, the number of the clicker that is registered to you is displayed.
Click Register a Clicker.
| Warning |
|---|
You can only have one clicker registered to you at a time. If there is already a clicker registered to you for the current semester, call the ITS Help Desk to have the serial # changed. |

Step 4
You will be asked to enter the six digit Device ID number on the back of your clicker and confirm it. This Device ID is unique to each clicker and will be used to link your student number to the clicker.
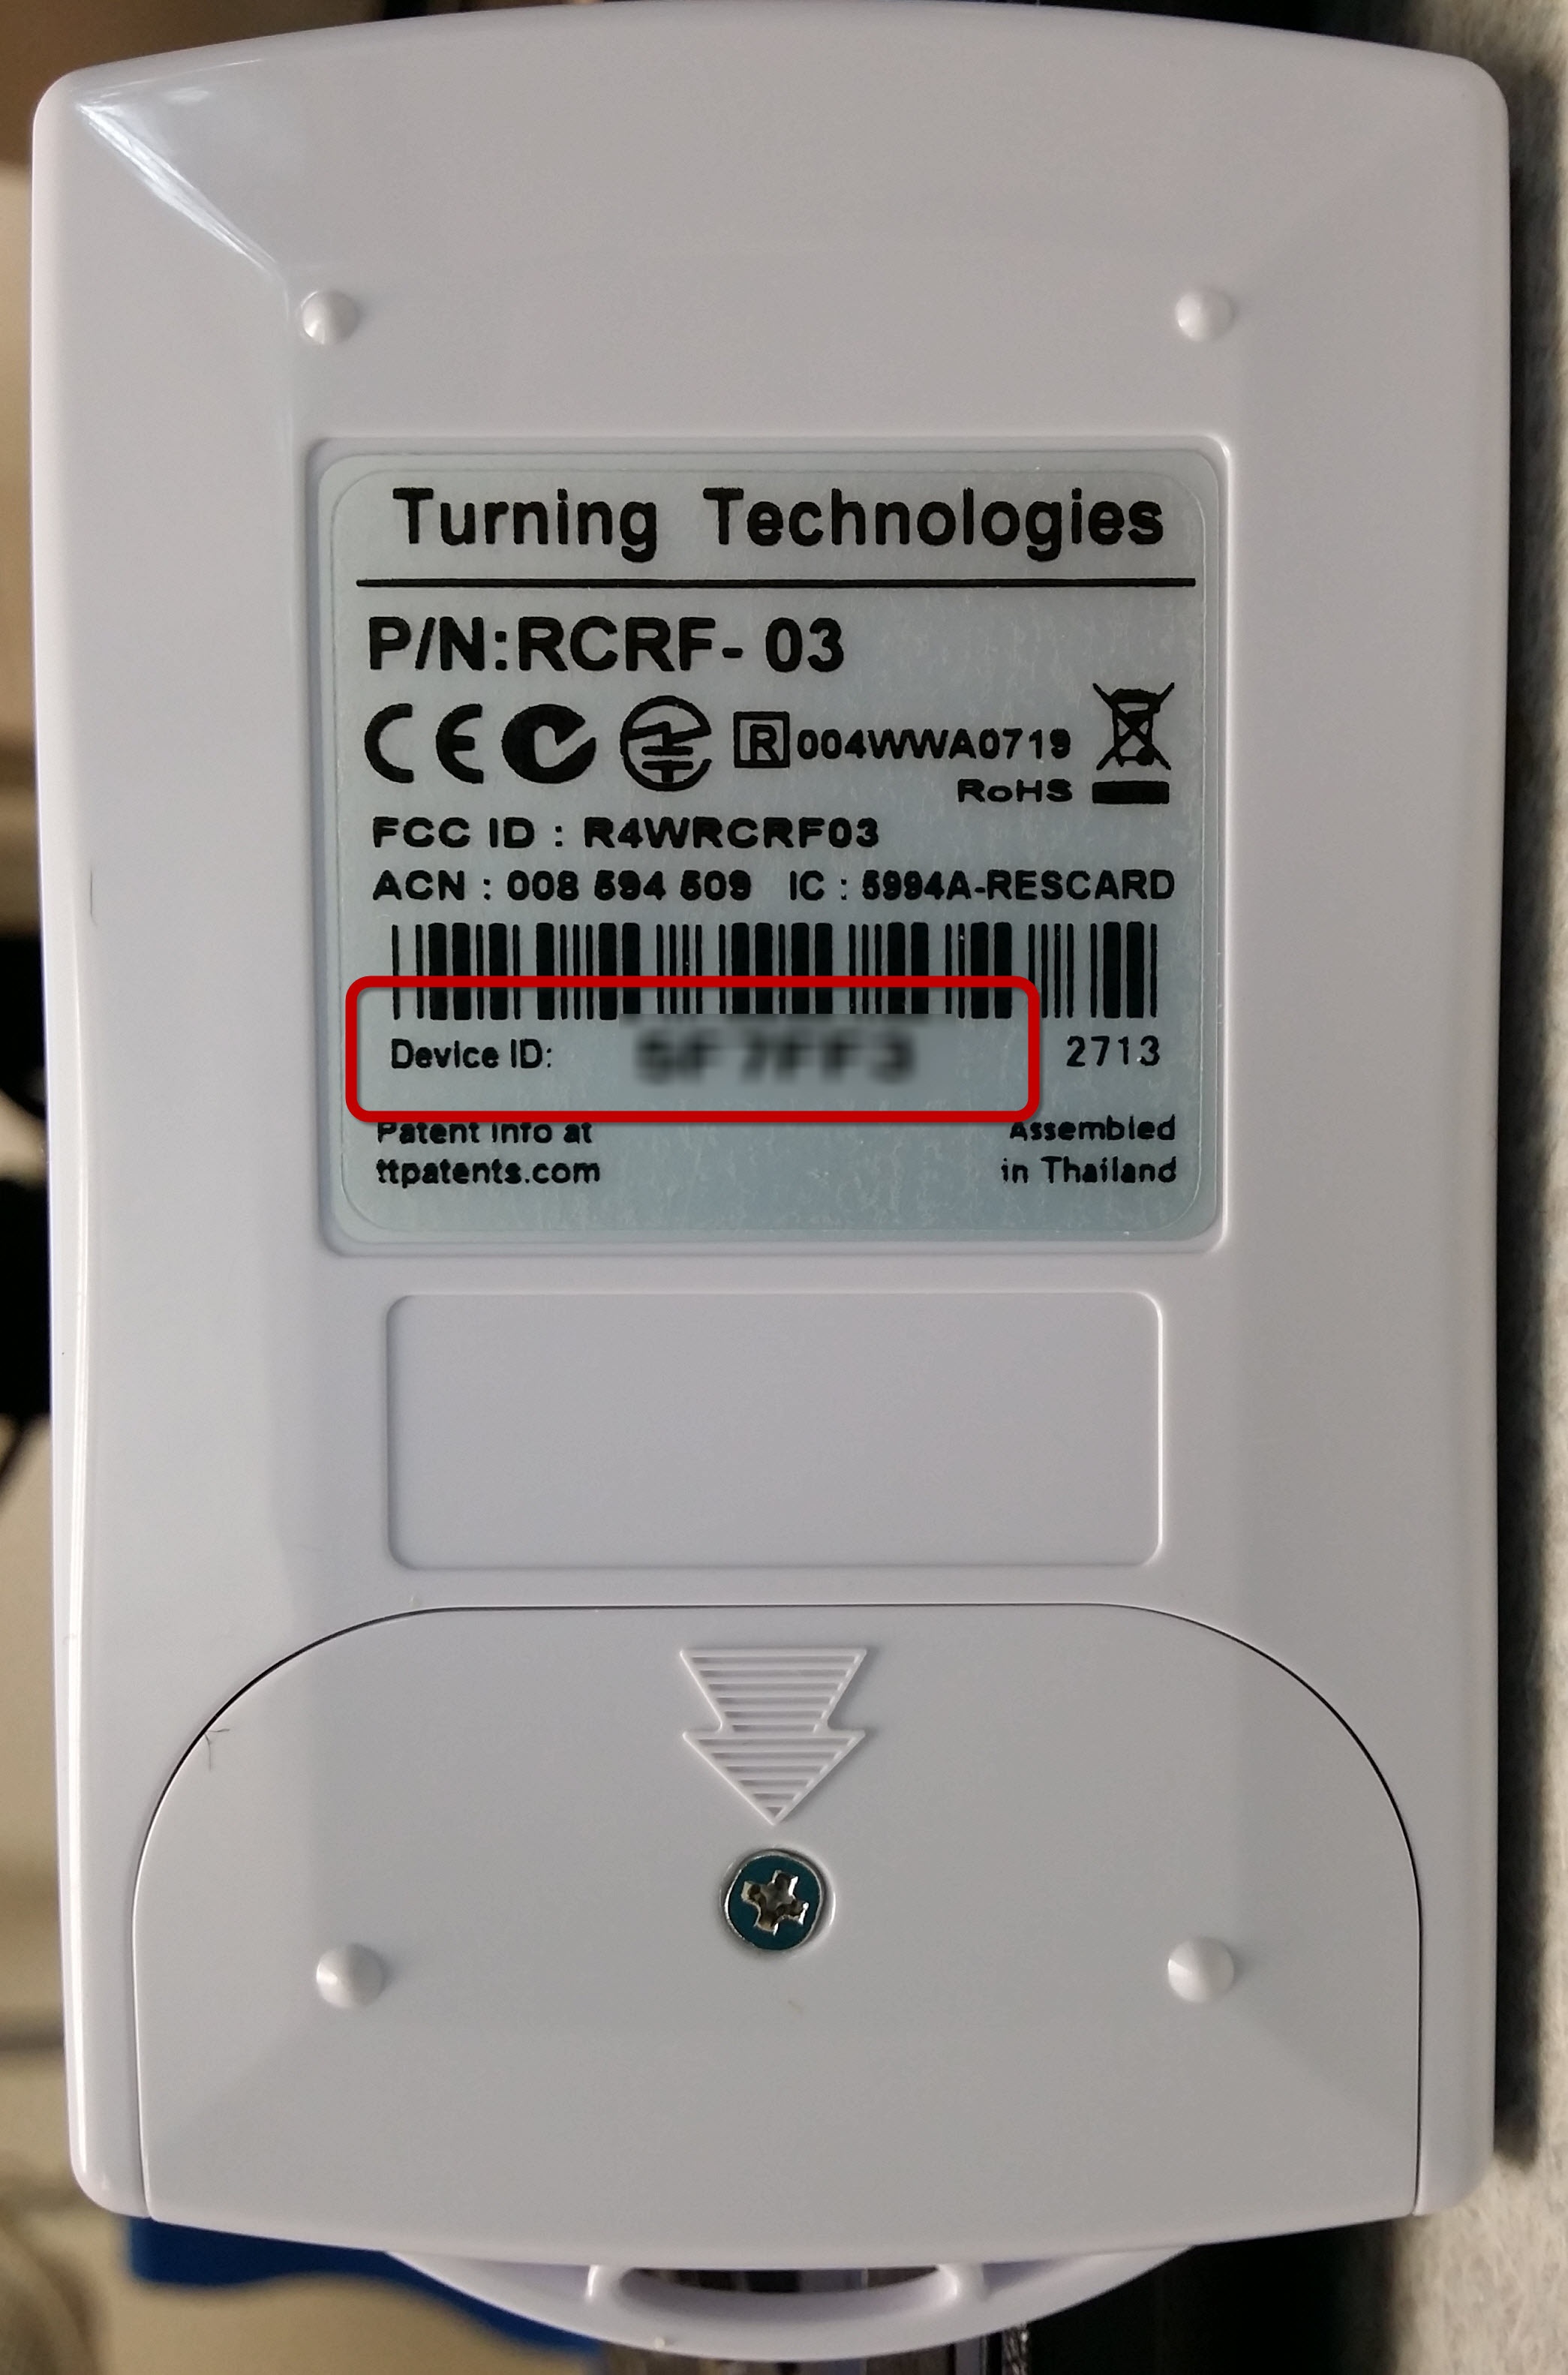
Step 5
Enter the Device ID and confirm it. Once entered, click Register.
Once you login to MyUWF, click on the eLearning app.

Step 3
Open one of your eLearning course. It does not matter which one.
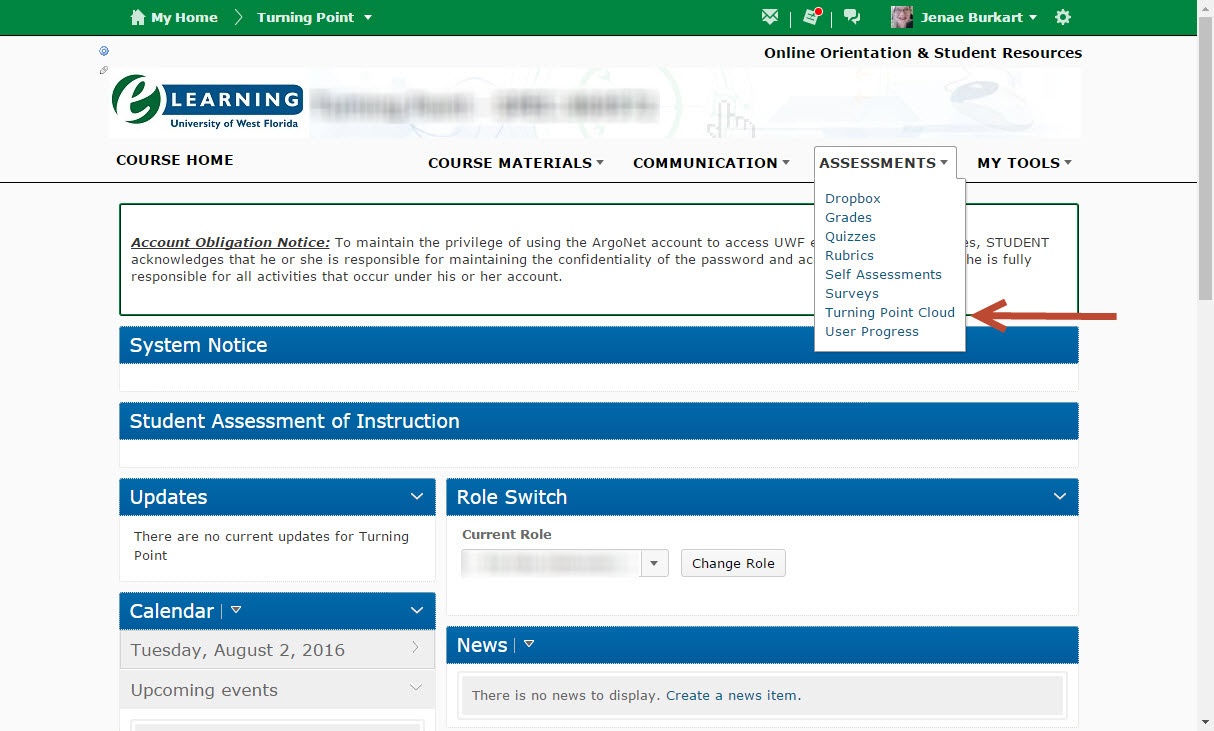
Step 4
Click on Assissments in the navigation bar.

Step 5
Click on the Turning Point Cloud link from the pull down list.
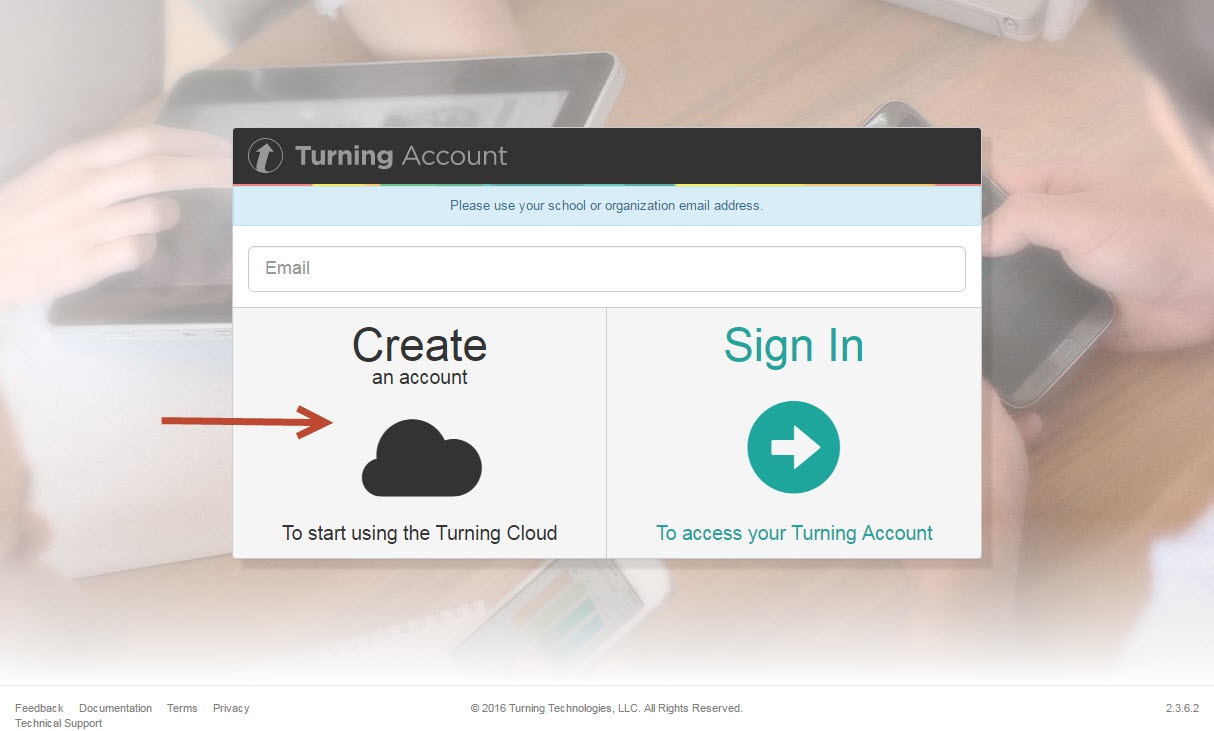
Step 6
Enter your UWF email and then click Create an account.
Step 7
Step 8
Step 9
Step 10
Step 11

| Include Page | ||||
|---|---|---|---|---|
|
...