...
...
Select your operating system:
...
| title | Windows 11 |
|---|
...
Internet icon in the tray at the bottom right

Step 2: Click the arrow next to the Wifi symbol in the upper left and select "UWF Guest Wireless" and click "Connect"

...
| title | Mac OS |
|---|
Step 3: This will open a browser and take you to a "Sign in" page. Select the "register" link to create a 12-hour account.

Note: After this step, it may ask if you trust this network. If so, select Connect again.
Step 4: Enter your contact information and complete the CAPTCHA
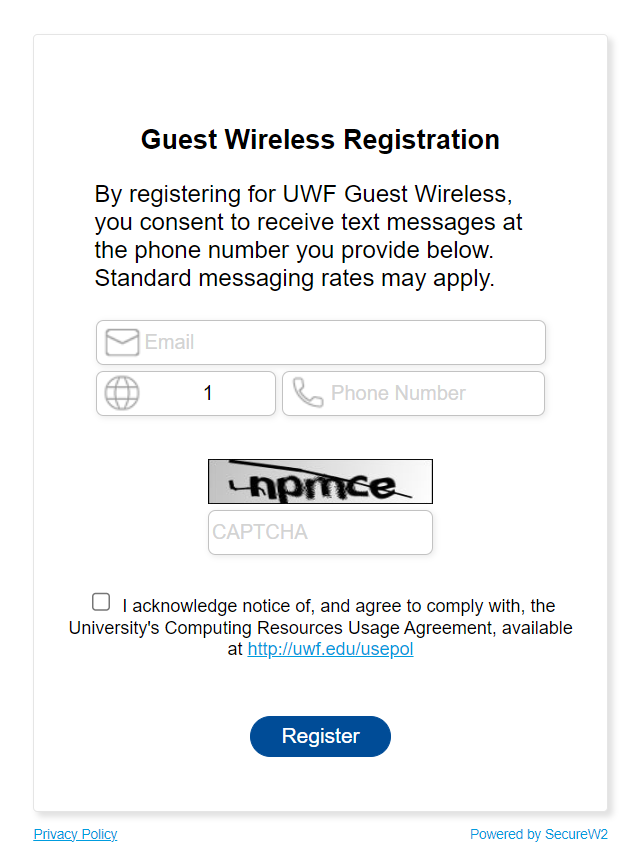
Step 5: Locate your password from the text message that you received from the number you enrolled with.

Step 6: Enter your email address and the password to log in.
Mac OS:
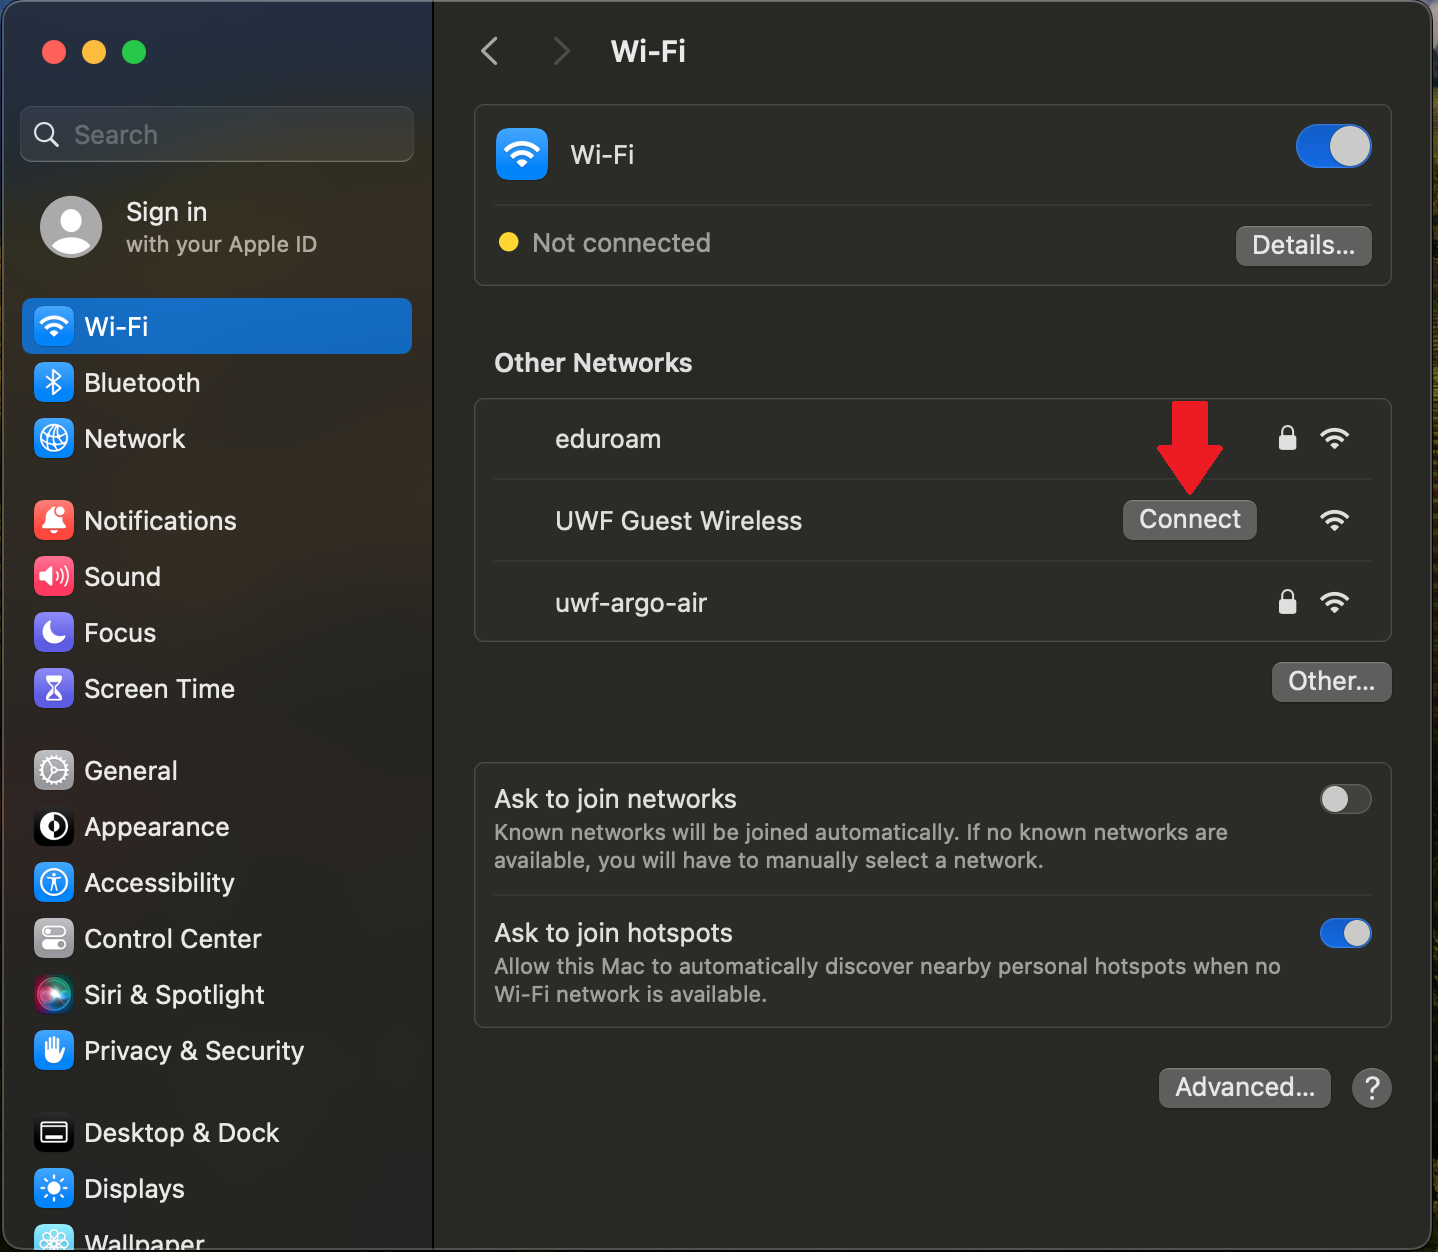
Step 1: Open "System Preferences" and Select "Wi-Fi"

Step 2: Select UWF Guest Wireless and select "Connect"
Step 3: This will open a browser and take you to a "Sign in" page. Select the "register" link to create a 12-hour account.
Note: After this step, it may ask if you trust this network. If so, select Connect again.
Step 4: Enter your contact information and complete the CAPTCHA
Step 5: Locate your password from the text message that you received from the number you enrolled with.
Step 6: Enter your email address and the password to log in.
| Include Page | ||||
|---|---|---|---|---|
|
| Table of Contents |
|---|