
Overview
Instructions
Step 1
Swipe your personal Nautilus Card. (Card swipe is on right end on machine, over the bypass tray)
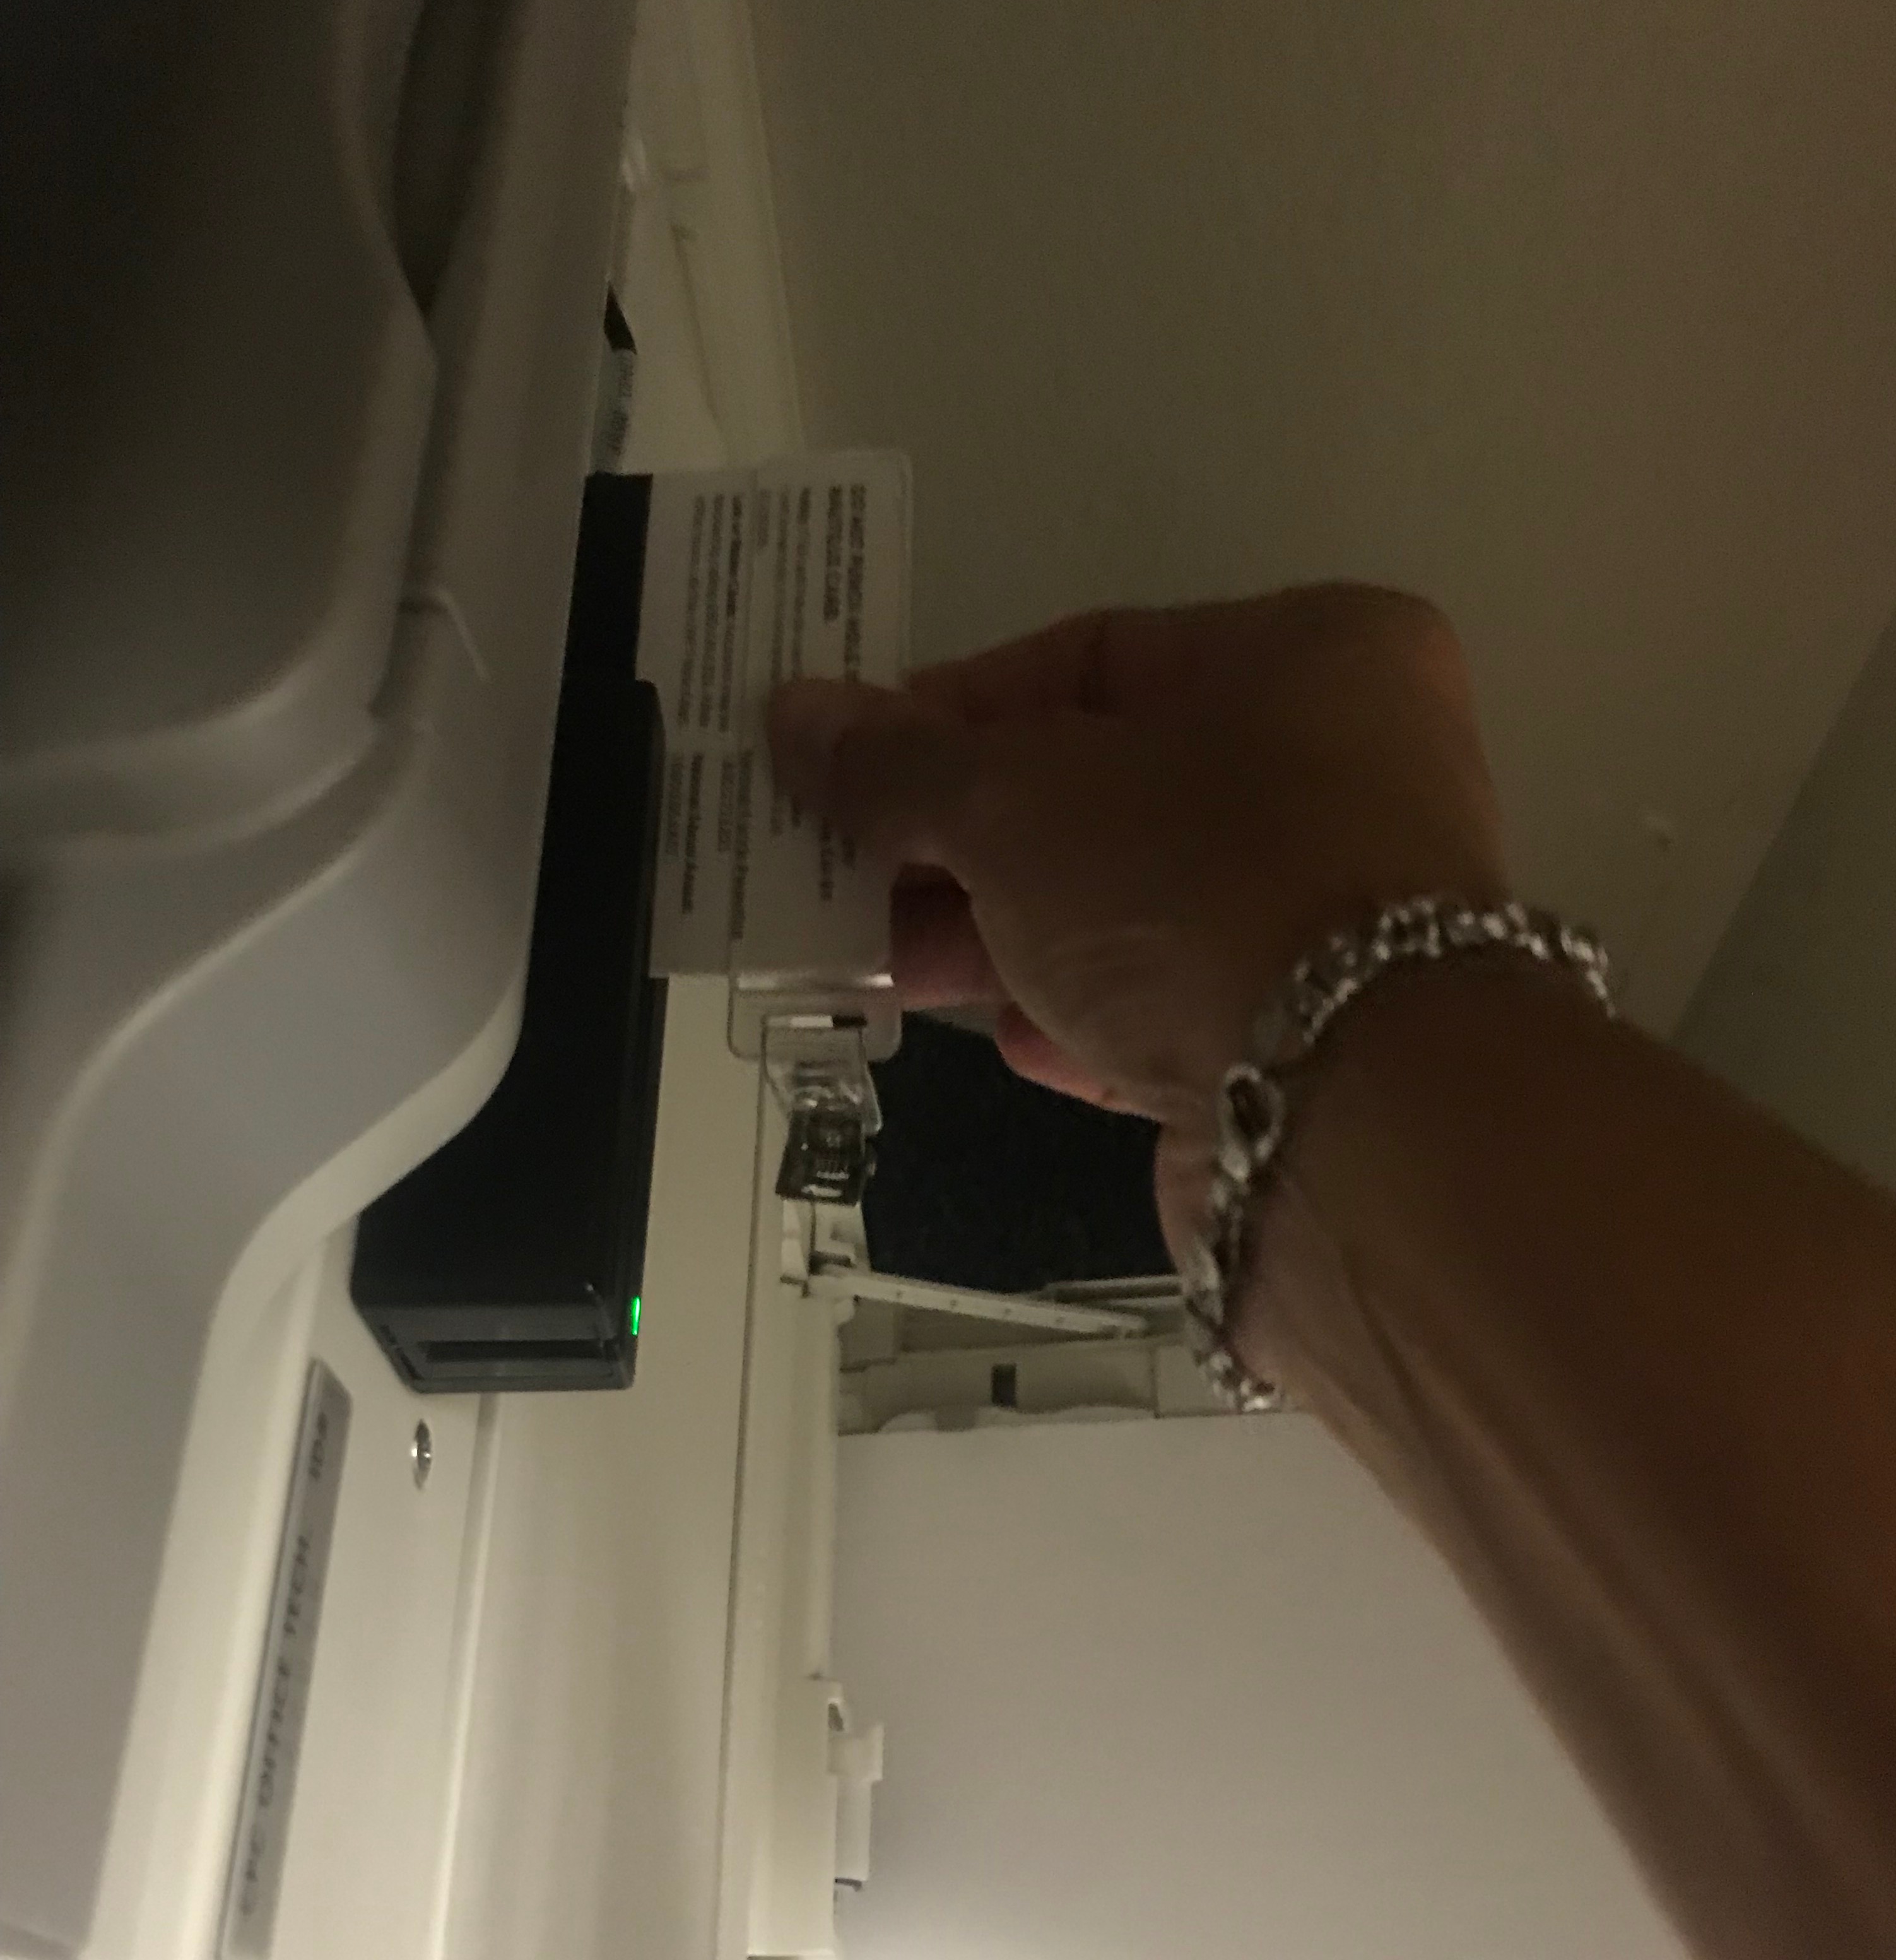
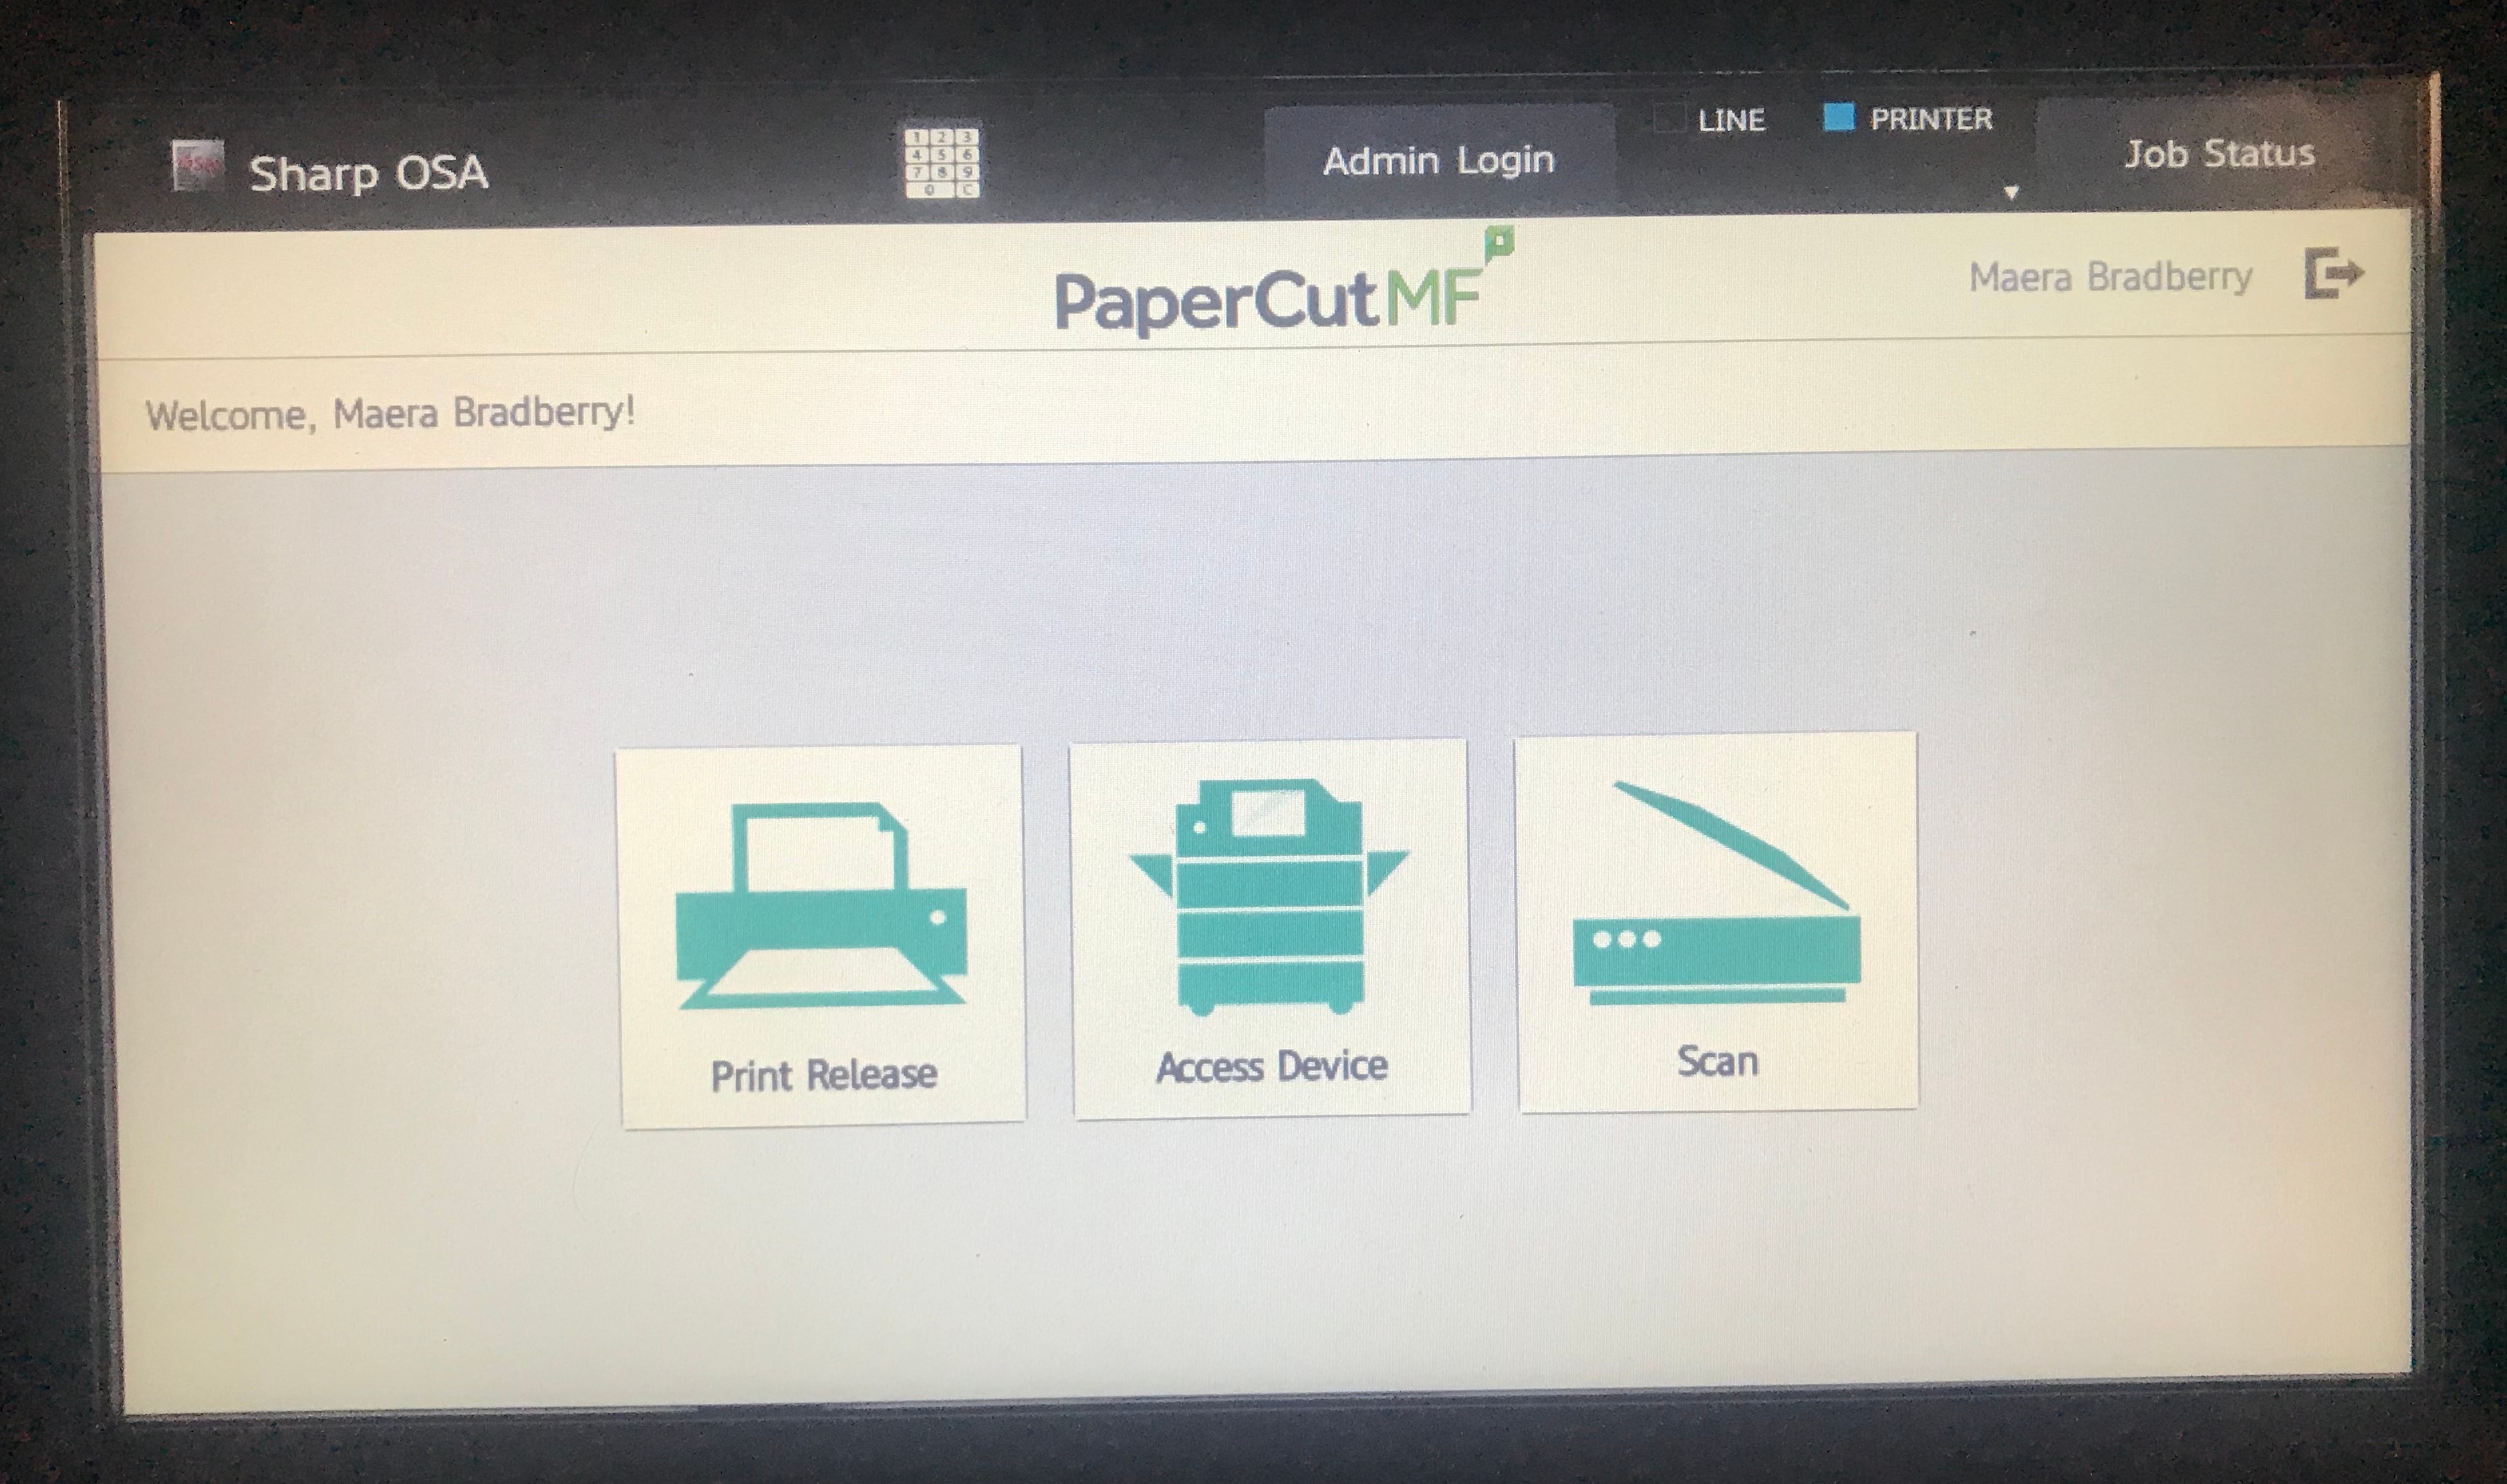
You will then see the screen below.
Step 2
Touch “Use Copier Functions”“Access Device”
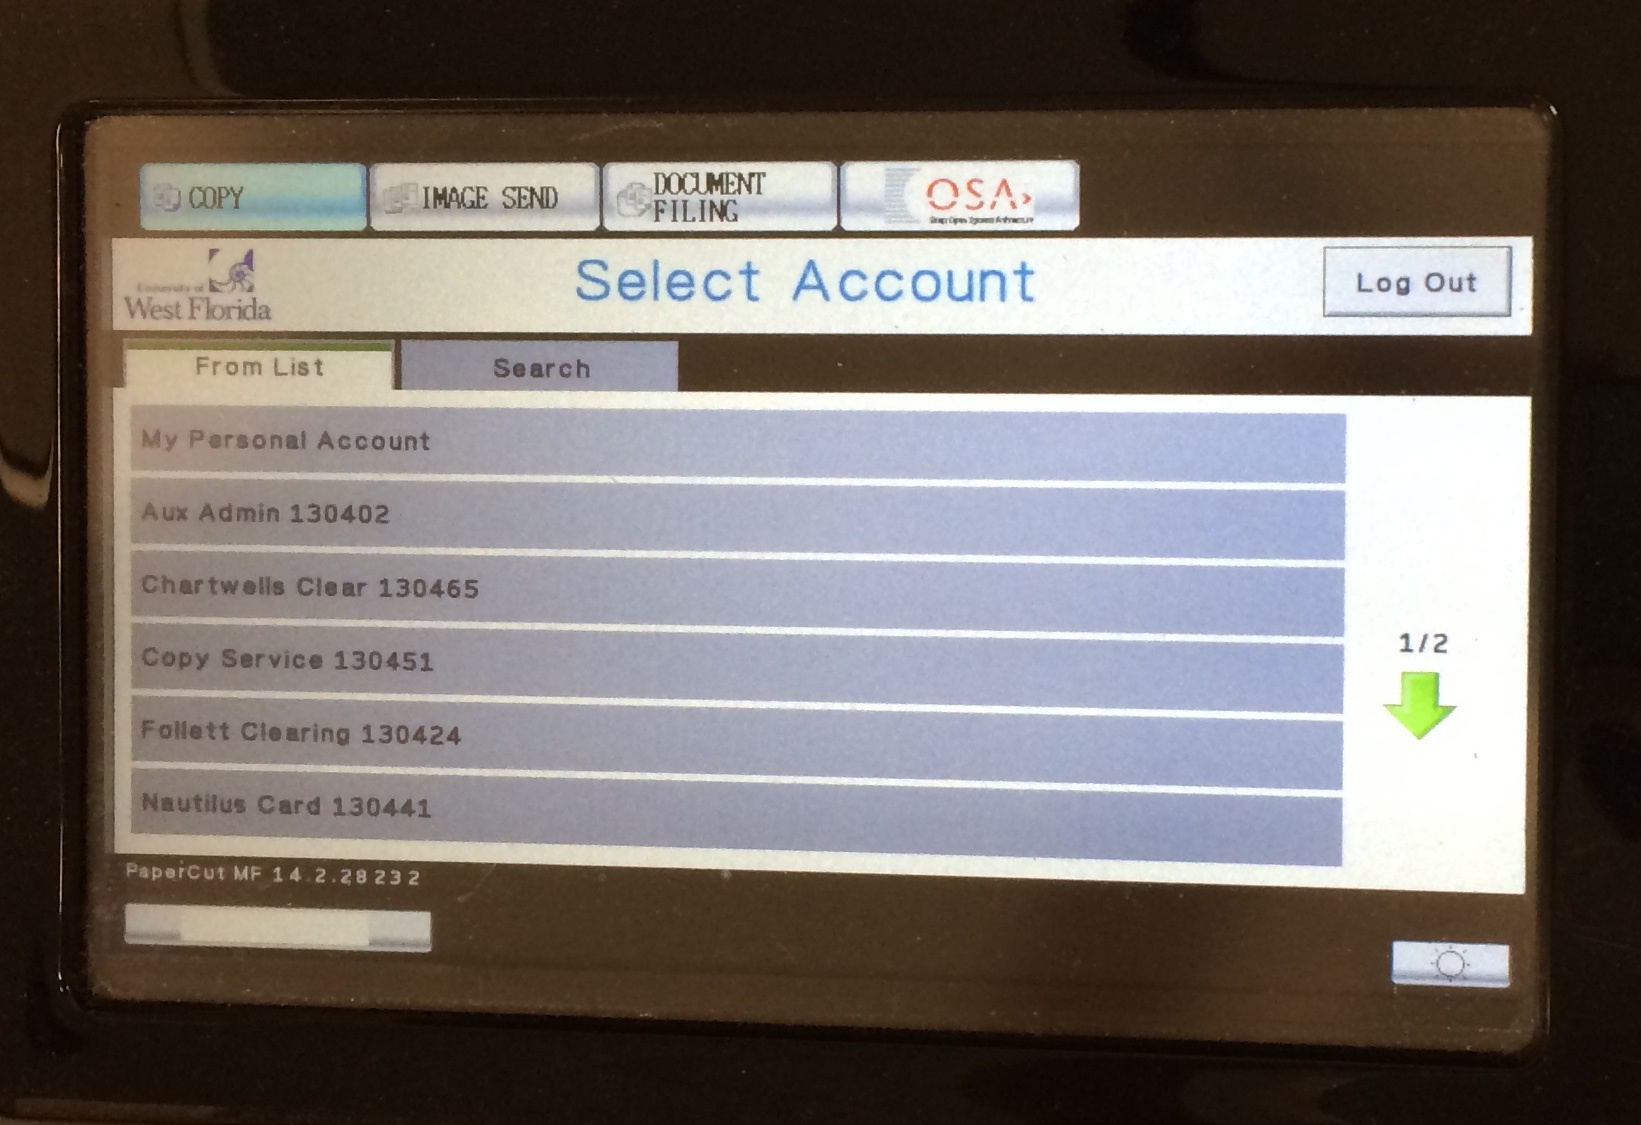
You will then see a screen similar to the one below.
Step 3
, showing your Personal Account and department accounts to which YOU have access.
Select an account for your job to be charged.
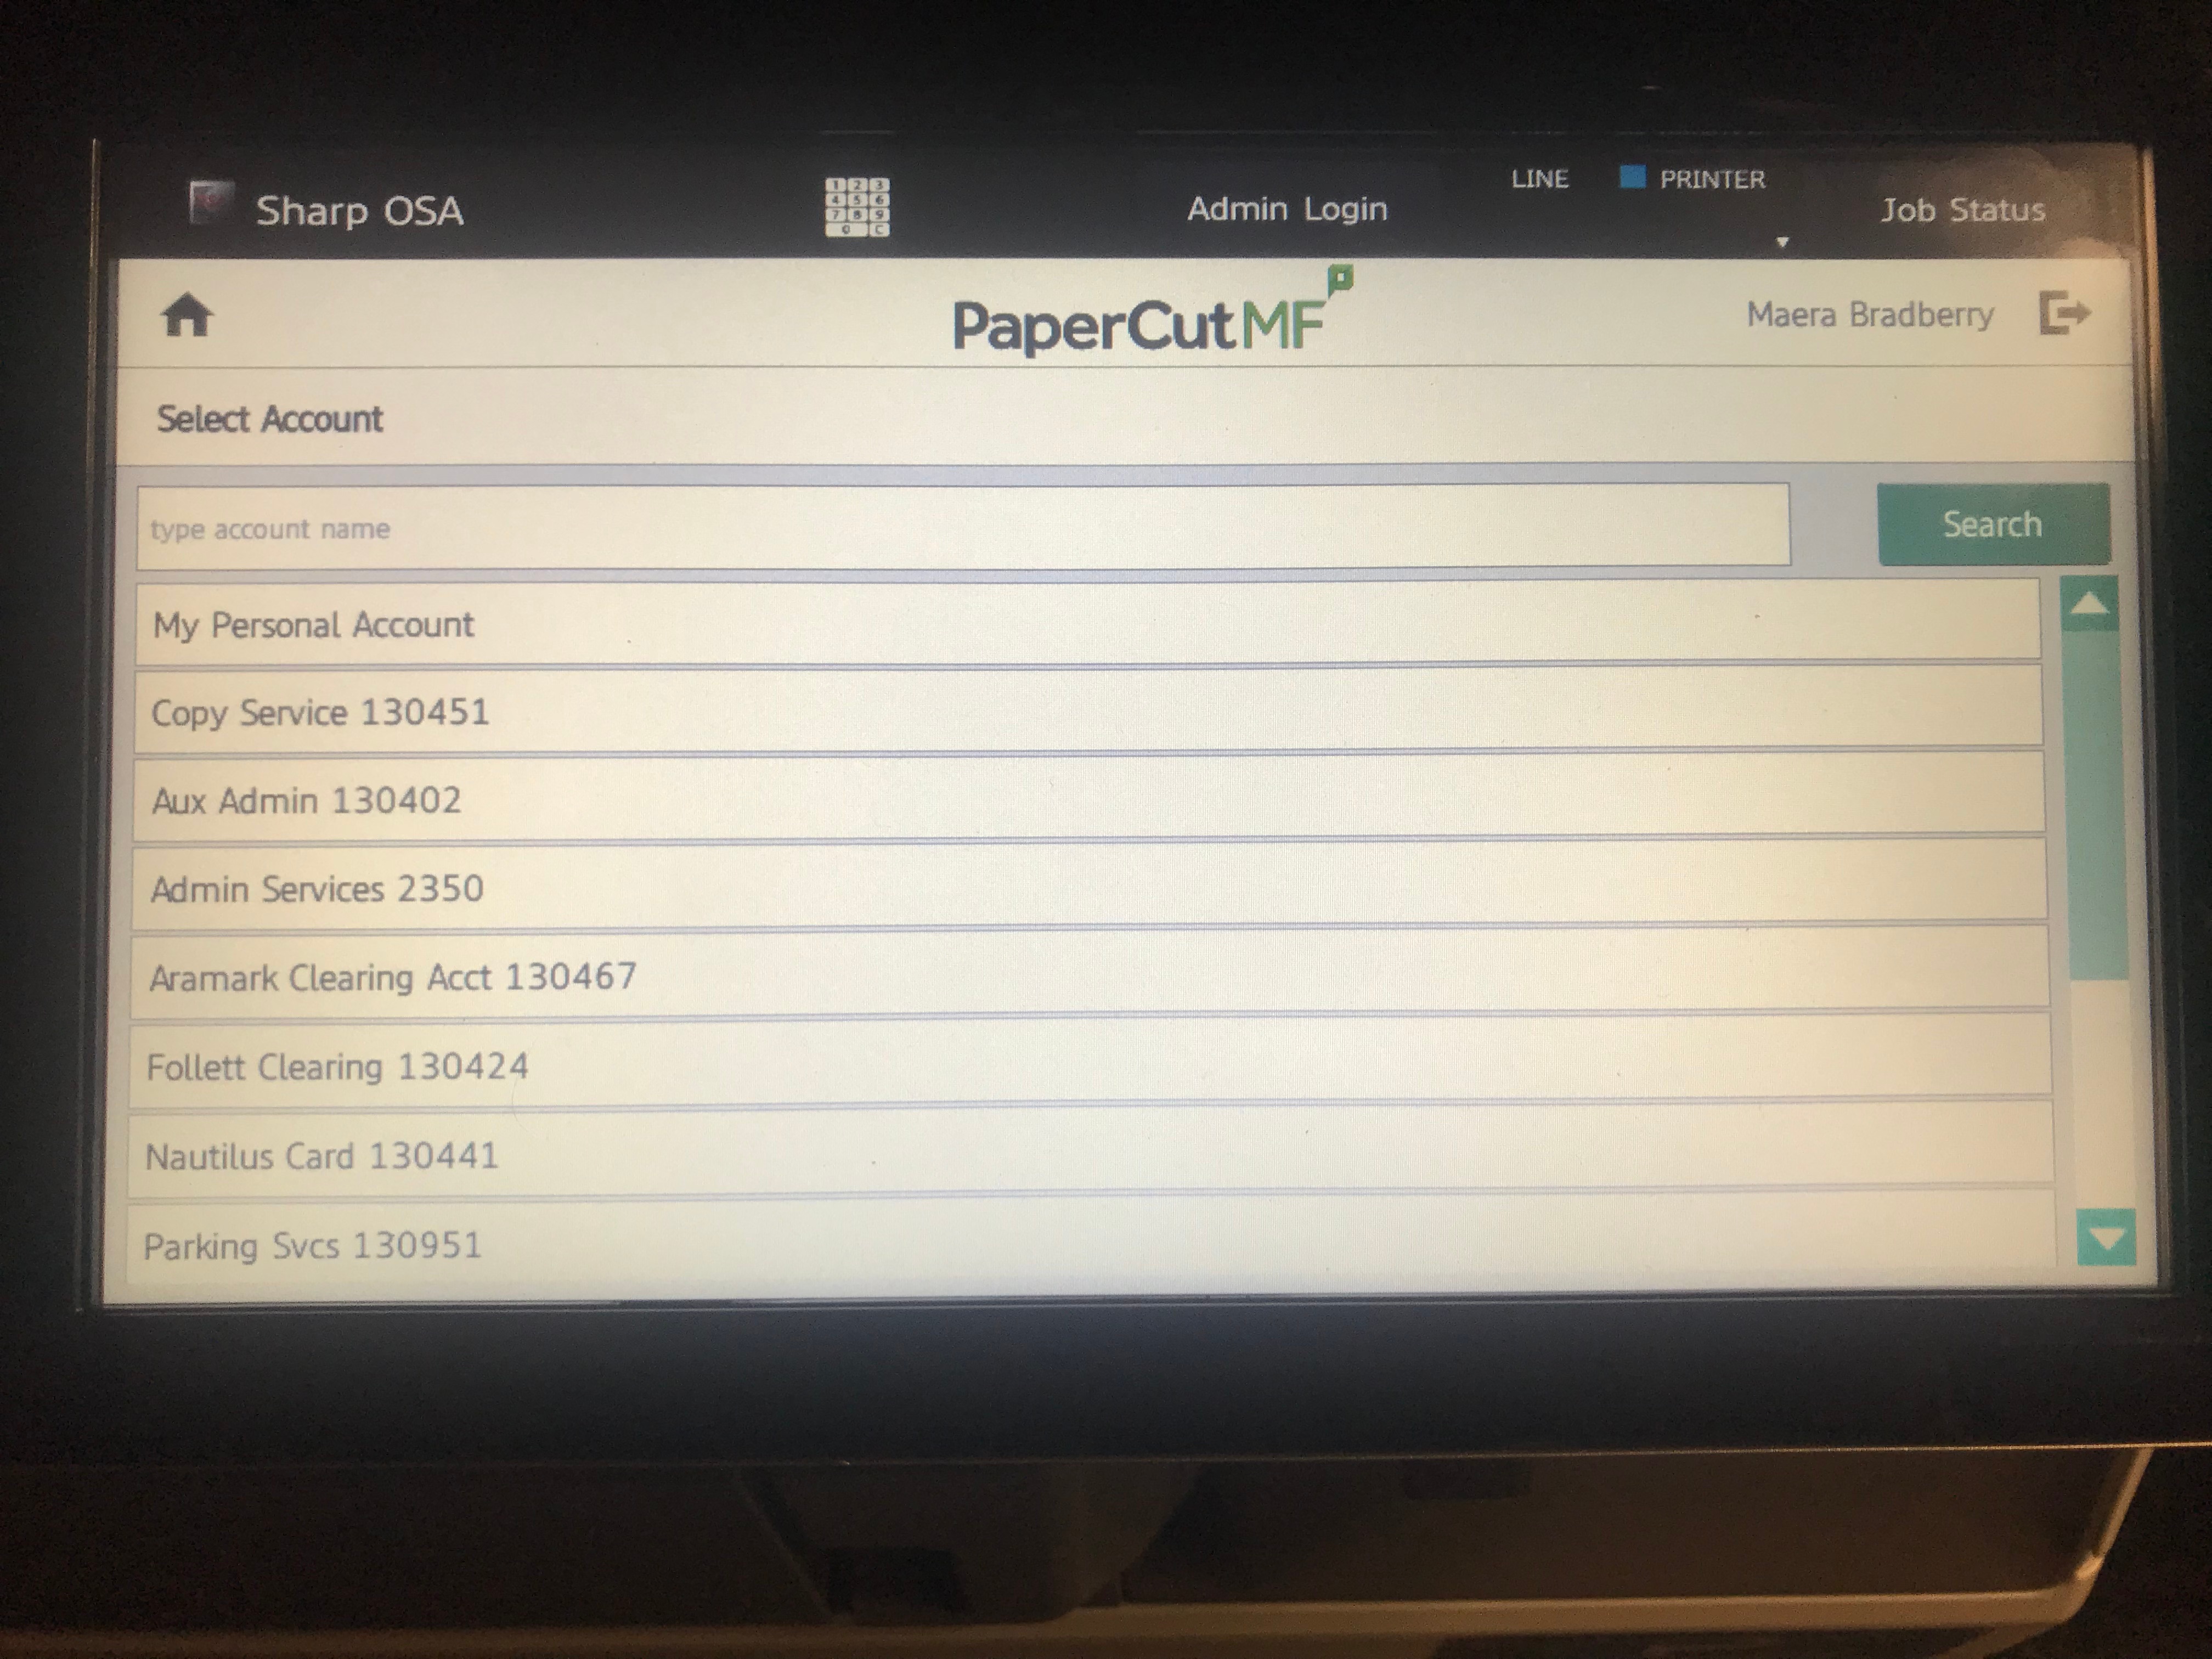
Step 3Select the account you choose to charge.
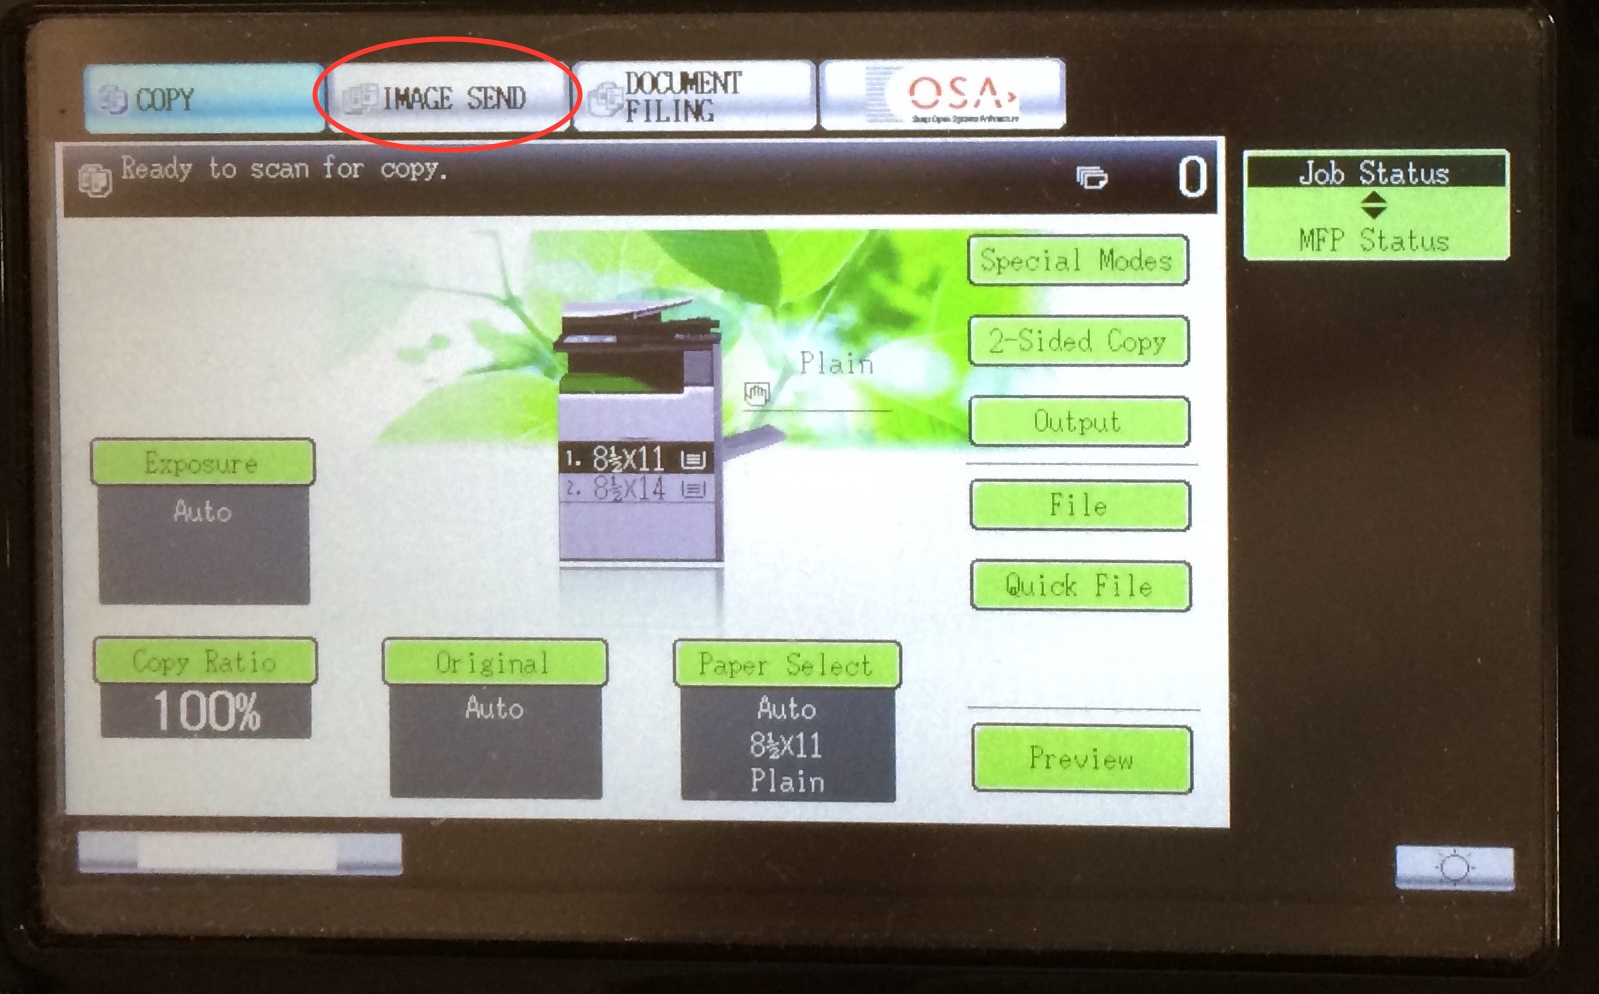
You will then see a screen similar to the one below. The device defaults to the copy screen. You will need to change to the “Image Send” screen for scanning by touching the “Image Send” button at the top of the screen.
Step 4
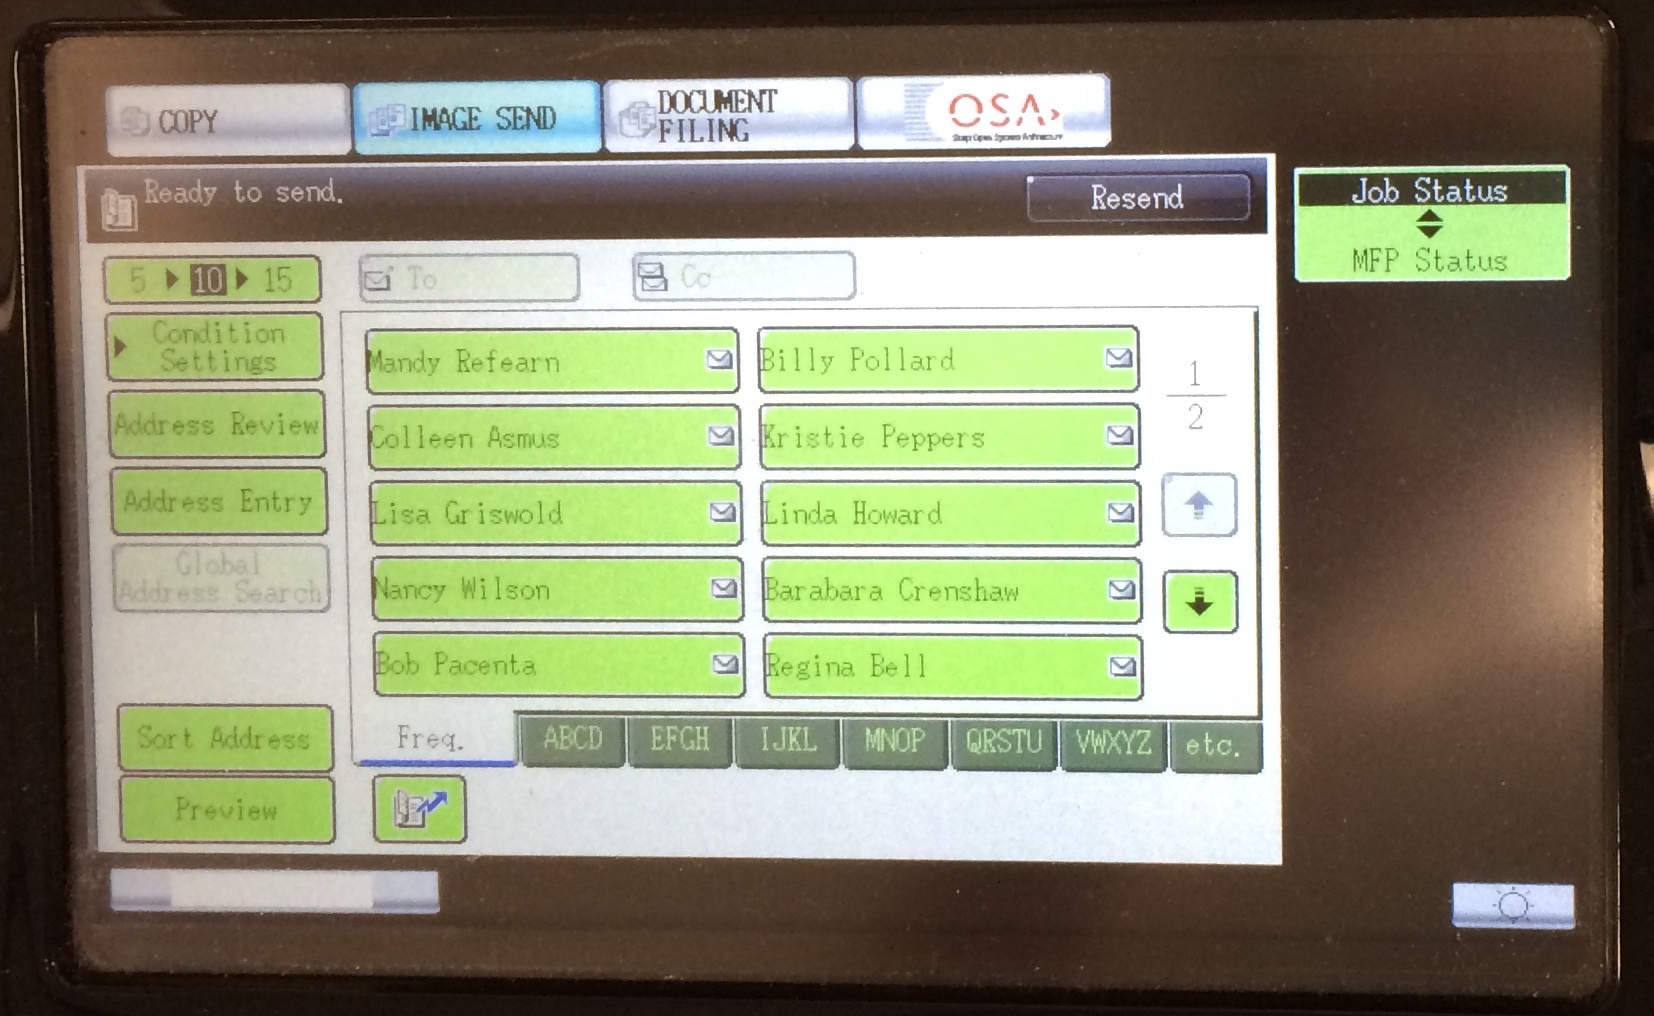
You will then see a screen similar to the one below. Choose whom to send the scan to from the address book. You may choose more than one person.
Step 5
Load originals in the document feeder on top of the device, face up.
| Note |
|---|
IMPORTANT NOTE: When you scan to email, you are using GMAIL to send the document. GMAIL will only send up to 25mb at one time. If you are or will have a need to send larger documents, you will want to request to be set up for scan to drive. If you would like to be set up for scan to drive, please call or email Maera Bradberry, Ext. 6071 or mcarr@uwf.edu. |
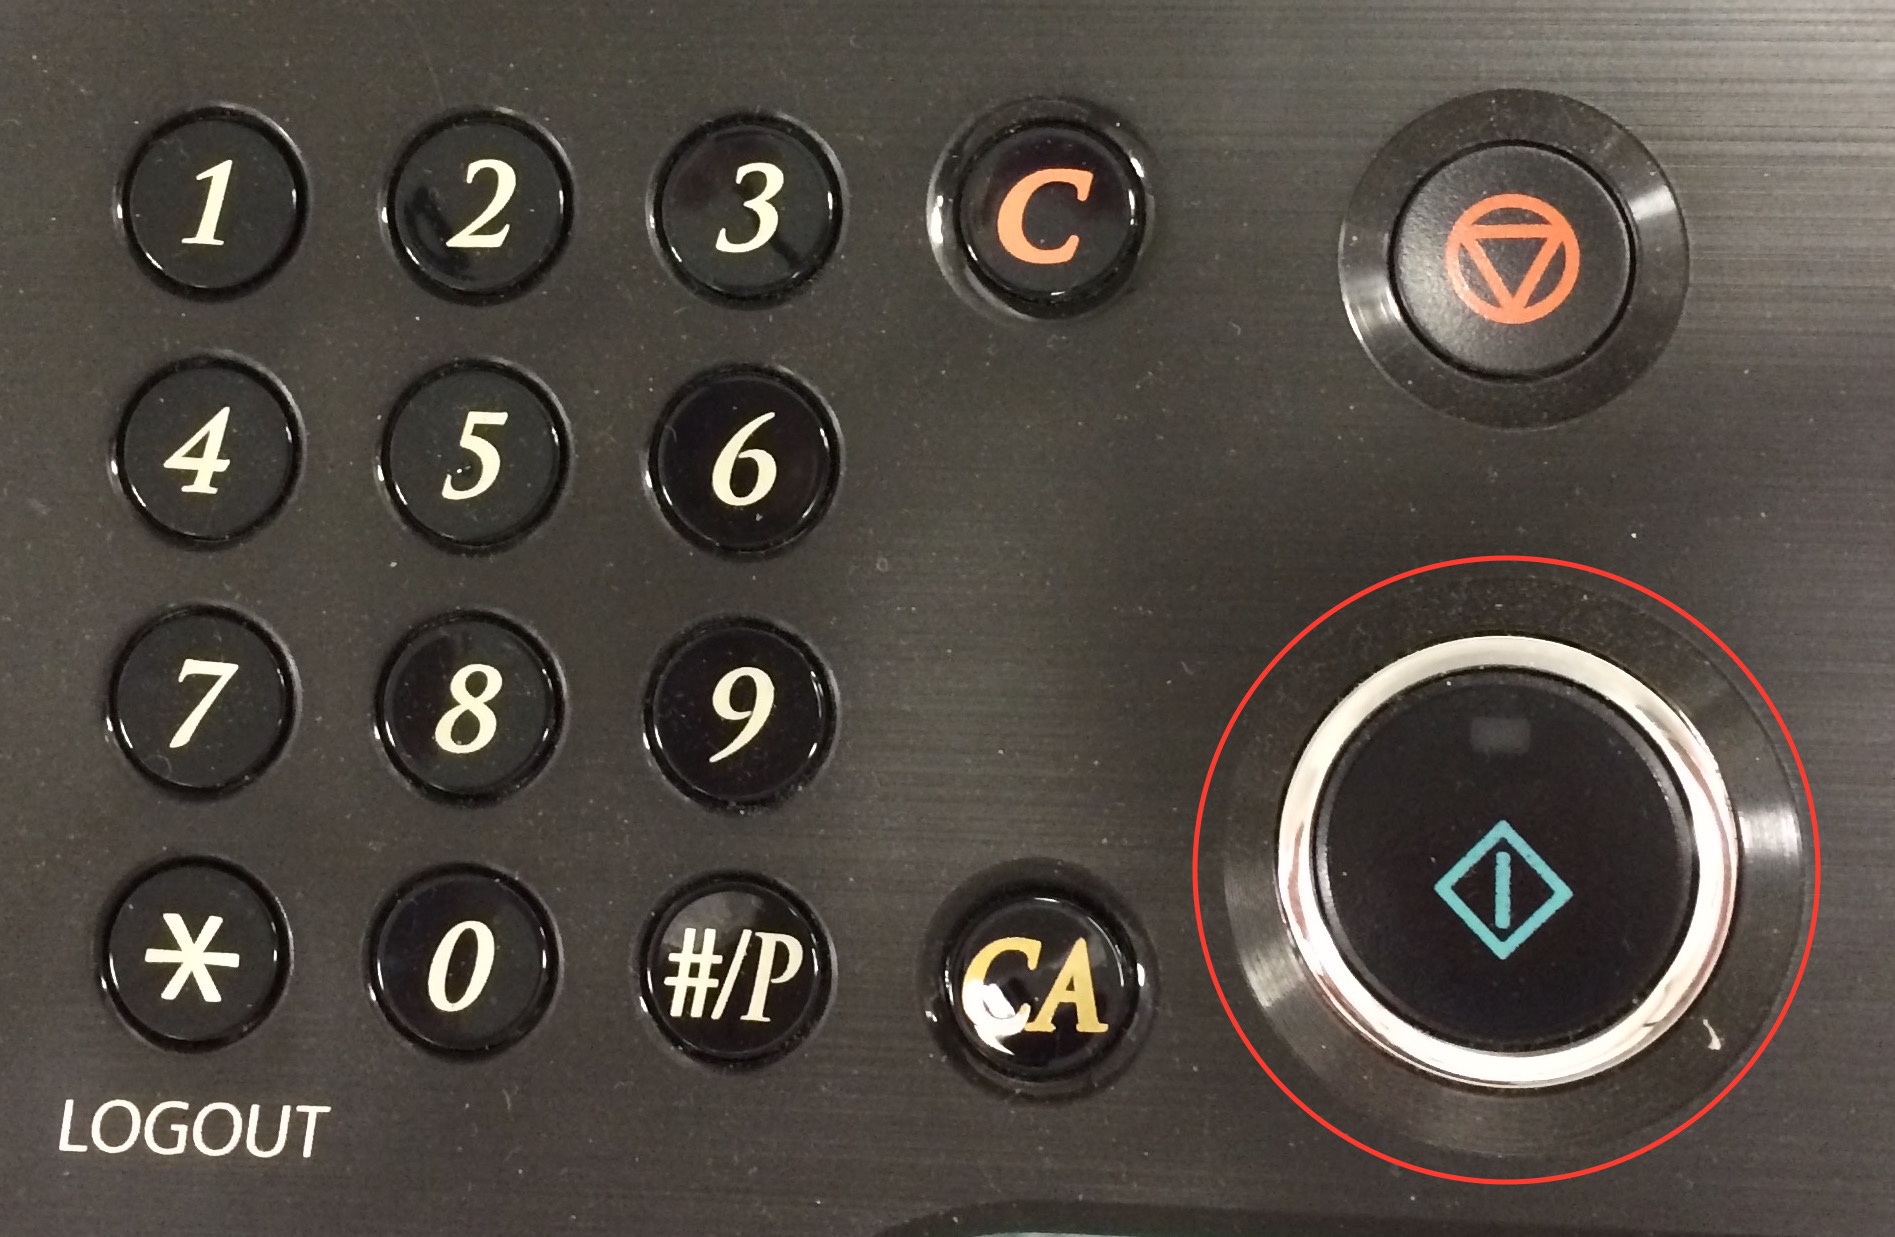
On the control panel to the right of the touch screen, press the large button to begin the scan.
Step 6
When the scan is complete, make sure you “Logout”.

...
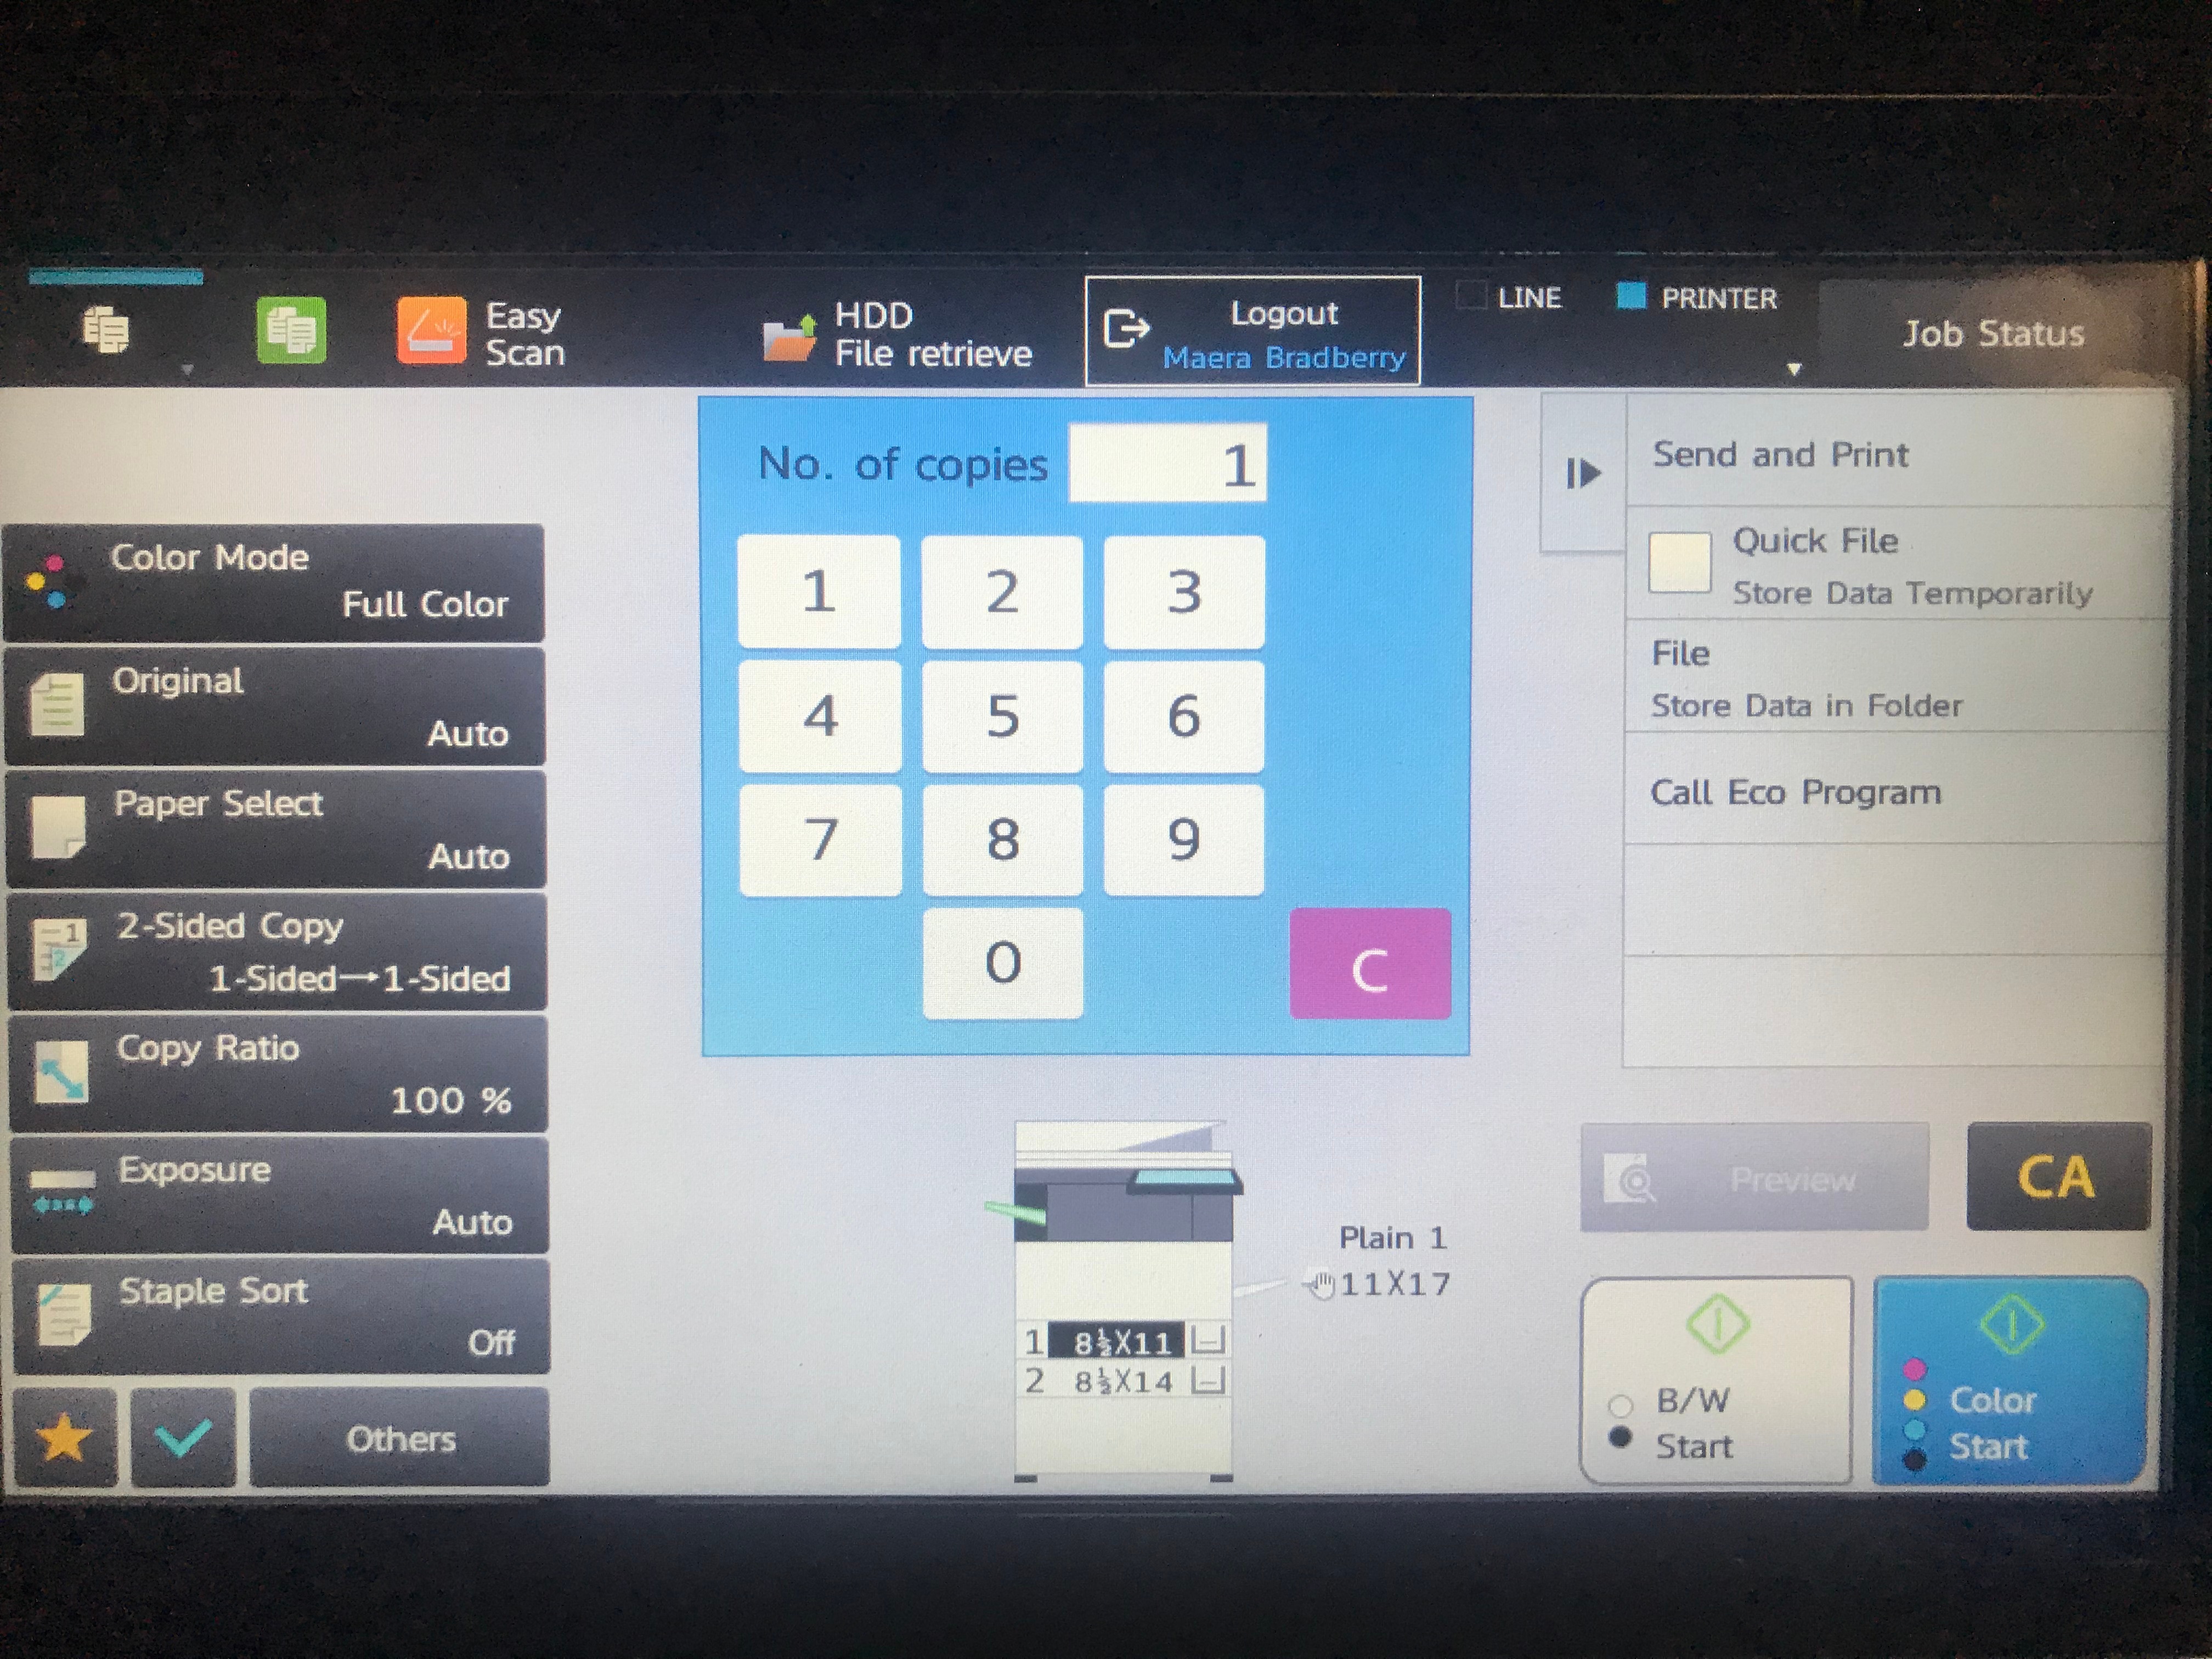
the Copy options screen. Make your selections that pertain to your job. Most devices offer a stapling option, if desired.
When ready to copy, touch the B/W or Color button in the bottom right corner of the screen. (You will only have a B/W button if you are not using a color device.)
Step 4
Your job will be copied. The job will be delivered to the tray on the left side of the device.
FAQs
| Expand | ||
|---|---|---|
| ||
Enter answer here |
...