Overview
After creating a Native Google Group, you'll have to add new members. You can change the roles of these new members, so that they could also adjust the group membership and the roles of the other members.
Instructions
| Anchor | ||||
|---|---|---|---|---|
|
| Expand | ||
|---|---|---|
| ||
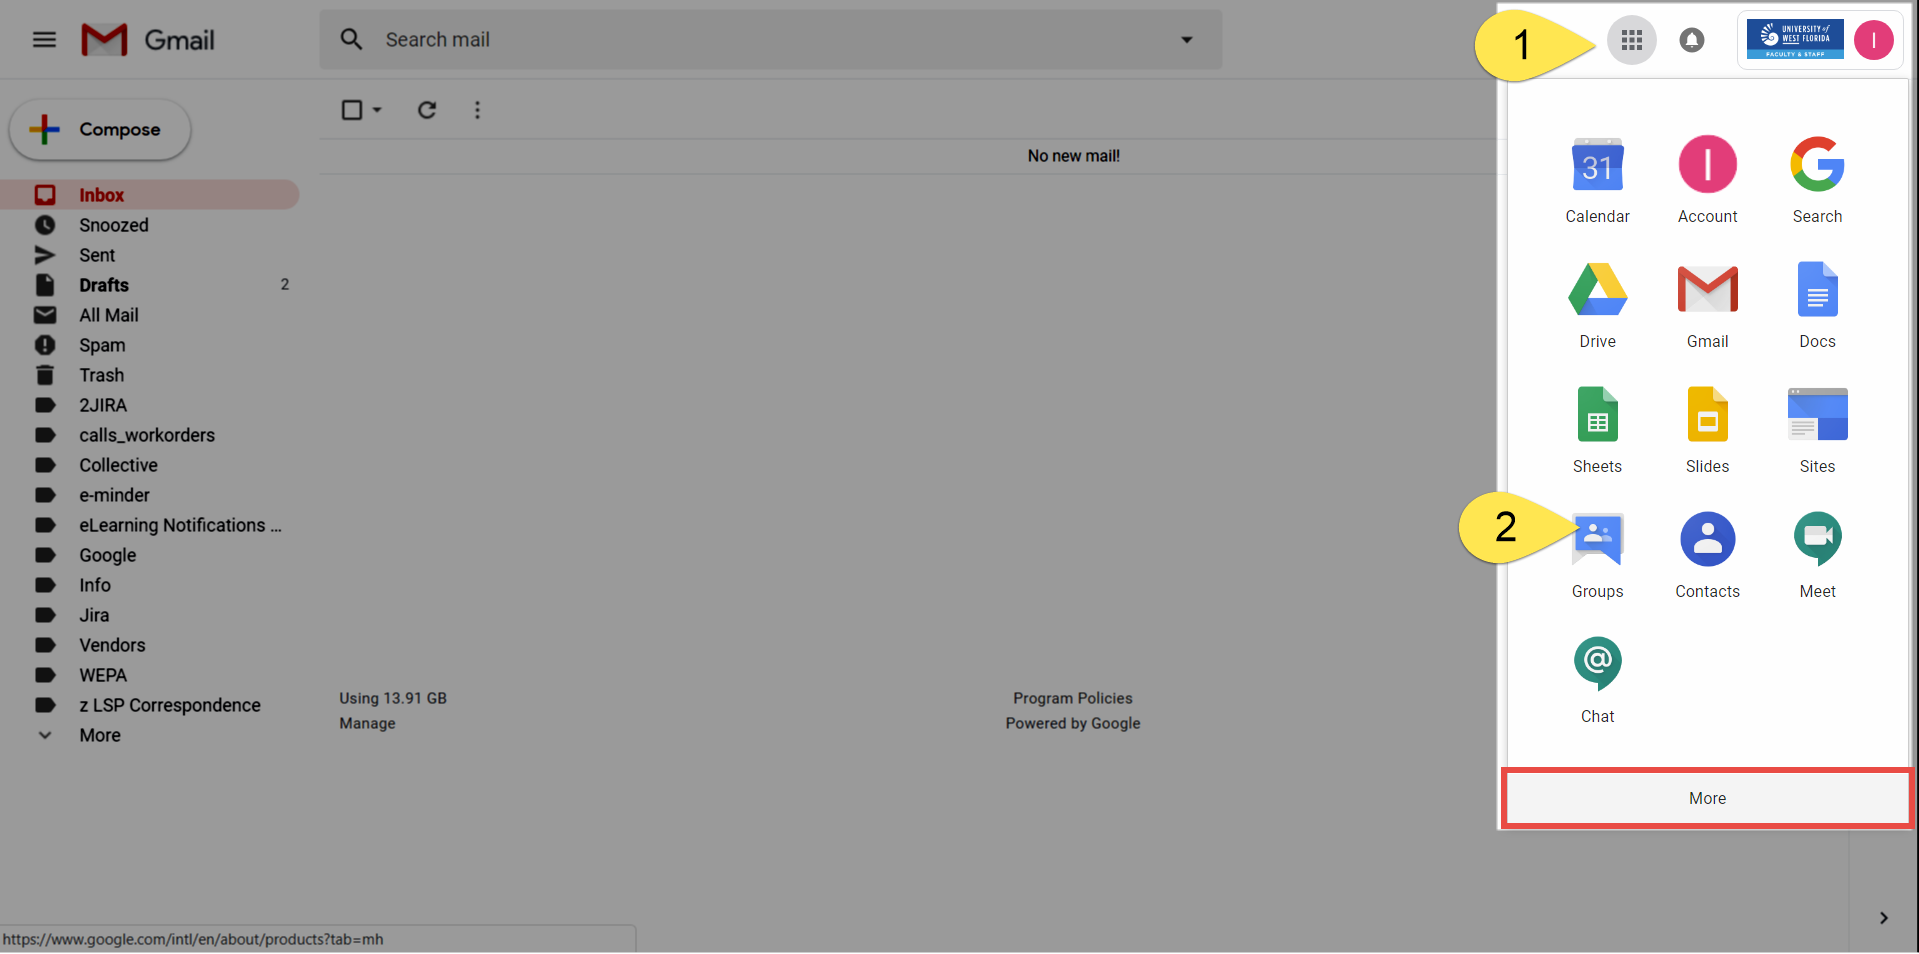
Step 1Log in to Gmail.com. Be sure you're logging into the account that owns your Google Group. Step 2Go to the Google Groups app. Click More to find the Google Groups app, if necessary.
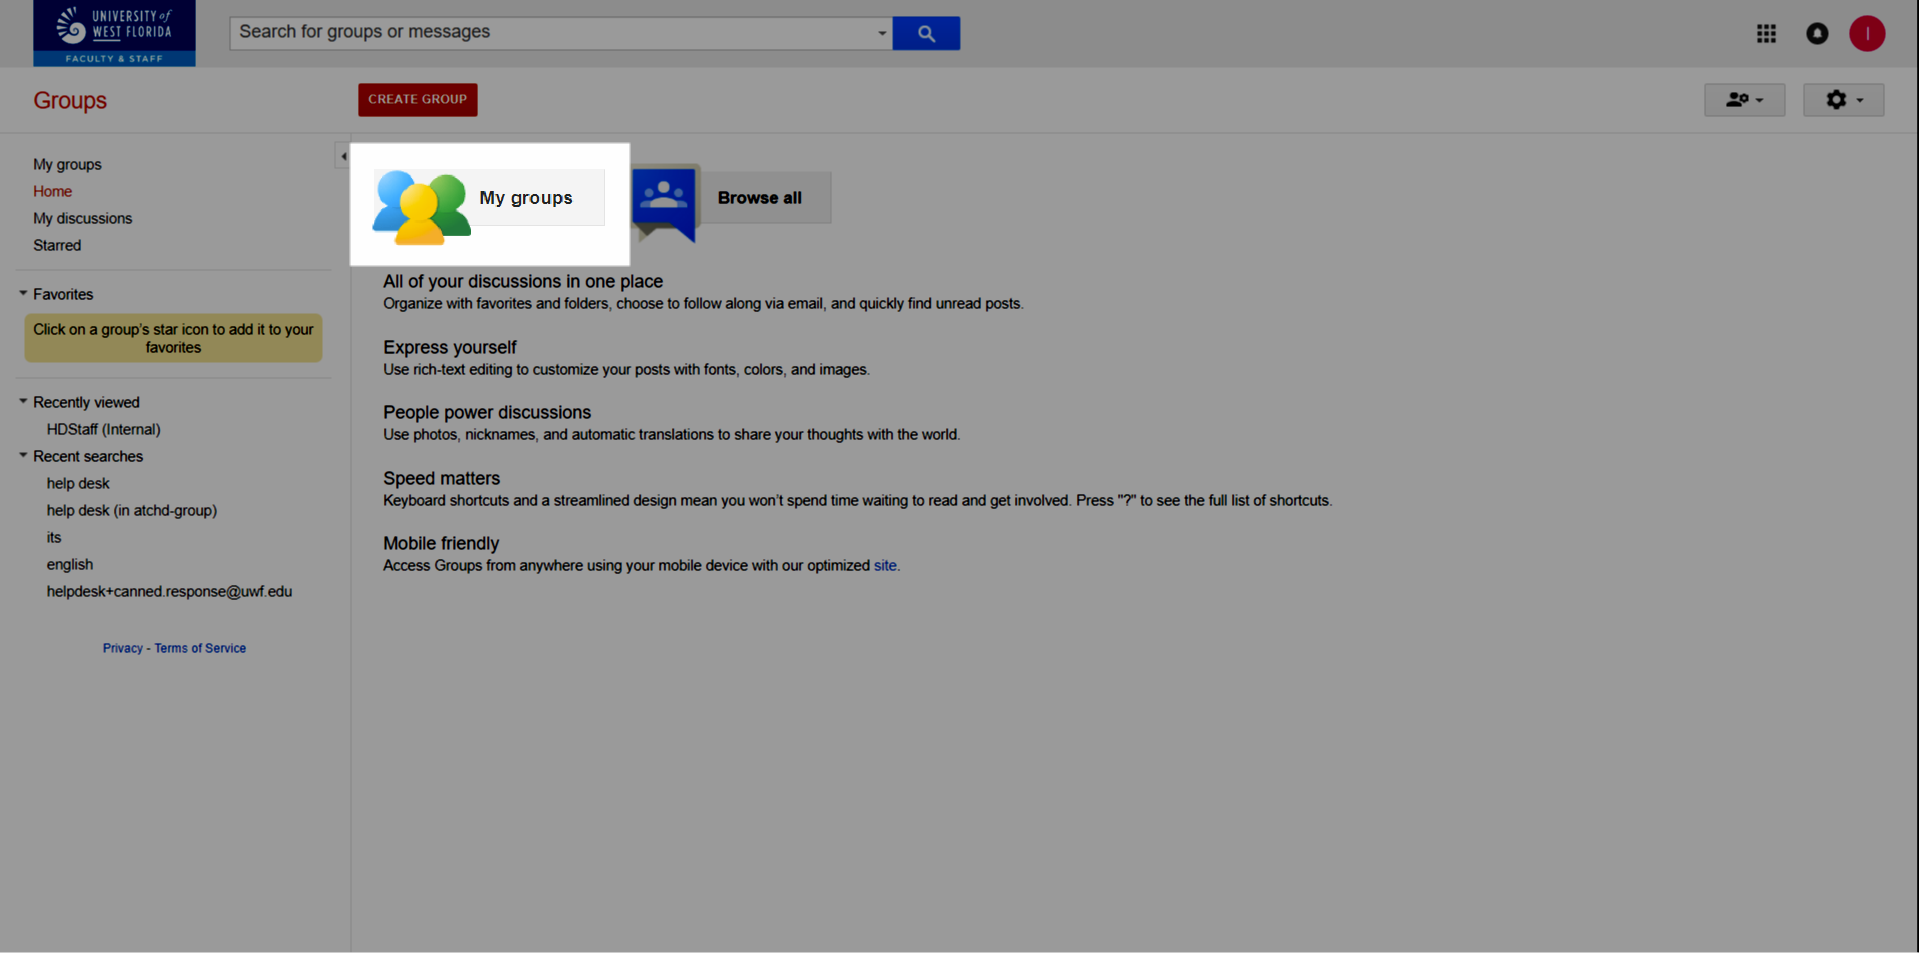
Step 3Click My Groups.
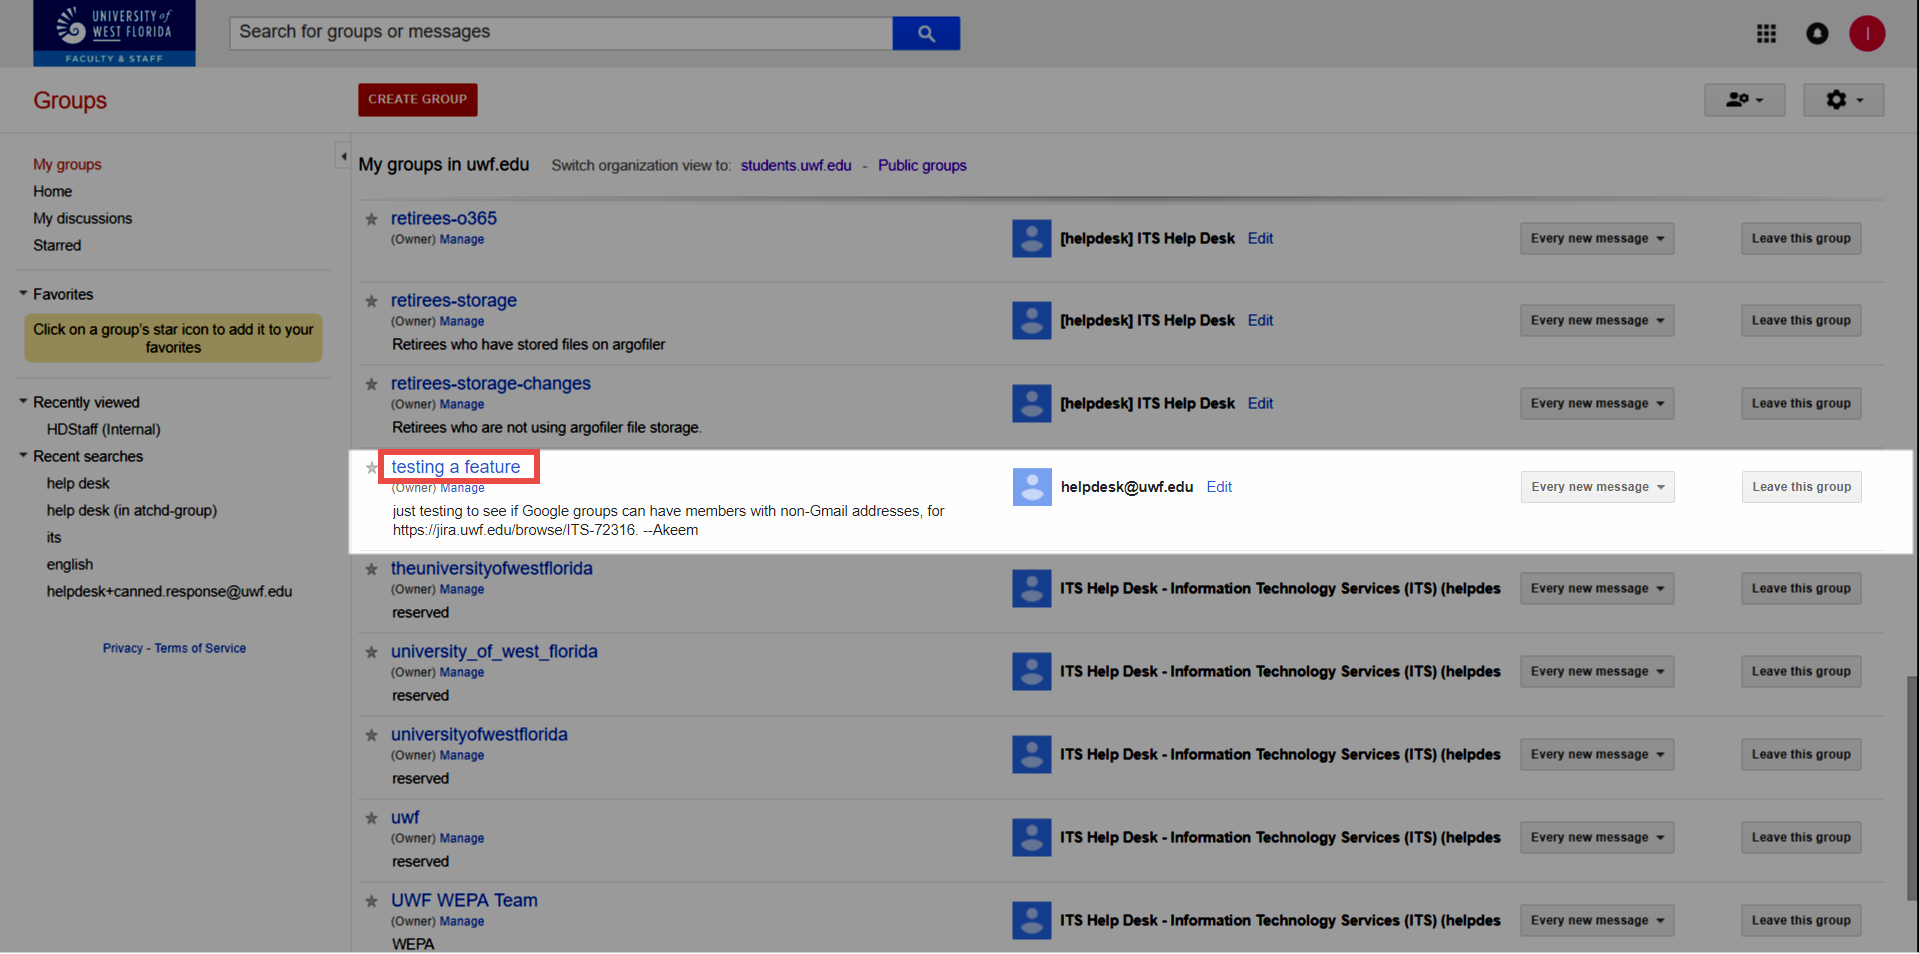
Step 4Find and click the group you'd like to edit.
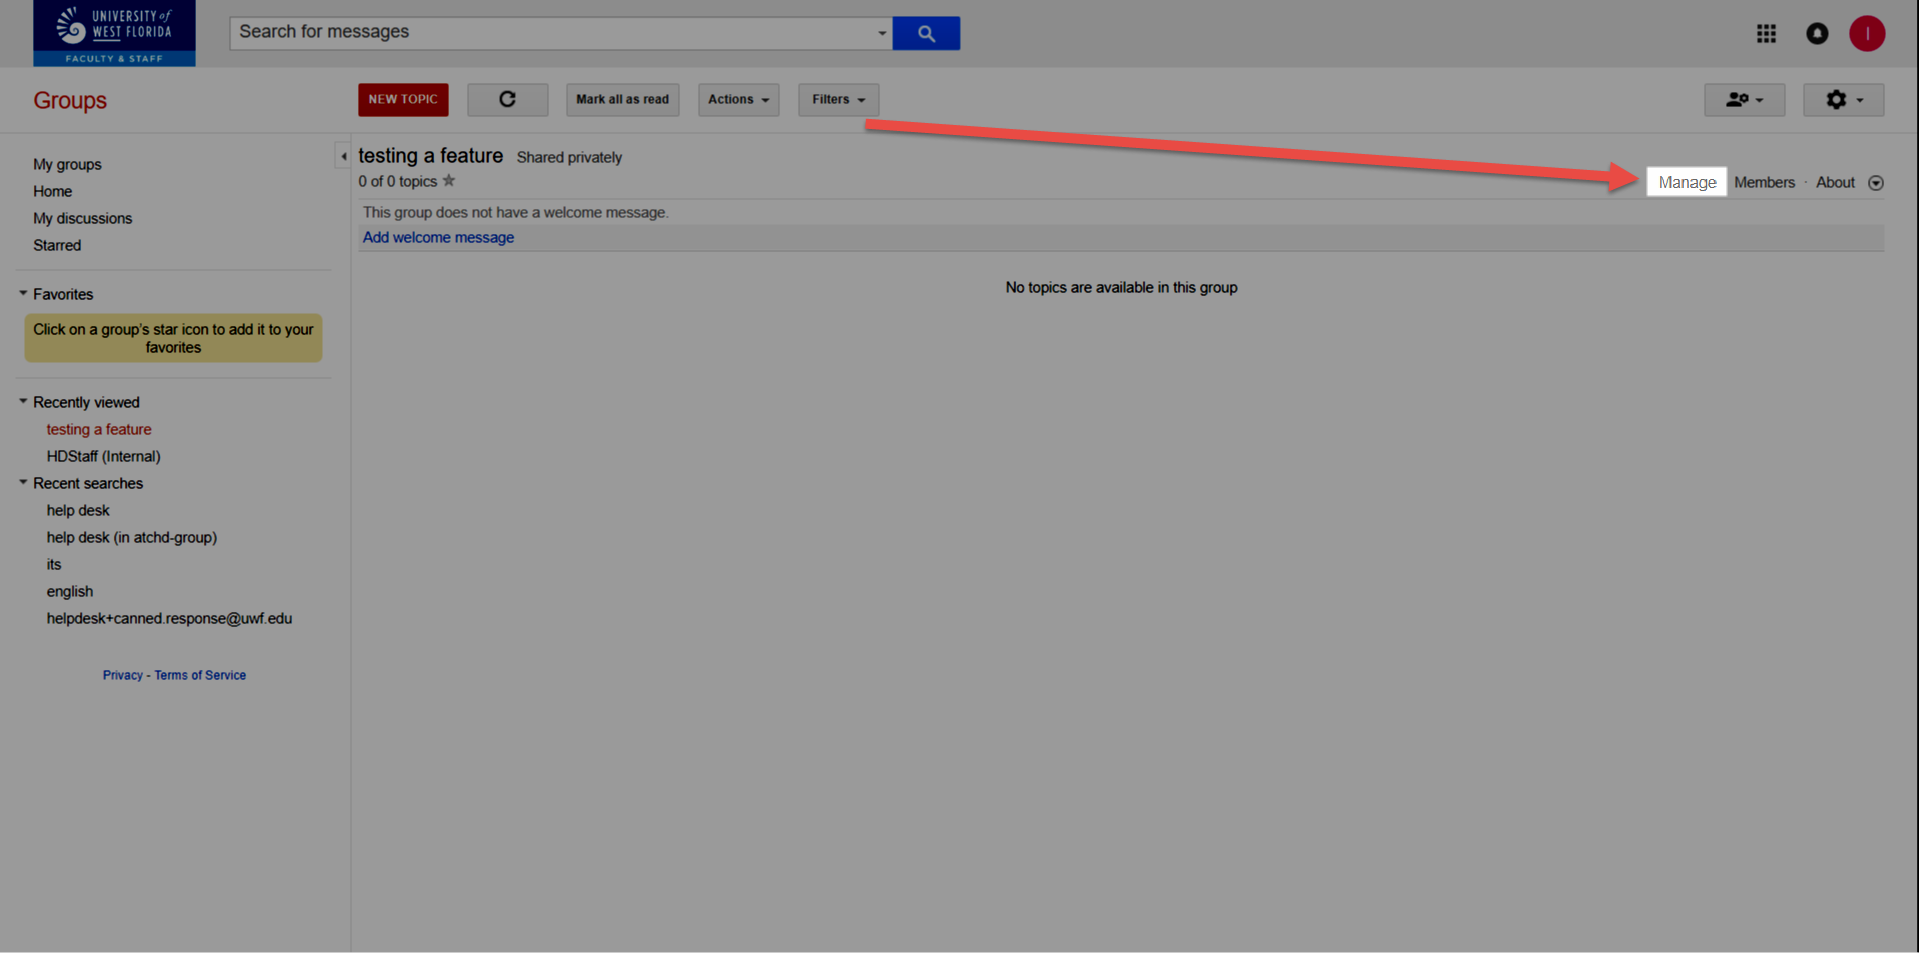
Step 5Click Manage members.
|
Additional settings
Complete the following steps after getting to your Native Google Group's Manage members page. All the steps below are recommended.
| Anchor | ||||
|---|---|---|---|---|
|
| Expand | ||
|---|---|---|
| ||
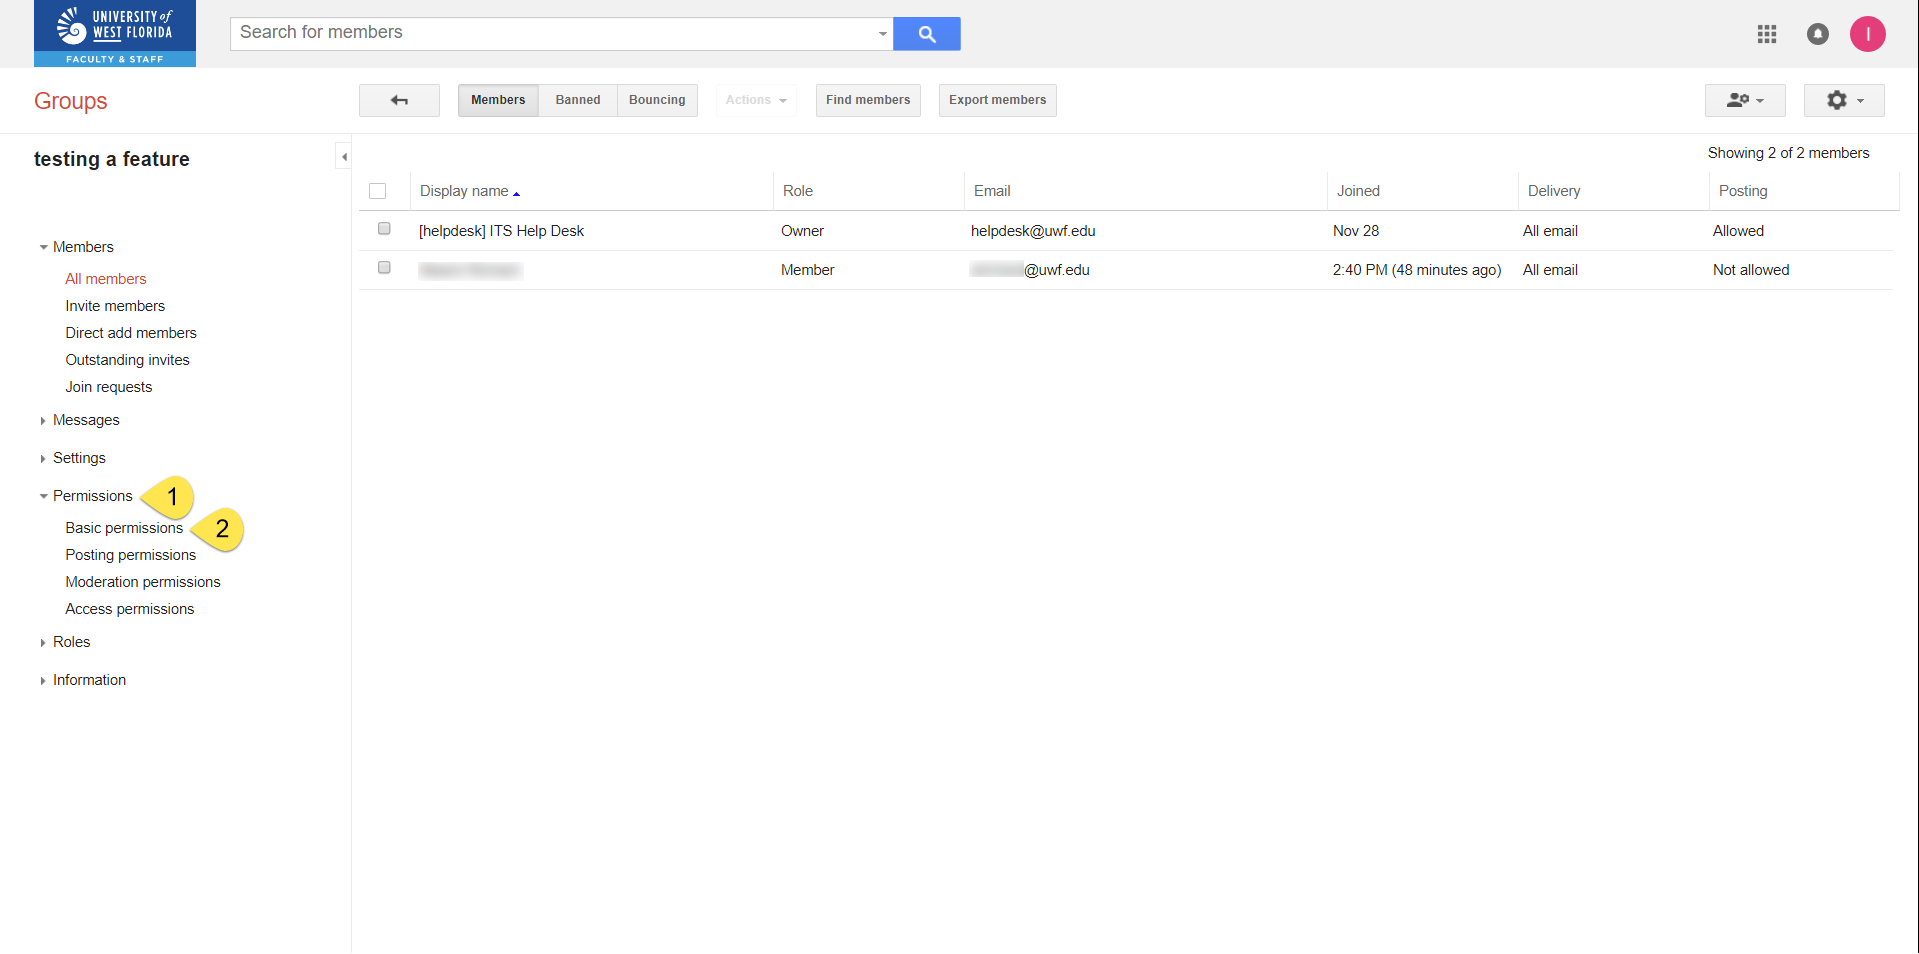
Step 1Click Permissions >> Basic permissions.
Step 2Check Allow new users not in {domain/organization}. Click Save.
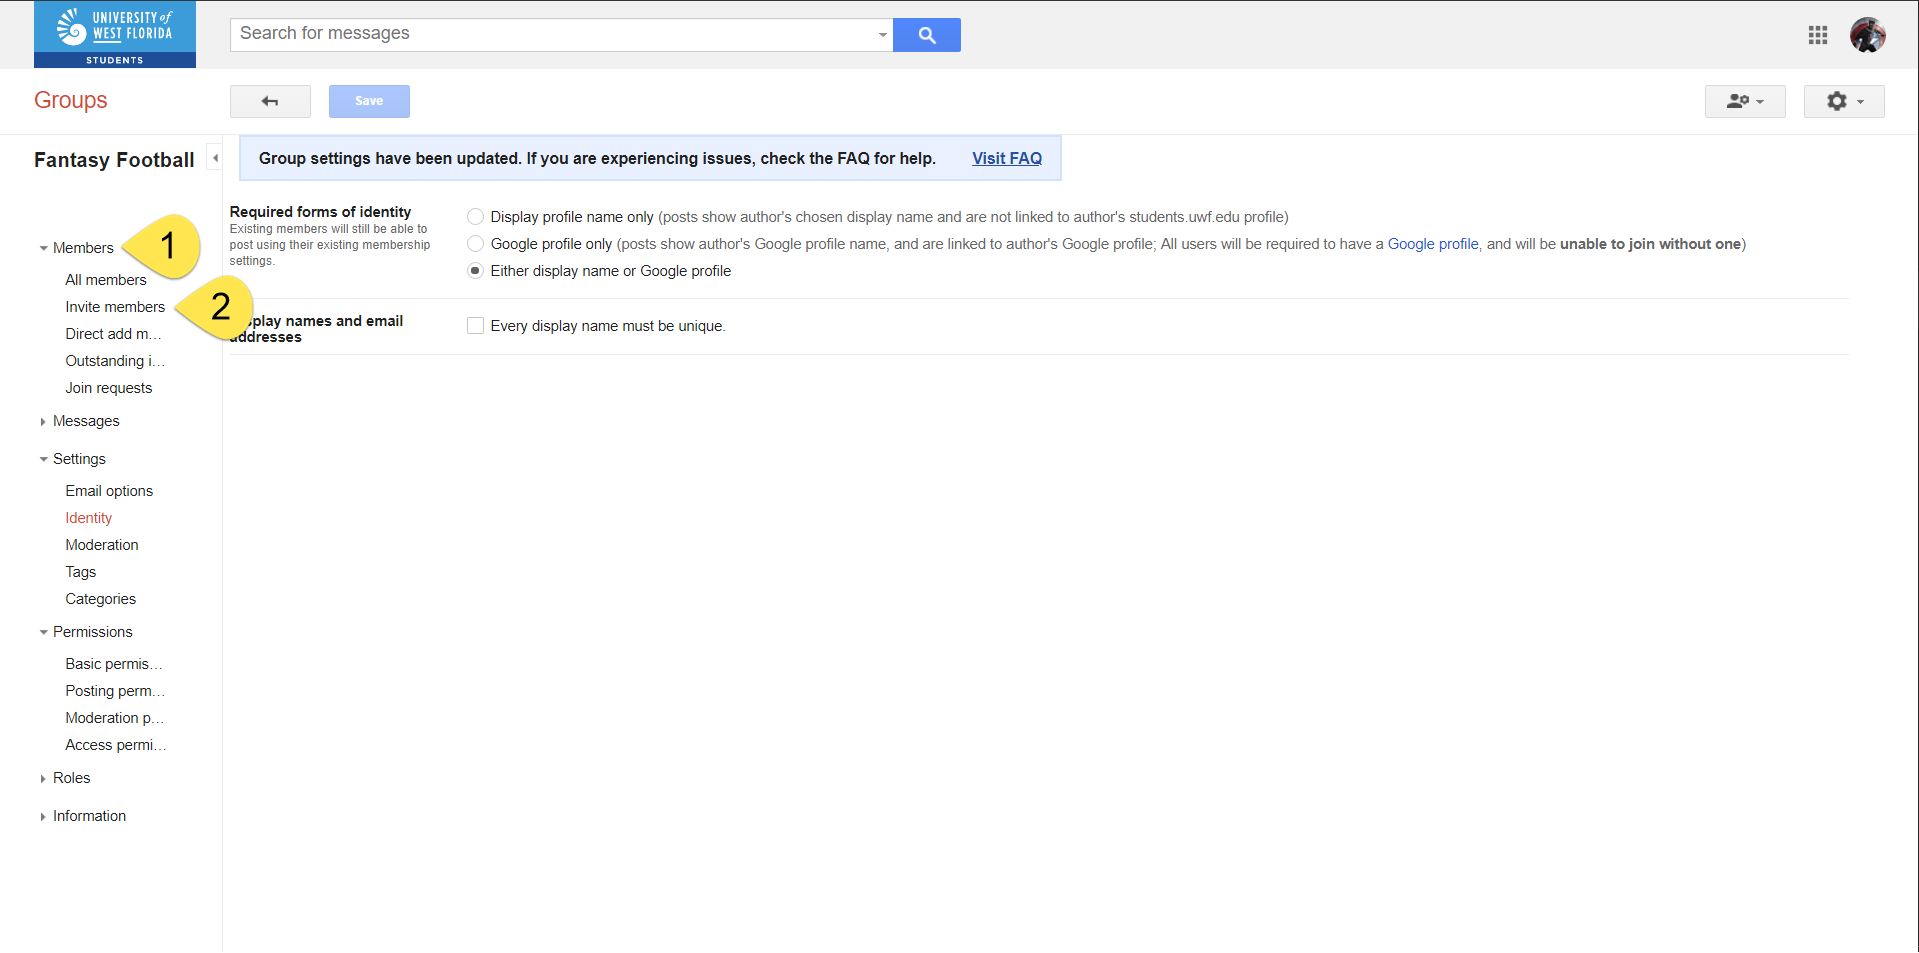
Step 3Click Settings >> Identity.
Step 4Click Either display name or Google profile. Click Save.
|


| Expand | |||||
|---|---|---|---|---|---|
| |||||
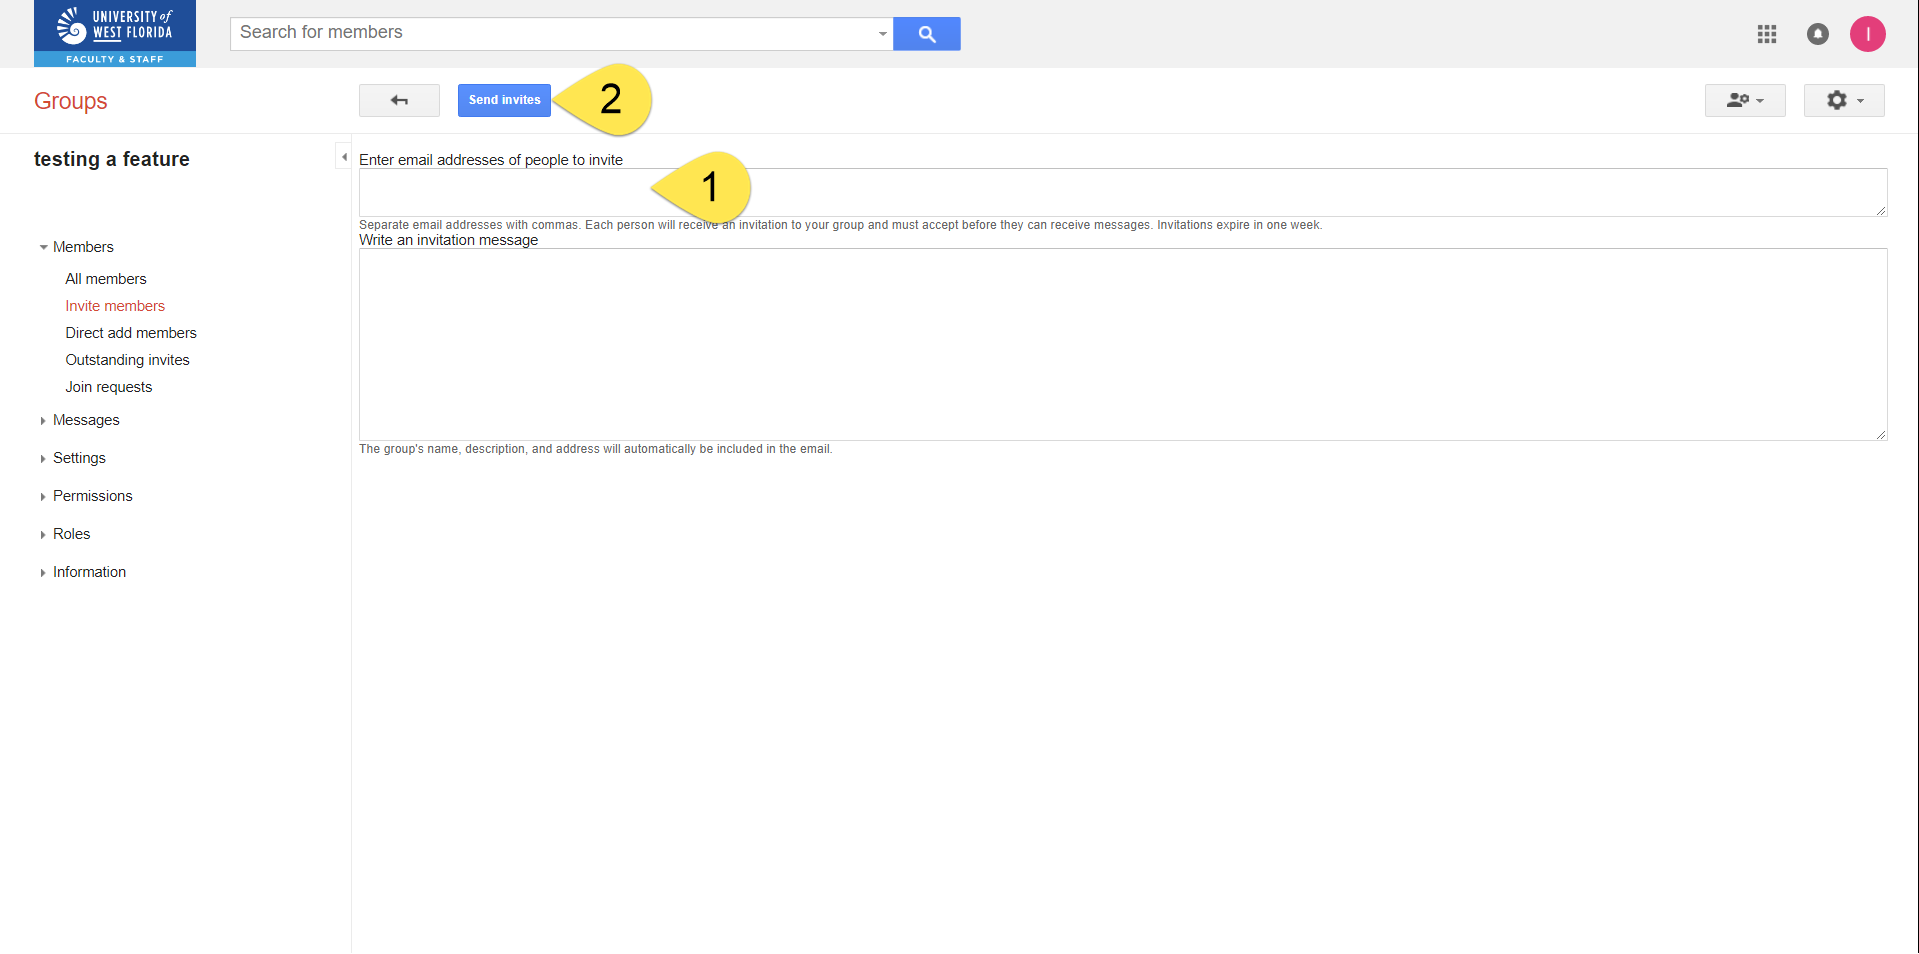
Step 1Click Members >> Invite members.
Step 2Enter the email addresses of the members you'd like in this group, write an invitation message, and click Send Invites.
Step 3Click Outstanding invites to view your outstanding invites. Step 4If necessary, select the outstanding invites and either resend the invitation or revoke the invitation.
|

| Expand | ||
|---|---|---|
| ||
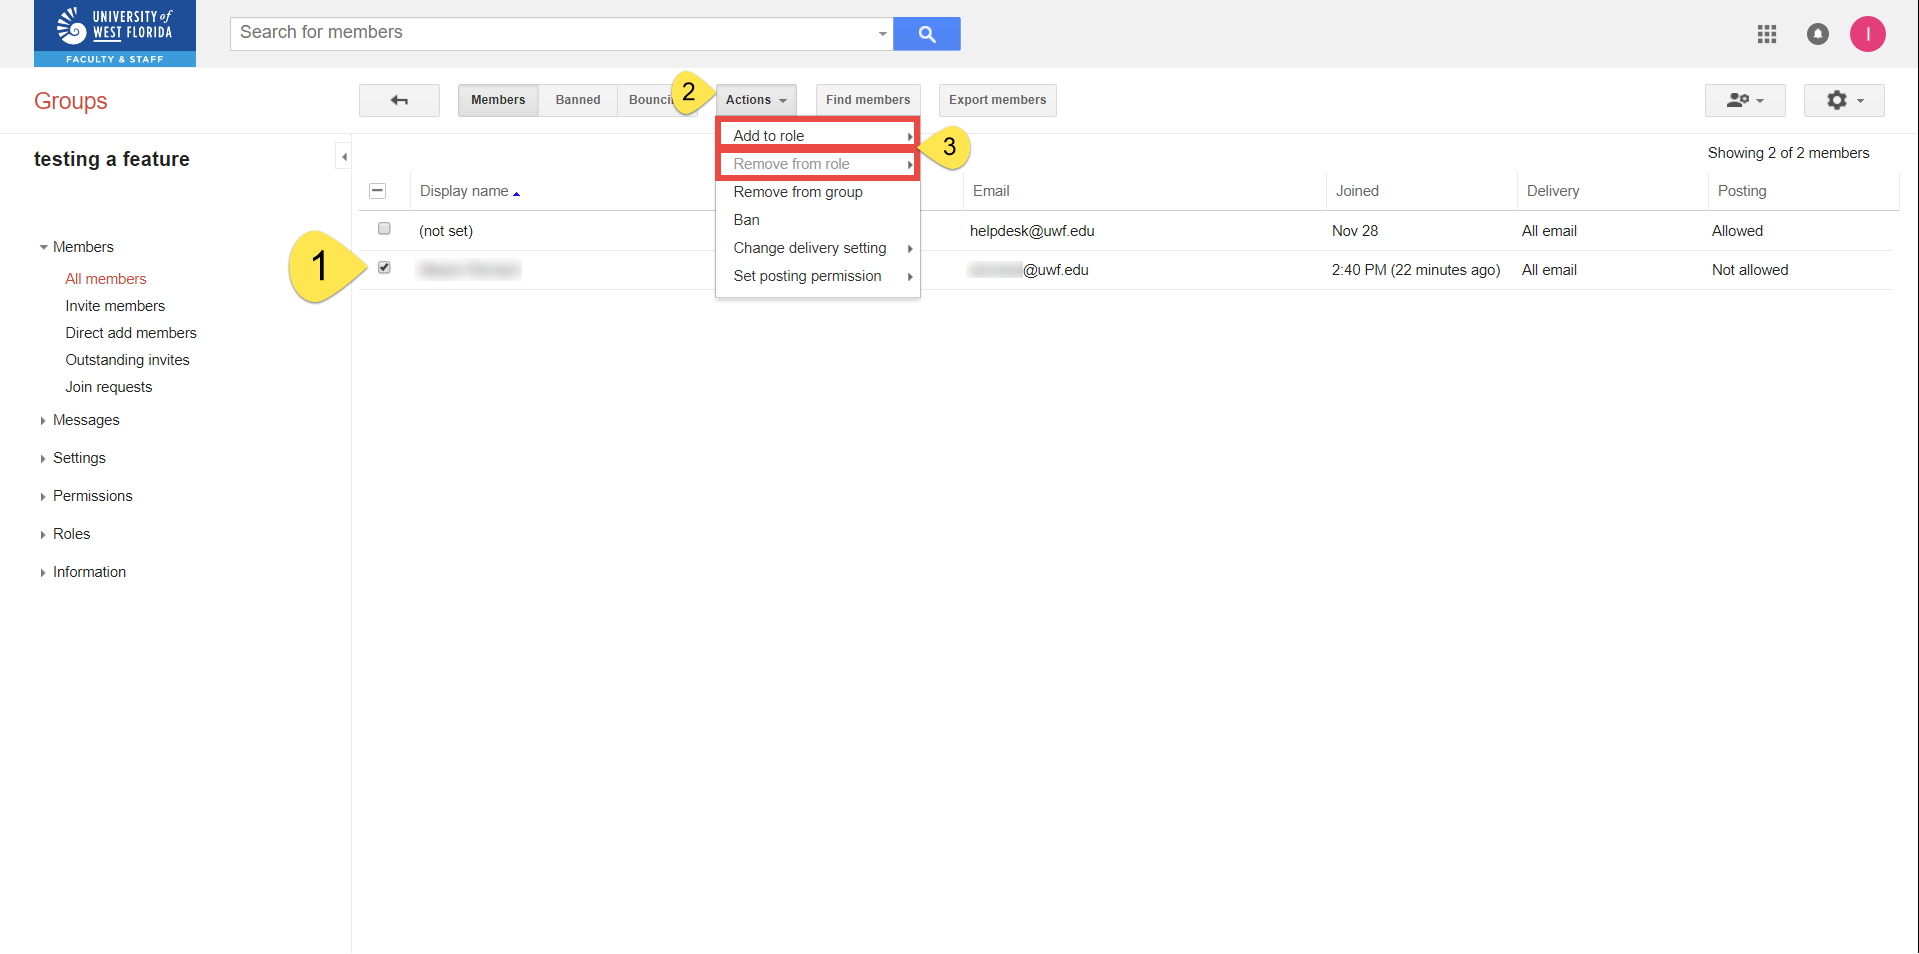
Click the members that you would like to change the roles for, then click Actions >> Add to role OR Remove from role and choose the role to add/remove.
|
| Expand | ||
|---|---|---|
| ||
Step 1Click Settings >> Email options.
Step 2Adjust these settings to fit your needs. You could leave these settings unchanged, if you wish. Click Save. |

| Expand | ||
|---|---|---|
| ||
Step 1Click Information >> General Information.
Step 2Check Allow posting by email, then Save.
|


| Expand | ||
|---|---|---|
| ||
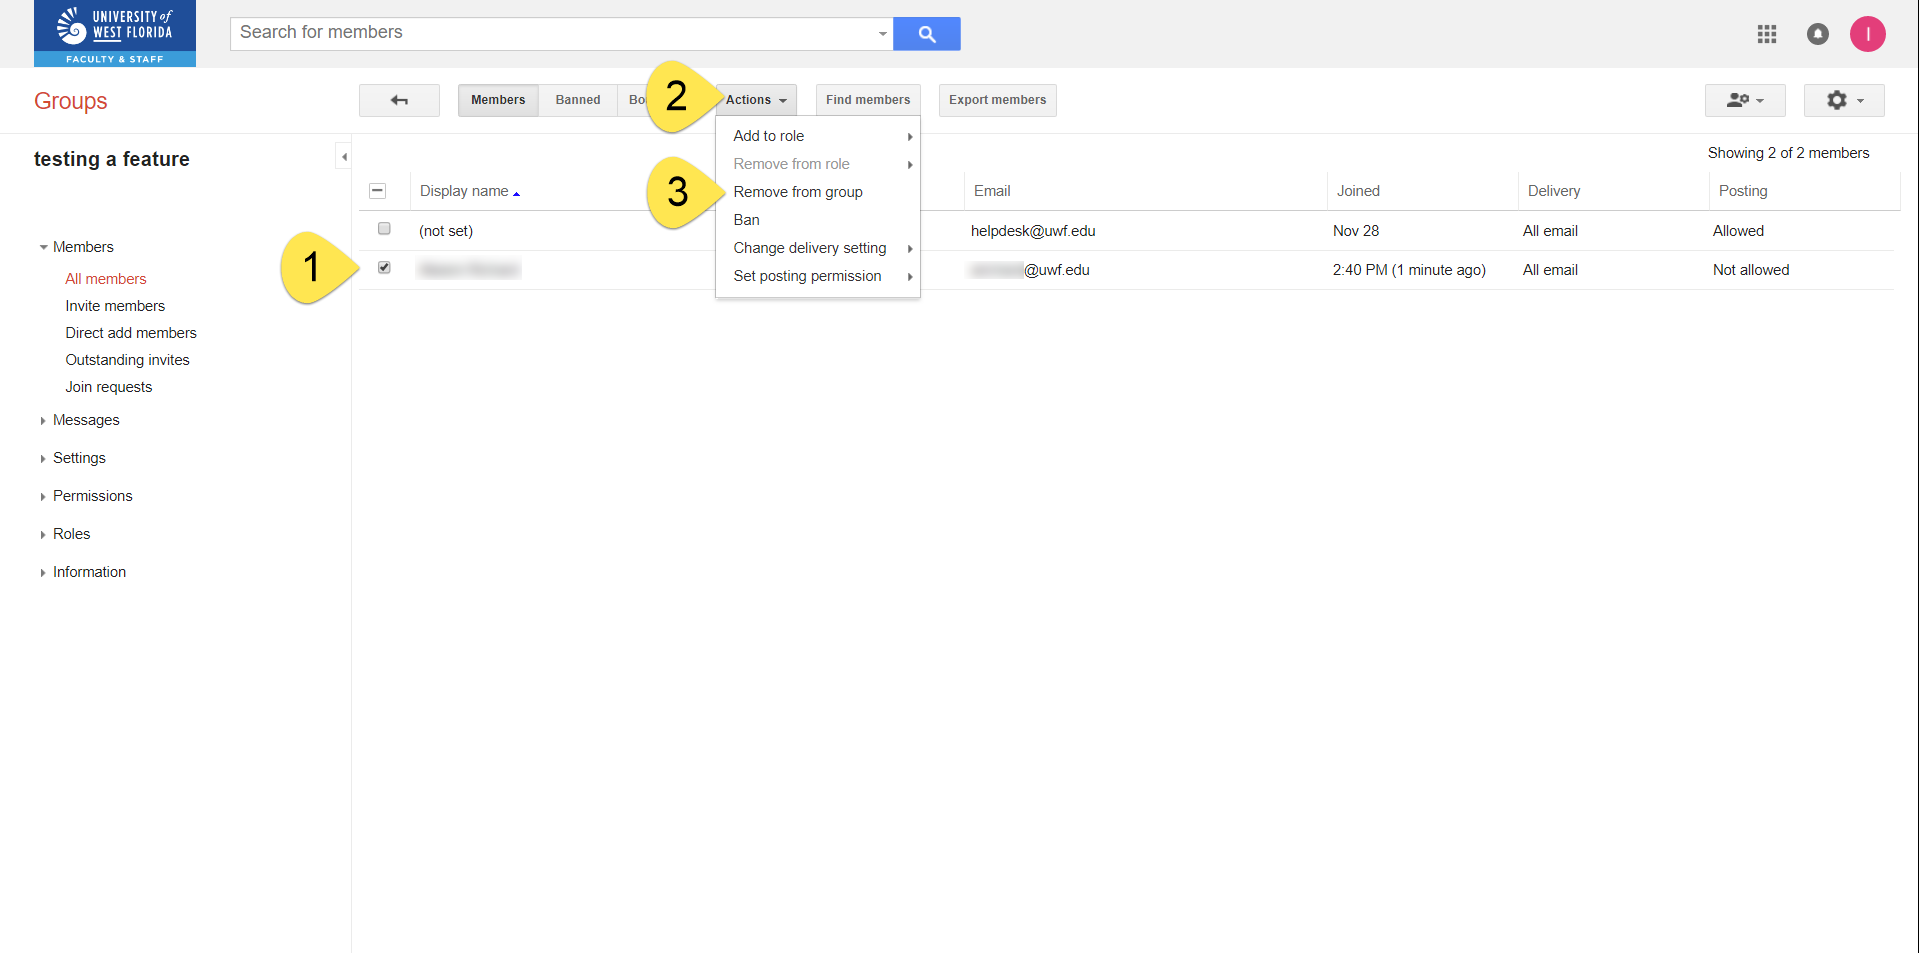
Click the members you'd like to remove, then click Actions >> Remove from group.
|
Related Content
← Go back to the Google Groups Guide
| Include Page | ||||
|---|---|---|---|---|
|
| Panel | ||||||||||||
|---|---|---|---|---|---|---|---|---|---|---|---|---|
| ||||||||||||
|