Overview
Instructors should visit the Panopto Instructor Guide.
Students should follow these instructions, to learn how to access and create Panopto recordings via eLearning.
Instructions
Viewing Panopto Recordings
Step 1
Log into MyUWF and navigate to eLearning.
If you use a guest eLearning account, log into eLearning directly.
Step 2
After clicking into eLearning, enter one of your courses.
Step 3
Click "Panopto Recordings" on the left navigation bar.

Step 4
Any recordings to which you have been given access to view will appear. Simply click the video to launch Panopto and the recordings will autoplay. *Please note that if you are a Continuing Education student or a user with a guest eLearning account, recordings MUST be accessed this way. Links shared directly via email may not work.*

The remaining steps for creating sessions will only apply to instructors and eLearning administrators (ELAs), unless an instructor has given "Creator" access to students.
Creating Panopto Recordings
Step 1
If you are an instructor in a course, you will by default have a Panopto "Creator" role in the course. If you have a Creator role, you will have additional features appear in the Panopto Recordings section of your course.

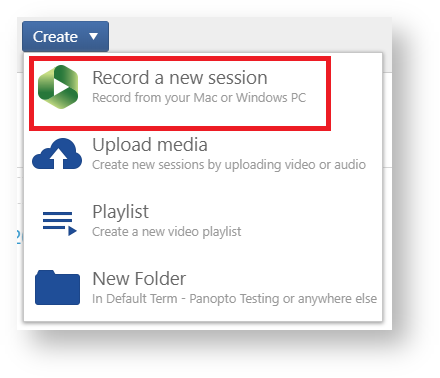
Step 2
To create a new recording, click the "Create" drop down menu and select "Record a new session."
Step 3
Download the Panopto application. Click the "Download Panopto" button. Follow the prompts to install the application.
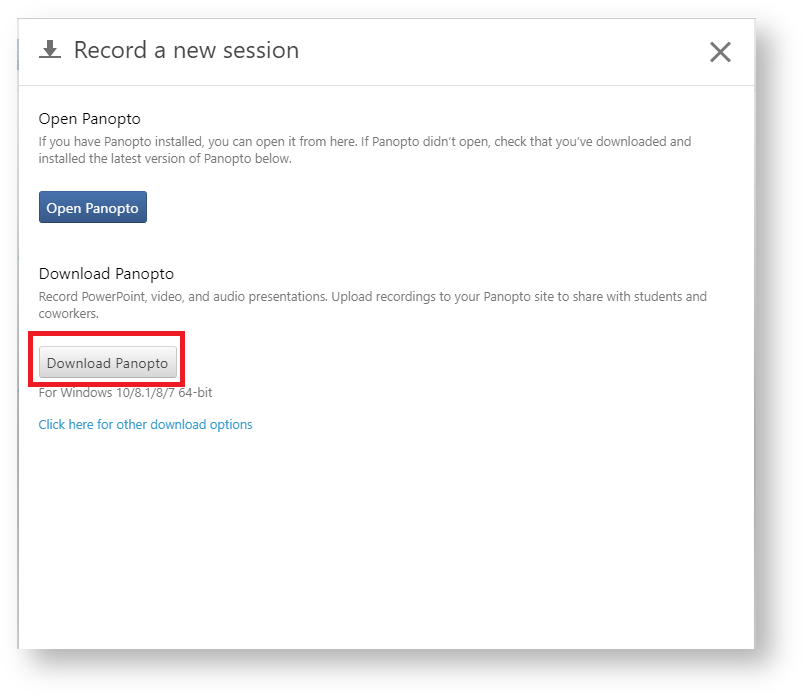
If you have already downloaded Panopto previously, proceed to step 4. If you use a guest eLearning account (not ArgoNet credentials), you MUST close out of the Panopto program after installation is complete before proceeding to step 4.
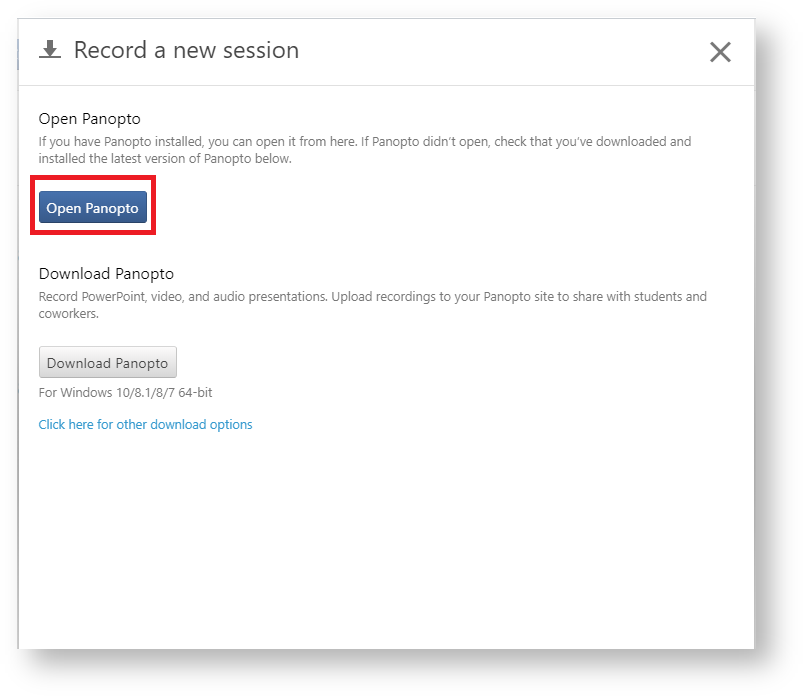
Step 4
Click "Open Panopto." The recorder should automatically launch without prompting for any credentials.
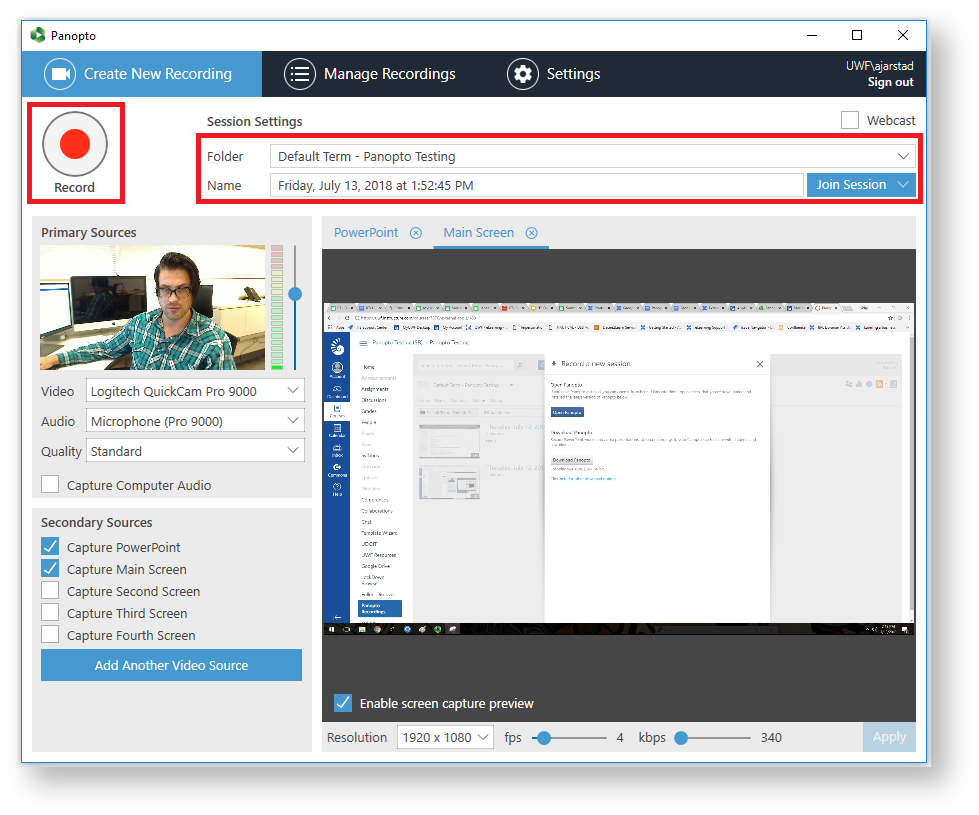
Step 5
When the Panopto application launches, it will default to the course folder in eLearning from which the application was launched. You may use the drop down menu to record to another folder in which you have access. The session name will default to the date and time, but can be renamed by typing in the box. When ready to record, click "Record."
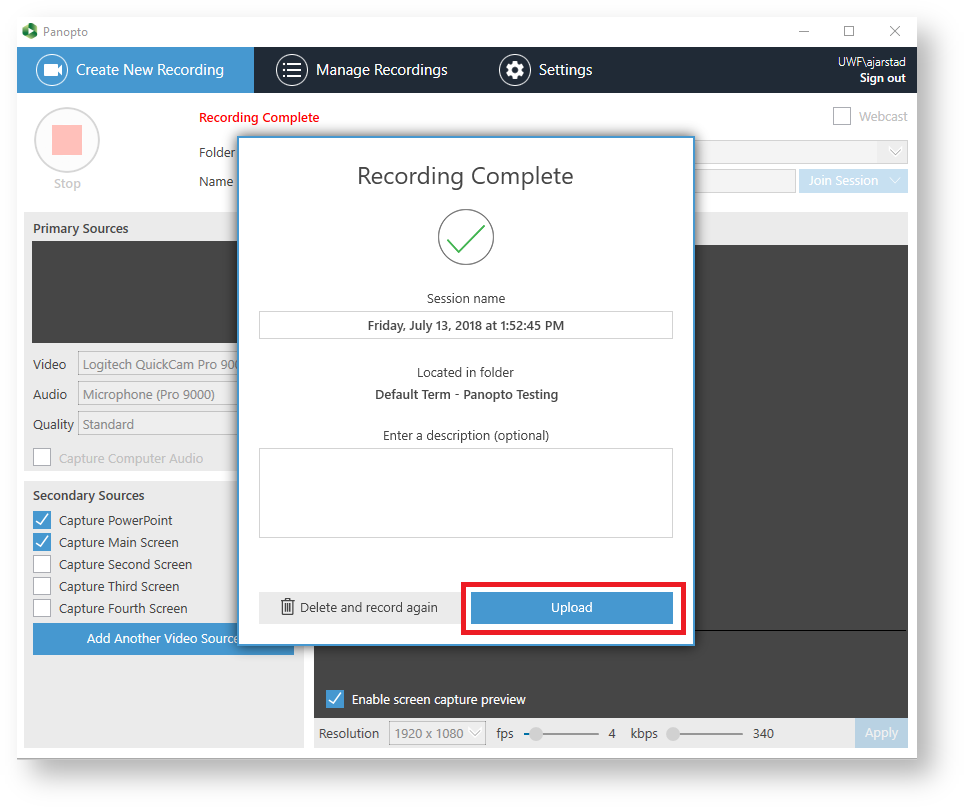
Step 6
When finished recording, you may type in an optional description for the video, then click upload to automatically upload it to your course.
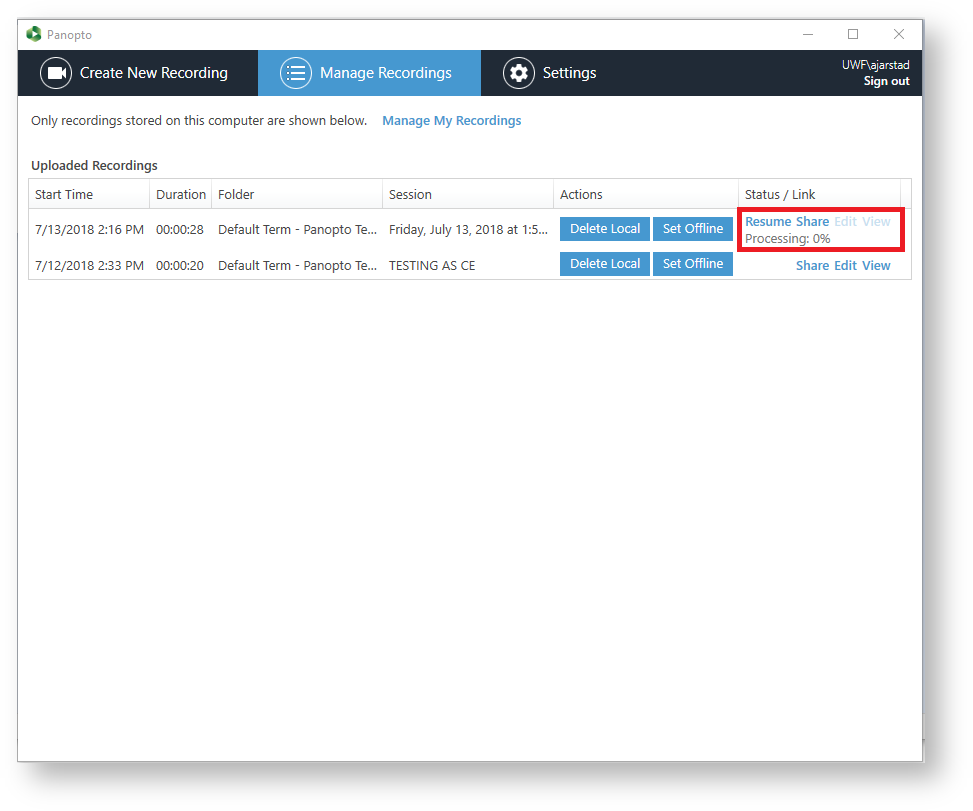
Step 7
The recording will then begin processing. After processing is complete, the session will become available within the eLearning course.
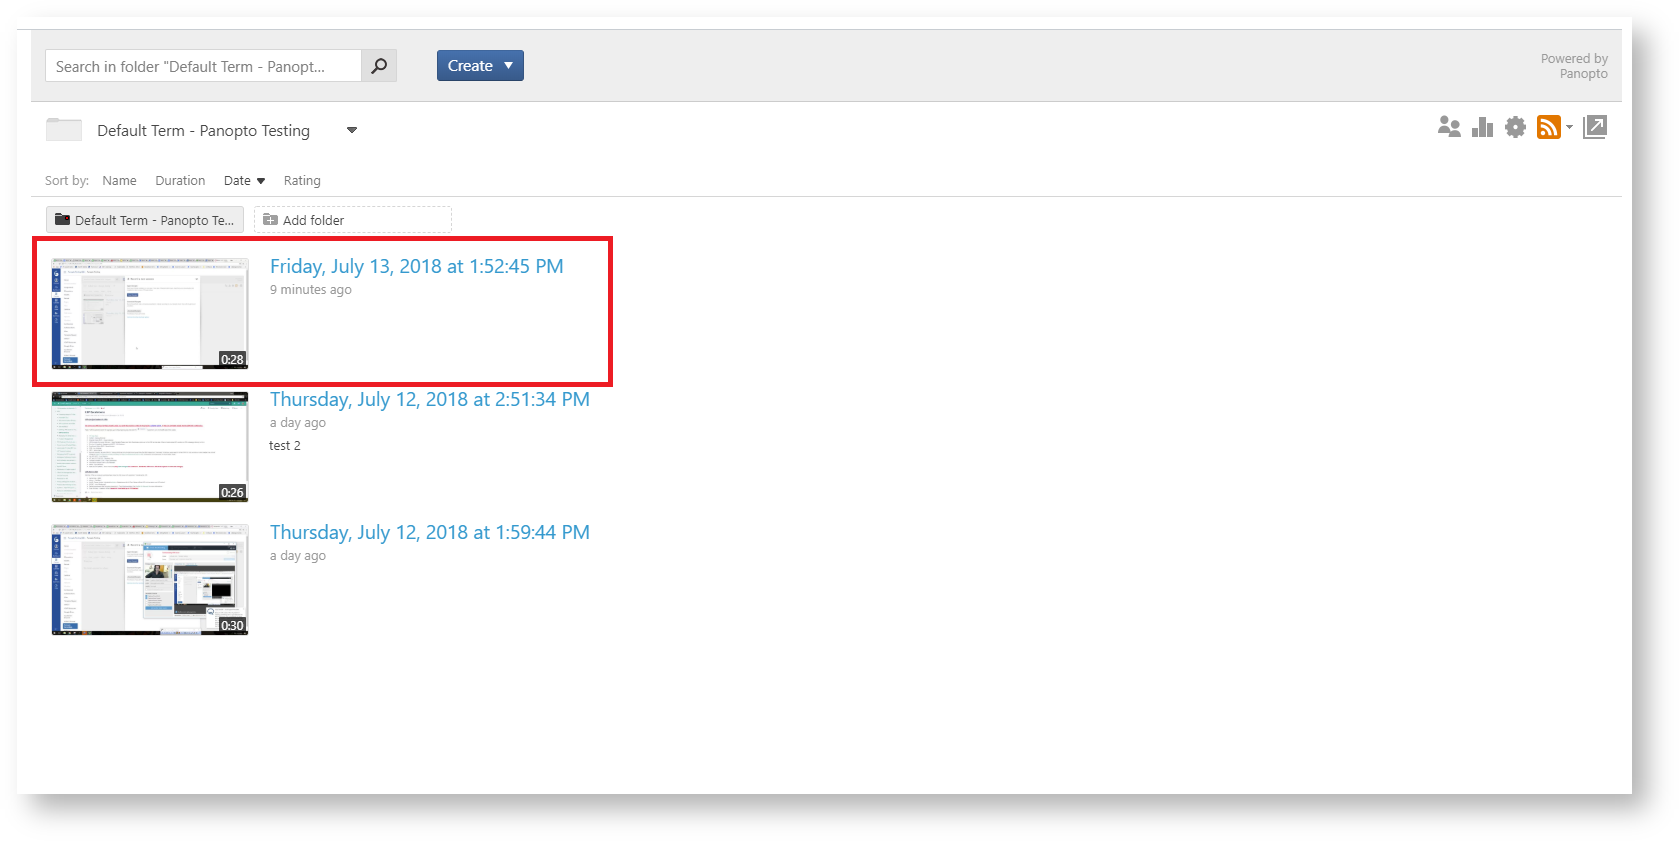
Step 8
The recording is now available within the eLearning course.
Please note: After the Panopto application has been downloaded, only users who access eLearning via an ArgoNet account will be able to authenticate directly within the desktop application. All users who use a native eLearning account (e.g., ELAs, ATechs, Continuing Education) must follow the steps above each time to create recordings.